The Rocketry Forum

Help Support The Rocketry Forum:

This site may earn a commission from merchant affiliate links, including eBay, Amazon, and others.

R3verb

Well-Known Member
Joined
Nov 30, 2022
Messages
64
Reaction score
102
Location
Fort Collins, Colorado
Hi All!

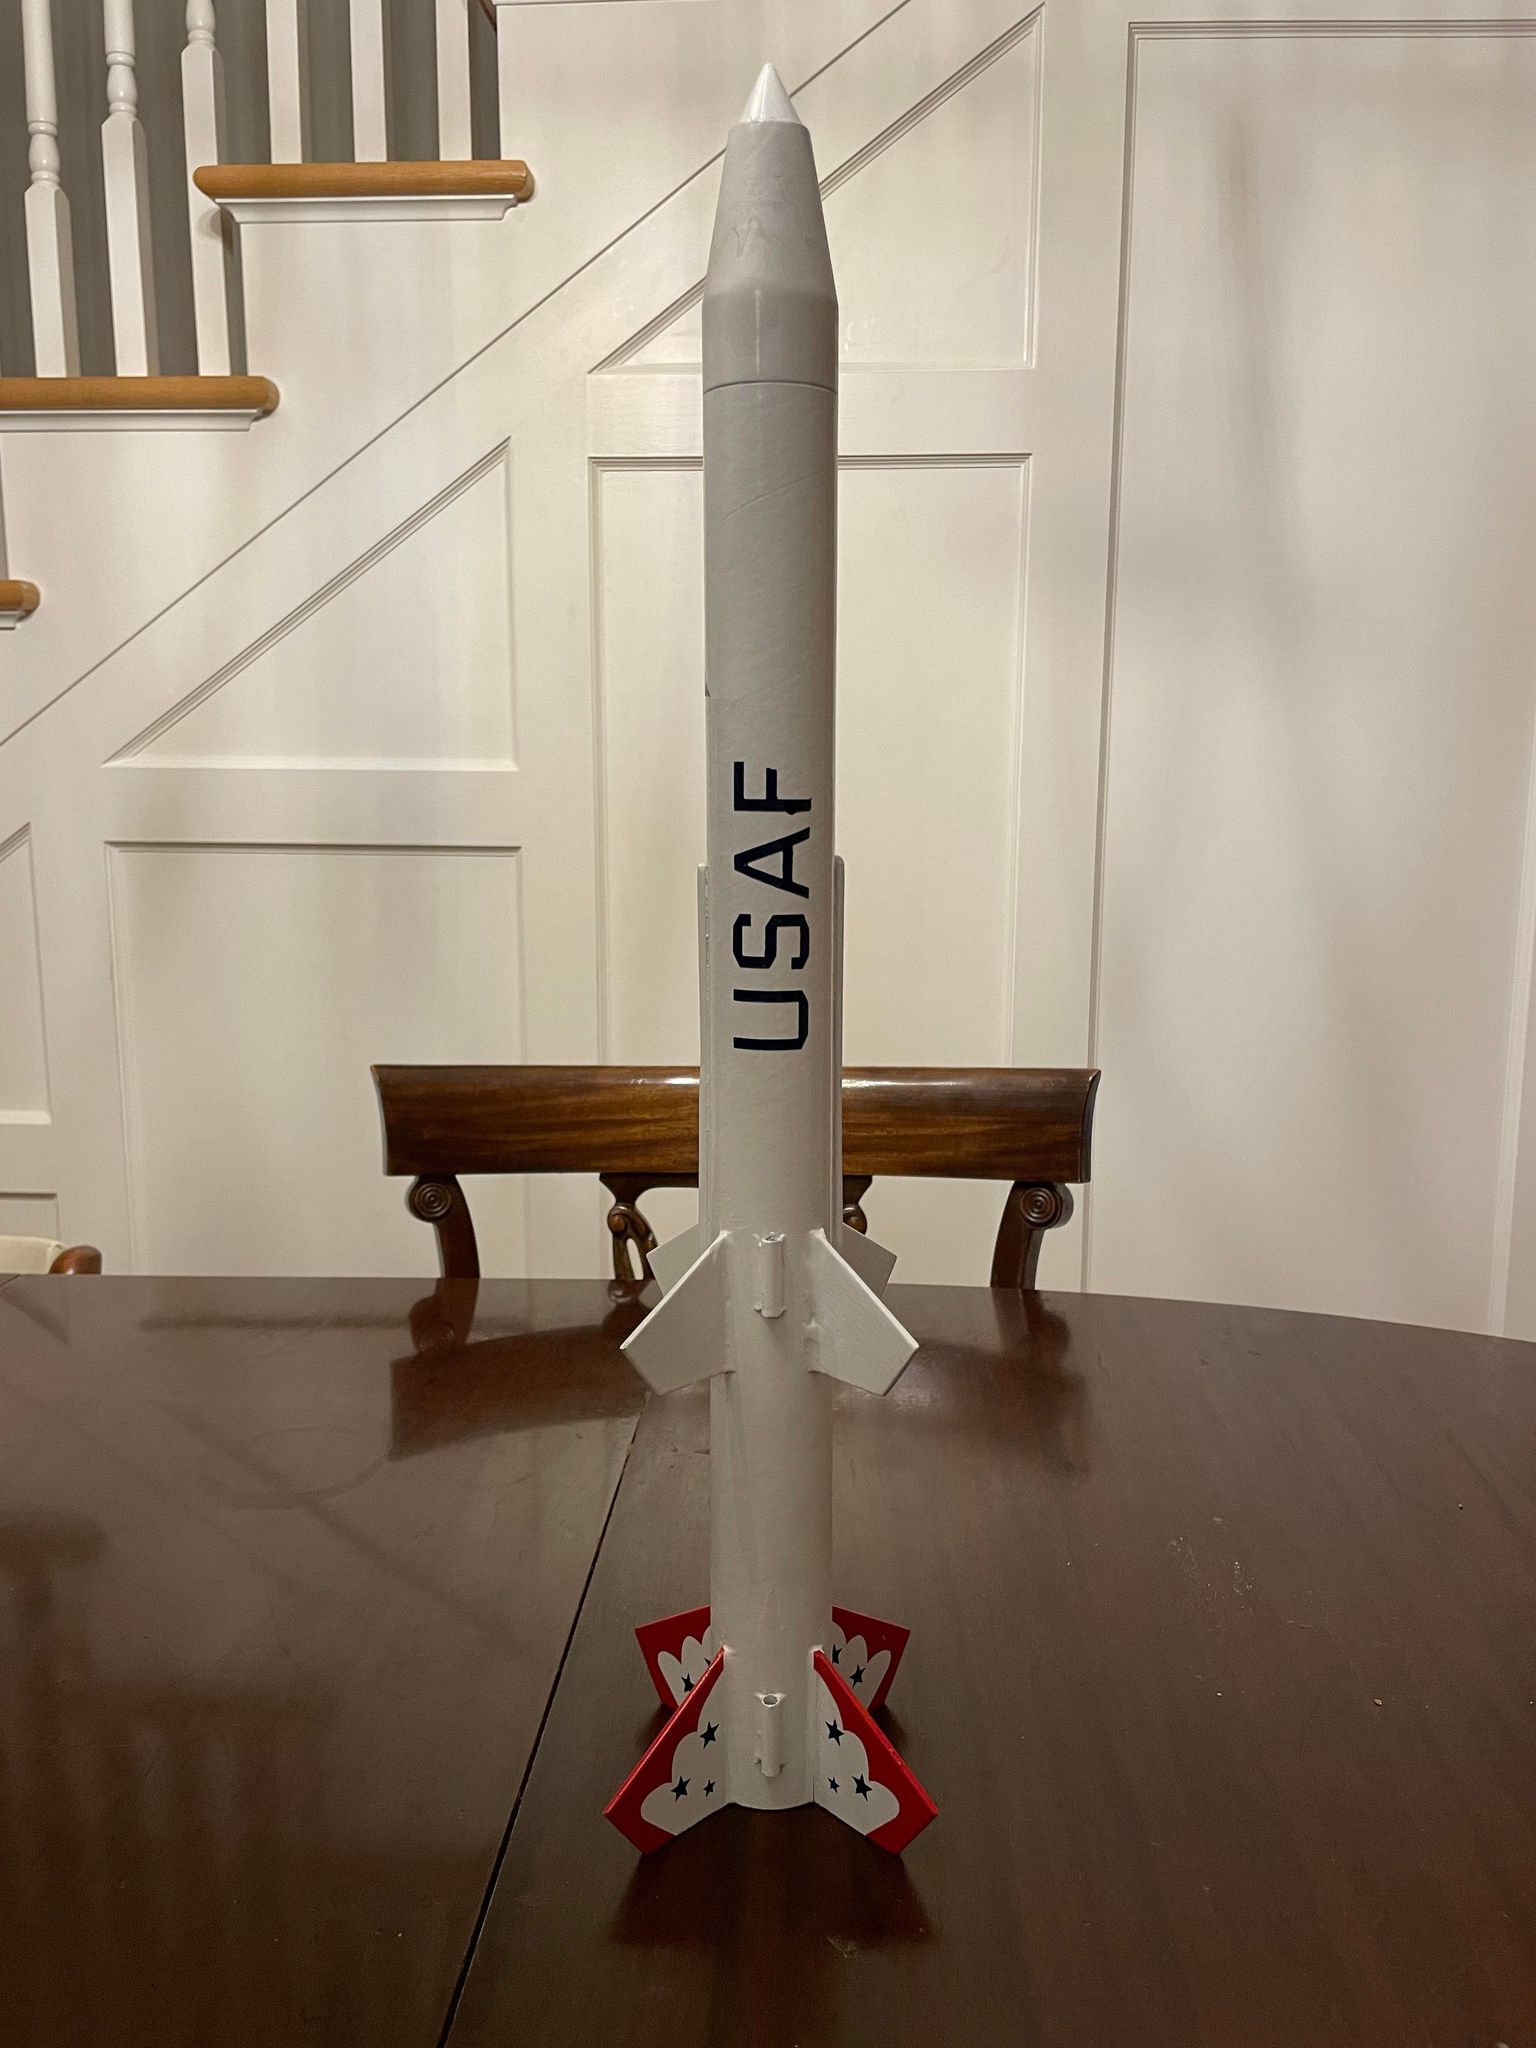
I'm pretty new to the forum and so I had already started this build when I joined but I figured better late than never. I'm currently working on an Estes Red Nova kit (https://estesrockets.com/product/007266-red-nova/) that I'm calling Project Thunderbird. It's named this as I'm going to give a USAF Thunderbirds pain job! I recently completed an Estes Boosted Bertha kit that I did in the Blue Angels livery so I figured the Air Force deserved some love as well.

You join me just as assembly was completed. I did a pretty good job on this one. There's some very minor fin alignment issues and the little wood stripes are a tiny bit off but good enough for MPR work. I am planning on doing some interesting stuff with this rocket.

-Fly the Estes altimeter
-Dual Deploy via a Jolly Logic Chute Deploy
-Motor retention upgrade to the PSII screw motor retainers

I'll post some pictures this afternoon of where it stands!

Thanks for dropping by!
 
Filet time! I finally made it to Hobby Lobby last night and got some popsicle sticks so I could do my filets. I know at this scale filets are probably overkill but I want to mess up at this scale first so I can avoid some pitfalls on the bigger stuff coming up later this year. I'm using JB Weld Steel Reinforced Epoxy (again, overkill), some blue painter's tape and popsicle sticks.

My first filets went pretty well but I did learn something. I taped the entire rocket (all 4 sides) and then when I went to peel the tape off while the epoxy was still wet, it was super hard to get off since the tape was stuck to itself on the opposite side of the fins. This made for some tense moments trying to not get the epoxy all over the place and still trying to get the tape off. For my second filet that I did this morning, I tore all of the tape off and just taped the side I was doing. That went a lot better. I'll let that setup today, get the launch lug side completed tonight and then the 'Hero" side done tomorrow morning.

If anybody has any good tips on filets for small rockets, let me know!

Rocket all taped up, ready for epoxy:
No description available.


First set of filets done, little did I know the tape would be a PITA to get off:
No description available.


Second set of filets complete. Much cleaner this time:
No description available.


Thanks for stopping by!
 
It’s prime time! Got some grey filler primer on the rocket tonight. There’s a launch on Saturday morning (5 days from today) so I’d really like to get this thing finished and ready to fly by then. Lucky for me, my dad has a shop with a paint booth so I should be able to crank the heat and be able to get multiple coats a day on it and hopefully be ready in time. Here’s how it turned out after the primer:

F3C413C7-1EEB-4506-95B5-DBAB6505E46F.jpeg
5A139558-F2E3-499E-96E8-7C81FBC6A815.jpeg
4484D517-7C88-444F-AF2F-A45743E1A9F2.jpeg

I’ll hit it with some sand paper tomorrow and then get at least 1 coat of white on it tomorrow. I gotta say, for my first attempt, I think my filets came out pretty decent:
32541688-8504-48F7-8FC7-76DC3DB65729.jpeg

For sure some learning to be done but good enough. I also finished painting this little gem:
B6751B21-ED36-482B-9E82-7DEF77CDA503.jpeg

It’s an Estes Quinstar that I painted hot pink. I think I’m gunna name it “hottie without a body (tube)”. Seems fitting. Alright, more updates to come this week!
 
Got the primer finished and got some gloss white on yesterday and today. It came out pretty good but not amazing. I think the can was too cold when I sprayed the first coat so I got some orange peel but lesson learned. Anyways, after a few light coats of white, it’s finally time to start the decal process. I’m trying out a new method using the Cricut and stencil paper. My wife made some sweet stencils based off of pictures so here we go I guess! Threw the first coat of red on the finish tonight, I’ll probably do a second coat tomorrow morning and then get the blue on tomorrow night. It’ll come down to the wire with a launch in less than 36 hours but it’ll probably be fine lolC9F2A7DE-6C40-4008-9241-DFDC76B8281F.jpeg8D9C5D62-6531-42B3-8A94-10CC4F689B60.jpeg
 

Attachments

  • 2EA8CA2B-53A8-469B-8435-92A20397307C.jpeg
    2EA8CA2B-53A8-469B-8435-92A20397307C.jpeg
    2 MB · Views: 0
thanks for all the pics. I had a bad experience with blue tape when it pulled the outer coating off the cardboard tubing. Now I use "Delicate Surface" tape.
 
Well, I didn't get to fly it on Saturday :(. We got about 1/3 of the way to the launch and my 2 year old threw up all over my car. So what was going to be a fun day of rocketry went to a less fun day of cleaning out my car and watching a sick kid. ANYWAYS, it's fine, the paint wasn't quite done anyways so it was just the universe telling me to complete the damn thing before I fly it.

We're honestly really close. As I said above, I'm using the Cricut cutter and some stencil mask for all of the masking and honestly, I'm super impressed. I have a little bit of bleeding but for the most part, everything has come out really nice. I still need to do the scallops on the nose cone. I'm trying to figure out how to wrap the image in photoshop so that it prints on a cone instead of flat.

My next chance to launch will be the CRASH launch on the 21st so it should for sure be done by then (and probably even a clear coat too!). Here's a couple of pictures of the progress:

No description available.


No description available.


Ok so with that out of the way, I have a few questions that hopefully you all can help answer:

-Question #1: As I said, I used the estes pro series motor retention ring for this instead of the included motor hook. It looks like I didn't take everything perfectly into account and put the motor block a little too far in. The solution seems to be make a thrust ring out of tape like they tell you to do in the Star Orbiter instructions:
1673369667734.png

The other option would be to shove another motor block down into the motor tube which would put the motor at the right spot. Thoughts? Seems like the thrust ring should work just fine right?

-Question #2: I plan on flying this with the jolly logic chute release. Do I need holes in the body tube for the altimeter to work? I assume no since the JLCR should be out of the body by the time it needs accurate reading but just wondering.

-Question #3: Right now, I have the chute connected to the nose cone. It seems like on most HPR stuff, they connect it to the middle of the shock cord. It seems like this might be a good idea to keep the JLCR from tangling with the chute on decent. Anybody have any experience putting the chute in the middle of the shock cord on Estes kits?

Thanks everyone! Hopefully I'll get to fly this thing soon!
 
After this rocket sitting in my garage ready to fly for almost 7 months, I finally got to fly it today! This was honestly the best launch of the day. I flew the it on a D12-3 with the JLCR set to 400’. Ive honestly never seen a rocket boost so straight! JLCS worked perfectly and the chute opened perfectly. I honestly think next time I’ll set the Shute to release at 300.

The one thing I’d like to do differently for next time is change how things are attached. When everything came down, it was a little tangled. Any suggestions?

IMG_4422.jpeg
Last thing, I really want to figure out how to fly the altimeter on this. I’m thinking I might be able to open up the nose cone a bit and get it in there. Any suggestions would be great. I don’t really want to try and also attach it to the nose cone, seems like there’s enough going on there already.
 

Attachments

  • Sequence 01.mp4
    26.2 MB
A fairly common practice is to attach the parachute to the shock cord about 1/3 of the way down from the nose (I don't usually do exactly 1/3"; more like 8" or so, whatever the shock cord length.) This gives a bit of separation between the parachute and nose, which *reduces* (but does not completely eliminate) the likelihood of tangling.
 
A fairly common practice is to attach the parachute to the shock cord about 1/3 of the way down from the nose (I don't usually do exactly 1/3"; more like 8" or so, whatever the shock cord length.) This gives a bit of separation between the parachute and nose, which *reduces* (but does not completely eliminate) the likelihood of tangling.
How should I do this with the Estes shock cord? Just tie a knot? I’m a little worried about the cord breaking if it’s knotted.
 
Back
Top