You could attach flanges to the root edges and screw them to the body. Drill through the metal ferrule and drive the screws.
You are using an out of date browser. It may not display this or other websites correctly.
You should upgrade or use an alternative browser.
You should upgrade or use an alternative browser.
Neil_W's half-baked design thread
- Thread starter neil_w
- Start date


Help Support The Rocketry Forum:
This site may earn a commission from merchant affiliate
links, including eBay, Amazon, and others.
That would work well at larger sizes, but I'd not be too optimistic at the size I'm working (BT55 core tube, 24mm mount). If I went with an 18mm mount, I'd have a bit more to screw into, maybe could work. Wouldn't even know how to do the flanges in a way that wouldn't be ugly, though.You could attach flanges to the root edges and screw them to the body. Drill through the metal ferrule and drive the screws.
Nytrunner
Pop lugs, not drugs
Nah, just sand the ferrule and fin with rough grit paper. Then fillet accordingly with the grey goo
I'm slowly but surely forcing you to develop high power building skills
I'm slowly but surely forcing you to develop high power building skills
I'm slowly but surelyforcingtrying to force you to develop high power building skills
Fixed.
")
Tell you what: let me cobble together my prototype first; we can continue the discussion then.
- Joined
- Aug 27, 2011
- Messages
- 11,715
- Reaction score
- 6,381
Dremel cut through the wall fins?This is an interesting challenge. I am experimenting.
View attachment 392513
Even I can reproduce this, how do I attach fins to it, clear or otherwise?
Hmm, maybe.... That would scare the bejeebers out of me, but could be worth a shot. I'll have to try cutting the prototype and see what happens.Dremel cut through the wall fins?
- Joined
- Aug 27, 2011
- Messages
- 11,715
- Reaction score
- 6,381
Create the ferrule and eraser as a separate fin can and motor mount.
Cut the slits full length open from forward end. Use that as a jig to mount the thru the wall plexiglas fins to the motor mount. Then do internal fillets.
Then slide the completed fin can into the body.
You could really have fun with this rocket with break away segmental recovery, but that takes the build up a whole nether level.
boatgeek
Well-Known Member
- Joined
- Dec 27, 2014
- Messages
- 7,520
- Reaction score
- 8,198
'Twould be a mess, gluing to the bumpy surface. Dontcha think?
I'd go with replicating the surface texture with a printed decal between the fins rather than actually making it textured. Then you can glue with whatever you like.
My new maker space's* laser cutter has a rotary positioner that should be good for cutting fin slots, though I haven't done it yet. If you send me a CAD file I can give it a try and mail you the result.Hmm, maybe.... That would scare the bejeebers out of me, but could be worth a shot. I'll have to try cutting the prototype and see what happens.
* Not really mine, and not so new; I just started using it. It's in the public library in Elmira, NY. Have I mentioned that three or four or ten times before?
As a great philosopher once said:I'd go with replicating the surface texture with a printed decal between the fins rather than actually making it textured.
I personally would go maximum pencil-ness, but YMMV, etc. etc.
Anyway, I could resort to that if other techniques won't work. My first attempt is underway.
I layered some 1/32" balsa onto a piece of BT55. One layer for the "eraser", and two layers for the "ferrule". I calculated that that would be just about the correct diameter to mate with the hex-cladded BT55 main body tube.
I pencil-marked (roughly) some contouring lines:

Honestly, it already looks kinda good, just having the slightly smaller diameter piece at the end to represent the eraser. I also rounded the ends down a bit (left edge in that picture).
Then, more quickly and carelessly than I ought to, I sanded in some contours to kind of sort of represent the contours of a real hypothetical ferrule. It was messy, and I know that if I use this approach for realsies then I'll have to take it much slower and more carefully (and use some sort of guides to ensure straight grooves. Mainly, though, this is a very general test if the technique will work at all.

Next up: wrapping in foil tape.
As a great philosopher once said:
boatgeek said: ↑
I personally would go maximum pencil-ness, but YMMV, etc. etc.
Sounds like words of wisdom!
Interesting idea! Did the 1/32" balsa wrap without issues? No tendency for the grain to split? That really does look a lot like a pencil ferrule already. A lot of the pencils I see around here have fairly imperfect looking stamps and grooves, so it would still look realistic without being perfect.
Works perfectly. I used that technique on the IRIS-T. I wet the outside of the wood to soften it and counter the expansion in the other direction due to the water in the glue. Then tape it up for an hour or two. May take another couple of hours to completely dry out.Interesting idea! Did the 1/32" balsa wrap without issues? No tendency for the grain to split?
I so want to say "Laser cutter!" again, but actually I got nuthun'.Then, more quickly and carelessly than I ought to, I sanded in some contours to kind of sort of represent the contours of a real hypothetical ferrule. It was messy, and I know that if I use this approach for realsies then I'll have to take it much slower and more carefully (and use some sort of guides to ensure straight grooves.
"Shall we say 'laser cutter'?"
"We can say it. I don't know what it means, but we can say it."
Points for identifying reference (paraphrased, of course)."We can say it. I don't know what it means, but we can say it."
WARNING: AWESOME POST AHEAD
Applying the foil tape to the balsa form was a big concern to me. Would it conform properly? Would I have a problem with air bubbles? What would it look like? Let's answer these questions.
First, I cleaned up and improved the grooves with a rounded jeweler's file. It looked much better after that.

I subsequently added a final step to make it even betterer: the handle of an Xacto knife. Smooth, hard, and perfect diameter. Sorry, no pics of this step.
Then I had to decide: should I try to cover the whole thing in one piece of tape, or more than one? I decided that one piece was going to present to many problems, so I went with 2. They would overlap in the middle recessed section, and I'd align the exposed edge with one of the ridges.
I quickly learned this would not work. There ended up being so many wrinkles in the middle recessed section (not surprising), there was no way I could get them out. So I cut the first piece at the edge of the middle section. It was a bit messy, but that's why we experiment here. For the real thing (if it ever comes to be), I'd pre-cut the piece to the correct size.
Anyway: there was also quite a bit of wrinkling in the grooves:

I was not feeling optimistic at this point. Then I remembered the Xacto knife handle...

I pushed the handle against the groove, and rotated the piece (same thing I did to smooth out the grooves in the balsa). After a few rotations it looked.... well, you'll see.
The final application was three pieces: one on each of the ends, then one piece to cover the middle recessed area. The trusty Xacto handle was used to smooth out everything. And here, my friends, is the result in all its glory. The color was added in post, don't worry I haven't started painting yet.

Pretty freaking awesome if I do say so, better than I even hoped for. I'd say we have achieve a very high level of pencilness here, even without the hex pencil body (of course there are round pencils, and that right there looks a lot like one).
There are still problems, though:
1) I can't imagine *any* way to get fins onto that. Gluing, cutting, forget it. I will try, but I lack optimism. I suppose it's within the realm of possibility that the right Dremel blade will cut it cleanly, but... well, we'll see. I really hate to disturb it, but I have to try something, unless I just want to make a non-flying pencil sculpture.
2) Foil tap over balsa = very delicate. I should probably CA the balsa after getting all the grooves finalized... would that make it more likely to get bubbles? I don't know.

I will next attempt a little piece of hex body. That should be fun. Still not planning to build this rocket immediately.
Hope you all enjoyed!
Applying the foil tape to the balsa form was a big concern to me. Would it conform properly? Would I have a problem with air bubbles? What would it look like? Let's answer these questions.
First, I cleaned up and improved the grooves with a rounded jeweler's file. It looked much better after that.
I subsequently added a final step to make it even betterer: the handle of an Xacto knife. Smooth, hard, and perfect diameter. Sorry, no pics of this step.
Then I had to decide: should I try to cover the whole thing in one piece of tape, or more than one? I decided that one piece was going to present to many problems, so I went with 2. They would overlap in the middle recessed section, and I'd align the exposed edge with one of the ridges.
I quickly learned this would not work. There ended up being so many wrinkles in the middle recessed section (not surprising), there was no way I could get them out. So I cut the first piece at the edge of the middle section. It was a bit messy, but that's why we experiment here. For the real thing (if it ever comes to be), I'd pre-cut the piece to the correct size.
Anyway: there was also quite a bit of wrinkling in the grooves:
I was not feeling optimistic at this point. Then I remembered the Xacto knife handle...
I pushed the handle against the groove, and rotated the piece (same thing I did to smooth out the grooves in the balsa). After a few rotations it looked.... well, you'll see.
The final application was three pieces: one on each of the ends, then one piece to cover the middle recessed area. The trusty Xacto handle was used to smooth out everything. And here, my friends, is the result in all its glory. The color was added in post, don't worry I haven't started painting yet.
Pretty freaking awesome if I do say so, better than I even hoped for. I'd say we have achieve a very high level of pencilness here, even without the hex pencil body (of course there are round pencils, and that right there looks a lot like one).
There are still problems, though:
1) I can't imagine *any* way to get fins onto that. Gluing, cutting, forget it. I will try, but I lack optimism. I suppose it's within the realm of possibility that the right Dremel blade will cut it cleanly, but... well, we'll see. I really hate to disturb it, but I have to try something, unless I just want to make a non-flying pencil sculpture.
2) Foil tap over balsa = very delicate. I should probably CA the balsa after getting all the grooves finalized... would that make it more likely to get bubbles? I don't know.
I will next attempt a little piece of hex body. That should be fun. Still not planning to build this rocket immediately.
Hope you all enjoyed!
Wow, that totally worked! It looks great, I think without your fingers in there for a sense of scale, I would take it as a pencil.
What about putting the fins above the ferrule? It would be a shame to cut that up, or even hide it in anyway with the fins.
What about putting the fins above the ferrule? It would be a shame to cut that up, or even hide it in anyway with the fins.
Matt_The_RocketMan
Well-Known Member
Looks legit, probably what I would call going above and beyond with details!
Or put the fins below the ferrule, maybe that's a better idea.
boatgeek
Well-Known Member
- Joined
- Dec 27, 2014
- Messages
- 7,520
- Reaction score
- 8,198
As a great philosopher once said:
Man, it sucks when your words get thrown back at you! I should know, with a teenager in the house.
WARNING: AWESOME POST AHEAD
...
View attachment 392604
Pretty freaking awesome if I do say so, better than I even hoped for. I'd say we have achieve a very high level of pencilness here, even without the hex pencil body (of course there are round pencils, and that right there looks a lot like one).
There are still problems, though:
1) I can't imagine *any* way to get fins onto that. Gluing, cutting, forget it. I will try, but I lack optimism. I suppose it's within the realm of possibility that the right Dremel blade will cut it cleanly, but... well, we'll see. I really hate to disturb it, but I have to try something, unless I just want to make a non-flying pencil sculpture.
Awesome indeed! That looks great!
Or put the fins below the ferrule, maybe that's a better idea.
Could you adapt @Matt_The_RocketMan 's idea with a Flis Praetor-like fin set only on the eraser? I'd worry about popping fins with the short fin roots though. Alternatively, maybe you could assemble in the following order:
Shape balsa
Cut fin slots
Add foil tape, covering slots
Trim foil tape with Xacto
Glue in fins
I second this.What about putting the fins above the ferrule? It would be a shame to cut that up, or even hide it in anyway with the fins.
But isn't that... wait for it...Looks legit, probably what I would call going above and beyond with details!
the point?
If I follow your lead I might be drawn into a pencil-pun thread. My stylus different. Prefer to stick with just discussing the write way to implement this rocket.
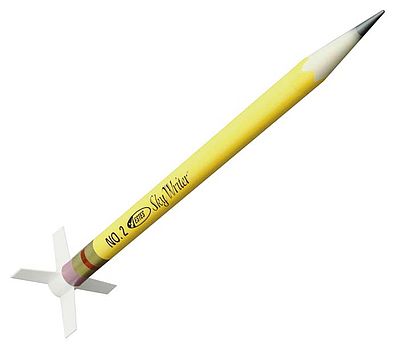
It is a bit worrisome. The Skywriter is very light and has a solid plastic fin can, so it's not an issue there. My eraser is about 1.2" long in this test version, that is pretty short for a fin attachment, although conceivably with TTW I could make them pretty strong (especially if they're plexiglass).Could you adapt @Matt_The_RocketMan 's idea with a Flis Praetor-like fin set only on the eraser? I'd worry about popping fins with the short fin roots though.
I feel like no matter where I put the fins they're gonna ruin something. Above the ferrule is possible; if I were willing to make them out of wood (and paint them matching yellow to the body) then I could even surface mount them, without needing to cut through the cladding and such (although that probably wouldn't be very hard.) Maybe that really is the best idea, need to think about it.
That seems like it could work. How much worse would the ferrule look with fins cut through it? At some point I *will* have to cut this one up with a Dremel to see.Alternatively, maybe you could assemble in the following order:
Shape balsa
Cut fin slots
Add foil tape, covering slots
Trim foil tape with Xacto
Glue in fins
You sir. are a master of ingenuity.
In fact, one could say you are ingenuous.
Oh wait.........
In fact, one could say you are ingenuous.
Oh wait.........
That's a dis if I ever heard one.
Nytrunner
Pop lugs, not drugs
3 clear find in corners of the hexagon, above the ferrule.
Use lead and washers at nose base like the IRIS.
Use lead and washers at nose base like the IRIS.
Hey, let's not draw the wrong conclusion.
This should be incorporated, not erased from your design.
Fin attachment needs to be sharpened and tweaked a bit though.
How about a removable fin can with a screw on coupler?
This should be incorporated, not erased from your design.
Fin attachment needs to be sharpened and tweaked a bit though.
How about a removable fin can with a screw on coupler?
Ya, maybe.3 clear find in corners of the hexagon, above the ferrule.
Use lead and washers at nose base like the IRIS.
(another movie reference!)
Last edited:
Depending on the motor used, this could be the only rocket with graphite at both ends!
Matt_The_RocketMan
Well-Known Member
Nose Cone may be the best part yet, lets see what he can do!
Matt_The_RocketMan
Well-Known Member
Yellow fins maybe? This could be added above the eraser part, 3 or 4 may do the trick, just figuring the CG, CP are the hardest part on adding weight on the back end.Man, it sucks when your words get thrown back at you! I should know, with a teenager in the house.
Awesome indeed! That looks great!
Could you adapt @Matt_The_RocketMan 's idea with a Flis Praetor-like fin set only on the eraser? I'd worry about popping fins with the short fin roots though. Alternatively, maybe you could assemble in the following order:
Shape balsa
Cut fin slots
Add foil tape, covering slots
Trim foil tape with Xacto
Glue in fins
Similar threads
- Replies
- 13
- Views
- 584