Biohazard build thread

The Rocketry Forum

Help Support The Rocketry Forum:

This site may earn a commission from merchant affiliate links, including eBay, Amazon, and others.
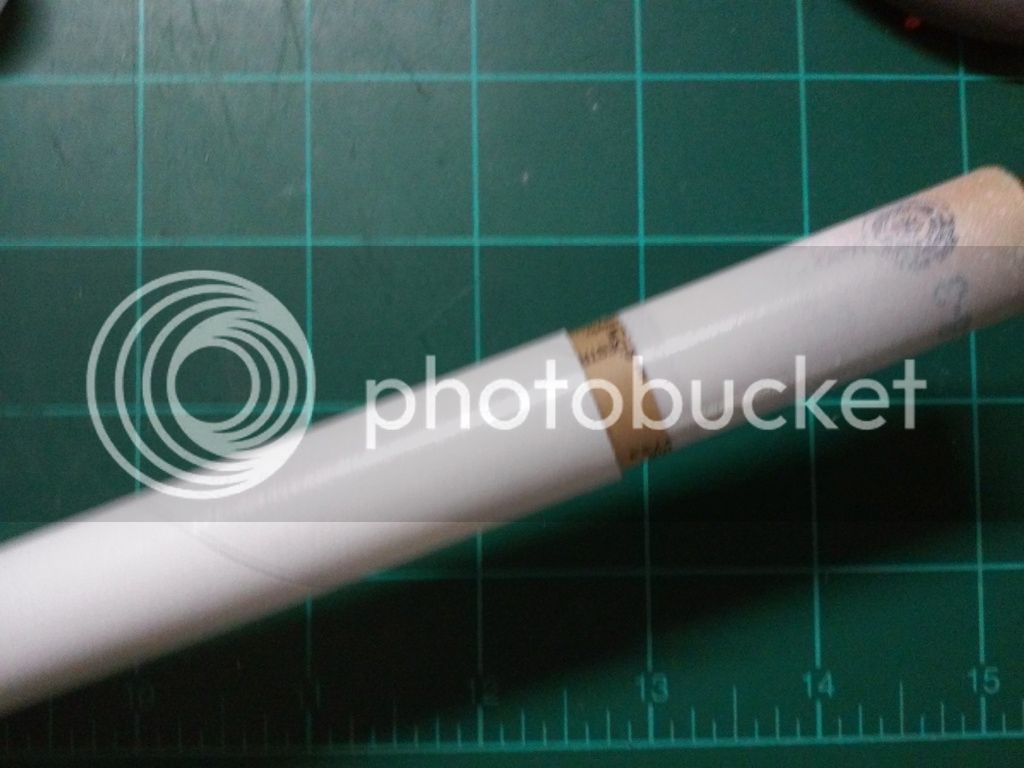
If I understand your suggestion correctly, the friction fit of the paper inside the tube is serving the masking function. Would I presume that you at least apply tape at the ends of the tube, to create a good seal? That sounds like a good combination to me: use the rolled paper to fill most of the length of the tube, and then just use a thing strip of tape at the ends to seal it off.

One final note: I used plain old blue tape here because none of it was intended to create sharp mask lines. Later on I'll break out the Tamiya tape.

Keeping in mind, that sharp mask lines aren't important here (this build) just a good snug fit of the paper inside the tube with enough tape to keep it that way, is all you need. The tape really doesn't have to run the length of the tube/pod. As long as the paper is blocking the paint from going on the inside surface. I read where someone uses wax paper rolled up and stuck inside launch lugs for the same reason. There was no tape involved at all. Just the wax paper with its nature to unravel, making for a somewhat snug fit inside the lug. This prevents paint from getting in there also.

Let me know if a detailed diagram is needed. I'd hate to confuse anyone with something so simple.....:duck:
 
I was just thinking that the paint would tend to wick under the edge of the paper (at the ends of the tubes) unless it was sealed down pretty well.
 
On another note, prolly should have waited to paint the pod interior AFTER all other painting was done. It wouldn't have been that hard to do. I suppose you're trying not to mess that up now, but just in case you did get some over spray in there, so what!!! You can hit it with a few touch-ups and be good to go.
 
Yes, in hindsight that would have made more sense. I think I had the notion that I needed to prepaint the pod interiors *before* I decided to brush paint them, and I never revisited my sequence after I picked up that little bottle of Testor's. Fortunately it is not a damaging mistake, just adds a bit of masking and care as I do the rest. And yes, any slight mess-ups in there will be easily fixed with the brush later on. Although I have to say it was super easy to paint the inner tubes when I didn't need to worry about getting stray paint on any other finished surfaces...

One final note on the pods: Despite having gotten some filler/primer spray in there and *attempting* to sand it out nicely (not so easy inside a BT20), the interior surfaces really are pretty nasty in some spots, beyond the cavernous spiral seams. At the diagonal cut ends you can see it pretty easily. It certainly won't detract from the final result in any significant way, but in the future I probably *will* give a bit more care to internal tube prep, at least near the edges where you can see it.
 
Despite having gotten some filler/primer spray in there and *attempting* to sand it out nicely (not so easy inside a BT20), -snip-

I make a variety of sanding rods from wooden dowels for such a thing. Small ones to sand inside of lugs, and a multi-purpose larger rod for tubes and corners where fin fairings are glued to another fin. Helps to round out the area if it's needed. Cut a piece of desired sandpaper (150 grit is what I have) about 2-3 inches x a length that barely overlaps or butts up to the other end of the sandpaper. This is an indispensable tool for me. I use it more often than I thought I ever would. You can put a couple of different grits on one rod if you mount sandpaper on both ends.
 
If it's BT20, you can used spent 18mm motors (wrapped with a bit of tape to make a snug fit) so paint won't go in them. I do this all the time when I paint small body tubes of built rockets and don't want spray in where the nose cone goes (but I skip the tape unless it's really loose). Did just that on 2 bt20's last two nights.
 
If it's BT20, you can used spent 18mm motors (wrapped with a bit of tape to make a snug fit) so paint won't go in them. I do this all the time when I paint small body tubes of built rockets and don't want spray in where the nose cone goes (but I skip the tape unless it's really loose). Did just that on 2 bt20's last two nights.

Another good idea! I always forget about all the exciting ways to use spent motors... :)
 
Another good idea! I always forget about all the exciting ways to use spent motors... :)

Keep EVERYTHING! You never know when it will help save you from spending $50 on a specialized interior painted tube paint shield! :)

Here's a blurry pic of what I mean...in my case, I leave it loose for convenience and not caring about a tiny bit of overspray, but you can adjust with tape.

2016-07-01%2014.37.41.jpg


I should note that if the inside of the tube is painted, make sure the paint is dry before doing this otherwise you'll be posting on how to remove a spent motor stuck inside a painted tube. :wink:
 
Keep EVERYTHING! You never know when it will help save you from spending $50 on a specialized interior painted tube paint shield! :)

New product idea! File that patent, pronto!

I should note that if the inside of the tube is painted, make sure the paint is dry before doing this otherwise you'll be posting on how to remove a spent motor stuck inside a painted tube. :wink:

That is a very possible and utterly horrifying possible outcome. :shock:

As it is, I'm hoping I let my tubes dry long enough before applying the blue tape (4 days, maybe cutting it a bit tight TBH), but I can touch that up later if needed.
 
That is a very possible and utterly horrifying possible outcome. :shock:

As it is, I'm hoping I let my tubes dry long enough before applying the blue tape (4 days, maybe cutting it a bit tight TBH), but I can touch that up later if needed.

Alternatively, you can use plain printer paper to wrap around the motors and insert in...should be snug and you won't have to worry about tape peeling up any paint (I've had that happen too). Best part here is you don't have to wait 4 days...just wait until the tackiness is gone. :)
 
I think I read/see that someone uses balloons to mask inside of tubes.
Stick the balloon in/thru the tube and inflate enough to seal.
anywhoo- sure am glad you went ahead and built this beauty!
 
So I applied a very mediocre base coat of Rusto 2X gloss white today. It did not go on as smoothly as I would like, and because I was in an unholy rush I didn't really have time to slow down and think it through. It should be OK after a bit of wet sanding and a coat of Future.

Because I didn't have my wits about me I forgot to take a picture, so instead I have created this artist's rendering of the current state of the rocket:
bio_paint_status.png
Yes, a little critter decided to try to ruin my day by committing suicide on one of the canards, but the joke's on him (or her) because those are going to be painted black eventually anyway.

And now, a nice loooooong wait while the base coat dries, and until after the house is completely packed up and prepared for a major remodel that's starting in a week. And I still need to order my vinyl from Mark, which is a prerequisite for the next painting step. So this build goes into hibernation for a little while now. I'm sorry that there are no other interesting build threads going on in this forum to keep you all occupied while you wait breathlessly for this one to resume.
 
Last edited:
Demolition starts in our house in a week, so most time is now spent packing stuff up and today we hauled a couple of loads to the CubeSmart where we'll be keeping most of our crap while the work gets done. Rocket stuff is mostly boxed up and in the basement, other than Biohazard which chillin' in the shed.

Went out to visit it today... I dunno, something just looks off about the paint, nothing I could capture well in a picture. I'm not sure why that would be, although I was in a hurry I still think I had everything pretty well covered (figuratively and literally). My can of Rusto white was working fine, weather conditions were perfect, and my primer coat was pretty good.

It'll look OK once the black and red bits are on, but it doesn't seem to be a great start. Or maybe I'm imagining things, and I shouldn't try to judge it until I have it on the bench and can examine it properly, which will be... well, who knows when.
 
I was able to get to the shed for a few minutes during visiting hours and examine the patient a bit further. I would say it is better than my previous impressions; looks like the main issue is simply a rough surface; don't recall if it's technically "orange peel" or one of the other maladies that afflicts rattle-can surfaces, but it's basically the same as my Solar Warrior, which eventually came out good after wet sanding and Future. So I think I'm good. Now the terribly hard part is waiting for an opportunity to continue working, could be weeks. :(
 
Snuck in an opportunity to hand-paint the inside of the ring:
ImageUploadedByRocketry Forum1468002608.247540.jpg

It's not quite as perfect as it looks in that picture, but it's fine.

The interior of the ring was in decent shape (other than the cavernous spiral); I did three coats of *very slightly* thinned Testors red spaced about 40 minutes apart. I think in the future I need to thin it a bit more; it got a bit gloppy and thick in a few places despite my efforts. Inside tubes and rings is a good place to practice this.
 
What's the base for that paint? I haven't used anything but rattle can. I used acrylic once so I could paint indoors but it seemed way too heavy.
 
It's enamel. I chose it for its compatibility with the Rusto 2x rattle cans I use everywhere else.

It looks really nice, although my technique needs work. Just for a laugh I might try to wet sand the ring and see how it comes out. If I could just smooth out the surface a little bit, it might look almost as good as a spray finish. Maybe.
 
...and also because one of itty bitty bottles is like a buck at Michaels with coupon. :)

I did the math on that some years ago. If you're paying a buck a bottle @ 40% off, that's retailing at 1.65 a bottle. X 4 = 1oz of paint @ 6.60 per oz. A gallon of Testor's enamel paint would cost $844.00. It doesn't sound all that bad until you crunch the numbers...

 
I just use it for small touch-up jobs here and there, and for those purposes the ability to purchase a very small quantity for super cheap is desirable, even if the unit price is, uh, "scary". You can't really expect them to charge much less than that for a small bottle regardless of how little it contains.

I would not use it to paint my house. :wink:
 
It's a perfect match for the 2X paints. I have 15-16 bottles of the stuff and have used it often. They make an excellent silver paint. Your ring turned out very well I might add. I wouldn't worry too much about it being brushed rather than sprayed. I'm sure the "Finish Nazi's" aren't really going to look in there to see what you did.
 
After reading about KenECoyote's recent paint-pulling adventures, I got a bit nurvious about the blue tape I had on the interior of the pods, so I decided to remove it and see if it pulled off any of the Testor's red. Short answer: no! It pulled off absolutely cleanly, which I was quite happy about, given that it only had 3-4 days to cure (I wouldn't tape up my Rusto 2x after that short a time). It also looks pretty darn good, although you can't tell too well from these pictures:
ImageUploadedByRocketry Forum1468200025.042341.jpg ImageUploadedByRocketry Forum1468200005.125017.jpg

The white looks really uneven in the second picture; I didn't notice that with my naked eye, we'll see if it persists after other actvities are completed.

OK, now I *really* need to get off my butt and order the vinyl this week (which is needed for the next painting step, which is the black.) I'd hate to have a painting opportunity go by because I didn't have my materials ready.
 
Last edited:
After reading about KenECoyote's recent paint-pulling adventures, I got a bit nurvious about the blue tape I had on the interior of the pods, so I decided to remove it and see if it pulled off any of the Testor's red.

LOL! Don't worry Neil...in my case it was a combo of the very old "left on" blue tape along with the G-Force Nose cone being notorious for sub-optimal paint adhesion and being soft. Either one alone wouldn't normally be an issue, but both combined was bad mojo. :)

I think BH is looking great!
 
Just started working on an Astroid Hunter that I picked up on clearance sale last year, and I noticed in the decal sheet a couple of radioactive signs and a couple of biohazard signs. They are not very prominent, and kind of blend in, but they do look pretty cool. Nice work on the build, turning out great so far.
 
Just started working on an Astroid Hunter that I picked up on clearance sale last year, and I noticed in the decal sheet a couple of radioactive signs and a couple of biohazard signs. They are not very prominent, and kind of blend in, but they do look pretty cool. Nice work on the build, turning out great so far.

Thanks. I was thinking about doing something with the radioactive symbol in a future build, lots of possibilities...
 
While prepping my decal files to send to Mark, I realized I had some serious errors in my OR file. Here it is all fixed up, with updated decals. For the pods, the black part at the front represents the diagonal cut of the tubes (i.e., there will be no black there in the final design). However, if I hadn't made those diagonal cuts, I would definitely do the pods in this 3-color scheme, since it looks really good. Noted for future builds. I also update the pattern on the ring; I think the new version matches the rest of the design a bit better. Feedback welcome as always.
bio_update_final.png

View attachment biohazard_final.ork
 
Last edited:
Tonight I did a quick 800-grit wet sanding of the white coat, just to smooth out the surface a bit before the next colors go on. At the end, before applying Future, I'll probably do another pass of the whole rocket at 1500.

While removing the masking tape from the middle fins, I got careless and the blue tape lifted up the surface of a piece of the fin paper. I was momentarily horrified, but i just glued it back down at the end and it should be ok after being covered with red. This blurry picture kinda sorta shows it:
ImageUploadedByRocketry Forum1468890338.798401.jpg

I'll have to be more careful removing tape in the future. I think the problem here was the direction I lifted and an inadequate glue-down of the edge of the paper. I might have not spent too much effort in that spot because I knew it would eventually be embedded in a fillet. Oops.

Sanding around all the books and crannies of all the fins is tedious, and I did a half-assed job of it. Should be a good 5 foot paint job in the end, which is ok with me.

Here's how it stands right now, both literally and figuratively:
ImageUploadedByRocketry Forum1468890880.879390.jpg

Vinyl order is in progress.
 
Last edited:
Back
Top