Upscale Estes Guardian

The Rocketry Forum

Help Support The Rocketry Forum:

This site may earn a commission from merchant affiliate links, including eBay, Amazon, and others.

lppa2006

Well-Known Member
Joined
Sep 24, 2009
Messages
166
Reaction score
0
Okay guys I am planning on doing a upscale Estes Guardian and was wondering if anyone else has attempted to upscale this and make it dual deploy...

I know if i went with a much bigger diameter it wouldnt be a problem but im trying to stay with-in a 3" mailing tube (yazoo mills) as the main body tube.

So has anyone succesfully upscaled a Guardian to a 3" airframe and made it dual deploy.

Also I want to be able to fit a J350 in it which will be my motor size limit, so 12" MMT is planned there will be space beyond motor tube to allow for a J350... (i hope anyway)...

Ive simmed it up in rocsim and I think it looks like guardian, but it will be much taller (scale wise) for teh upscale if i go with dual deploy.. Im not so sure how thios will make it look with a 3" main section and a 2.56" tube for the upper section... although i must say the simmed outlines end up looking like the finished project... so i am probablly being paranoid... I just reallyw ant this to look liek guadian since i think its one of the cooler looking estes kits out right now, not to mention its a really great flyer... :)

Anyway here are images from rocsim, this is all rough draft, and is missing alot of stuff liek bulkheads and miscellaneous.

guardian-2D.jpg


guardian-3D.jpg


Ill post more as the build progresses
 
Good luck with this - it looks great so far. I'm pretty sure others have upscaled the Guardian. Bonus for you: The forward tube should act nicely as an e-bay!
 
Originally posted by DaveCombs
Bonus for you: The forward tube should act nicely as an e-bay!


Ya know tahtw as my original idea, but after contemplating where id put the parachutes i decided that wouldnt work since the ebay has to have ejection charges fired from each end for dual deploy... and teh nose cone isnt gonna be sufficent space to pack a chute really...


The way im looking at now is to basically run a 2" tube from the upper section down through teh transition and use that to pack the main chute in, this will also allow a small amount of airspace between the upper tube an dteh chute stuffer tube for me to do TTW fin mounts on the upper fin tube, there wont be much of a fin tab but at least they will still be TTW mounted (plus i can always fill the TTW compartments with epoxy and those fins will be PERMANENT for sure)

To continue on with teh dual deploy setup...

then from teh transition i have added a 6" piece of airfarme to extend out so the ebay can couple with the transition and have a little bit of airspace to build pressure for teh main ejection.... then there is the ebay which i cut a 6" piece of airframe and will either have one continuous length of coupler or at this point because i alredy cut one coupler 2 on each side sticking out 2.5".... this allows me to connect to the lower bady section which will basically be the booster and drouge compartment... teh only thing now is im running into space constaints on the booster/drouge section... I really want to have a baffle system installed so i can fly it on regualr sized motors (G64 and up) and use motor enabled ejection until i get an altimeter(s) and am ready to fly it on teh BIG BOYS... right now dual deploy isnt totally neccesary since it wont reach much more than a couple thousand feet on Level 1 motors (and im still not L1 yet )

I aint gonna lie, this is turning out to be one of teh most challenging projects ive worked on to date.. You would think this idea would be a straight forward one but suprisingly that transition really throws a curveball atcha...

If only i had chosen to go with a 4" airframe instead........... (damm my hindsight is 20/20)
 
Well I have the mock up of what its gonna look like.. already have some of the fins cut, but ran out of ply stock so some of the project is on hold until i get more wood.. The transition should be a challenge but then thats most of teh fun of building from scratch :)

Id say its gonna have dual-deploy possibilty, i was gonna leave out an ebay until i needed it but it actually needs teh extra length to make it look more like Guardian...

Anyway here is the mock up pic..

guardian_mockup3.jpg
 
Looking good so far.

My daughter "made me" buy a Guardian kit. It's really grown on me and the more I fly it the better I like it. I'm looking forward to this build. I might copy it later.

Good luck and keep us updated. I want launch reports when you get the dual deploy working.
 
:) yeah Guardian can grow on you pretty quickly, and it does have some really great flights...


As for the dual deploy, that will be quite awhile off, i still have to obtain level 2 before this one will actually NEED dual deploy.. Although some of the simmed launches on I's will get it to almost 2500', which could be dual deploy altitude.. Plus i still need to scrounge enough for an altimeter, maybe i should submit my altimeter request to good old santa for xmas..

LOL although im sure the "I want an altimeter" will be misinterpreted as "I need socks and cologne"... ---- someone give Santa a Q-tip for his ears please---
 
Originally posted by lppa2006
:) i still need to scrounge enough for an altimeter, maybe i should submit my altimeter request to good old santa for xmas..

LOL although im sure the "I want an altimeter" will be misinterpreted as "I need socks and cologne"... ---- someone give Santa a Q-tip for his ears please---

By all means put it on the Xmas list:D Unless you have a Birthday coming up sooner.

I would suggest putting the exact model number, price, store/website, etc on the xmas list too. I've found that Santa just doesn't know much about rockets and you have to spell out exactly what you want. In fact, you might want to make sure your better half can understand exactly what you want, if she understands, then maybe Santa will too.;) That always seems to work around here.
 
anyone got some good ideas for beveling fin edges w/o having a router... ive got a dremel with sanding drum or a bench grinder that would work unless someone has a better idea...


this 1/4" ply really needs beveled to cut down on extra drag, plus it will look a lot nicer
 
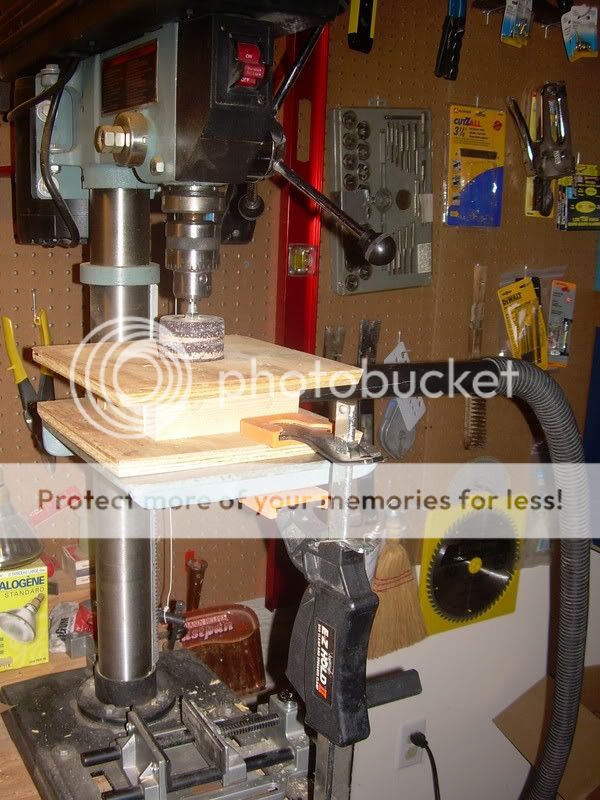
If you have a sanding drum for a drill and a drill press, you could put it in the press and use that instead of a router.

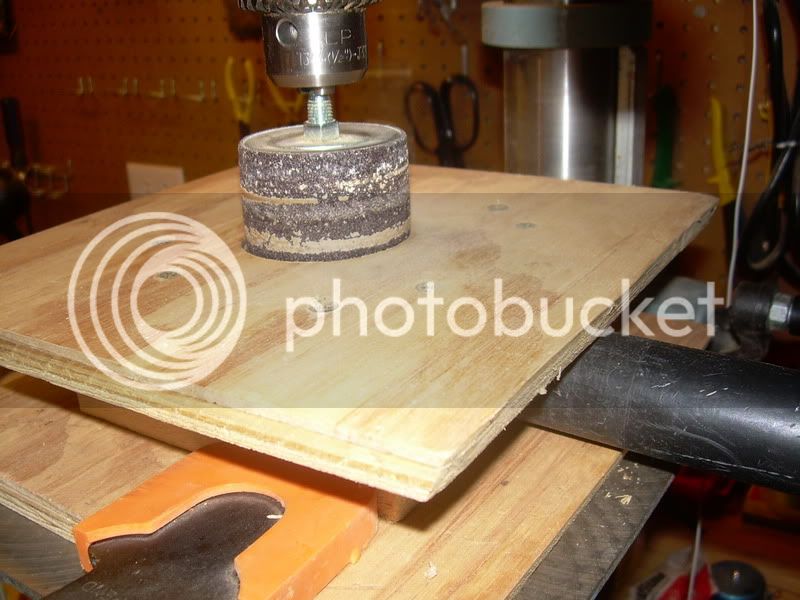
I build a small box that I clamp to the drill press and put the sanding drum into. I also connect the shop vac to reduce the dust. Two pieces of wood trimmed at 10º like I used on the router table would also work on the sanding drum.

Here's a few pics.

Drill press with sanding drum and shop vac.
Drillpresssander1.jpg


Closeup of drill press
Drillpresssander2.jpg


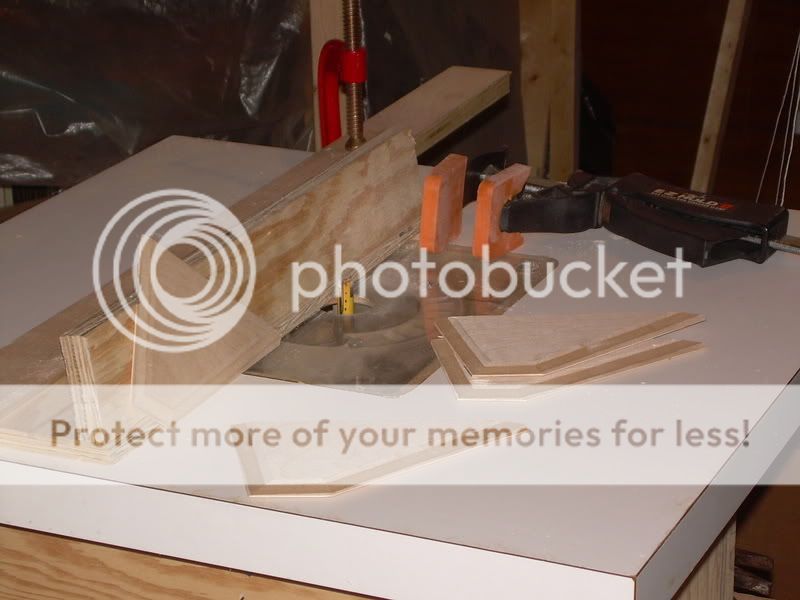
Wood jig @ 10º as used with router.
Finsbeveled.jpg


Hope these give you a few ideas.
 
o yeah another thing i was curious about for ideas... whats the best way to get epoxy fillets on the inside with this smaller diameter and the amount of length i need to reach inside the tube...

The only thing i can think of is using some syringes and connect aquariam tubing to it and pipe the epoxy in like that.... normally id just mix and pour it in .. but since i have lots of length to cover inside, i dont want to risk getting epoxy everywhere inside which could prevent me getting the next centering rings in after i finish up one layer of CR's**


**installing each centering ring individually


The only problem i forsee with teh syringes is the pot time for the epoxy, im not using west systems but am using menards "brand" 30 min epoxy which usually starts to set/thicken after 10-15 minutes or so, especially when mixed in larger batches
 
and yet another question i have....

What is the best thing to use for attaching coupled pieces (like nose cones) so they don't come apart but can be taken apart when needed. Friction fit with tape is teh "easy" fix i know but it doesnt ALWAYS stay together, especially when you get a really good "oomph" ejection charge...

I know shear pins are used for some stuff but i dont think thats what i am talking about here, similar though except i just dont want them to shear (i dont think anyway)...


Normally id just try to figure this stuff out myself but heck thats what TRF is for.. To share and trade ideas/concepts and give good advice :)..

On that note i wanna thank everyone at TRF for being so helpful...
 
heres a dry fit with all the fins and my Estes Guradian (aka Silver Streak) next to it for scale comparison..

Next up on workbench is fin can... ill post when its done

guardian_dryfit-smlr.jpg
 
I POSTED THIS IN COFFEE HOUSE ALSO, BUT I SHOULD GO AHEAD AND INCLUDE IT HERE TOO, SINCE ITS ALSO PART OF THIS THREAD...
-----------------------------------------------
Ok guys I am somewhat okay with photoshop but i was wondering if there is anyone else out there with some major skills in Pshop that could upscale Guardian decals for Project Guardian Upscale...

Id also like to know if anyone has a set of guardian decals they could scan in for me so i can attempt to enlarge and touch them up in photoshop, in case no no one can help with a crisp version of them..

The sad part is i should have a set of decals from my last kit since i never used them, but i sure cant find them.. LOL (something about being disorganized)
-----------------------------------------------
 
I'll hook you up with a decal scan. I did it for someone else already; I just have to find it.
 
thanks dave...


and this is off topic.. but looks like im gonna break 100 posts today .. hehehe
 
Handeman, your drill press box setup looks like. How exactly do you slide the fins into the box/past the sanding drum?

Thanks,

Marc
 
:mad: NOT COOL HANDEMAN :mad:

I have that same saning drum! ;) and router beveling jig :D

Ben
 
Handeman, your drill press box setup looks like. How exactly do you slide the fins into the box/past the sanding drum?

Thanks,

Marc

I've been using the router table for tapering the fins. I took two pieces of wood and trimmed an edge to 10º on each of them, then put them together to make my 10º jig. You can see it on the third pic of the router table. I clamp the fin to the jig and slide it along a straight edge to keep the position correct.

You might need a little bigger table/top for the drill press/sander, but you can clamp the fins to the 10º jig and a straight edge to the table (that's why I made the top and bottom larger then the vacuum box.) and use that to run the fins past the sanding drum.
 
Well it took me almost 4 months to finally get'er done.. But its done Should have a Pic up soon... Its not 100% exact but it still looks like Guardian...

If all goes well it will be flying at MWP5 on a H242T and should reach around 1500', unfortunately someone will be flying it for me, since i couldn't afford registration (or pre-register in time) and do my L1 cert.. O well poop happens

Anyway the current specs are... 3" - 2.14" Airframe, 55" tall, weighing in at 3lbs 9 oz w/o motor, removable/replaceable baffle system, it can take up to a J350 but i doubt ill ever try it, and it can be adapted to dual deploy w/ some work-arounds...

Not sure what i am going to do for recovery yet, but Aerocon's descent calculator recommends a 52" chute. Which means ill go w/ a 48" chute when i can afford one... If no one has a 48" loaner at MWP5, ill be bringing it down on 2 x 36" chutes.. Which should be a crazy slow descent from 1800', unless i mess up with placement on shock cord or packing two chutes for the first time incorrectly (LETS HOPE NOT ANYWAY)...

Overall this was a really cool build, and i definitely think I am going to do a 5" or 6" version sometime in the distant future. Probably be my L2 project!!!

Anyway here is a pic of it after i finished painting the fins, you will notice the booster is missing some paint which happened when i pulled the painters tape off!!! That of course has since been repainted and the decals are on... Ill take the finished picture when its daylight...

guardian1.jpg
 
finally got some decent light outside today, unfortunately the wind sucked (or blew technically) hence why there is an arm in the photo, also our house isnt slanted LOL, the rocket was tilted a little so i rotated the photo a little to straighten it...

Anyway here Guardian is, in all it's glory.. All i have to do now is clear coat it and hopefully successfully launch it.

guardian-finished.jpg
 
THE HOTNESS!!!

So, are you going to reattempt your L1 with it? What, monetarily, is holding you back? Is it the casing, or the cost of the reload? Do you need to re-up your NAR membership?

(If these were answered earlier, I apologize; I seem to have the attention span of a goldfish today.)

(Ooh, look! A castle! :D )
 
Dave;

Well the main thing that is holding me back is i didnt have money to register for MWP, unless something short of a miracle happens between now and next saturday... Ill prolly have to wait on a Three Oaks launch or maybe one coming up in Peoria, IL...

If all goes well though It should still launch at MWP on a H242T, just not by me..

And boy I cant wait on MWP since ill be getting flown there by an acquaintance (one o fmy poker league members) who has never been to a HPR launch event..

I am definitely looking forward to flying in a small plane to say the least, although still trying to find someone willing to pick us up Saturday morning from the Peru airport 20 minutes away
============================================

EarlyStarts;

P.M. Me your email address and ill share the rocsim file same goes for anyone else wanting it.. Besides I need to tweak it some first anyway...

And, Ill explain in the email why i do not want to publicly post it :)
 
Cool build! The rocket looks great. Now that you're done have you thought about extending the transistion to build your electronics bay?

My daughter is going to do a bt80 version for her 4h rocket this next year. I think we will design it to handle electronics in the transistion and dual deploy it just for kicks.

Good luck on your flight.
 
Back
Top