Always wanted a good southern Brunswick stew recipe. Anyone got one?
If you haven't been, you need to go to this:
https://www.stewbilee.com/
The Brunswick Chamber of Commerce has published a (what appears to be) decent recipe for Brunswick Stew and I think this is it:
https://www.officialguide.com/gistew.html
I don't have my (printed) copy immediately before me - but will check / compare and get back to you (altho I've never actually made any from the recipe -- planning to).
[obligatory recipe:]
Southern Pit-Cooked pork:
First, THE PIT:
==================
* Level out a spot of ground - say 2'x3' to bare (packed) dirt;
* 'Pave' the area with solid (not cored) brick - laid flat (dry laid, i.e. no mortar)
(There is no mortar used in this construction - everything is 'dry stacked' - simpler and also allows the pit to 'breathe');
* Establish your size - based on a ceramic coated replacement grill grate (for those fancy gas-fired jobs)
(Mine is based on a 16x20 grill - enough for 2 pork shoulders);
* Start by 'dry-stacking' brick (these can be cored - more common) approx 1" bigger in both dimensions
(i.e. 17x21) INSIDE dimension - to fit the grill grate above
(lay these brick in 'running bond' - i.e. offset the next course up by half a brick - this will 'knit' the brick together...
... stacking the brick one on top of the other will guarantee the pit will fall over... eventually);
* Leave the front side open (for the first 3 courses of brick) (this for a place to 'charge' the pit with coals)
(you'll need to procure a 'lintel' - small piece of flat steel etc - to support the brick above this front opening...
and secure some scrap tin to serve as a 'door' for the front opening (simply hold in place with a brick));
* On the 3rd course, turn the corner brick at 45 deg - to provide a 'ledge' to support the grill grate
(this will allow the grate to be removed for cleaning)
(this thing is going be 'ugly' - inside relatively square, but outside is... well,you know)
(this is important for flavor -- pork cooked on 'pretty' pits tastes horrible
")
);
(ALT: if you find 8" (3 courses) places the coals too close to your meat, raise it up to 4 courses)
* Lay your lintel across the front opening on (top of) the 3rd course;
(you will want the top of your 45 corner ledges to be approx 8 inches above the 'floor' - which will be 3 courses of brick);
* Continue dry-stacking brick for another 3 (or 4) courses - this time all the way around (i.e. including front - on top of your steel lintel);
* Secure a piece of 1/4" plywood for the top and drill a small hole (for the thermometer) in the center;
(alt: you can also find a scrap piece of 3/4" urethane insulation - lay of top of plywood to minimize heat loss)
COOKING:
============
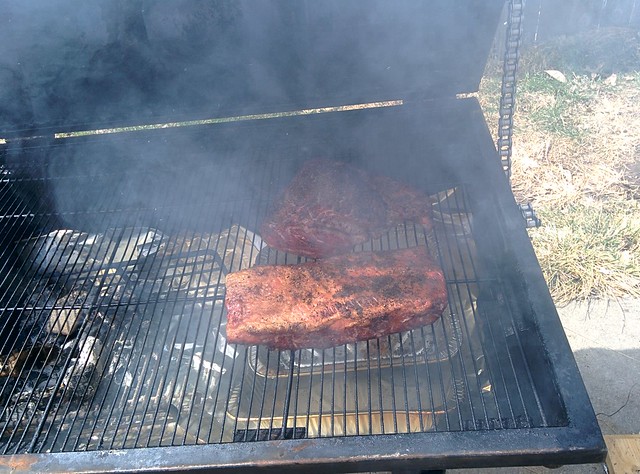
The principle of cooking here is to build a fire (of whatever hardwood of your choice) off to the side - typically on a piece of metal roofing - and, as the wood burns down to coals, you place a shovelful or 2 in the base of the pit periodically to maintain your cooking temperature (250-300 - put a dial thermometer in the hole in your cover - 500deg range). This will be an all-day job (I typically start right before lunch and have 'good food' for the evening meal). I generally pre-heat the pit prior to putting the meat on - maybe 20-30 minutes. DO NOT place burning (or unburned) wood in the pit -- actual flames will damage the meat - the meat is cooked by radiant heat from the coals (and vaporized fat dripping off the meat - which is where a lot of your flavor comes from).
You will need to 're-charge' the coals about every 1/2 hour (which is also how often you turn the meat) - use your shovel and *gingerly* add the coals thru the door - so as to not get (too much) ash on the meat. This works for most any meat - but the 'classic' down here in the south is the pork shoulder ('boston butt'). Start your meat 'fat side up' to benefit from the melted fat basting your meat. Keep the 'door' closed to the coals except when charging.
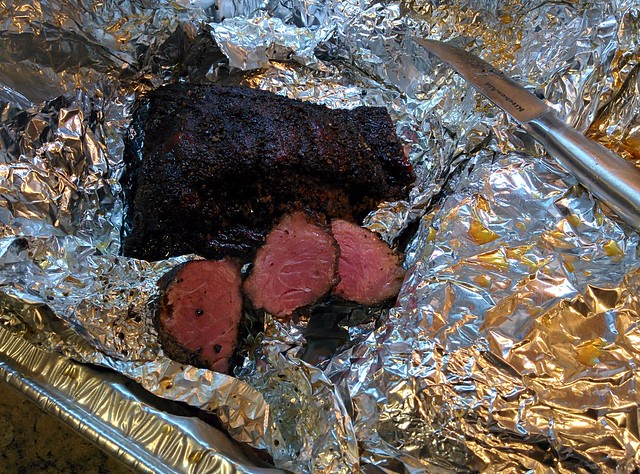
You can apply any rub or other treatment to your liking - but I've never done so -- just 'plain jane' here. You should cook your meat a minimum of 5 hours - up to about 7 (when it literally falls apart is about the best). Again, keep your temperature below 300 for best results.
NOTE: There are those who believe in the 'smoke' of burning wood is what bar-b-que really is and there are pits around here constructed that way - a separate fire-box for burning the wood that is then 'vented' under and then OVER the meat (a drip pan keeps the fat from starting a fire and routed back to a chimney over the fire (it just re-routes the smoke over the pit). This also somewhat mimics those 'smoker grills'. While I agree that these cooking aproaches are nice ideas (those kinds of pits - constructed of masonry - are a rather serious undertaking), the approach here (above) is a considerably simpler approach and, over the years, I can't find any fault with it -- the result is as flavorful as any I've tasted anywhere (including Corky's in Memphis). Since this is such a simple little pit, it takes the most minimal effort to try it out and see for yourself.
-- john.