My first HPR!

The Rocketry Forum

Help Support The Rocketry Forum:

This site may earn a commission from merchant affiliate links, including eBay, Amazon, and others.
I think the chute tamer for rockets is a rubber band or ring that gathers the shroud lines to just under the shroud. The filling of the chute forces the ring or rubber band down the shroud lines expanding the chute.

I'm pretty sure you can get a rubber band for less than $200;)

No, the product named/Trademarked "ChuteTamer", as linked by the post I quoted, is indeed a $200 product. As the post said, it allows you to make your rocket Dual Deploy "easily". Heh. If you want to spend $200. :D
 
Then they trade marked a term that has been in common use for years, typical corporate schinanigans.

I'll bet if I tried to market a rubber band called a Chute Tamer they'd try to sue and given some of the court cases I've seen here lately I'd lose:rolleyes:
 
I think the chute tamer for rockets is a rubber band or ring that gathers the shroud lines to just under the shroud. The filling of the chute forces the ring or rubber band down the shroud lines expanding the chute.

I'm pretty sure you can get a rubber band for less than $200;):

I agree $200 is rediculous!!! Although I'm not allowed to use any electronics for this launch, I was thinking of ways to build my own "chute tamer" with a 555 timer and a g-switch. The timers cost around $2 and a g-switch is around $8. The only thing I'm still trying to think of is the way to release the parachute without some really complicated chip or something, mainly thinking of a mechanical way to do it.


BsSmith - The -20 degrees gives me a lot of reassurance, thanks. How were your fingers after epoxying in that temperature? Haha.
 
BsSmith - The -20 degrees gives me a lot of reassurance, thanks. How were your fingers after epoxying in that temperature? Haha.

I moved to the unheated basement during that, but it was still pretty cold. Be careful though, the epoxy gets really thick.
 
I'm not trying to get on anyone's case here but while $200 is more than many folks are willing to spend on the Chute Tamer(TM), it's certainly not a ridiculous price for the professionally designed and packaged device that works as advertised.

The Perfectflite MT3GminiTimer3 digital staging/airstart/ejection timer with integrated G switch alone costs $42.95 plus shipping! The box, stitches, connectors, wiring, etc. probably cost another $40 in small quantities, and the heating elements probably cost between $0.50 to $1 each. Plus the cost of printing the manual, the shipping box, the shipping to the retailer and the decals probably come close to another $20. My math says he's got over $100 of parts and components into each unit. LOC retails it for $200 but they have to make something too, so they can only afford to pay between $120 to $150 for it.

No one is getting rich on this. This is the case of another hobbyist who decided to make a production run of a pretty neat item in a really professional package. He's not getting any return on his investment of design time which these days goes for $150 to $200 per hour, and he's really not charging much for his time and efforts in making the units which would cost $20 each in quantities of 10 to assemble if you job shopped it out. If he charged a commercial markup, the retail price would be over $500 for the component quantities he buys.

Yes, you could buy a 555 timer and a g-switch for $10 or so but without a bunch of other parts you can't make a safe and reliable unit. (To make a safe unit you need a microprocessor or similar device to determine if a launch occurred or if you bumped the unit.) You can buy the same Perfectflite timer that uses a PIC uC and a G-switch as the basis for a timer for ~$50 including shipping, but you'll need another $40 or so in parts to make a workable unit unless you have a good stash of electronic parts, and I'm guessing it would take you a good day to make a first unit.

When you're a student or a young adult starting your first job, you don't have a lot of money and you can usually make time for your hobby interests and making a similar device would be a good learning experience. But don't say that a high quality speciality item for hobby rocketry is overpriced because you can't afford it. An adult who can afford high power rocketry and whose free time is limited may think differently.

Bob
 
if i may just add a few more things...

the thing about amesbury and that field is...i've found that KISS works wonders. for a lvl 1, i'd urge you to go with the simplest method of getting a rocket up, and down. and to be quite honest, that field is an awesome MPR field...one of the best, but for HPR, it's really limiting. i've seen 3000ft flights there than come down right next to the pad, but i've also seen 1500ft flights land on rooftops over the hills and far away. and in powerlines across the field and through the 6ft brush/swamp. and of course, some of my rockets (some of my more prized ones too) have been eaten by the rocket gods.

if i was giving honest advice to my little brother on how to certify lvl 1 inexpensively, reliably, and safely, i'd say find a 3 or 4fnc airframe, build it as per instructions, make sure you've got TTW fins or extra strong fillets, and use a 29mm H. or the smallest motor that will keep it stable to 1500ft. and at 10mph winds+ that would be my limit for sure on that field.
 
I've got a quick building question:

I looked up some different ways to epoxy fins, rings, and other components and one of the things I read said something about using a 1/2 inch diameter dowel and sliding that across the creases where I am epoxying but it also says to dip the dowel in alcohol. What does the alcohol do for the epoxy/dowel?

It keeps the epoxy from sticking to the dowel.

I use my finger rather than a dowel, I think the tactile feedback gives you a lot more control.
 
Yeah the finger method(hopefully while wearing a nitrile glove!:eyepop:) DOES offer a bit more control and the 'tactile feel'..However, you will get a more consistent fillet with a constant taper by using the dowel method..It also helps when the epoxy is thickened up a bit too - to about the consistancy of peanut butter.
 
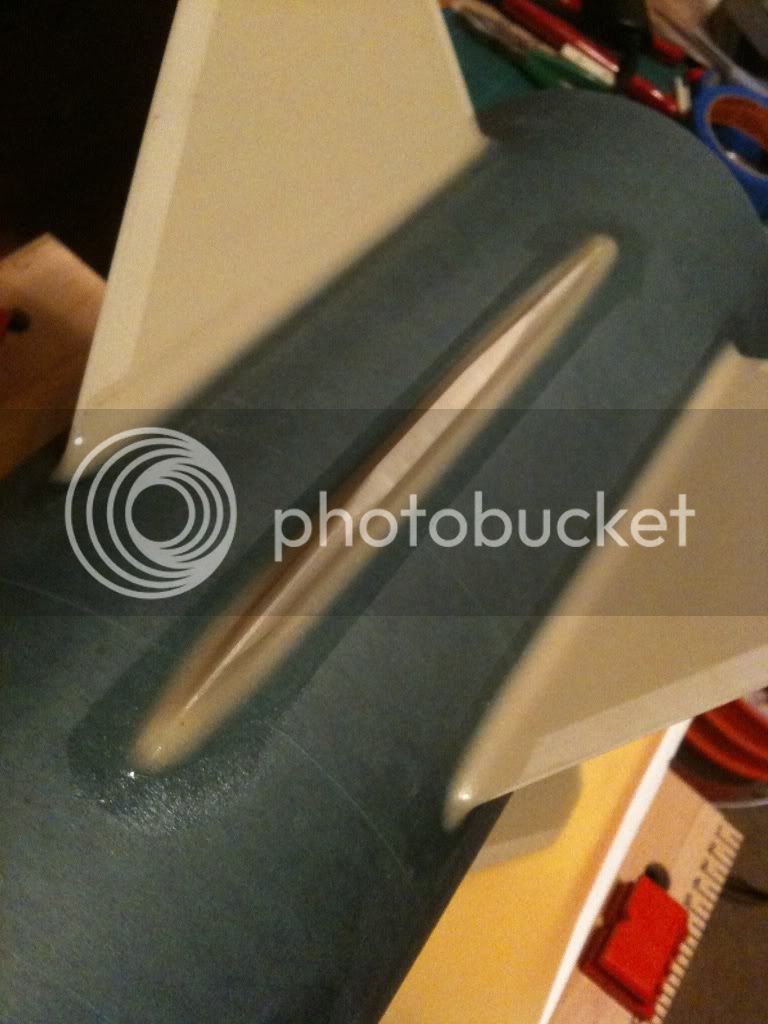
I use GLR Aeropoxy for fillets. It cures very slowly, but is the strongest bonding, toughest stuff I have found. I mix it 1:1 by volume using pump bottles (one squirt part A per one for part B) that I obtained from a local restaurant supply store. For fillets I add milled fiberglass 'till it thickens to an almost-toothpaste-like-but-not-quite consistency. I use painters tape on either side of the intended fillet area, spaced about 3/8" from the joint. The thickened mix pours very slowly, but nevertheless, I pour a bead in the joint, then drag the back side of a plastic soup spoon through the bead (spoon handle almost parallel to airframe) to give the fillet some initial shape. For this step I make sure I've used enough epoxy to cause the stuff to squeeze out over the edge of the tape. Then I use the tip of the spoon (handle perpendicular to the airframe) to scoop along the entire length of the fillet to get the final shape. I remove the tape immediately, shape the ends of the fillet with my finger, then I use a heat gun to warm up the epoxy which causes the tape lines at the edges to "melt" away, the small bubbles rise through the mix and pop, leaving a glassy smooth surface for the final product... easy as rocket science.

0057.jpg
 
Last edited:
I use painters tape on either side of the intended fillet area, spaced about 3/8" from the joint.

then I use a heat gun to warm up the epoxy which causes the tape lines at the edges to "melt" away, the small bubbles rise through the mix and pop, leaving a glassy smooth surface for the final product... easy as rocket science.

The painters tape is a brilliant yet simple idea, nice! When i read it I was wondering why i didn't think of that!
For a make-shift heat gun, could I use a hair dryer instead since I don't own a heat gun?

Anyways, here are some pictures of the things I've done over the past week. I installed the motor mount tube and attached one fin but i ran out of epoxy so i'll have to get some more.

IMG_2145.jpg

IMG_2143.jpg

IMG_2142.jpg

IMG_2140.jpg
 
The painters tape is a brilliant yet simple idea, nice! When i read it I was wondering why i didn't think of that!
For a make-shift heat gun, could I use a hair dryer instead since I don't own a heat gun?

____________________________________

A blow dryer would probably work, but a typical blow dryer blows much harder than a heat gun. Give it a try, pour some some epoxy on a disposable surface (or your mom's coffee table or whatever) and see how it works. If the blow dryer is adjustable use the highest heat setting and the lowest fan speed and be careful not to blow the epoxy out of its intended location...
 
i just called rocky's ACE hardware in N andover (114) and they have heat guns for 21.99. it's a solid investment.
 
Also try Harbor Freight if there is one in your area. Bought a heat gun there for $9.99. Seems to work OK.


Al
 
I think the chute tamer for rockets is a rubber band or ring that gathers the shroud lines to just under the shroud. The filling of the chute forces the ring or rubber band down the shroud lines expanding the chute.

I'm pretty sure you can get a rubber band for less than $200;)


p.s.; LOL!!! Looked at the one at LOC, that's nutso! $200 to reef a parachute? I wonder if they sell 2 a year:roll:

Actually, as some of you surmised - the Chute tamer is a device that uses a piece of monfilament to bind the main canopy, and a programable timer connected to a heating element. The heating element that cuts the mono line at a time predetermined by the user.

The standard motor ejection puts the captured canopy and device into the airstream...effectively making kind of a droque deployment until the main is released.

A bit more involved than a rubber band around the suspension lines...

That said, personally, I spend la lot ess than $200 just making additional altimeter bays and moving my electronics around from rocket to rocket.

But this device would have some value for persons not able to or wanting to deal with BP charges and ematches - and there are people in that situation - so it fills a niche....
 
Last edited:
I successfully attached my second fin last night before i ran out of sunlight. I used the painters tape method that SteelyEyed suggested. Looking at the fillet you would never guess its only the second one I've ever done! :eyepop: haha. I will attach a photo later today of the second fin.

I'm hoping to finish the entire construction of the rocket on Saturday and hoping to paint it Sunday and during the week so its ready for the Oct. 24 launch at Amesbury. I've got the shock cord mount, launch lugs, one more fin and the last centering ring to epoxy then just tie the shock cord and parachute on and it'll be finished!

Turns out, Amesbury is to small of a field to launch a 3" diameter rocket on what I was planning a 38mm H120 Red Lightning. So Boris is allowing me to borrow a 29mm adapter (thanks Boris) and I will fly on a Roadrunner G80-7, turns out i'll have to fly it as a mid power rocket until next spring. :(

I do however have one question. I'm using dog barf as my wading for this launch and I was wondering how I stuff the dog barf in the rocket? Do I need a wire netting to hold the dog barf in place or do I let it fall all the way down to the motor mount tube then place the parachute and shock cord on top?
 
I'm using dog barf as my wading for this launch and I was wondering how I stuff the dog barf in the rocket? Do I need a wire netting to hold the dog barf in place or do I let it fall all the way down to the motor mount tube then place the parachute and shock cord on top?

Door #2. Toss a few loose handfuls in before installing shock cord and chute. It's OK if it falls to the bottom of the airframe and sits on top of the motor mount... this way the tube is protected too. The key here is loose -- make sure you crumble (maybe fluff is a better word?) it up as you put it in to give the ejection gases a way to get through.

Good luck with the flight!
 
here are the pictures of the second fin. I'm currently working on putting the third fin on and will put up some pictures soon.

kinda looks like the first fin but oh well. haha. :)

IMGA0114.JPG

IMGA0115.JPG

IMGA0116.JPG

IMGA0117.JPG
 
here are the pictures of the second fin. I'm currently working on putting the third fin on and will put up some pictures soon.

kinda looks like the first fin but oh well. haha. :)

Rotate the rocket 60 degrees and then do the fillets. That will prevent the epoxy from migrating away from the fins...
 
That is a pretty tough rule...
Not really. It's simply a matter of self-preservation.

CMASS uses Woodsom Farm Park in Amesbury, MA for our high power launches. This great field was the site of NSL 1995 and is the only publicly accessible open area in eastern MA that can support high power launches so we do what we have to do to insure that we will not have an incident that would cause use to loose access to it.


Our "tough" launch rules went into effect a few months before "Launch Safe" was published because we had 3 incidents in one day IIRC that could have cost us the use of the field:
  1. A high power rocket landing across a power line in a residential neighborhood adjoining the field that required the power company to respond and shut down the line so the low hanging rocket could be retrieved followed by a visit from the local PD.
  2. A high power rocket land on a roof in the neighborhood, fortunately under parachute.
  3. A high power rocket flight ending with a ballistic impact in a condo parking lot, fortunately not causing any property damage or personal injury.
I as the NAR Senior Advisor and the other officers proactively looked at our launch procedures and determined that allowing flights to the waiver altitude without sufficient consideration of wind velocity and direction, and recovery method was not in the club's best interest. We performed trajectory analysis and recovery drift analysis and altered our safety check procedures to insure that high power flights will not land in outside the field. At first it was not a popular decision, but it was accepted and adopted by the members.

Our conclusions were virtually identical to "Launch Safe" and since incorporating them we have had only 2 high power rocket land outside the field in the last 4 years which shows it's been pretty effective. No safety policy is 100% effective, but ours is really close.

Bob
 
i have to agree, that field is in close proximity to the ocean, so the winds are always a factor for the most part. adding insult to injury, there is a stretch of powerlines in the grassy part which pose a hazard, and the condo's on top of the hill...it's a tough spot to send up big birds, especially over 2,500ft. just too unpredictable.
 
i have to agree, that field is in close proximity to the ocean, so the winds are always a factor for the most part. adding insult to injury, there is a stretch of powerlines in the grassy part which pose a hazard, and the condo's on top of the hill...it's a tough spot to send up big birds, especially over 2,500ft. just too unpredictable.
Perhaps it seems that way for newer folks, but it's not unpredictable for the current safety crew.

We check the winds aloft forecast before each launch, and we actually look at the weather charts. We have a pretty good idea where a rocket will land after it's been launched. That's why we simply haven't had many rocket leave the launch field in the past 4 years.

If we know that your rocket will land in the swamp or the woods which are part of the launch site, and not in the residential neighborhoods, we will advise you that you should not launch your rocket because you will loose it, but we won't stop you if you're insistent since it will not be an unsafe flight. We are not going to argue with someone who thinks they know more than safety does. Sometimes it takes a few painful and expensive learning experiences for an overenthusiastic person to realize why we have certain launch rules and and make recommendations.

Bob
 
so did it fly?

Yes! it did fly. :D However, I launched it on an Aerotech G77-7R instead of the Roadrunner G80-7. It worked perfectly, the 7 sec delay charge worked out really well. I was waiting until I was able to get a few pictures on the computer before I posted anything but since you asked...

I have a video of the takeoff but only the takeoff cuz my brohans lossed it after a few seconds in the videocamera, but oh well. I'll post that up on YouTube and post the link up here later.
 
Here are some pictures of the Lil Diter launch, thanks to Boris :)

My family had no luck with technology that day. My dads camera ran out of battery seconds before the launch so Boris e-mailed me a few pictures he took.

LIL DITER Boris pictures - lift off.jpg

LIL DITER Boris pictures - flight.jpg

LIL DITER Boris pictures - parachute deploy.jpg
 
bravo on the paint job bro! and nice flight

Matt (adams older brother)
 
Back
Top