Mach 1 Exiter Build Thread

The Rocketry Forum

Help Support The Rocketry Forum:

This site may earn a commission from merchant affiliate links, including eBay, Amazon, and others.

NateB

Well-Known Member
Joined
Nov 6, 2012
Messages
3,812
Reaction score
5,415
Location
NE Indiana
Since Mach 1 Rocketry first listed kits for preordering, I was very interested in his line of fiberglass low power rockets. I like working with fiberglass better than cardboard, and it also hold up to my curious 3 year old better than any Estes kit. Now, we have a line of fiberglass kits we can fly in the park on cheap BP motors.

I bought a few kits this Spring when they were first offered and a few more during his Haloweeen / Black Friday Sale. First up, is the Mach 1 Exiter, a minimum diameter 3 Fin and a nosecone kit. Open Rocket shows it flying about 230ft on an A motor up to 2000 ft on a D. Sounds perfect for us.

Step 1 is always to give the fiberglass parts a good bath.

full


After the parts were washed, rinsed, and dry, I put them on the scale. 31g before any recovery. The kit includes a black printed streamer with the Mach 1 logo. I might use it, or I might use something more reflective if I end up sending it higher.

full


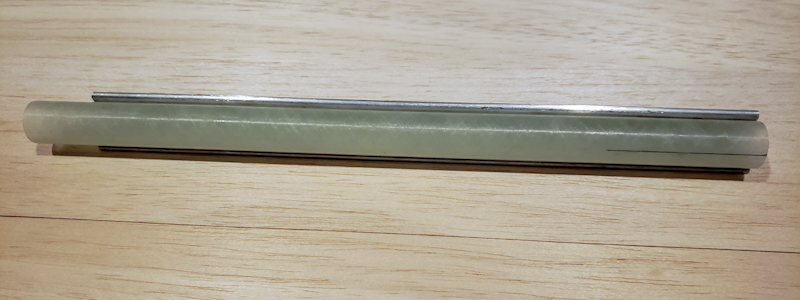
Now the body tube was marked for the fin and rail button locations. The kit includes micro sized rail buttons for the Makerbeam rail or a launch lug. I like the appearance of buttons better than a launch lug. I don't see building a tower or fly away guides for a park flyer being worth the effort.

full


Next steps, epoxy the thrust ring in place, rough of the area on the body tube for the fin roots and fillets, epoxy the fins in place. I think it will take longer to talk about this rocket than it will to build it.
 
The area on the inside of the body tube for the thrust ring was scuffed up with 60 grit sandpaper along with the outside of the thrust ring. The thrust ring was then glued into place with epoxy. I also glued the bulkhead to the nosecone since I had some epoxy mixed up. Once this has cured for a few hours, I'll attach the fins.
 
Each fin root and edge where the fillets will be were sanded with 60 grit sandpaper. Same with the body tube. I also drilled small holes for the rail buttons. The screw for holding the lower guide will be trimmed and sanded flush with the body tube so it doesn't impede insertion of the motor. The upper guide was drilled through the thrust ring. It will get trimmed down so it doesn't melt too much from the ejection charge.

Using the Estes fin guide with the thin G10 fins was helpful as a set of third hands, but still requires patience to keep everything straight. There is not much to attach the fin roots to the body tube. I think most of the strength will come from the fillets. I'm going to use Rocketpoxy for the fillets, but I'm not sure yet what tool I will use to pull them for the proper radius.

PSX_20181110_224207.jpg
 
Last edited:
I have not abandoned or forgotten about this build, I have been busy with work, mandatory education and another project our director put me on with a small group.

This is my weekend off and I was able to get filets laid down and smoothed on each fin. It took a while to find the right tool to pull the Rocketpoxy. I was at a Meijer store and found a pack of "craft picks" The wide end is about half the size of a popsicle stick and it tapers to a blunt point.

Following Crazy Jim's advice, I colored the wide end of the pick with a sharpie and used it to mark the body tube and the fins for the fillet. The area was masked with tape and the epoxy buttered in place. The fillets were then smoothed with the tool and the tape pulled after they had few minutes to set. I'm happy with the results. There shouldn't be too much work to finish smoothing them out once the epoxy is fully cured.
PSX_20181124_170458.jpg
 
Now that the epoxy is well cured and the recovery attached, this little rocket is at a whopping 34 grams. It still needs paint and decals, but I think we will fly it naked tomorrow afternoon. My 3 yr old son is convinced it will fly "up, up, up, into space", but Open Rocket sims to 256 ft with an A8-3 and 607 ft with a B6-4. The A motor might be a little too slow off the pad.
 
We had a successful maiden flight this evening on a B6-4. My 3 yr old son was excited to see his first model rocket take off, but he didn't want to push the button this time. It came down fast under the streamer and landed nearby on frozen grass without any damage. I think this little rocket has earned a paint job and will hopefully enjoy many more flights.

PSX_20181207_171114.jpg PSX_20181207_171231.jpg

 
We had 2 more good flights this afternoon to finish up the pack of B6-4 motors I had on hand. I'm going to try a C next, but I think a D motor would take it out of sight and be hard to find. Really, the B6-4 is a perfect motor to fly this rocket in a soccer field.

The aft button flew off on the second flight of the day, but it still flew straight. This weekend looks good to start painting, so tonight and tomorrow I will work on sanding and get a coat of primer on.
 
when it comes to 18mm

A is for Aww that's fun!
B is for Blast off!
C is for C-ya later!
D is for Dangit, where the heck did it go?
 
It seems like it has been forever since I have touched this little rocket. We finally had a day where it was warm enough to paint, not raining, and no 50kt winds. It isn't much progress, but I was able to prep the surface and get 2 coats of primer on. I have several steps of sanding and painting to go, but I think it will look nice. PSX_20190326_172518.jpg
 
Now that the epoxy is well cured and the recovery attached, this little rocket is at a whopping 34 grams. It still needs paint and decals, but I think we will fly it naked tomorrow afternoon. My 3 yr old son is convinced it will fly "up, up, up, into space", but Open Rocket sims to 256 ft with an A8-3 and 607 ft with a B6-4. The A motor might be a little too slow off the pad.

A8, B6 and C6 all have the same initial thrust curve...The A is lighter (not much) so the liftoff would actually be slightly faster... A8's are good concept flight motors, is something is wrong with the rocket it ain't goin' far!
 
PSX_20190604_164748.jpg PSX_20190604_164830.jpg It only took 7 months and I finally got this rocket finished. It has flown 3 times already, but it is time for another flight with the paint on.

The purple I found is close to the vinyl color, but not quite a match. I also got a small twist in the wording. It is not a big deal, I just forgot how quickly the vinyl grabs and how unforgiving it is to reposition.

The rail guide is a section of 5/16" I-Beam from Evergreen Scale Models. Thanks to rharshberger for the suggestion in another thread.

My next day off is Friday, we might get a chance to launch then, but the Thunderbirds are having a meet and greet with an A-10 flyover and other fun things before their performances this weekend. We are planning on seeing them, so we will see if we have time for a quick stop in the park.
 
Hope to finally fly this in two weeks at MDRA. Using Old AeroTech F55. Mach 1.6, 3500' Alt. With old school pop lug, attached to pad with kevlar line rather than monkeying up the end of the rod with tape which can remove the rod...
Nose weight was not necessary, cg further forward than with a C6-7. Did not get decals with the kit, so made my own... Crooked in the same direction...lol
exiter (1).jpg exiter (2).jpg
 
That should be an entertaining flight. I'm not sure I have the nerve to stuff a D in there, but we will see.
 
I can't wait for the FlightSketch Mini altimeter to be back in stock. The size and price are perfect for these little rockets and won't be a huge loss if you can't find it.
 
Back
Top