First RocketPoxy Fillets

The Rocketry Forum

Help Support The Rocketry Forum:

This site may earn a commission from merchant affiliate links, including eBay, Amazon, and others.
I just did my first Rocketpoxy fillets and I got to say Im impressed. I had never done colored fillets
before unless you count black, but these yellow fillets look kinda cool. I cant wait to see some of the
red or yellow fillets on a black rocket. Lots of different color patterns to choose from.
I choose the yellow for this rocket just because I wanted to do something other than black.

Very Nice! I wondered how the rocketpoxy looked with other pigments mixed in. I've only used the black that came with it. Very nice.
 
Like this?
smooth.jpg


I found your thread two days ago and absolutely used that. after mixing in the bowel, I poured it out and spread it out. This picture was just after spreading. I found after 5 minutes 90% of the bubbles were gone! Thanks after the fact for great advice!!

I almost lost my dinner when I read this. A bowel is what you poop out of; a bowl is what you mean.
 
One of the things RocketPoxy suggests to reduce air bubbles is to heat it with a blowdryer after it is mixed and before application. The heat makes it initially a lot more runny and the bubbles surface quicker. Then it also sets faster. I tend to take my tape off right after I am satisfied with the look so I don't end up with tape lines.
 
Ok. So I had the need again and just to be clear. I did NOT use a BOWL because I surely wouldn't want to cause that ruckus again! No harm was done to the cardboard nor myself this time!
WP_20151231_17_14_54_Pro%20360x640.jpg


I had to attach the nosecone coupler to my Tomach. (Just test fitting the upper tube to the coupler before removing after validating it fit properly.)
WP_20151231_17_18_52_Pro%20360x640.jpg


I've read three times. I believe I have everything properly spelled and can alleviate anyone's dinner from being ruined! :wink:
Happy New Year!
 
I had a project that needed fillets today and I thought I would do different colors all around. This project is going to get T2T and the fillets wont be seen
but I wanted to see what some of the other colors looked like. In the first pic I forgot to tape the fins but oh well. The green fillets in the last picture is
from mixing the blue and yellow. Now you can do colored fillets as cool looking accents.
GEDC0059.jpgGEDC0058.jpgGEDC0042.jpgGEDC0057.jpg
 
I had a project that needed fillets today and I thought I would do different colors all around. This project is going to get T2T and the fillets wont be seen
but I wanted to see what some of the other colors looked like. In the first pic I forgot to tape the fins but oh well. The green fillets in the last picture is
from mixing the blue and yellow. Now you can do colored fillets as cool looking accents.
View attachment 279347View attachment 279348View attachment 279349View attachment 279350

Where are you getting the pigments from??
those look really cool!!
 
I had a project that needed fillets today and I thought I would do different colors all around. This project is going to get T2T and the fillets wont be seen
but I wanted to see what some of the other colors looked like. In the first pic I forgot to tape the fins but oh well. The green fillets in the last picture is
from mixing the blue and yellow. Now you can do colored fillets as cool looking accents.
I've been thinking of buying those from Rocketry Warehouse. The Green really looks cool! Thanks for posting those!!
 
For great looking fillets with no bubbles, read the instruction data sheet that came with the ROCKETPOXY, I think it would solve all the issues I have read here, For example hitting the fillets with a quick pass of a heat gun at the appropriate time will get rid of all the bubbles, you can mix in a cup and use out of a cup ( as long as you don't whip it up into a froth). I am attaching the back side of the data sheet below:
RP_G5000_DATASHEET_P3.jpg
 
Also wanted to explain about the ROCKETPOXY colored pigments that come with and/or are sold by ROCKETPOXY distributors. The ingredients are all sourced from USA professional industrial grade pigment companies such as BASF and Huntsman. These are not cheap imports that you may find on some discount websites and big box craft stores. The difference is that all of our pigments we sell have been tested with ROCKETPOXY to not negatively affect any of the physical properties such as strength, brittleness, etc. and have all passed or we would not be selling them. Also another big difference is that cheaper import pigments will fade over time quicker, especially in the bright sun as most have no UV additives in them. ROCKETPOXY pigments do have some UV additives in them, while we cannot guarantee a little fade may occur if left in the sun continuously for 10 years, the RP pigments bright color will definitely outlast any of the cheap quality pigments that almost always have no UV additives in them. Bottom line if you use a website or big box store to obtain pigments try and know what manufacturers make the pigments you are adding in the RP and if they have UV additives in them. ROCKETPOXY also sells some of the same pigments to some of the filament wound tube manufacturers such as Rocketry Warehouse so you can get an exact color match between the colored tube and epoxy fillet when getting the correct color pigment(s). Usually towards Christmas RP (last two years was with Wildman Rocketry) has a special Christmas sale that includes about 5 different RP pigment colors in the kits for free.
 
Old thread, but since I got my advice from this one, I'm gonna post here. I followed Swissyhawk's advice. Mix, wait 10 minutes (I waited closer to 15 and was happy with the consistency), apply, wait 5 minutes, draw with alcohol dipped Popsicle stick and remove tape immediately. I believe they turned out well.

Rocket is just an Estes Goblin. Obviously didn't consider that the blue painter's tape would mess up the papering I did (only my second time with that), but not overly concerned since this rocket is just a playground to try some techniques.

Goblin_Rocketpoxy.jpg

My questions are:

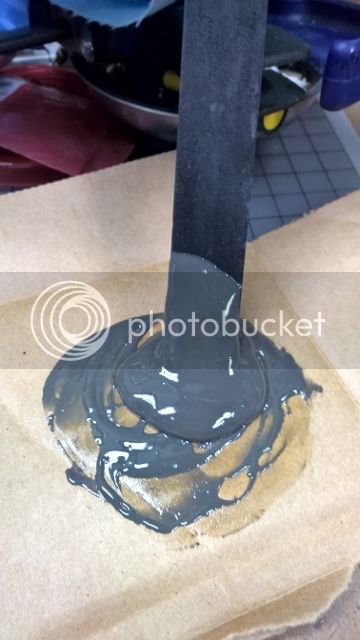
1. On the FB group for our local Tripoli club, I asked about using a syringe to apply Rocketpoxy. I could not get it into a syringe. I would really prefer this application method to a finger (see below). I have some fairly large syringes...

Syring_No_Needle.jpg
(60ml)

...but given the viscosity of Rocketpoxy, I really am stumped. The photo is just a plastic applicator type, but I also have needles (18 gauge is my largest, which works fine for Titebond). I'd love advice about using a "hands-off" application method.

2. I've given in to the fact that I'm going to waste some epoxy as I go - no avoiding that. But is there any way to save anything that the epoxy comes in contact with? It appears, through the advice I've read, that doing two fillets (as shown) at a time is the way to go, which means that, after two fillets, I have to toss everything. Is that just a reality that can't be avoided?

3. Popsicle sticks were great for shaping the fillet along the length of the AF (I've also read of people using metal ball fondant cake decorating tools, which I plan to buy (but see #2, above)), but the forward and aft ends of the fins seem to be half-arsed process. I'd prefer something a little more consistent. Any suggestions?

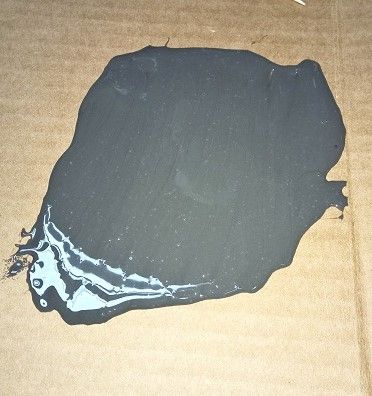
4. Any real reason to use the dye that came with this stuff? I mean, yeah... neat colors (they only gave me black for some reason), but isn't that a bit of a pain to paint over?

For a first experience with Rocketpoxy (and having never used any other), I'm very pleased with it. The $50 or so I spent on the Rocketpoxy kit (including crazy shipping) was well worth it, IMO.

Thanks in advance for any advice. Hopefully this thread isn't too old/defunct.

Happy flights!
^_^ Stephen
 
1. Are you trying to draw it up into the syringe? Rocketpoxy is too thick for that, generally. You need to remove the plunger and scoop it in.
2. Wasted epoxy is a fact of life. The only things that can help are:
Measure excess carefully on the first set, use that to mix for the next sets.
Think ahead for any other things that might need bonding (bulkplates, nosecones, etc.) and use excess for that.
3. PVC pipe works well for for the fillet, as well as the ends.
4. You don't have to use the dye. On fiberglass rockets, it does help to see if the coverage is good. No issues with primer/paint coverage.
 
I'd love advice about using a "hands-off" application method.

Fat popsicle stick. Scoop it up, use the viscosity to dribble/spread it in place. Then use a gloved alcohol finger or alcohol pvc pipe to round it out.

ing that. But is there any way to save anything that the epoxy comes in contact with?

I mix it in the round flat containers that frog tape comes in. The plastic is incredibly slick and I can pop the cured r-poxy off of it the next day when I'm doing the next set of fillets.
Also smooth plastic like that on cake covers (like from the grocery store baked sections) is pretty slick too.

but the forward and aft ends of the fins seem to be half-arsed process.

That's were art comes in

ny real reason to use the dye that came with this stuff?

The dye is best for colored fiberglass rockets where builders are just waxing/clear coating the fiberglass. The dye helps get the epoxy closer to their color scheme.

For cardboard/wood rockets, I forego the rocketpoxy entirely (unless bonding to plastic) and use titebond II for structure, and titebond quick&thick for fillets
 
Thank you for the advice. I'm employing this in my attempts. I did try to "scoop into the syringe" method and that worked very well, other than totally trashing the syringe. I tried to flush it with acetone, but that really didn't work (pushing acetone through the rear end the get the epoxy out the front). I've managed to reduce waste in other areas (reusing Popsicle sticks after the epoxy has dried out them for mixing sticks, etc), but the syringe thing still seems to be problematic for me, at least.

I agree that using Rocketpoxy on small kits is overkill. I'm just playing with it to learn how it functions so I can better apply it to the FG kit I'll be continuing on soon.

I will look for the bakery section containers. I've never used Frog tape, though I'm familiar with it. The mixing cups I got (cheap, of course) are not smooth on the inside. But I understand the idea here! Thanks!

Did a couple more fillets tonight - tried post-it notes as a masking method on the paper - worked quite well other than one of them slipping a bit. The end result was not perfect, but good. I tried applying with my finger and did not like that. I'll go the Popsicle route the next time.

And yes, the art... I'll figure out the fore and aft ends!

Thanks again, guys, for the help. Greatly appreciated. Practice makes perfect!
 

Latest posts

Back
Top