


Purkeypilot
Well-Known Member
- Joined
- Aug 7, 2015
- Messages
- 158
- Reaction score
- 2
Well, it's finally complete! After a several week business trip, I start to finished my launch control system project today! Here are some pictures of the finished product(s)!
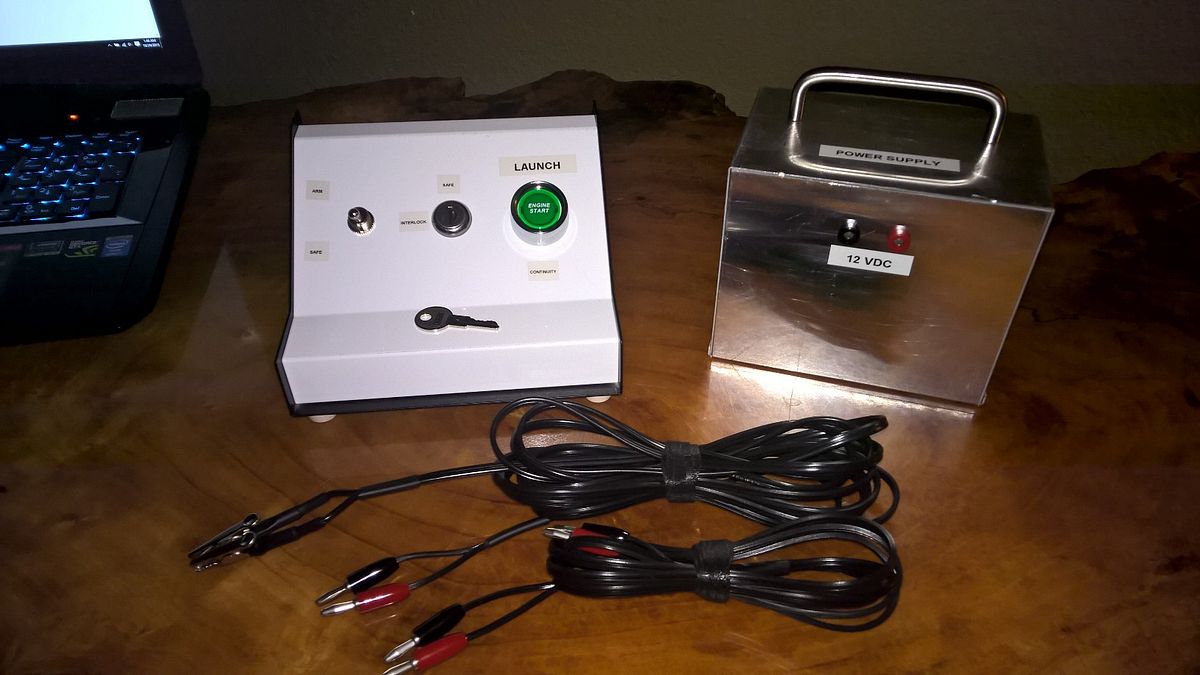
Here is the whole setup - Controller, 12 VDC Power Supply, Igniter Leads, and Controller Power Cables
Controller and Power Supply

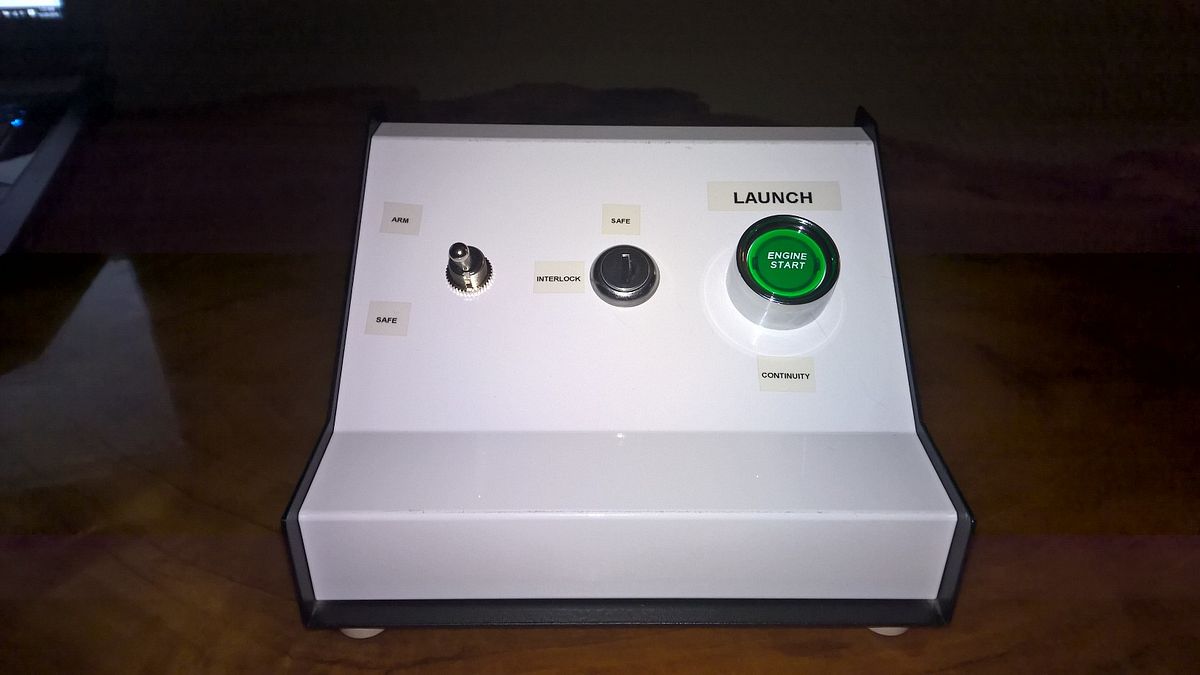
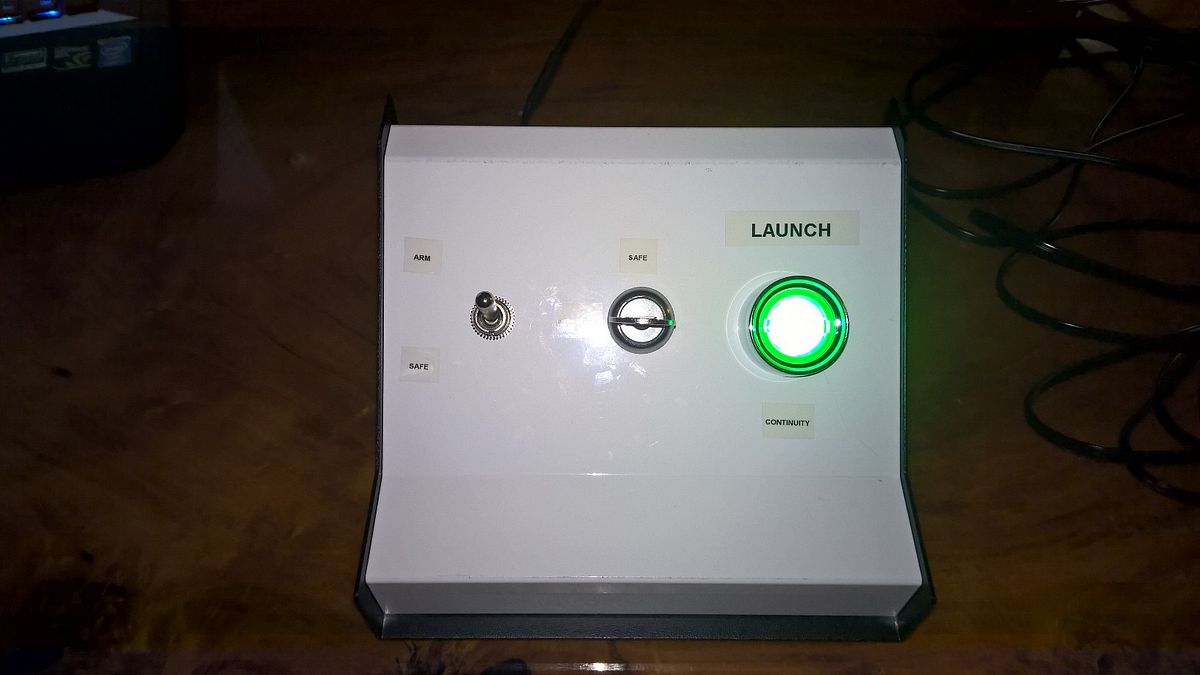
Here is the bread and butter; The Launch Controller. I built it using a LMB Heeger 7" 007 Modular Project Enclosure. As you can see, it's a 3 switch system utilizing a 2 position, single-pole-single-throw key switch as an interlock (key removable in the "off"/safe position only), a two position, single-pole-single-throw toggle switch, and a three contact, single-pole-single-throw LED push button switch as the Happy Button. The internal wiring is all 18 AWG stranded copper primary wire. The only thing that is missing is my switch guard cover that ended up being discovered out of stock when the supply order was prepped and shipped. Hopefully it will arrive soon.
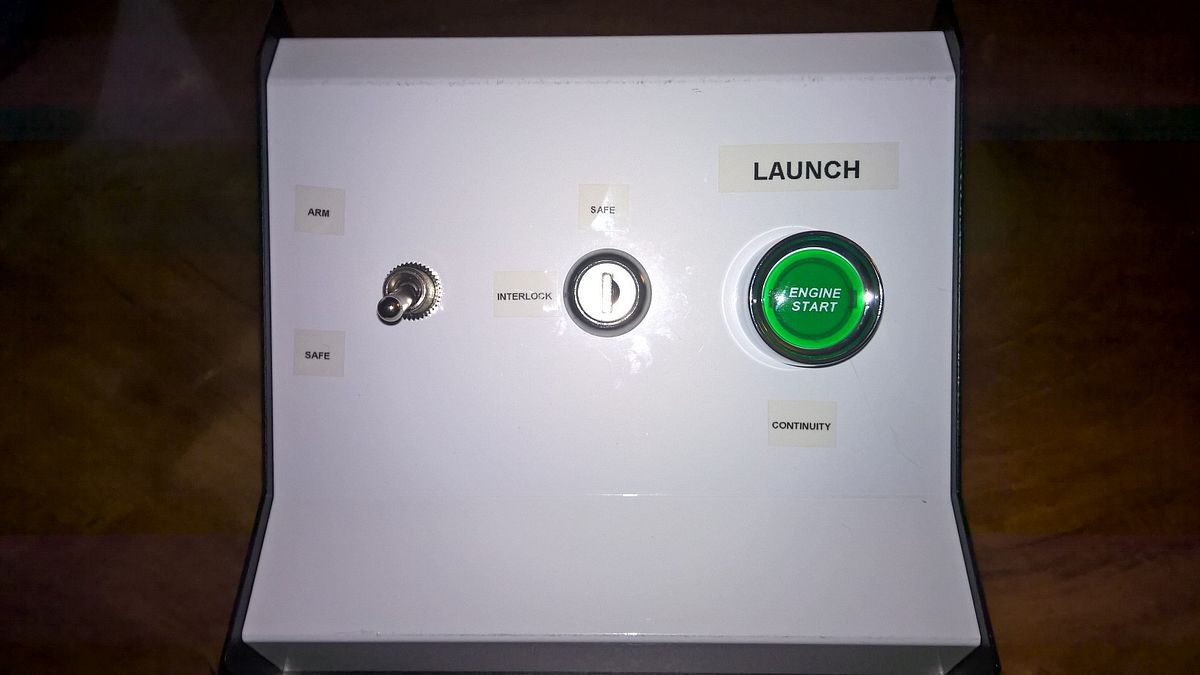
Slightly different angle...
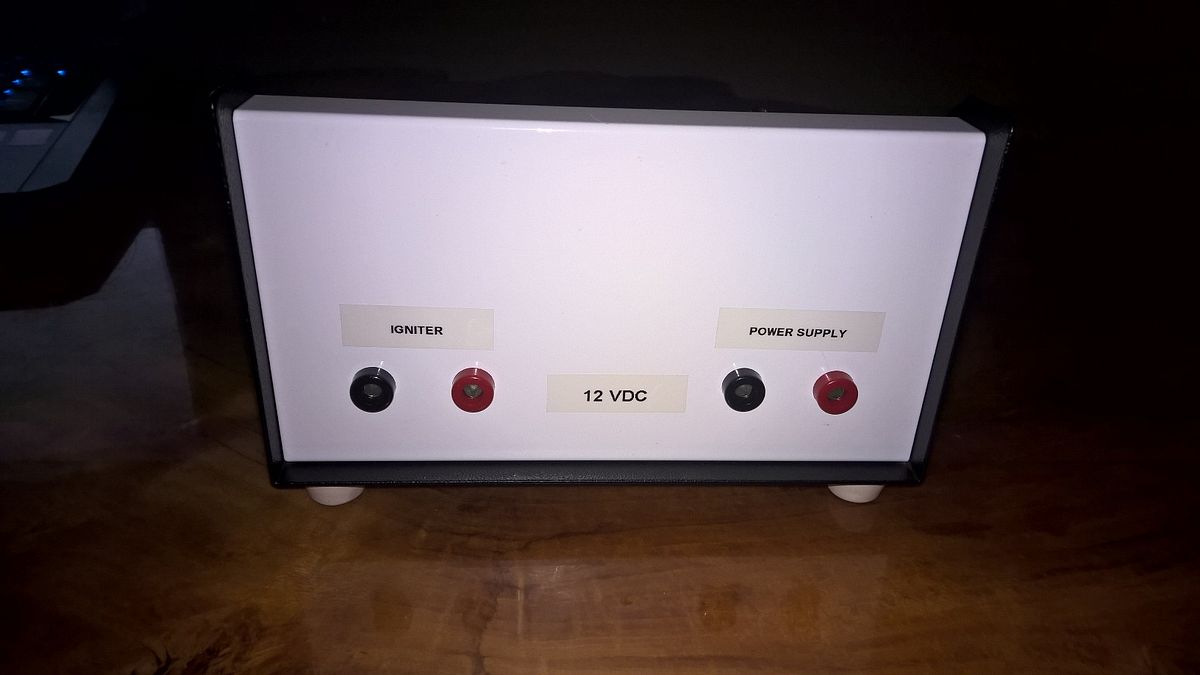
Rear of the launch controller. I utilized 4 Johnson solder contact banana jacks.
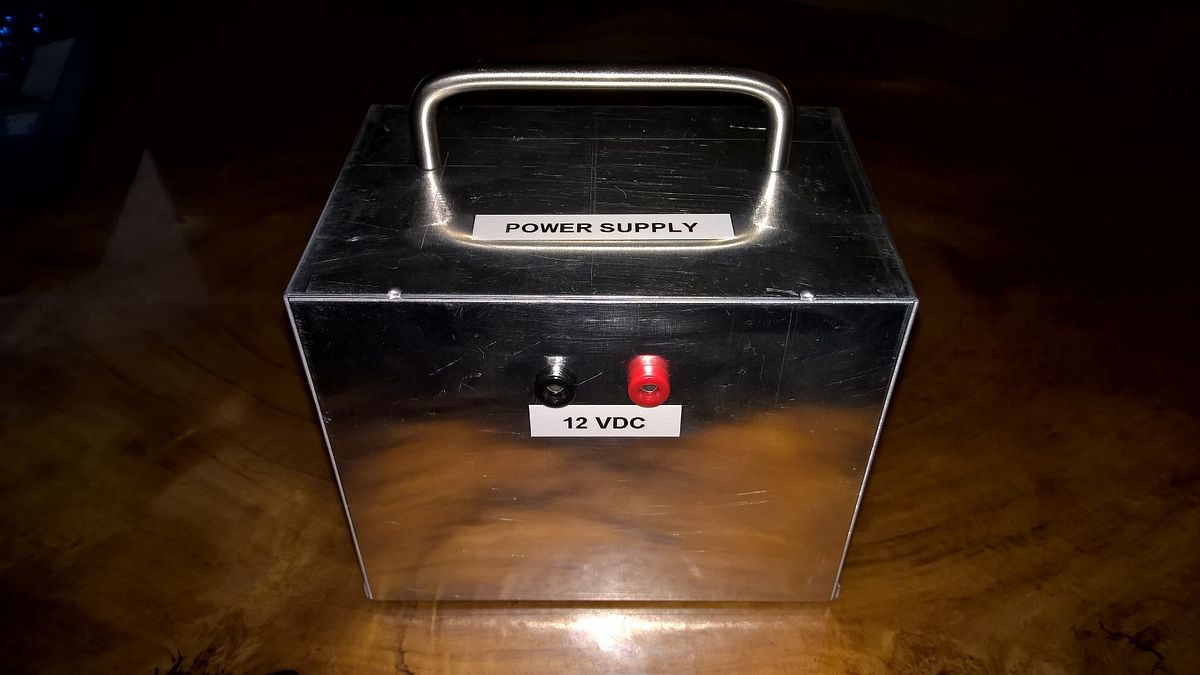
Power Supply Unit. I built it using another LMB Heeger enclosure. I added the handle for convenience. It is a simple cabinetry handle from Home Depot. Again, 2 Johnson solder contact banana jacks were used.
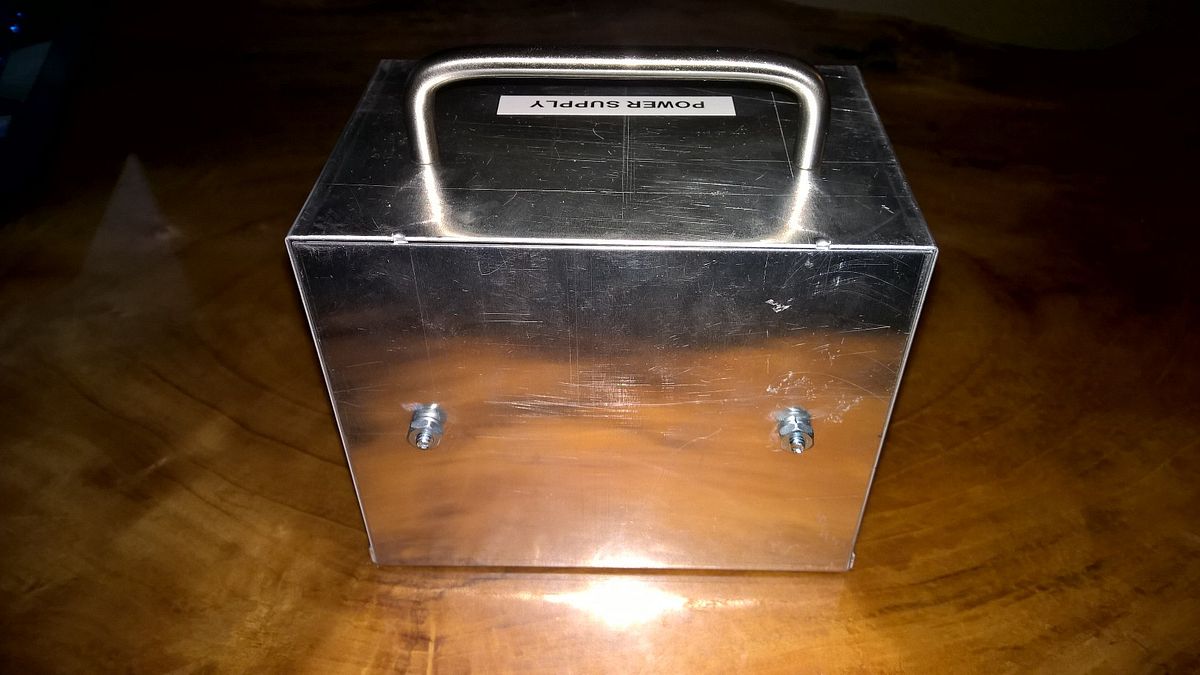
Rear of the Power Supply Unit. The 2 10-24 screws hold 2 90 degree brackets on the inside that I used for a sort of battery retention system.
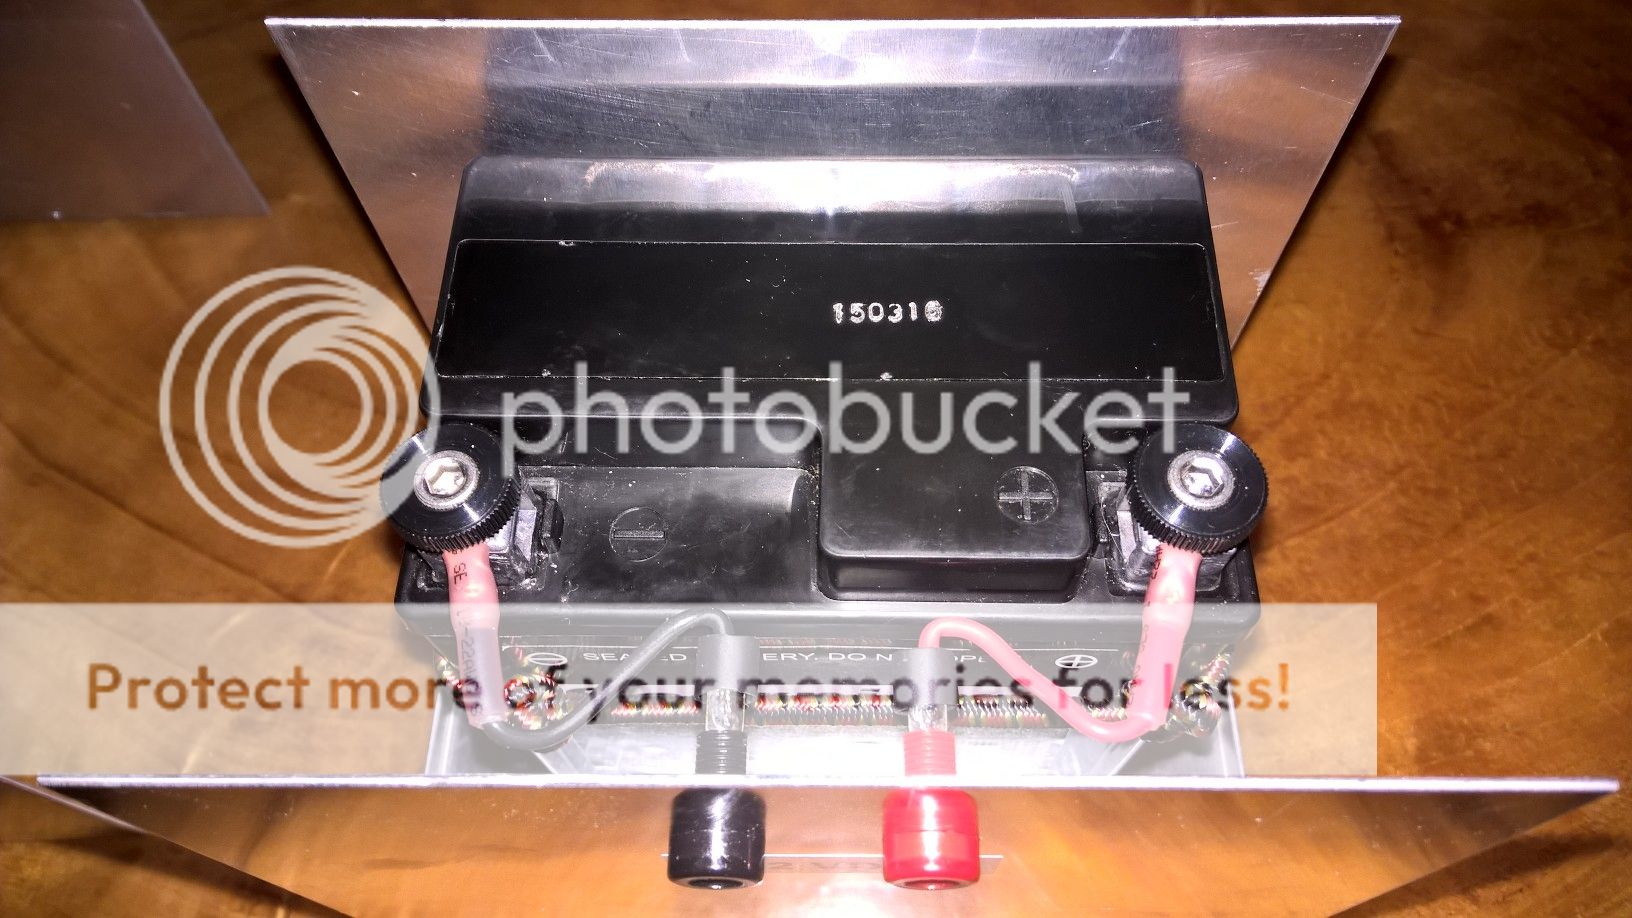
The power supply is a 12 volt, 6 Amp-Hour Scorpion motorcycle battery. Wire is 18 AWG stranded copper primary. 2 heat shrink #10 stud spade terminals and 2 knurled thumb screws for easy removal.
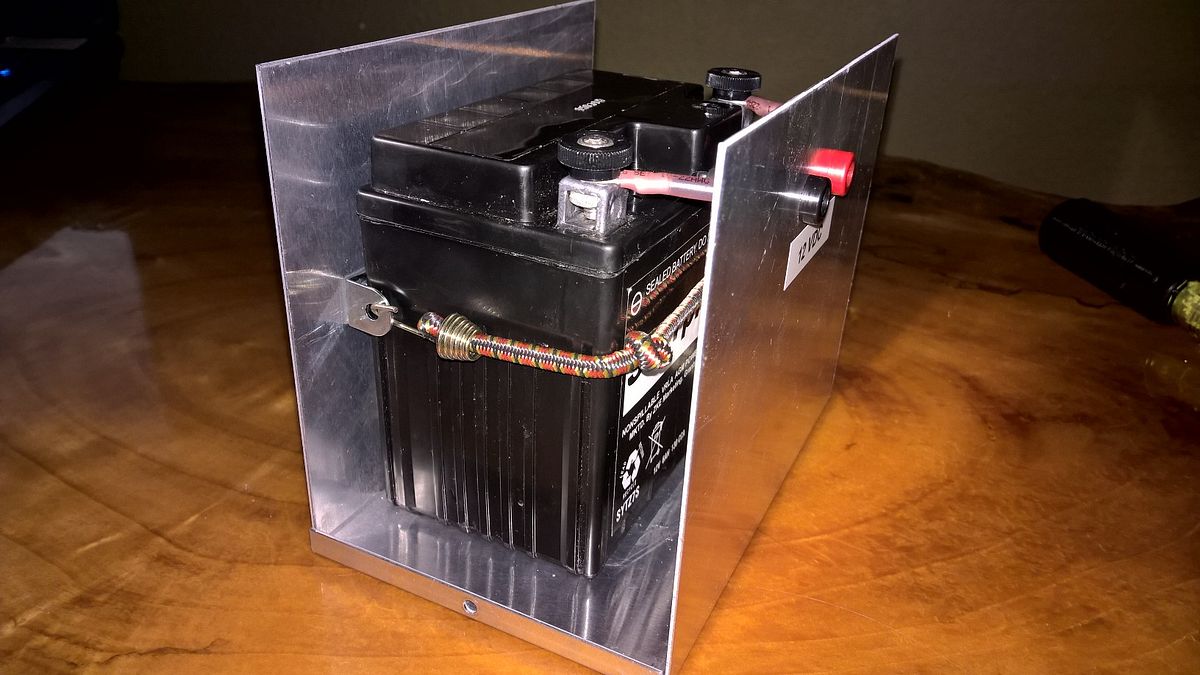
Side view. Here you can better see the bracket and 10" bungee cord that was knotted twice to reduce the effective length and increase tension.
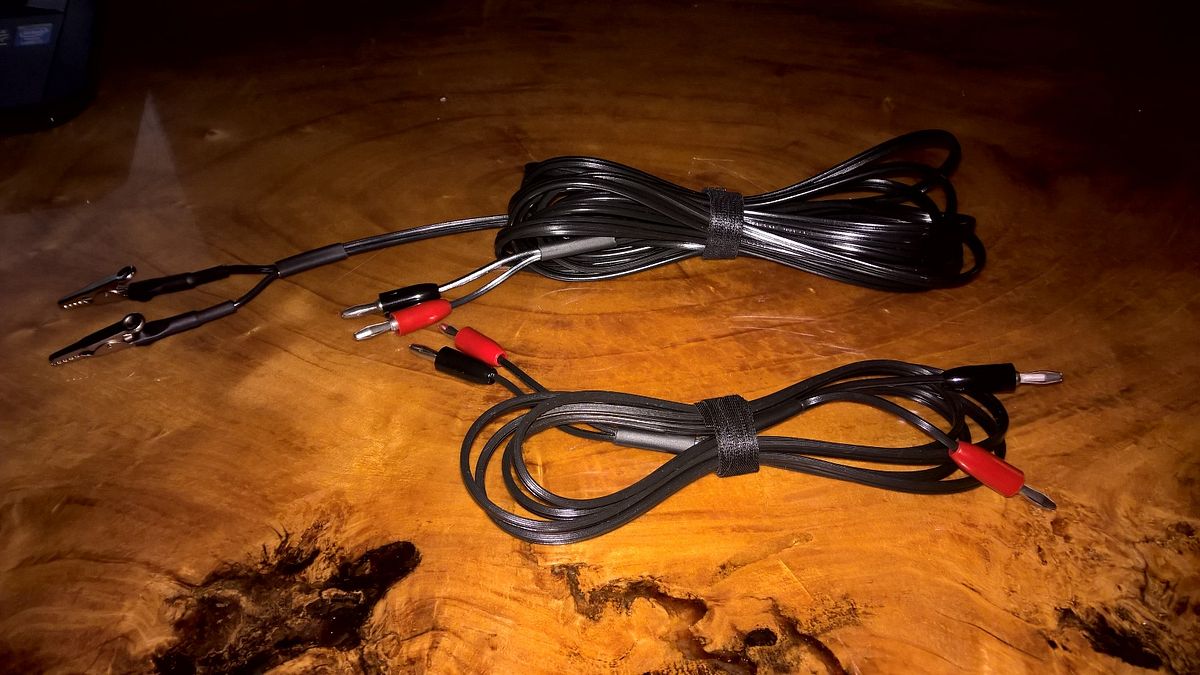
Top: 15' Igniter Leads. Fabricated with 18/2 AWG stranded copper ripcord, 2" alligator clips, Johnson banana plugs, and 1/4" 3:1 heat shrink.
Bottom: 5' Controller Power Cable. Fabricated with 18/2 AWG stranded copper ripcord and Johnson banana plugs.
And for the last picture, here is the controller connected with the power supply, interlocked, and armed. The ignition switch is wired such that the LED acts as a stereotypical continuity check light. With the circuit closed through the LED, only 12/100 of an amp reach the igniter.
REALLY looking forward to getting it out and launching some rockets with it! I'll post an update with how it goes")
Here is the whole setup - Controller, 12 VDC Power Supply, Igniter Leads, and Controller Power Cables
Controller and Power Supply
Here is the bread and butter; The Launch Controller. I built it using a LMB Heeger 7" 007 Modular Project Enclosure. As you can see, it's a 3 switch system utilizing a 2 position, single-pole-single-throw key switch as an interlock (key removable in the "off"/safe position only), a two position, single-pole-single-throw toggle switch, and a three contact, single-pole-single-throw LED push button switch as the Happy Button. The internal wiring is all 18 AWG stranded copper primary wire. The only thing that is missing is my switch guard cover that ended up being discovered out of stock when the supply order was prepped and shipped. Hopefully it will arrive soon.
Slightly different angle...
Rear of the launch controller. I utilized 4 Johnson solder contact banana jacks.
Power Supply Unit. I built it using another LMB Heeger enclosure. I added the handle for convenience. It is a simple cabinetry handle from Home Depot. Again, 2 Johnson solder contact banana jacks were used.
Rear of the Power Supply Unit. The 2 10-24 screws hold 2 90 degree brackets on the inside that I used for a sort of battery retention system.
The power supply is a 12 volt, 6 Amp-Hour Scorpion motorcycle battery. Wire is 18 AWG stranded copper primary. 2 heat shrink #10 stud spade terminals and 2 knurled thumb screws for easy removal.
Side view. Here you can better see the bracket and 10" bungee cord that was knotted twice to reduce the effective length and increase tension.
Top: 15' Igniter Leads. Fabricated with 18/2 AWG stranded copper ripcord, 2" alligator clips, Johnson banana plugs, and 1/4" 3:1 heat shrink.
Bottom: 5' Controller Power Cable. Fabricated with 18/2 AWG stranded copper ripcord and Johnson banana plugs.
And for the last picture, here is the controller connected with the power supply, interlocked, and armed. The ignition switch is wired such that the LED acts as a stereotypical continuity check light. With the circuit closed through the LED, only 12/100 of an amp reach the igniter.
REALLY looking forward to getting it out and launching some rockets with it! I'll post an update with how it goes
Last edited: