ECayemberg
Well-Known Member
- Joined
- Jan 21, 2009
- Messages
- 2,877
- Reaction score
- 850
The new Estes Dark Energy kit has been a pleasant surprise several times over now, so I feel compelled to share with a few posts here. The first surprise came when the Dark Energy kit was gifted to us at NARAM 54 for participating. What a nice gift from the fine folks at Estes; Thank you!
The bulk of construction occurred a few days back when an hour was suddenly freed up; the wife was out and about and the kids had just gone to bed. Looking at a small pile of new rocket kits on top of the cabinet, the Dark Energy was selected as it looked to a fairly quick project that I could assemble while reclining in my living room with the TV on for background noise.
I began by freeing the fins from their host sheet. Yet another surprise; I never realized from the header card, catalog, or website photos that this kit has FIVE fins. Thats unique:cyclops:, cool! Not surprising, but pleasing as well, was the outstanding laser cutting of the fins. Precise cuts that made for minimal sanding and easy removal from the sheets. With the fins freed, I took a minute or two to sand the perimeter of the fins simply to eliminate any bumps from the balsa sprues (ok, I actually got out of the chair for this step).
The next pleasant surprise was an ingenious fin jig supplied with the kit. When gluing the outer fins onto the ends of the inner fins, this jig serves as a right angle alignment guide. Thus, the two-piece fins were united using a modest amount of Titebond. After checking their perpendicular status, they were allowed to dry for a while.
While the fin assemblies set, the motor mount was constructed. Nothing unusual here; a 2.75 length of BT-20, thrust ring on the forward end, motor clip, exterior retaining ring, and a pair of BT-55 to BT-20 centering rings. Glued up and set aside to dry.
Now on a roll, the trusty tri-fold shock cord mount was glued up per instructions and set aside to partially cure. Wife wasnt home yet, so on we go. The fin marking guide was cut from the instructions, wrapped around the tube, and marked appropriately. Lines were extended courtesy of graphite lead and a handy window frame. The shock cord mount was glued into the forward section of the airframe. Checking on the motor mount assembly, I discovered that the glue had dried enough to keep everything in place and therefore it was time to glue the assembly into the airframe. Two rings of glue around the perimeter of the ID of the tube and into place it went. There is a neat molded plastic tailcone provided with the kit, and this was used during this step to ensure the motor mount was placed far enough forward into the airframe to allow for the tailcones shoulder later on in construction. With all the internals complete, the BT-55 airframe was set aside to dry.
Still free to do as I pleased, I decided to tack the fins in place. Using the double glue approach, the five fins were on in no time. Thanks to another pleasant surprise, alignment was a breeze. The fin jig mentioned earlier doubles as a fin alignment jig as well, ensuring perpendicular alignment with the airframe as well as perfect alignment with the neighboring fin (72 degrees on centerline). I'll post a photo of the jig later on. Before calling it a night, the launch lug was tacked in place as well and all was set aside to dry overnight.
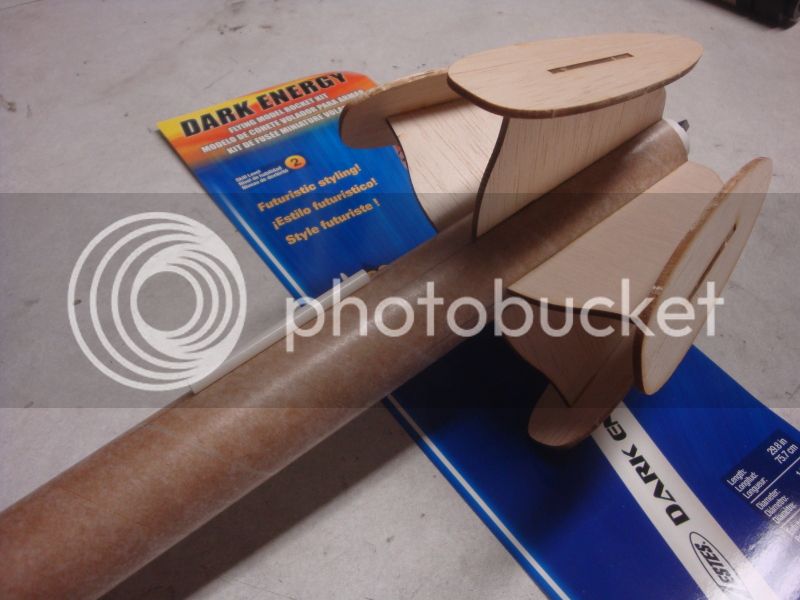
Here's a shot of the fin area; visible are the slot-and-tabs that lock the perpendicular fins together. The fit was precise enough that the pieces stayed in place once interlocked, without the tendency to wander out of alignment.

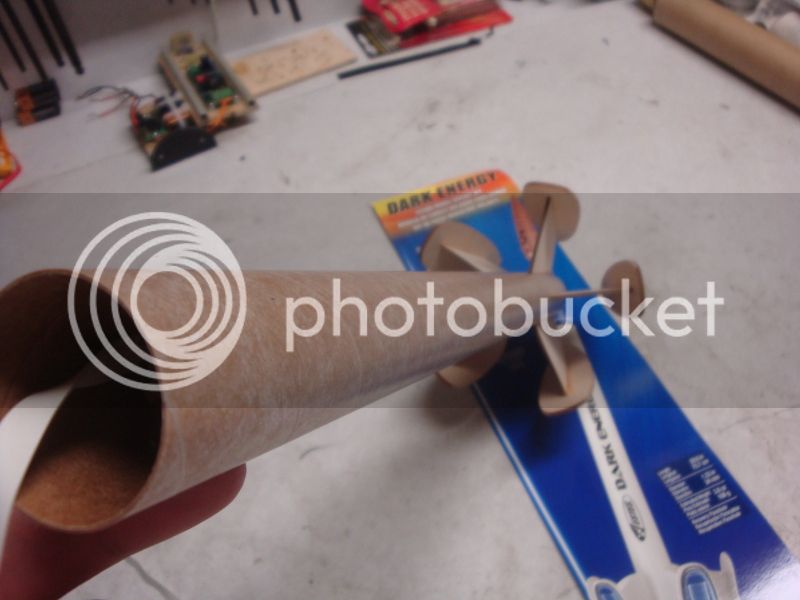
...and a fuzzy shot looking down at the five unique fin sets.

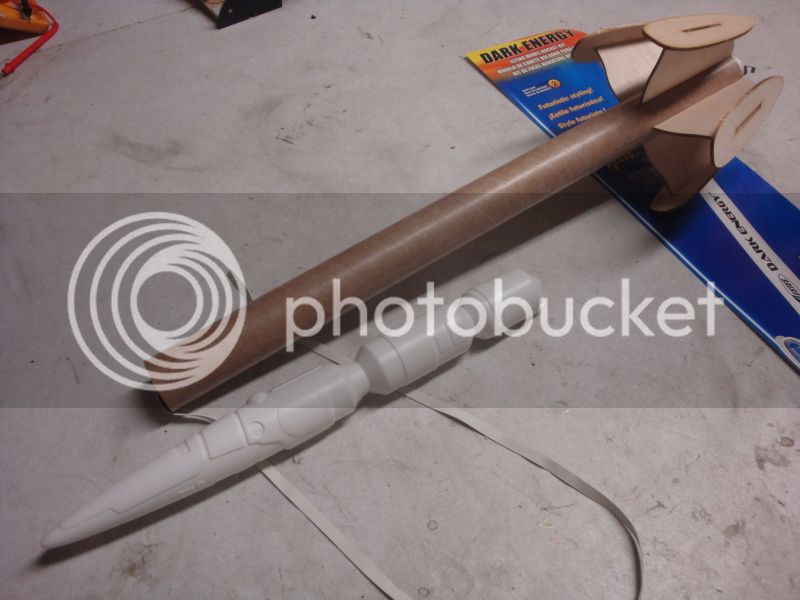
Lastly for now, a shot of the Dark Energy's structure including the newly molded cone very closely resembling the rare Rigel 3/Odyssey nose cone. Note, this is a nicely molded piece with fairly clean mold lines. Plenty of opportunity here for a lot of detailing if one so desires.

Since the photos were taken, all mating balsa-balsa and balsa-paper joints were filleted. The tabs where the fins interlocked were filled with a bit of Fill N' Finish. The plan is to primer the bird today, paint tomorrow, and have it on the pad for a club launch on Saturday. More to come....
-Eric-
The bulk of construction occurred a few days back when an hour was suddenly freed up; the wife was out and about and the kids had just gone to bed. Looking at a small pile of new rocket kits on top of the cabinet, the Dark Energy was selected as it looked to a fairly quick project that I could assemble while reclining in my living room with the TV on for background noise.
I began by freeing the fins from their host sheet. Yet another surprise; I never realized from the header card, catalog, or website photos that this kit has FIVE fins. Thats unique:cyclops:, cool! Not surprising, but pleasing as well, was the outstanding laser cutting of the fins. Precise cuts that made for minimal sanding and easy removal from the sheets. With the fins freed, I took a minute or two to sand the perimeter of the fins simply to eliminate any bumps from the balsa sprues (ok, I actually got out of the chair for this step).
The next pleasant surprise was an ingenious fin jig supplied with the kit. When gluing the outer fins onto the ends of the inner fins, this jig serves as a right angle alignment guide. Thus, the two-piece fins were united using a modest amount of Titebond. After checking their perpendicular status, they were allowed to dry for a while.
While the fin assemblies set, the motor mount was constructed. Nothing unusual here; a 2.75 length of BT-20, thrust ring on the forward end, motor clip, exterior retaining ring, and a pair of BT-55 to BT-20 centering rings. Glued up and set aside to dry.
Now on a roll, the trusty tri-fold shock cord mount was glued up per instructions and set aside to partially cure. Wife wasnt home yet, so on we go. The fin marking guide was cut from the instructions, wrapped around the tube, and marked appropriately. Lines were extended courtesy of graphite lead and a handy window frame. The shock cord mount was glued into the forward section of the airframe. Checking on the motor mount assembly, I discovered that the glue had dried enough to keep everything in place and therefore it was time to glue the assembly into the airframe. Two rings of glue around the perimeter of the ID of the tube and into place it went. There is a neat molded plastic tailcone provided with the kit, and this was used during this step to ensure the motor mount was placed far enough forward into the airframe to allow for the tailcones shoulder later on in construction. With all the internals complete, the BT-55 airframe was set aside to dry.
Still free to do as I pleased, I decided to tack the fins in place. Using the double glue approach, the five fins were on in no time. Thanks to another pleasant surprise, alignment was a breeze. The fin jig mentioned earlier doubles as a fin alignment jig as well, ensuring perpendicular alignment with the airframe as well as perfect alignment with the neighboring fin (72 degrees on centerline). I'll post a photo of the jig later on. Before calling it a night, the launch lug was tacked in place as well and all was set aside to dry overnight.
Here's a shot of the fin area; visible are the slot-and-tabs that lock the perpendicular fins together. The fit was precise enough that the pieces stayed in place once interlocked, without the tendency to wander out of alignment.

...and a fuzzy shot looking down at the five unique fin sets.

Lastly for now, a shot of the Dark Energy's structure including the newly molded cone very closely resembling the rare Rigel 3/Odyssey nose cone. Note, this is a nicely molded piece with fairly clean mold lines. Plenty of opportunity here for a lot of detailing if one so desires.

Since the photos were taken, all mating balsa-balsa and balsa-paper joints were filleted. The tabs where the fins interlocked were filled with a bit of Fill N' Finish. The plan is to primer the bird today, paint tomorrow, and have it on the pad for a club launch on Saturday. More to come....
-Eric-


