Dr. Zooch Space Shuttle build - Snowmageddon 2016

The Rocketry Forum

Help Support The Rocketry Forum:

This site may earn a commission from merchant affiliate links, including eBay, Amazon, and others.

kcobbva

Well-Known Member
TRF Supporter
Joined
Nov 8, 2015
Messages
1,401
Reaction score
78
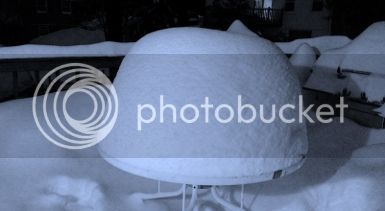
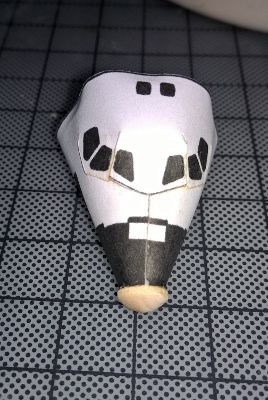
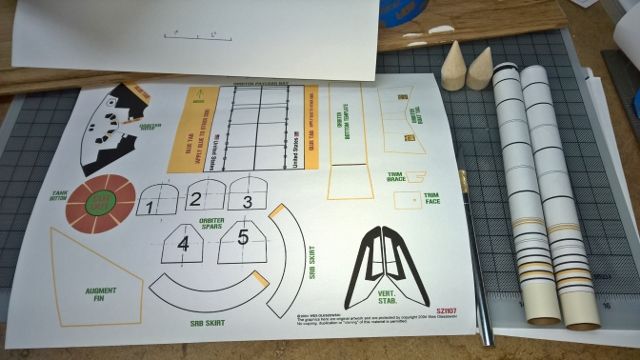
What else are you to do when you have a blizzard outside and stuck on painting three builds? Look at your inventory and start another one! First time building a Dr. Zooch, so I'm documenting to keep track. First, the instructions are really hilarious! Gotta love his sense of humor! The details are pretty cool too.

Edit: before reading my post, I HIGHLY recommend reading Mushtang's build thread here: https://www.rocketryforum.com/showt...To-Flight-Space-Shuttle-build-thread-2/page11 starting at post #304. He's really helped me through some things later in this thread that had I originally read what he did would have saved a few headaches!!

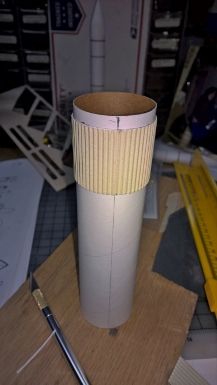
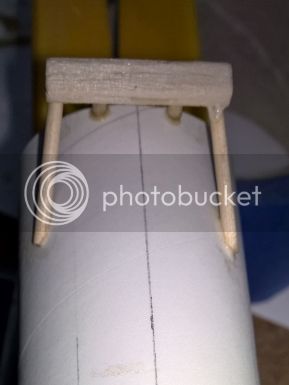
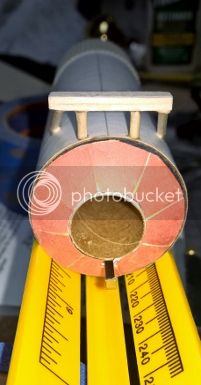
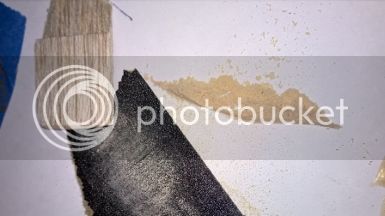
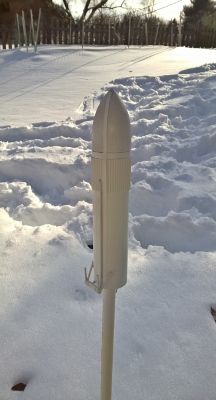
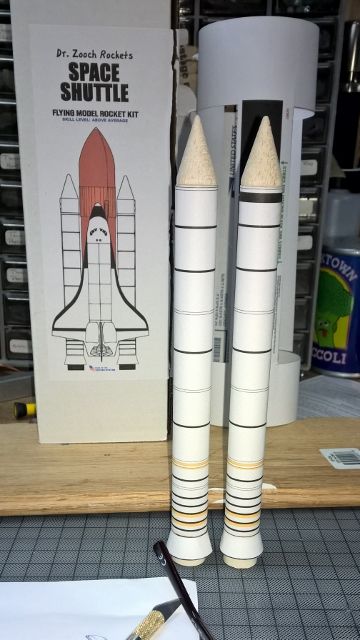
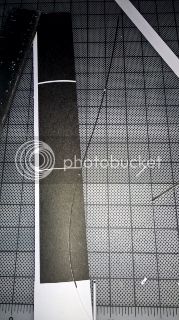
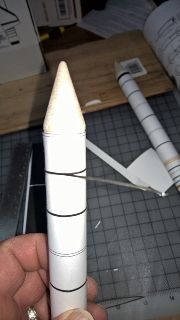
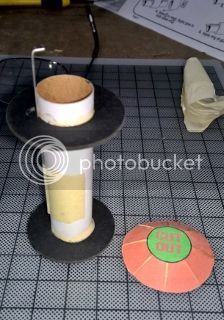
So the first step was to draw four guide lines on the External Tank. Next was to cut out the wraps for the SRBs and glue them on. Once I got them around, I wrapped a piece of wax paper around and then taped it tight to get them to adhere in place. Here's a shot after pulling off the covering. (Sorry so large...photobucket is dorking up again)
WP_20160122_23_14_22_Pro%20360x640_1.jpg


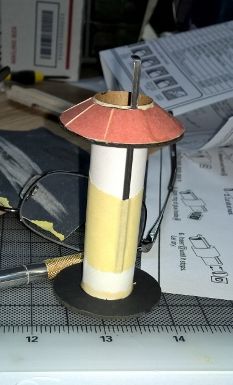
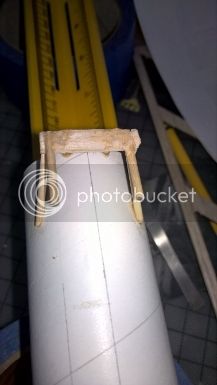
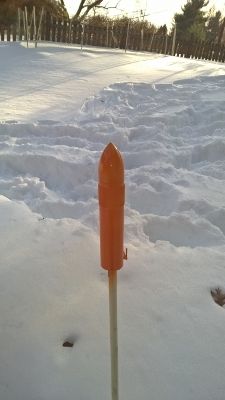
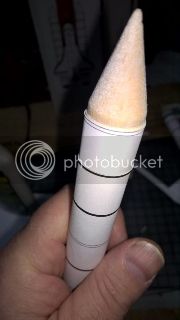
Nice details here...about to cut out the STB Skirts.
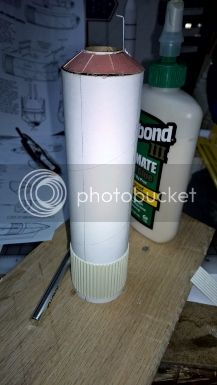
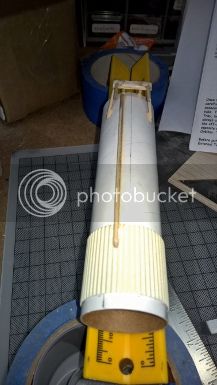
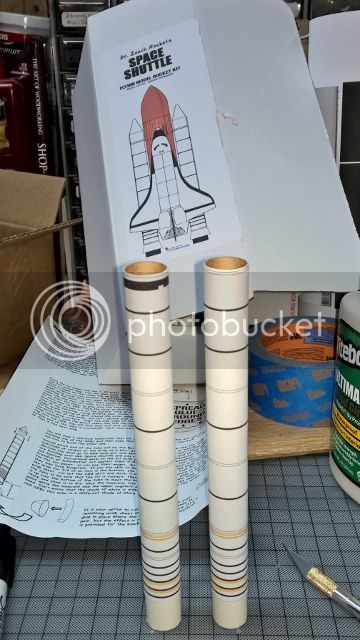
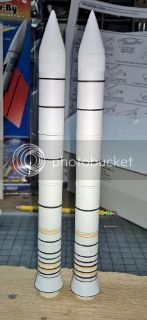
WP_20160122_23_17_31_Pro%20640x360.jpg


Completed SRBs
WP_20160122_23_39_19_Pro%20360x640.jpg


Fun so far.
 
Last edited:
The SRBs do look nice as is with just the paper wraps, but consider adding the optional white and black cardstock strips where the ring bands are printed, it really adds a little extra. use a blade and metal ruler to cut the strips, and just a little bit of glue. You have read through the other build thread by now, right? Dr. Zooch kits are fun builds, I have an ASTP set to get started on.
 
Please take lots and lot of pictures, at every step! This is one of my most favorite kits I've ever built. I'll be checking into this thread regularly.
 
Will do. Yes I planned to add the black strips today after shoveling out! Will see how good my attention to detail is!
 
she is looking great so far! And I agree with Mushtang..takes lots of pictures! we love pictures! The Zooch Shuttle is an awesome rocket to fly. Not only are the directions funny...but they are very methodical in the layout and really will help you ...the end product is a rocket that flies great and a Shuttle that really flies!

another Zooch kit that is a blast is his Lifting Body....you can really have a lot of fun coming up with paint schemes for the orbiter.
 
Glenn P the Zooch ASTP is an awesome rocket! My favorite kit of all time! Can't wait to see your build!

The SRBs do look nice as is with just the paper wraps, but consider adding the optional white and black cardstock strips where the ring bands are printed, it really adds a little extra. use a blade and metal ruler to cut the strips, and just a little bit of glue. You have read through the other build thread by now, right? Dr. Zooch kits are fun builds, I have an ASTP set to get started on.
 
It is the ASTP box set that came out last year for the 40th anniversary, both the 1B and the matching scale Soyuz. I have been holding off on getting them started until I actually finish some other kits in the pipeline.

and, I guess I have this Shuttle kit to thank for my rebirth into the hobby. apart from my kids' rockets, this was the one that got me back into building and collecting my own.
 
Last edited:
Please take lots and lot of pictures, at every step! This is one of my most favorite kits I've ever built. I'll be checking into this thread regularly.

So I'm looking back through threads at the pictures you posted during your build. I'm assuming the black strips go over the ones that are printed on the SRB. Just measure the width of each, cut to that width and glue on? Seems I cannot find a good thread discussing that, but from reading the instructions and seeing a picture you'd posted during one of your builds, I'm thinking that's what is going on here.
 
So I'm looking back through threads at the pictures you posted during your build. I'm assuming the black strips go over the ones that are printed on the SRB. Just measure the width of each, cut to that width and glue on? Seems I cannot find a good thread discussing that, but from reading the instructions and seeing a picture you'd posted during one of your builds, I'm thinking that's what is going on here.

That's correct. Just slice a 1/8", or whatever it is, width stripe off the printed black rectangle, wipe some glue on the back, and wrap it on the SRBs on the ones printed on the paper wraps. You can also wrap a few layers of white cardstock on the white stripes and build them up. You can't really tell in the pictures but it adds a lot to the way they look in person. Nobody at the launch site will notice either, but you'll like it.
 
hi kcobbva...yes....I think some where in his instructions he mentioned to cut the strips a certain width....but I think as long as you are consistent it will look great! The strips really do make the boosters pop! I glue the strips on with the lead edge of the strip where the glue joint will be to join the boosters. And if you really want to have fun, you can cut white and yellow strips as well!

Mushtang did an unbelievable job on a Zooch Shuttle...just spectacular....if you can find his thread I think that would be a great help for you! As far as I am concerned he is the master of the Zooch Shuttle!


So I'm looking back through threads at the pictures you posted during your build. I'm assuming the black strips go over the ones that are printed on the SRB. Just measure the width of each, cut to that width and glue on? Seems I cannot find a good thread discussing that, but from reading the instructions and seeing a picture you'd posted during one of your builds, I'm thinking that's what is going on here.
 
That's correct. Just slice a 1/8", or whatever it is, width stripe off the printed black rectangle, wipe some glue on the back, and wrap it on the SRBs on the ones printed on the paper wraps. You can also wrap a few layers of white cardstock on the white stripes and build them up. You can't really tell in the pictures but it adds a lot to the way they look in person. Nobody at the launch site will notice either, but you'll like it.

Awesome Thanks very much. Off to cut strips!! Btw Great avatar. Took my son to the concert a few years ago because he plays drums. He had no idea back then, but sure does now! Was the year they played the entire moving pictures album on top of everything else!
 
hi kcobbva...yes....I think some where in his instructions he mentioned to cut the strips a certain width....but I think as long as you are consistent it will look great! The strips really do make the boosters pop! I glue the strips on with the lead edge of the strip where the glue joint will be to join the boosters. And if you really want to have fun, you can cut white and yellow strips as well!

Mushtang did an unbelievable job on a Zooch Shuttle...just spectacular....if you can find his thread I think that would be a great help for you! As far as I am concerned he is the master of the Zooch Shuttle!

Thanks!!
 
Ok so thanks again for the info. Measured out the strips. I'm posting this because I cut the first strip across vs. down! DON'T DO THAT! Oh well, I can hide the one black strip that's 1/32 short where the SRB attaches to the external tank. ANyway, measuring properly, then the strips sliced and then separated.
WP_20160123_12_50_06_Pro%20180x320.jpg
WP_20160123_12_50_27_Pro%20179x320.jpg
WP_20160123_12_51_24_Pro%20320x214.jpg


Learning from you guys, I made a small pool of glue and ran the strip through it, then began to attach:
WP_20160123_12_52_30_Pro%20180x320.jpg


Showing the ridge line with the wrap in place
WP_20160123_12_53_17_Pro%20180x320.jpg
 
Learning from you guys, I made a small pool of glue and ran the strip through it, then began to attach:
WP_20160123_12_52_30_Pro%20180x320.jpg


Showing the ridge line with the wrap in place

Yes! Now you're posting plenty of pictures! Thanks, and keep it up please.

There are plenty of extra things you can do with this kit if you're up for it. The "by the instructions" finished product has blank white wings that, in my opinion, keep the shuttle from looking correct. BUT, it flies and looks good doing it.
 
Finished the SRBs. However, seeing me working on this, my daughter then said, Dad, can't we work on my rocket instead? So we began her FlutterBy. Will post her progress elsewhere.
WP_20160123_16_44_13_Pro%20147x320.jpg
 
Ok so back to the build. Got the Engine tube completed and the Tank bottom done.
WP_20160123_19_58_52_Pro%20224x320.jpg


Got called to make dinner while that was drying and found a new use for my Rocket build holder!! Noodle Rack :)
WP_20160123_18_12_58_Pro%20320x180.jpg


Afterwards I completed the Tank bottom. I really thought i'd been very careful, but as you can see it did NOT go on as nice as I had hoped.
WP_20160123_20_29_05_Pro%20233x385.jpg


Then I completed the corrugated tube. This part was really easy. When I first read the instructions I had flash backs to the Apogee Saturn V and 1B I built 10 years ago.
WP_20160123_21_14_17_Pro%20217x385.jpg


Finally I mounted the engine tube into the External Tank. Again, I'm quite disappointed with the tank bottom.
WP_20160123_21_20_17_Pro%20217x385.jpg


Next it was on to the orbital aft attach points. What I enjoyed most about this was the fact Dr. Zooch provided a sheet of unmarked balsa. I had to free hand the measurements, and cut with an Xacto knife. Thanks Dr. Zooch!! I miss those days. I know laser fins are EASY; but this reminded me of being a kid building rockets!
Parts laid out:
WP_20160123_23_12_34_Pro%20385x300.jpg


Finally gluing it together and stopping for the night.
WP_20160123_23_21_01_Pro%20385x347.jpg


Lastly, the only reason I got to do so many fun projects today was the weather. I guess we made up for all the warm weather we had through mid January.
WIN_20160123_23_45_35_Pro%20385x211.jpg
 
Ok so back to the build. Got the Engine tube completed and the Tank bottom done.

Afterwards I completed the Tank bottom. I really thought i'd been very careful, but as you can see it did NOT go on as nice as I had hoped.

Finally I mounted the engine tube into the External Tank. Again, I'm quite disappointed with the tank bottom.

What is it that you're not happy with about the tank bottom? It looks like the tab for the engine retainer wasn't cut, but that's easy to do once it's glued on if your xacto knife is sharp I think.

Am I missing something else?
 
What is it that you're not happy with about the tank bottom? It looks like the tab for the engine retainer wasn't cut, but that's easy to do once it's glued on if your xacto knife is sharp I think.

Am I missing something else?

no, just the way I had it glued on. Tabs were cut, but it's not even across the base where it meets the CR. Not bad, but I'm sure I cut wrong, or off just a tad. Ah just re-read that. You are right, at the point I took the shot, the tab for the retainer wasn't cut. I did that later in the evening after it had dried. VERY good catch! I could use you around here for attention to detail!! :)
 
Last edited:
So I realized last night before I went to bed that I did the orbital aft attach points wrong. I guess it wasn't clear until I put it on the external tank; then it became all clear. I ripped the dowels off and started again. This time I first made sure the plank was square on the tube.
WP_20160124_00_49_48_Pro%20385x252.jpg


Then after 4.5 hours of plowing the cars out today, I got the legs back on. If anyone else is in the build, hope these shots may clarify that step visually.

Looking from front of tube to rear..............Rear to front view..................Looking down from above
WP_20160124_13_43_44_Pro%20289x385.jpg
WP_20160124_13_43_53_Pro%20201x385.jpg
WP_20160124_13_43_58_Pro%20252x385.jpg
 
Last edited:
...but it's not even across the base where it meets the CR....
you won't notice things like that after it is painted and stacked up with the SRBs and Orbiter. If you want, you can easily cover things like that up with a generous fillet of white glue, or if you really want to fill some bigger gaps to even up the shape spread some light drywall spackle over it, then sand it down.
 
you won't notice things like that after it is painted and stacked up with the SRBs and Orbiter. If you want, you can easily cover things like that up with a generous fillet of white glue, or if you really want to fill some bigger gaps to even up the shape spread some light drywall spackle over it, then sand it down.

Sounds good!
 
A little more progress

So I sanded the divets for the dowels, but they came out a little wider than I'd hoped, so took some scrap balsa and sanded to get wood fibers to mix with glue. Then filled the open slots.
WP_20160124_14_54_13_Pro%20385x216.jpg
WP_20160124_15_01_31_Pro%20217x385.jpg


Next sanded and installed the LOX tunnel dowel and glued in place, removing a 1/2 long by 1/8" wide strip out of the corrugated wrap.
WP_20160124_15_34_30_Pro%20217x385.jpg


Finally rolled the nose to find the high side and mark it. Then my daughter showed up to start on her Flutter by again.
WP_20160124_15_55_01_Pro%20217x385.jpg
 
You're doing great. The really tricky parts are yet to come. Be sure to read the instructions carefully on how to fold and glue the nose section, and which order to glue the tabs. I've built a few of these and never thought it was a big deal, until I did it in the wrong order once and it was very clear after that. It really keeps the nose from forming the correct shape if you do it wrong.

I'd highly suggest scanning all your cardstock if you haven't already. If you make a mistake you can print a new one and try again.

Thanks!! I greatly appreciate all the advice you've been feeding my way! As for the cardstock, scanned it with a drawn scale on each page day 1. Figure that way if I reprint, I'm assured it's the right size if the scale matches when printed. I'll pay very close attention to the nose glue tabs and ask questions if I get stuck.

well, looks like the broncos are gonna win after that failed conversion just happened!
 
kcobbva, have you attached your SRB's to the ET yet? I had to do some repair work on mine that involved removing the SRB's and putting some junk in the trunk of the ET to repair it. I have a full stack CG from Mushtang, but could you measure the ET's CG from the tip of the nosecone if you haven't attached the boosters yet? Thanks

Great work too. I love my shuttle I have an older "High rider" configuration which has the shuttle mounted differently than the current "Low rider" config I've never had a bad flight, be warned though the shuttle glides like the real thing, fast and steep, it has beaten my stack down a number of times. There is a great, but long thread, where Mushtang, myself and others have chronicled the zooch shuttle if you haven't at least skimmed through it it is worth the look.

https://www.rocketryforum.com/showt...tle-build-thread-2&highlight=dr+zooch+shuttle
 
kcobbva, have you attached your SRB's to the ET yet? I had to do some repair work on mine that involved removing the SRB's and putting some junk in the trunk of the ET to repair it. I have a full stack CG from Mushtang, but could you measure the ET's CG from the tip of the nosecone if you haven't attached the boosters yet? Thanks
I have not yet. It's drying right now. Will measure tonight and get that out to you.
 
Continuing on today. I'd printed out the discovery card stock from Mushtang's previous thread, but after some PM discussion am sticking with the stock as suggested. So I got the nose cone complete today.

WP_20160125_15_09_49_Pro%20225x400.jpg
WP_20160125_15_26_58_Pro%20268x400.jpg


Then while I was picking up paint at michaels for my daughter I found a pumpkin orange and figured it'll just have to do. so I used her krylon primer and then the orange for the ET. As soon as that dries tonight I will get the CR and post.
WP_20160125_14_50_37_Pro%20216x400.jpg
WP_20160125_15_28_02_Pro%20225x400.jpg
 
Back
Top