Best way to mount rail buttons

The Rocketry Forum

Help Support The Rocketry Forum:

This site may earn a commission from merchant affiliate links, including eBay, Amazon, and others.

ArthurSull

Well-Known Member
Joined
Dec 9, 2012
Messages
315
Reaction score
0
A friend of mine mounted his just with epoxy, no screws or anything. He said that they bear almost no stress during the launch so epoxy would just be fine..

What do you say?

If I glued some nuts to the inside of the BT for the screws to go into through the buttons, would that help?

Not sure if I can get one into a CR. We're talking my PML Patriot
 
Check out Acme Rail Guides from Giant Leap Rocketry. They simply glue on to the outside of the rocket.


Matt
 
I wouldn't trust just gluing them in. I've had ACME rail guides pull off a rocket while loading it onto the rail.

But, I think I'm not alone in having arrived at the launch site only to discover that I had forgotten to install rail buttons. So, I drilled a couple of holes in the body tube, lined the holes with a little epoxy or CA, then screwed in the rail buttons. Using a screw and glue, even if not into a entering ring, seems to work well for all kinds of body tubes.

But, when constructing a rocket, I always look for a more secure way to mount the buttons. Lately, I've been using the technique I first used on my "YouBee" rocket.

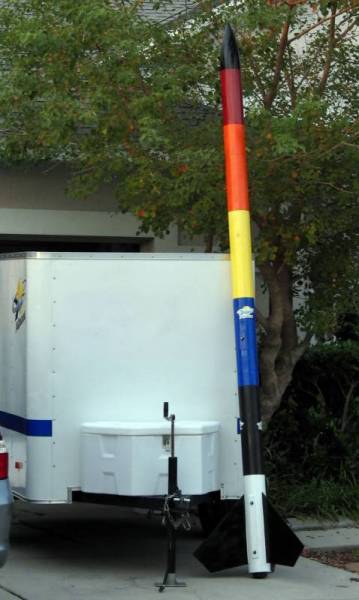
Rail Guide Attachment

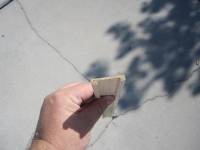
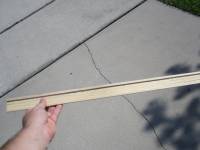
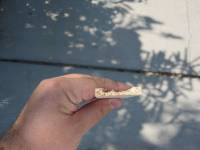
I started with a piece of 1/4" thick, 1 1/2" wide wood. I used a router to cut out the middle of the piece of wood.


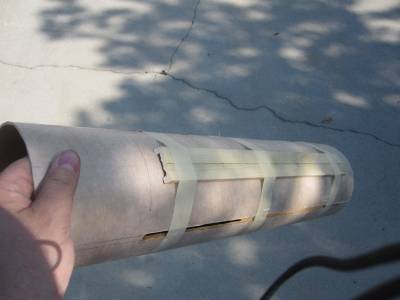
I glued the strip of wood to the body tube centered between two fin slots.


After the glue dried, I drilled two 1/2" diameter holes, one near the top of the wood strip and one near the bottom. After the fin assembly was complete, I inserted well nuts into the holes then screwed in the rail buttons.

This method has some advantages. The wood strip naturally aligns itself along the body tube ensuring that the rail buttons are also aligned. It provides a slight stand-off for the rail buttons. It makes sure the rail buttons stick out straight from the tube and that both are at the same angles. It provides a firm attachment for the rail buttons. The rail buttons can be removed and replaced. It looks cool. And, it's easy.


-- Roger
 
A friend of mine mounted his just with epoxy, no screws or anything. He said that they bear almost no stress during the launch so epoxy would just be fine..

What do you say?

If I glued some nuts to the inside of the BT for the screws to go into through the buttons, would that help?

Not sure if I can get one into a CR. We're talking my PML Patriot

I would ignore your friend - he gave you VERY dangerous advice. The purpose of rail buttons is to guide the rocket up the rail in a controlled fashion. If a button broke off at launch before it cleared the rail, the rocket could aim in the direction of the spectators with disastrous results.

If you can get behind the airframe, use a weld nut. Apogee sells nice rail button kits. If you can't, use a screw and epoxy at a minumum.

I included some pics, what I do is drill the holes first. Then, I slide the front centering ring past the hole, then insert the weld nut from the back and slather some epoxy on it from the rear. I put the rail button on and tighten the screw a bit to make sure its all the way in. No way these things are coming off. And if the rail button gets worn, just unscrew it and add a new one and screw it back down, as the weld nut stays in place.

image-3828479981.jpg

image-4263469889.jpg

image-2490947129.jpg

image-2958872592.jpg
 
If I can't drill into a CR, then I prefer weld nuts (McMaster Carr, P/N 90596A007 Plain Steel Round-Base Weld Nut, 6-32 Thread Size, 9/16" Base Diameter, 1/4" Barrel Height, Packs of 100). Just smooth the surface with a little epoxy so the laundry doesn't hang up- but the very low profile has minimum interference in the tube, and they are very simple and easy to install.

David
 
Thanks guys, and interesting method, Roger :)

Think I might go with a rail button kit, however, would the forward rail button interfere with the piston if screwed into the BT?
 
I suppose I could get the forward one into the forward CR. Is there a rule for spacing and position of rail buttons though?
 
Typically 1 at the CG, and 1 a few inches ahead of the back of the rocket.
 
"bear almost no stress during the launch"

Maybe -- if your fins and rail buttons are perfectly aligned and there isn't any wind.
In reality - there is a lot of stress one the top (usually) button while the rocket is hanging on the rail waiting...especially if it's windy.

I use T-Nuts on mine -- epoxied in of course....
 
I was at a launch one time and a guy CA'd his on. I like to glue a peace of 1/4" ply in a shape of a teardrop on the BT and use wood screws to hold buttons on. It makes a nice clean look after the finish stage is done.Also by having the button stand off from the BT like that I don't get rail scratches on my rockets.
 
Last edited:
I suppose I could get the forward one into the forward CR. Is there a rule for spacing and position of rail buttons though?

The best positioning to maximize the effective length of the launch rail would be to have two buttons near the rear of the rocket. But, the stresses on them would be great as the rocket sits waiting for launch and during the launch. So, we usually place one near the bottom and a second one somewhere higher up, near the Center of Gravity of the rocket.

For the YouBee, I have one higher up and two near the rear. Using three buttons, though, is sometimes problematic because they have to be more accurately aligned to prevent them from catching on the rail.

-- Roger
 
How to hold on rail buttons depends a lot on the weight of the rocket, and what the airframe is made from.

On light rockets, you can safely run the screw through the airframe and have a blob of epoxy on the inside holding the screws. I have no problem with this up to about 3 pounds (unless it's a minimum diameter screamer).

Bigger than that, and I want to see something on the inside, spreading the load a bit. It can be as simple as a small block of wood shaped to fit the inside contour of the airframe.

FWIW, I'm not comfortable with well nuts -- they're very sensitive to the size hole drilled. I've seen them pull out.

-Kevin
 
FWIW, I'm not comfortable with well nuts -- they're very sensitive to the size hole drilled. I've seen them pull out.

Maybe you're thinking of something other than the kind of well nuts that I'm using. Unless the hole is really large, there's no way they are going to pull out.

-- Roger
 
I glued a couple pieces of scrap plywood to my centering rings. on the bottom of the top centering ring, and the top of the bottom(on my Fantom). This way they don't interfere with anything. I use wood screws to attach the buttons to these wood pieces. So many ways to do it really.
 
Well, contrary to this thread, a local rocketry supplier had some conformal rail lugs to fit my Patriot (4") so I went for those. See what they're like, I guess. Will have to prepare the quantum BT well so they stick good.

Thanks for all the advice anyway, I just didn't fancy using the brass lugs that came with the kit. I'm actually going to use them as lugs for my electronics sled.

At least I have an idea of how buttons can be attached now, though.
 
Well nuts and weld nuts - two different animals.

From what I understand, well nuts go in from the front. Per the quote on Doghouse Rocketry: "The Well Nuts permit installation from the exterior. You just drill a hole, place the Well Nut in the hole and install the Rail Button and tighten. The 1010 Buttons use an 8-32 Well Nut that requires a 5/16 hole and about 1/2” interior clearance. The 1515 Buttons use a 1/4-20 Well Nut and require a 1/2” hole and about 3/4” interior clearance.".

Weld nuts (like the picture I posted a few posts above) use a metal backing plate and metal shaft that goes in from the back. I don't think I could yank it out of a glassed rocket if I tried, it would really take a LOT of force. Much more than the well nuts, which are inserted from the front.

Hope this helps clarify. Someone please correct me if I'm wrong, though.
Weld nuts:
https://en.wikipedia.org/wiki/Weld_nut
150px-Slab_base_weld_nut.png


Well nuts:
https://en.wikipedia.org/wiki/Well_nut
well nuts.jpeg


Threaded inserts:
threaded inserts.jpeg
 
Well nuts are good if your putting buttons on a rocket that has already been built, or you have an issue like I did with the backing wood(it was a learning experience, don't use balsa).

Jeff, what do you do about the part of the weld nut sticking out of the tube? Do you grind it off, or just leave it like it is?
 
The main issue Arthursull has is not rail button mounting in general, but rail button mounting in conjunction with the PML piston ejection system. I couldn't figure out how to do it for the forward button on my PML Patriot, so I used urethane PML rail lugs and screws one inch from the boittom and glue only at the CG.

The rail button does not have enough surface area to safely use only glue, in my opinion. So, how do you mount the forward button in a solid fashion, using a screw plus internal well nut/weld nut and not interfere withe smooth function of the piston??

Yup. I mean, the aft button can be screwed into the aft CR, but the forward CR is not really up high enough towards the CG to screw into. Perhaps the only answer is to use use rail lugs, like I have ordered today...or the brass lugs supplied with the kit.

:confused:
 
Jadebox's method in post 3 could work, but what a PIA compared to the ease and speed of mounting rail buttons on rockets without the piston. Particularly if you don't have a router table.

The brass lugs PML provides are very nice and heavy duty, but I am done with lugs after using rails and rail buttons.
 
Last edited:
Yup. I mean, the aft button can be screwed into the aft CR, but the forward CR is not really up high enough towards the CG to screw into. Perhaps the only answer is to use use rail lugs, like I have ordered today...or the brass lugs supplied with the kit.

:confused:

I think you've done the right thing since your using a piston. The rail guides are a better option than just gluing on a rail button and hope it holds.
 
I leave the weld nut alone, and drill the rail button to fit over the shaft of the nut. The rail buttons that come with weld nuts from Madcow (e.g. thoser that were included with my Prion) and I believe from Apogee as well, are already sized to fit over the shaft. I'm not sure about using them with a piston- if you had enough tube above the nut, and an internal ring to keep the piston from sliding down into the nut during boost, then it should work. I've never used a piston, though, so there may be other issues with that.

If you install during the build, and you don't have a CR near the CG for the top button, its hard to beat a weld nut for ease of installation, strength, and ease of rail button replacement.

David
 
These are the ACME rail guides from Giant Leap Rocketry. They are JB Welded on top of the paint and there stuck on there pretty good. I say get some 3.9 rail guids. They will match the radius of the airframe.

Front
image.jpg

Aft
image.jpg
 
These are the ACME rail guides from Giant Leap Rocketry. They are JB Welded on top of the paint and there stuck on there pretty good. I say get some 3.9 rail guids. They will match the radius of the airframe.

Front
View attachment 137422

Aft
View attachment 137423

They'll stay on as long as the paint does. Let's hope that you have super sticky paint that will never peel off.
 
These are the ACME rail guides from Giant Leap Rocketry. They are JB Welded on top of the paint and there stuck on there pretty good. I say get some 3.9 rail guids. They will match the radius of the airframe.

Front
View attachment 137422

Aft
View attachment 137423

Gotta agree with jsargevt. The jb weld and the paint are stuck for good but you've got no bond with the airframe. Best practice is to scape down to the bare body tube before gluing.
 
For some reason I do not like those type of guides. On the upper part of the BT I cut the screw off so it does not go inside of the BT. You can still use a piston in this way. You can see here how I do the stand off. My screw is not inside the tube at all.,

IMG_20130709_182220_821.jpg
 
These are the ACME rail guides from Giant Leap Rocketry. They are JB Welded on top of the paint and there stuck on there pretty good. I say get some 3.9 rail guids. They will match the radius of the airframe.]


Do those go in standard 1" 80/20?

A friend of mine mounted his just with epoxy, no screws or anything. He said that they bear almost no stress during the launch so epoxy would just be fine..

What do you say?

If I glued some nuts to the inside of the BT for the screws to go into through the buttons, would that help?

Not sure if I can get one into a CR. We're talking my PML Patriot

I don't have much experience with rail buttons but I would recommend the ones that Apogee sells. They fit in 80/20 which is cheep and easy to make launch pads with, they come airfoiled for high altitude rockets, they are made out of low friction material, and the nuts are thin but have a large diameter so they will not crack fiberglass or rip cardboard. Again, these are the only rail buttons I have ever used - and they are definitely a great way to go - especially if you are just starting out.
 
Back
Top