beantownJPL
Up up and away... Wait! Come back!
... or how about Back Assward Baby Bertha?
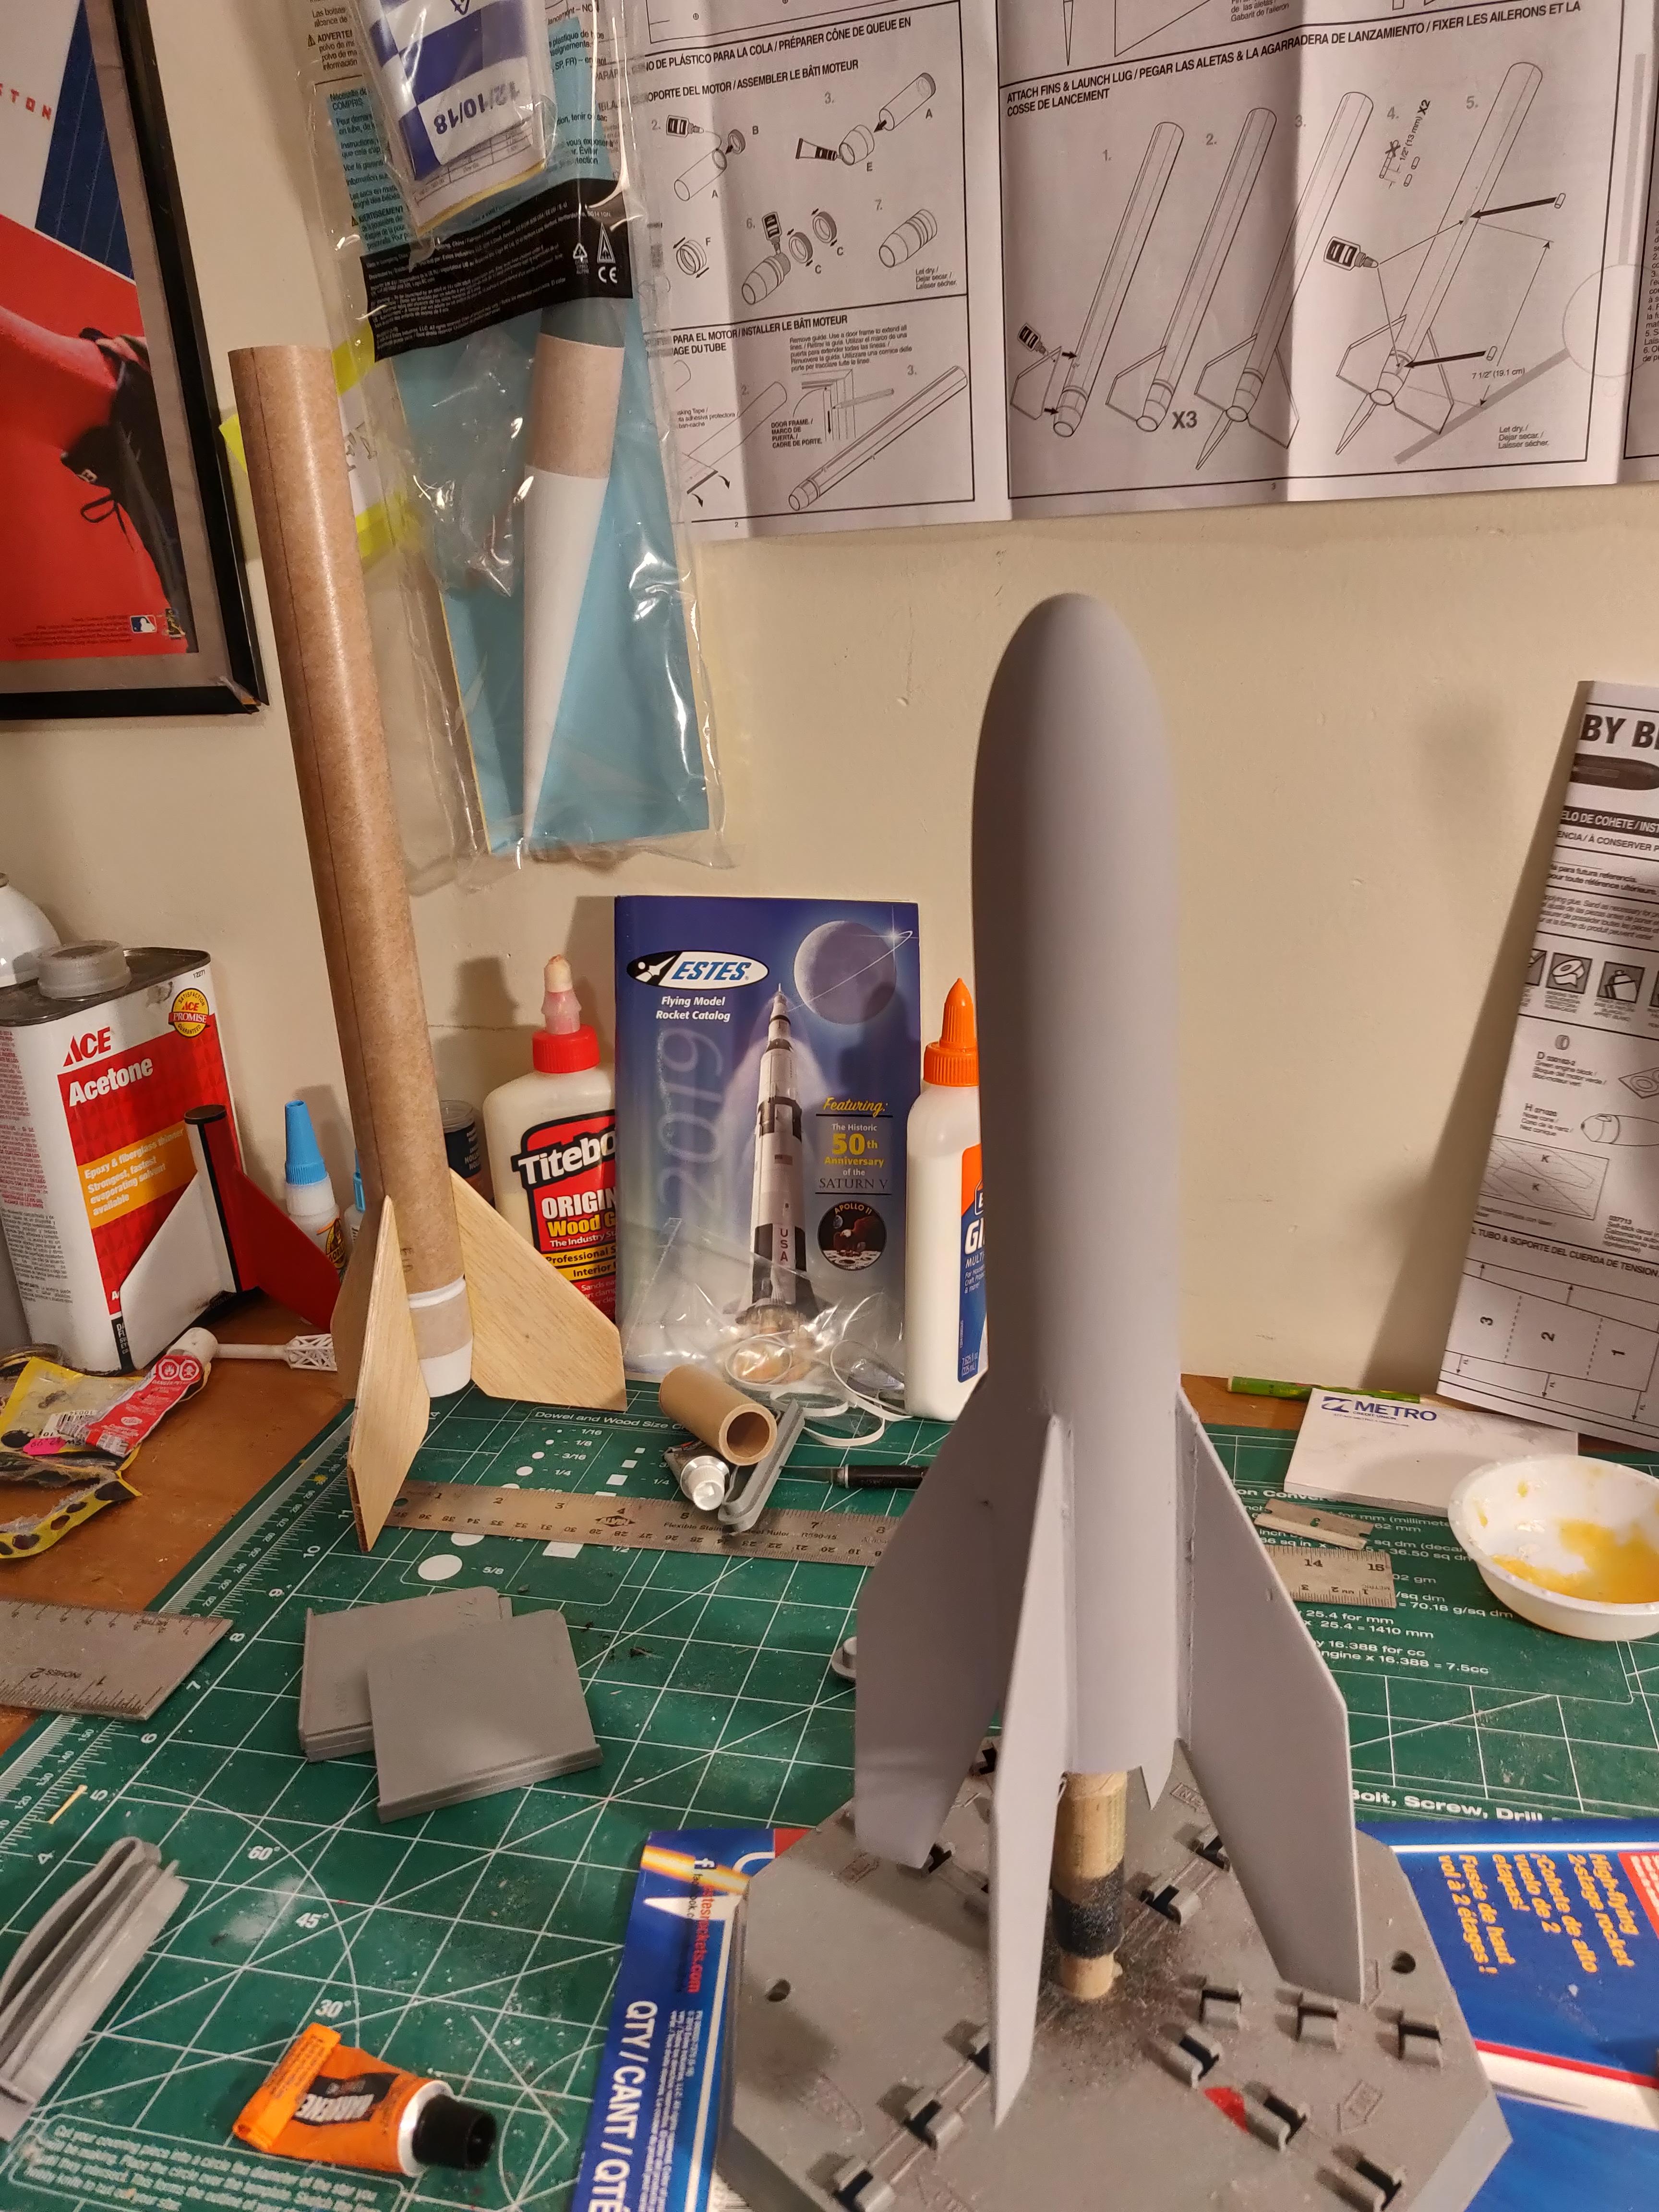
Ok ... so everyone's got (or has had) at least one member of the "Bertha Family". The Big Bertha and Baby Bertha are favorite smallish field flyers, and I've usually got one or the other, and sometimes both, in my fleet. My last Baby Bertha is on a nearby school roof, so I picked one up at a local shop recently.
I usually like to put some kind of "personal touch" on my kit builds, and thought I'd take a shot at modding this kit for rear ejection. I figured that with an 18mm motor inside the BT-60, that there'd be plenty of room to wrap the 'chute around the stuffer. I also hate having to use recovery wadding (really sucks when "oops, forgot the wadding" happens...), so usually take steps to make it unnecessary when I can. I'm a big fan of ejection baffles for "conventional" recovery deploys...
Peak of Flight issue #439 has an article on rear ejection that I used as thought fuel and hit the bench.
The only materials I needed that aren't already included in the kit were a length of kevlar shock cord, a couple of centering rings, a motor clip retention ring and a length of BT-20.
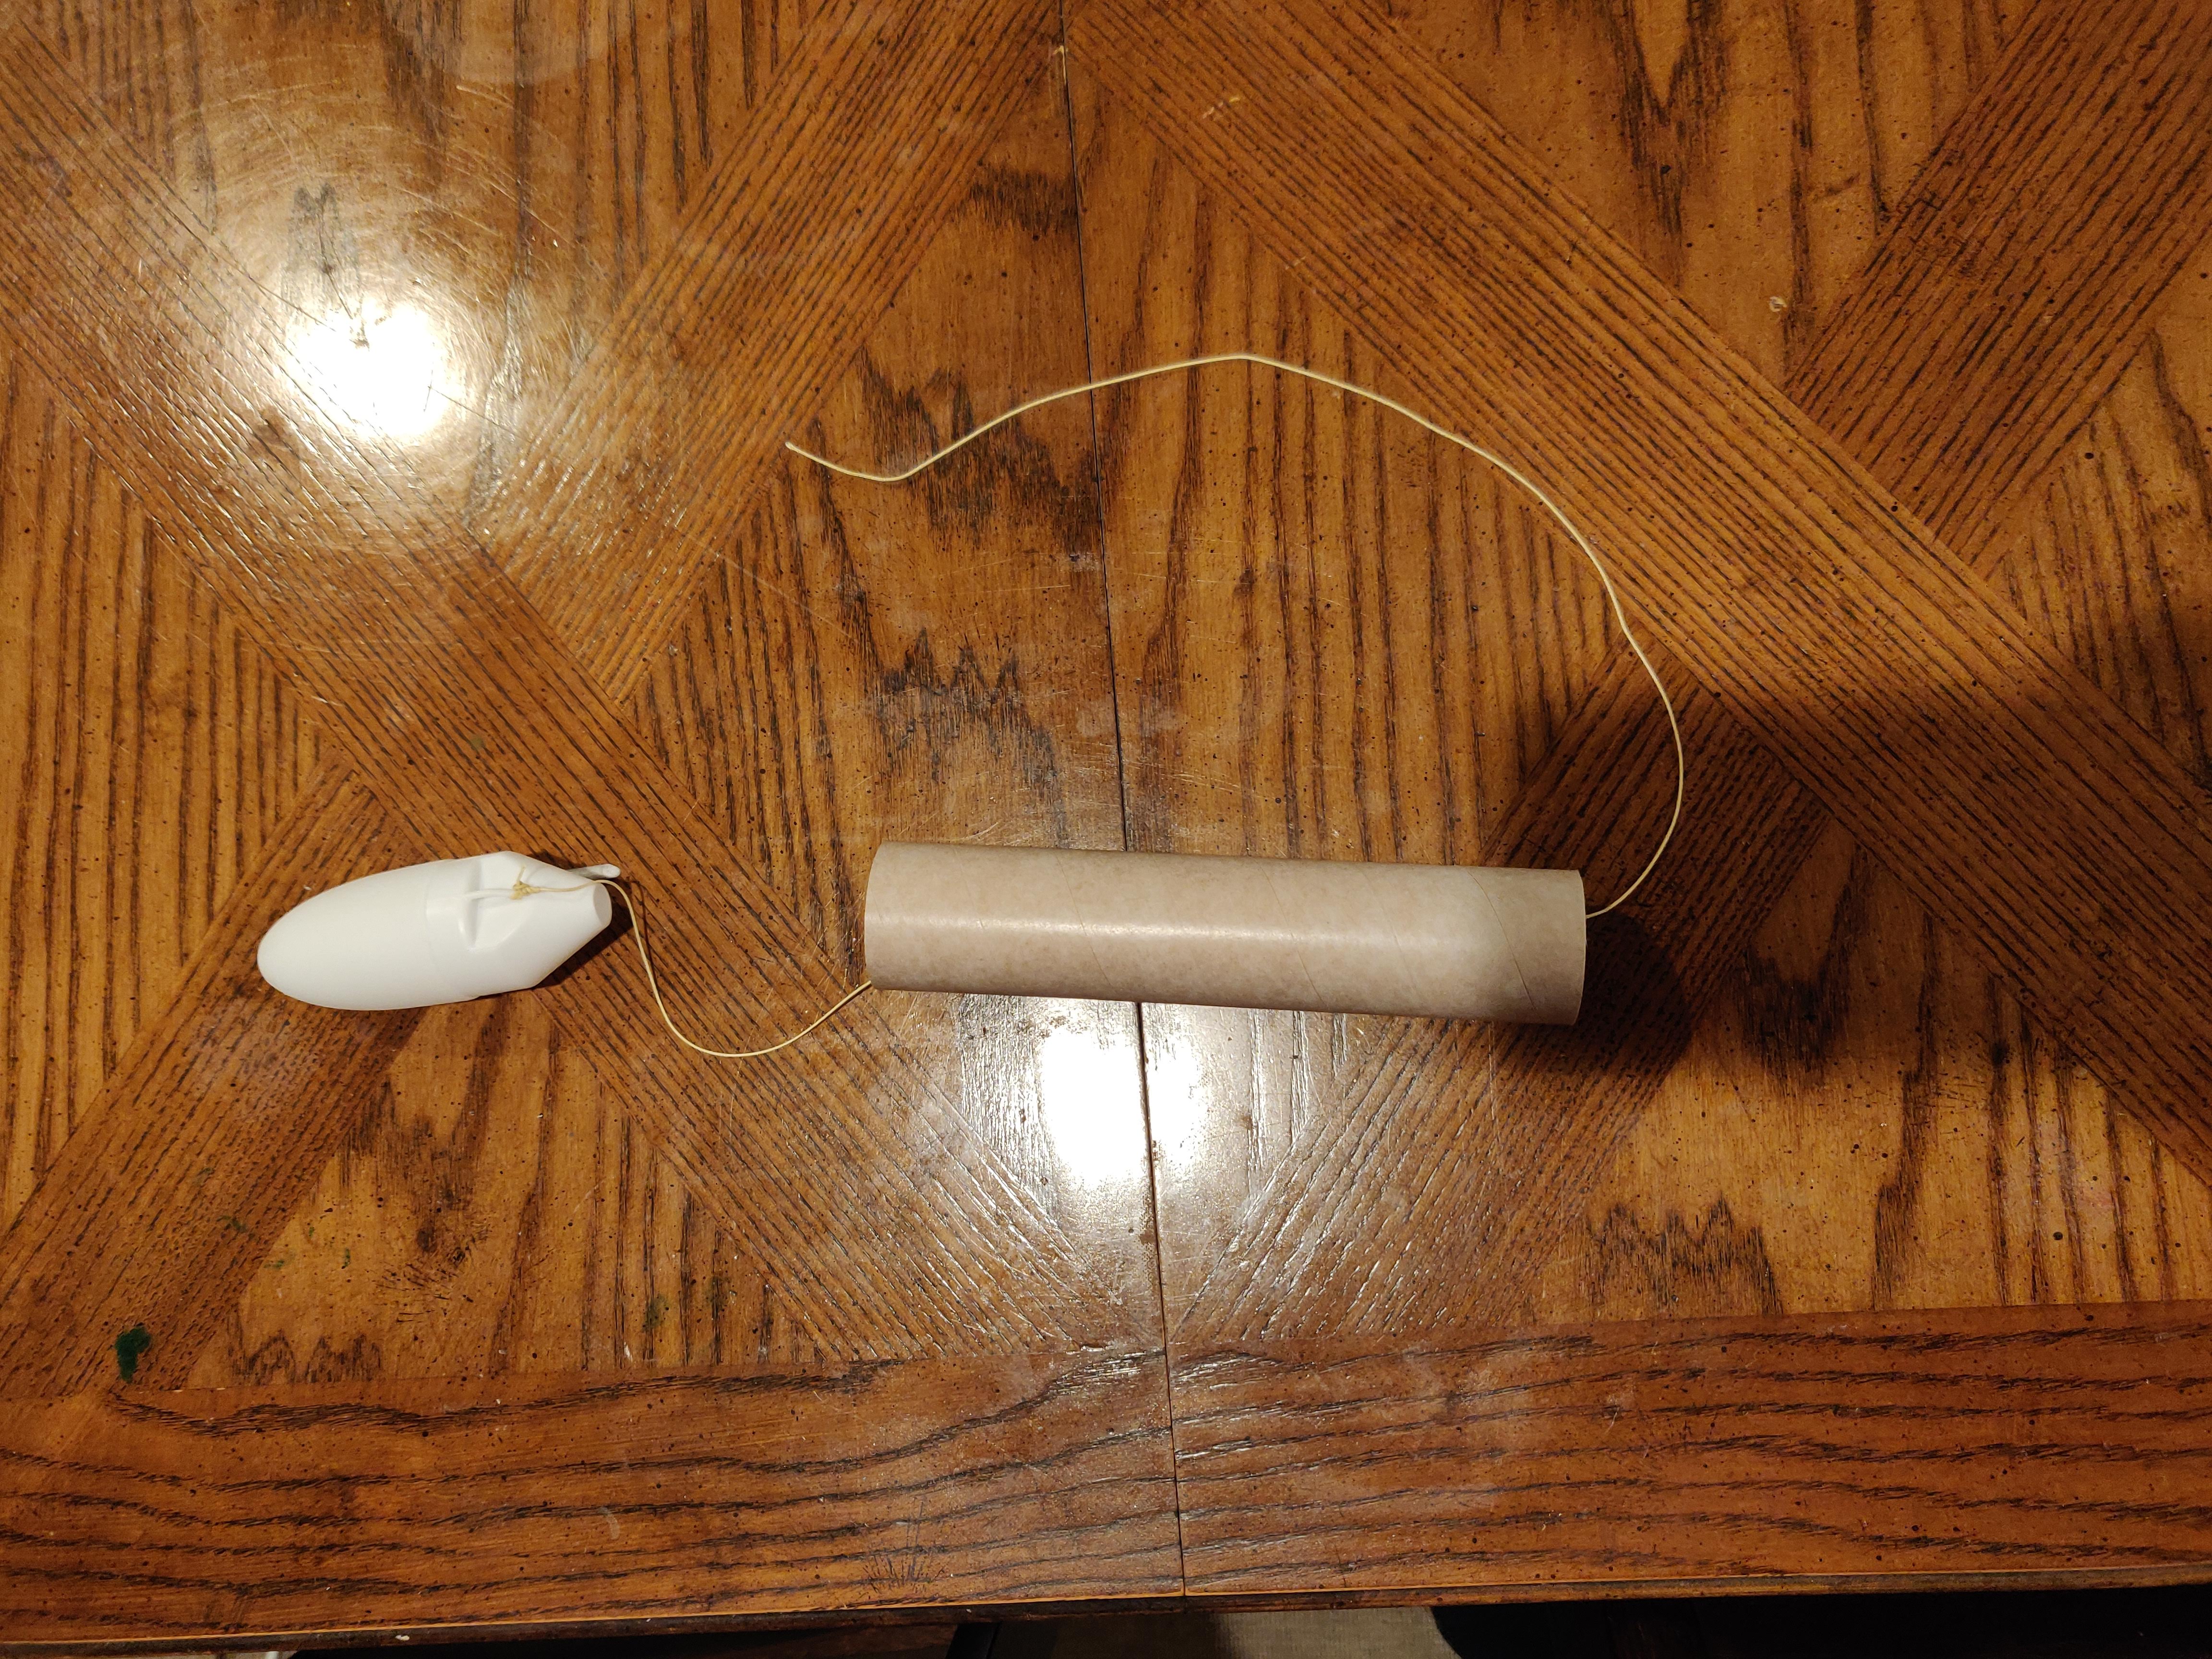
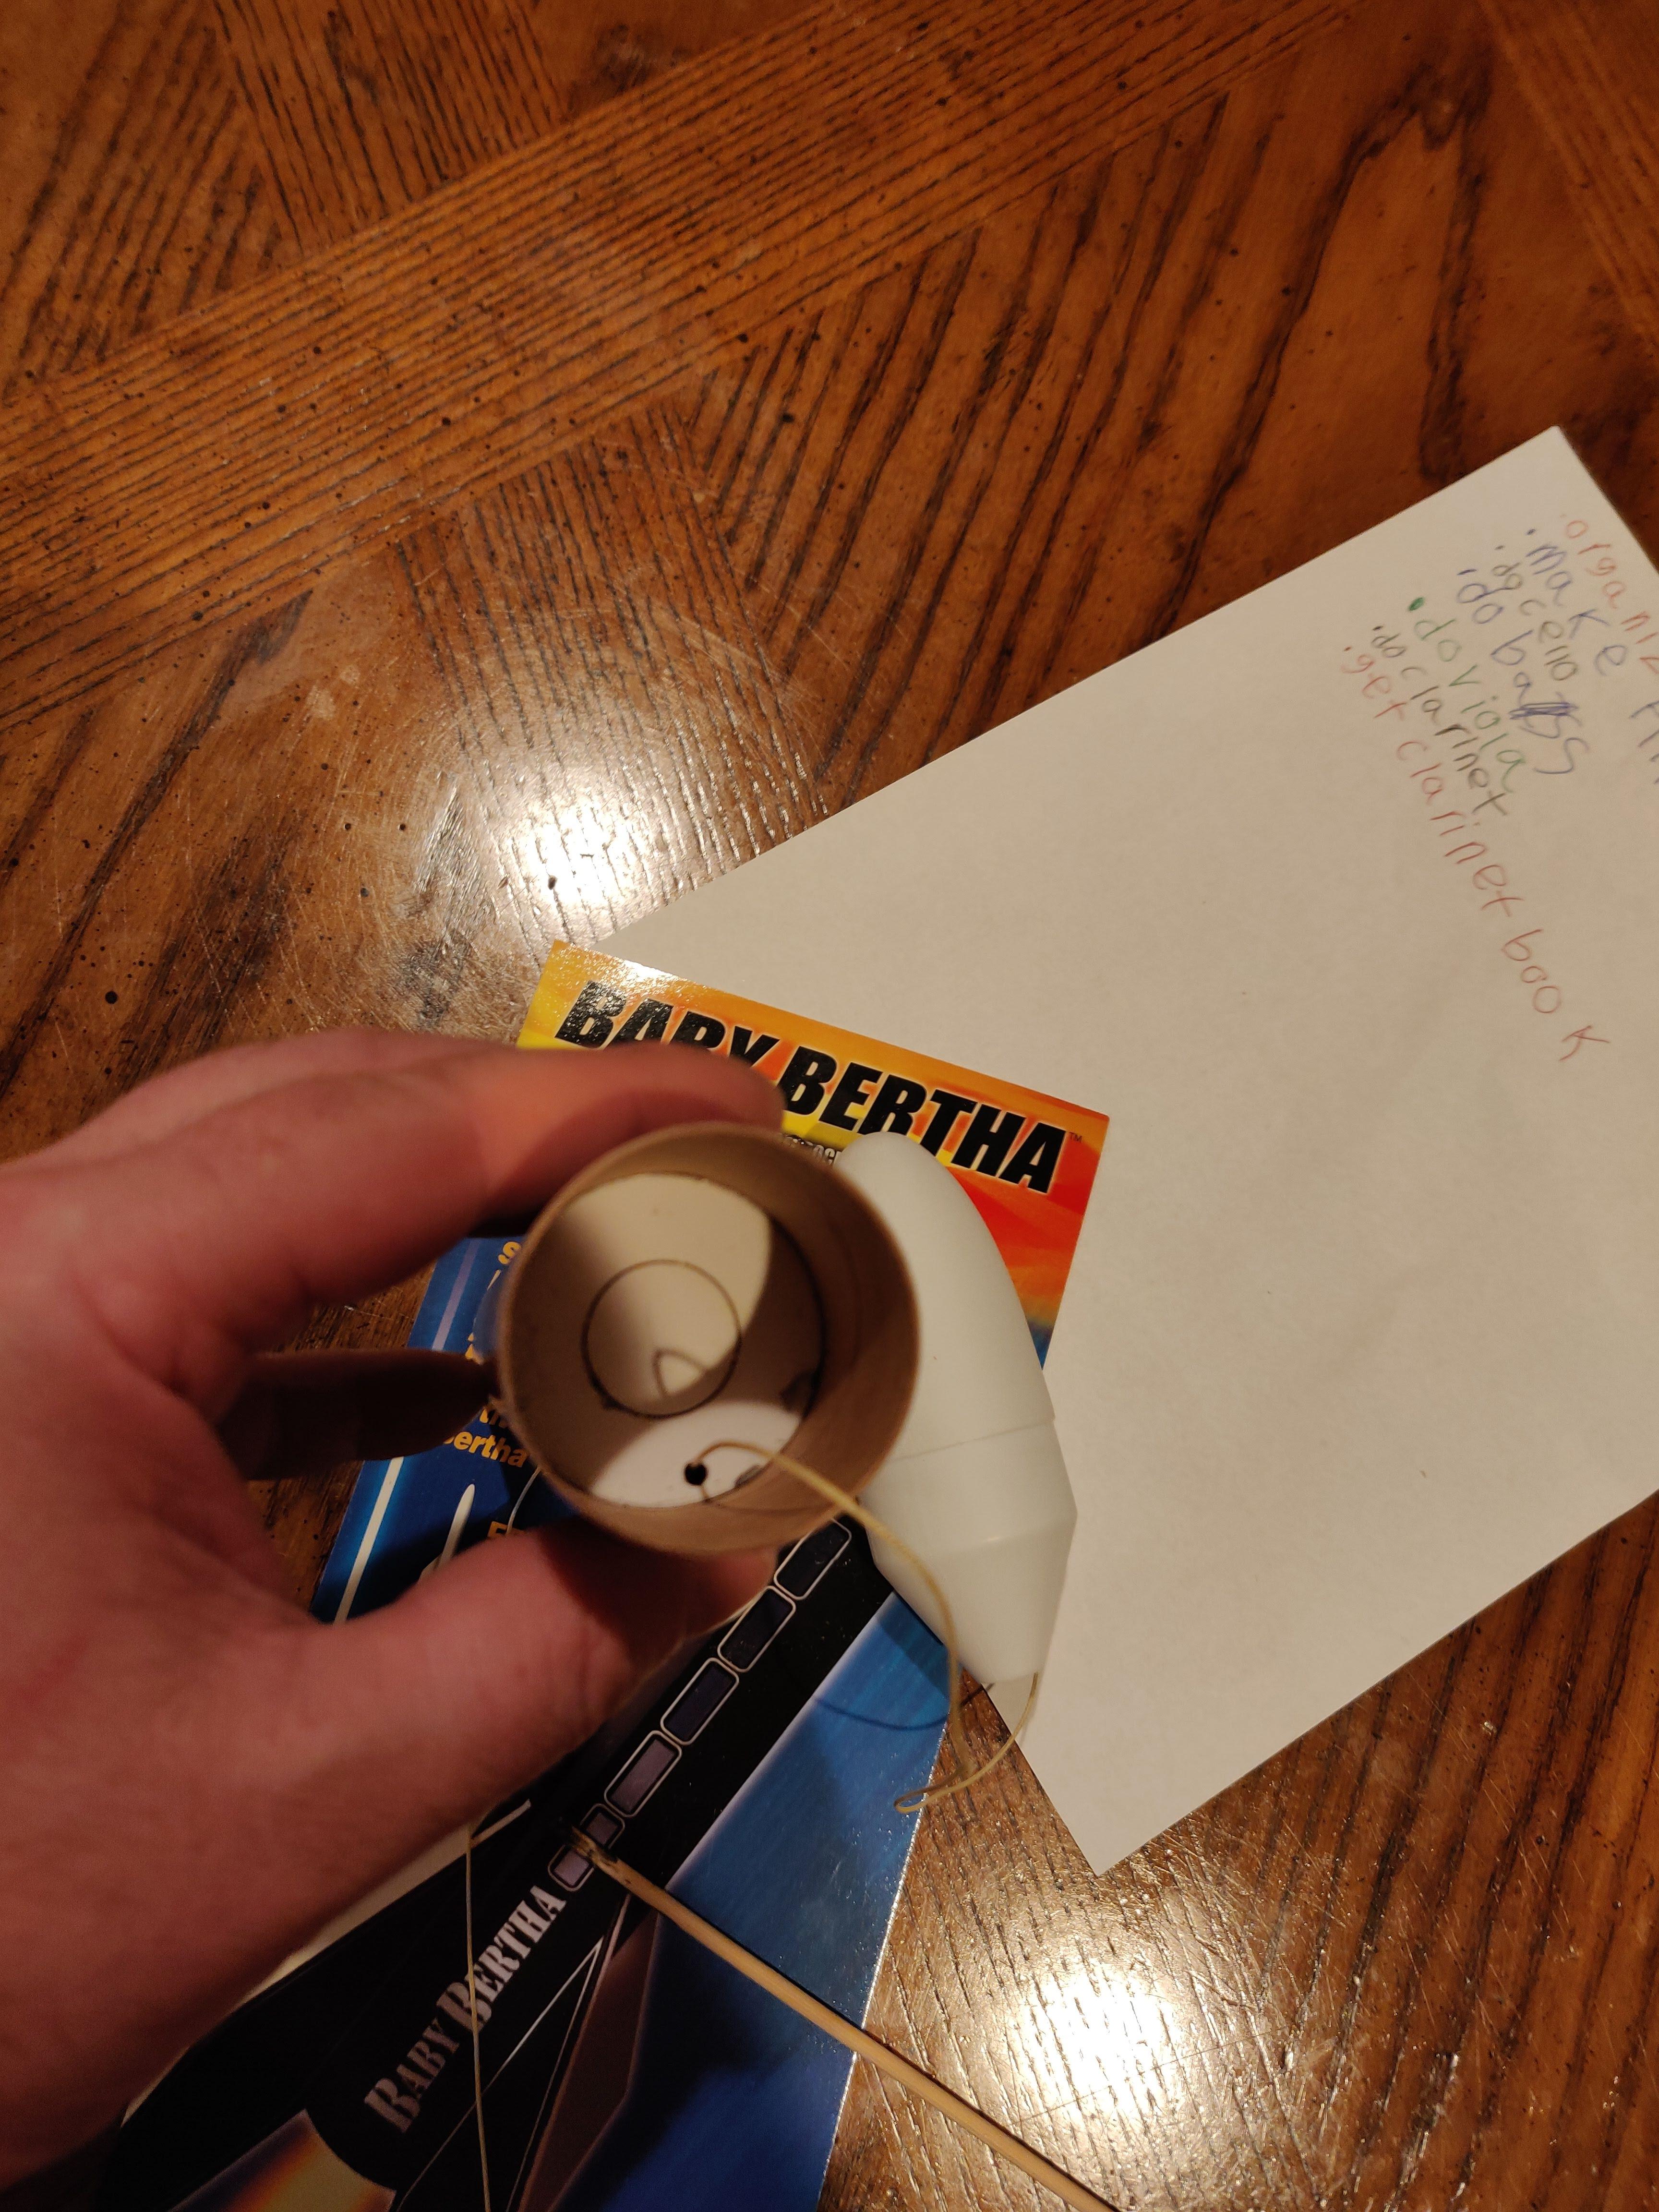
I tied off the shock cord to the nose cone, and cut off what looked like a sufficient length - I can always extend it later. I'll probably want to add a swivel anyway, and I don't have any at the moment.
I had considered just gluing the nose cone to the body tube and letting the stuffer-tube nest on the end of the inner cone, but I was concerned about what ejection gasses fired right at the nose cone might do to it (and the paint) over time.
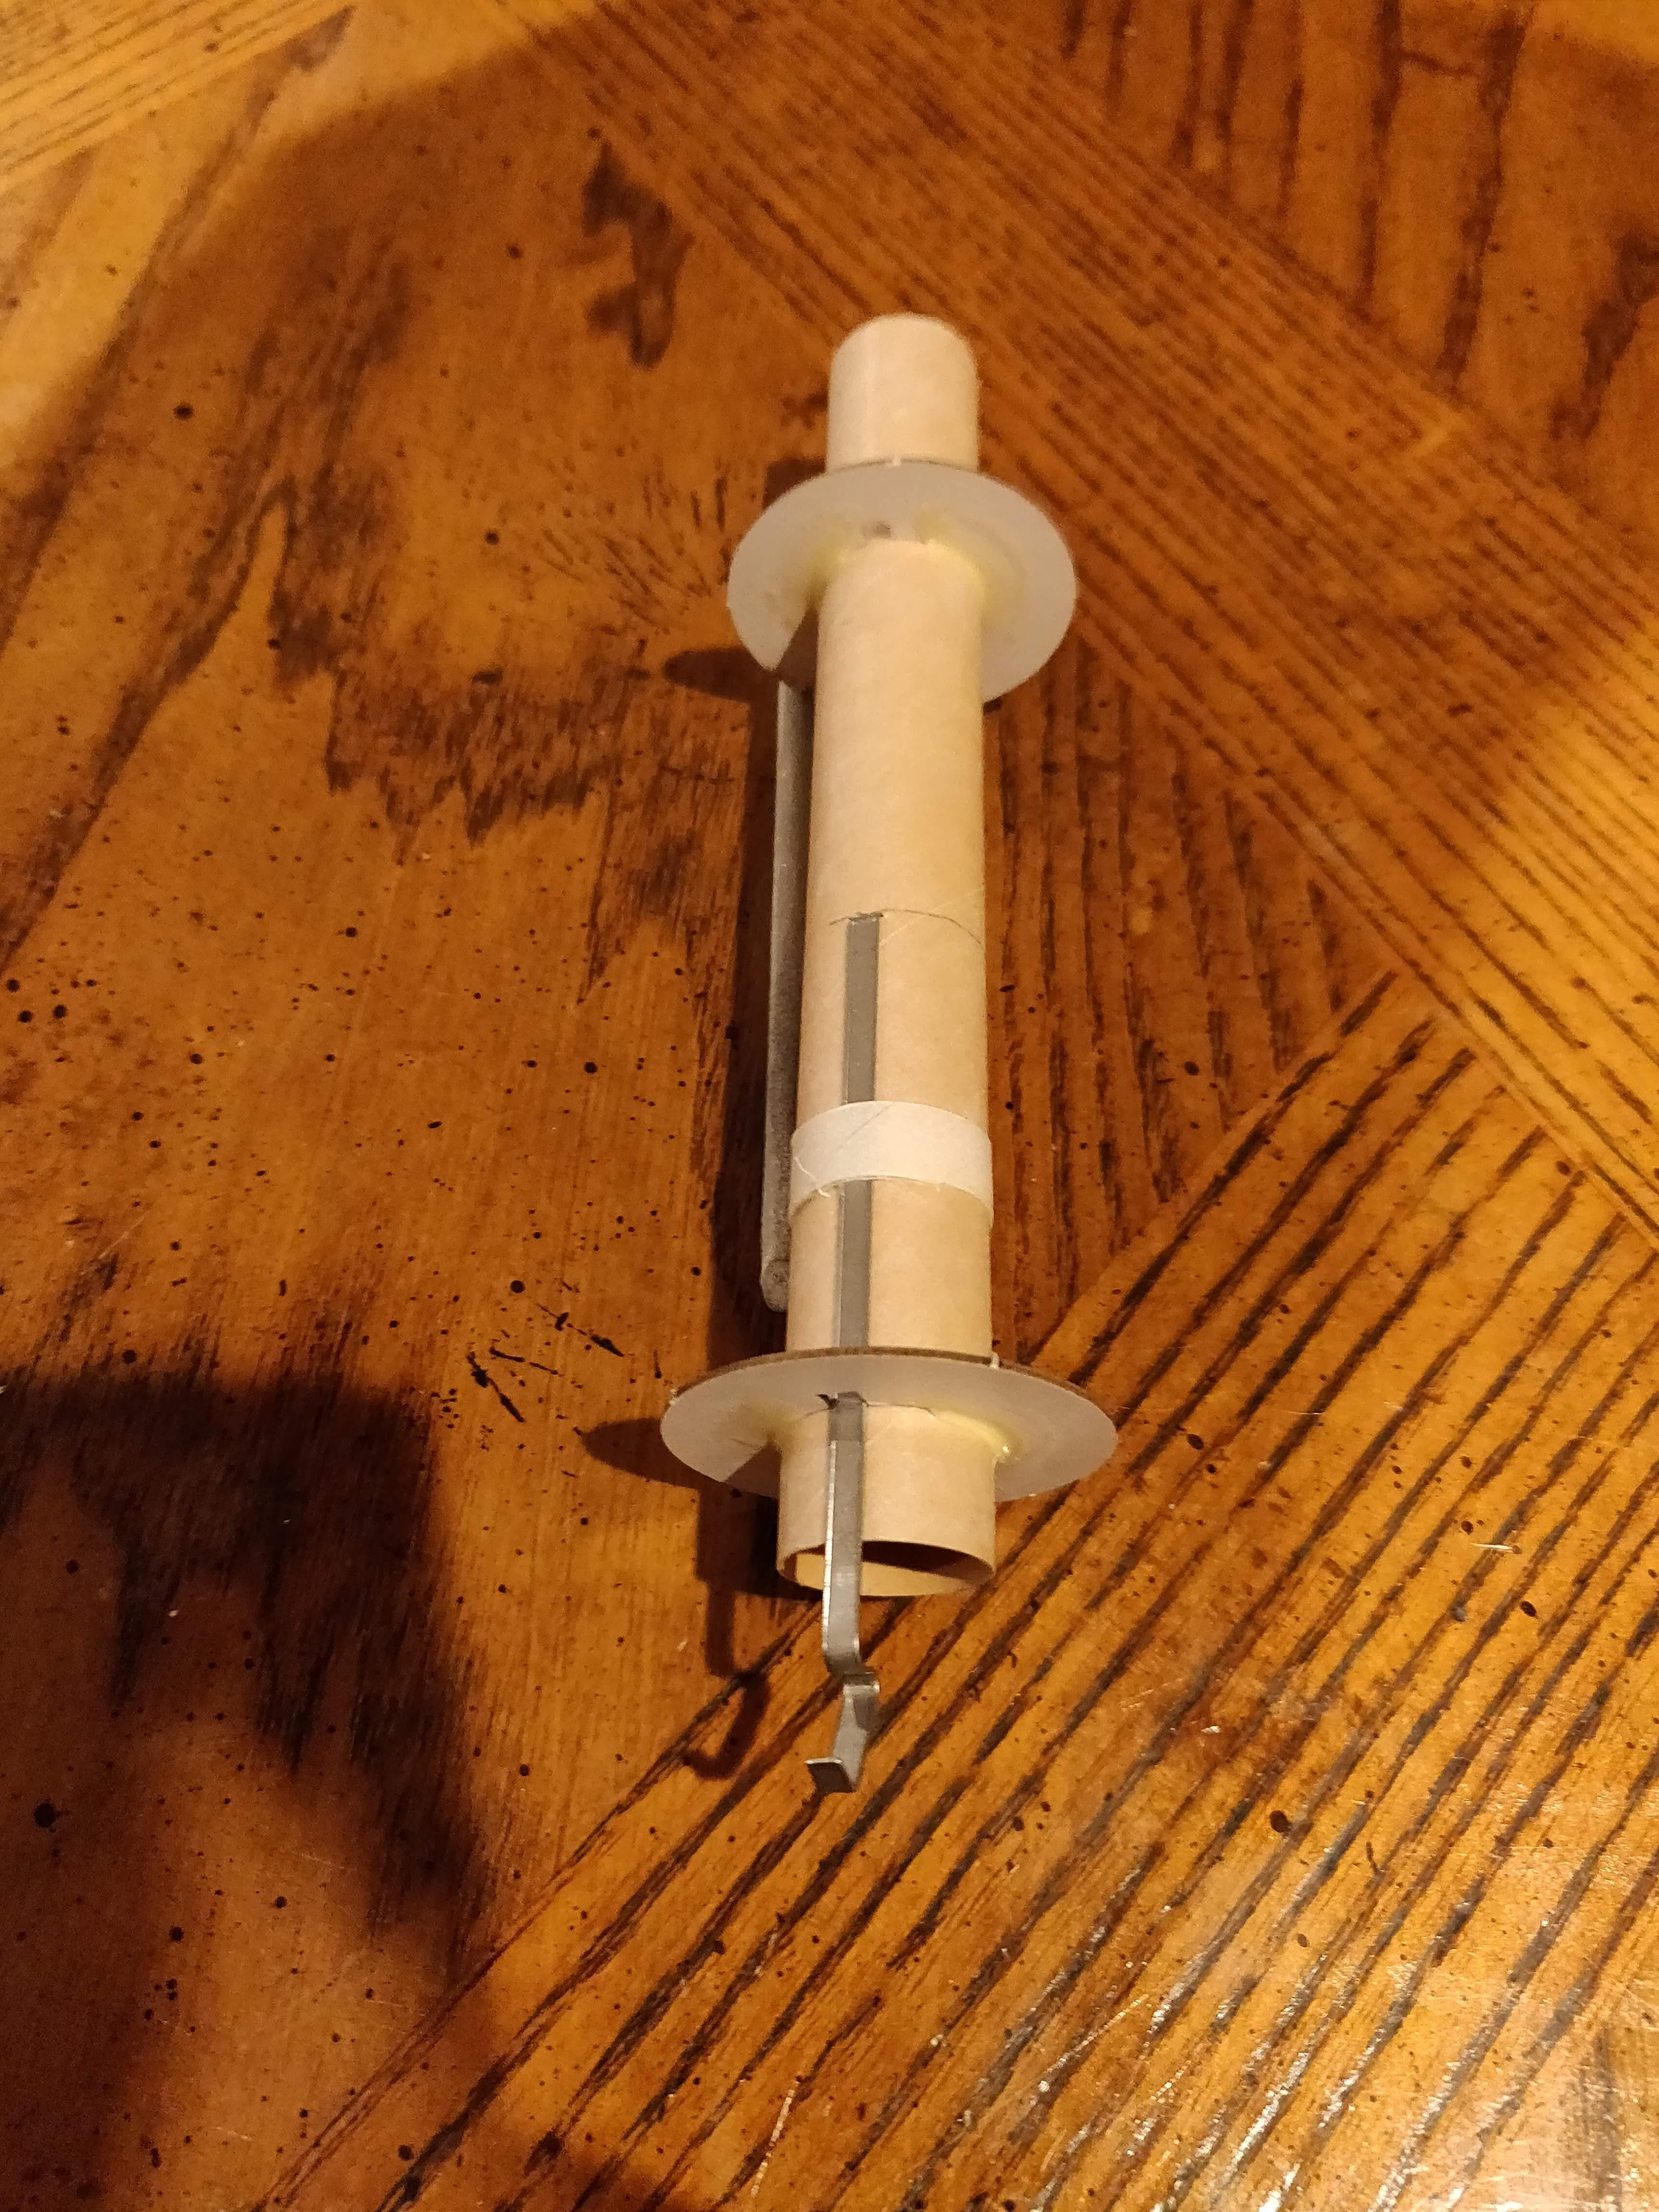
I decided it'd be best to add a bulkhead, so I took a centering ring I had and glued a piece of cardstock over of the inner punch-out, and coated it in a light coat of 10-minute epoxy to harden it against the heat of the ejection charge.
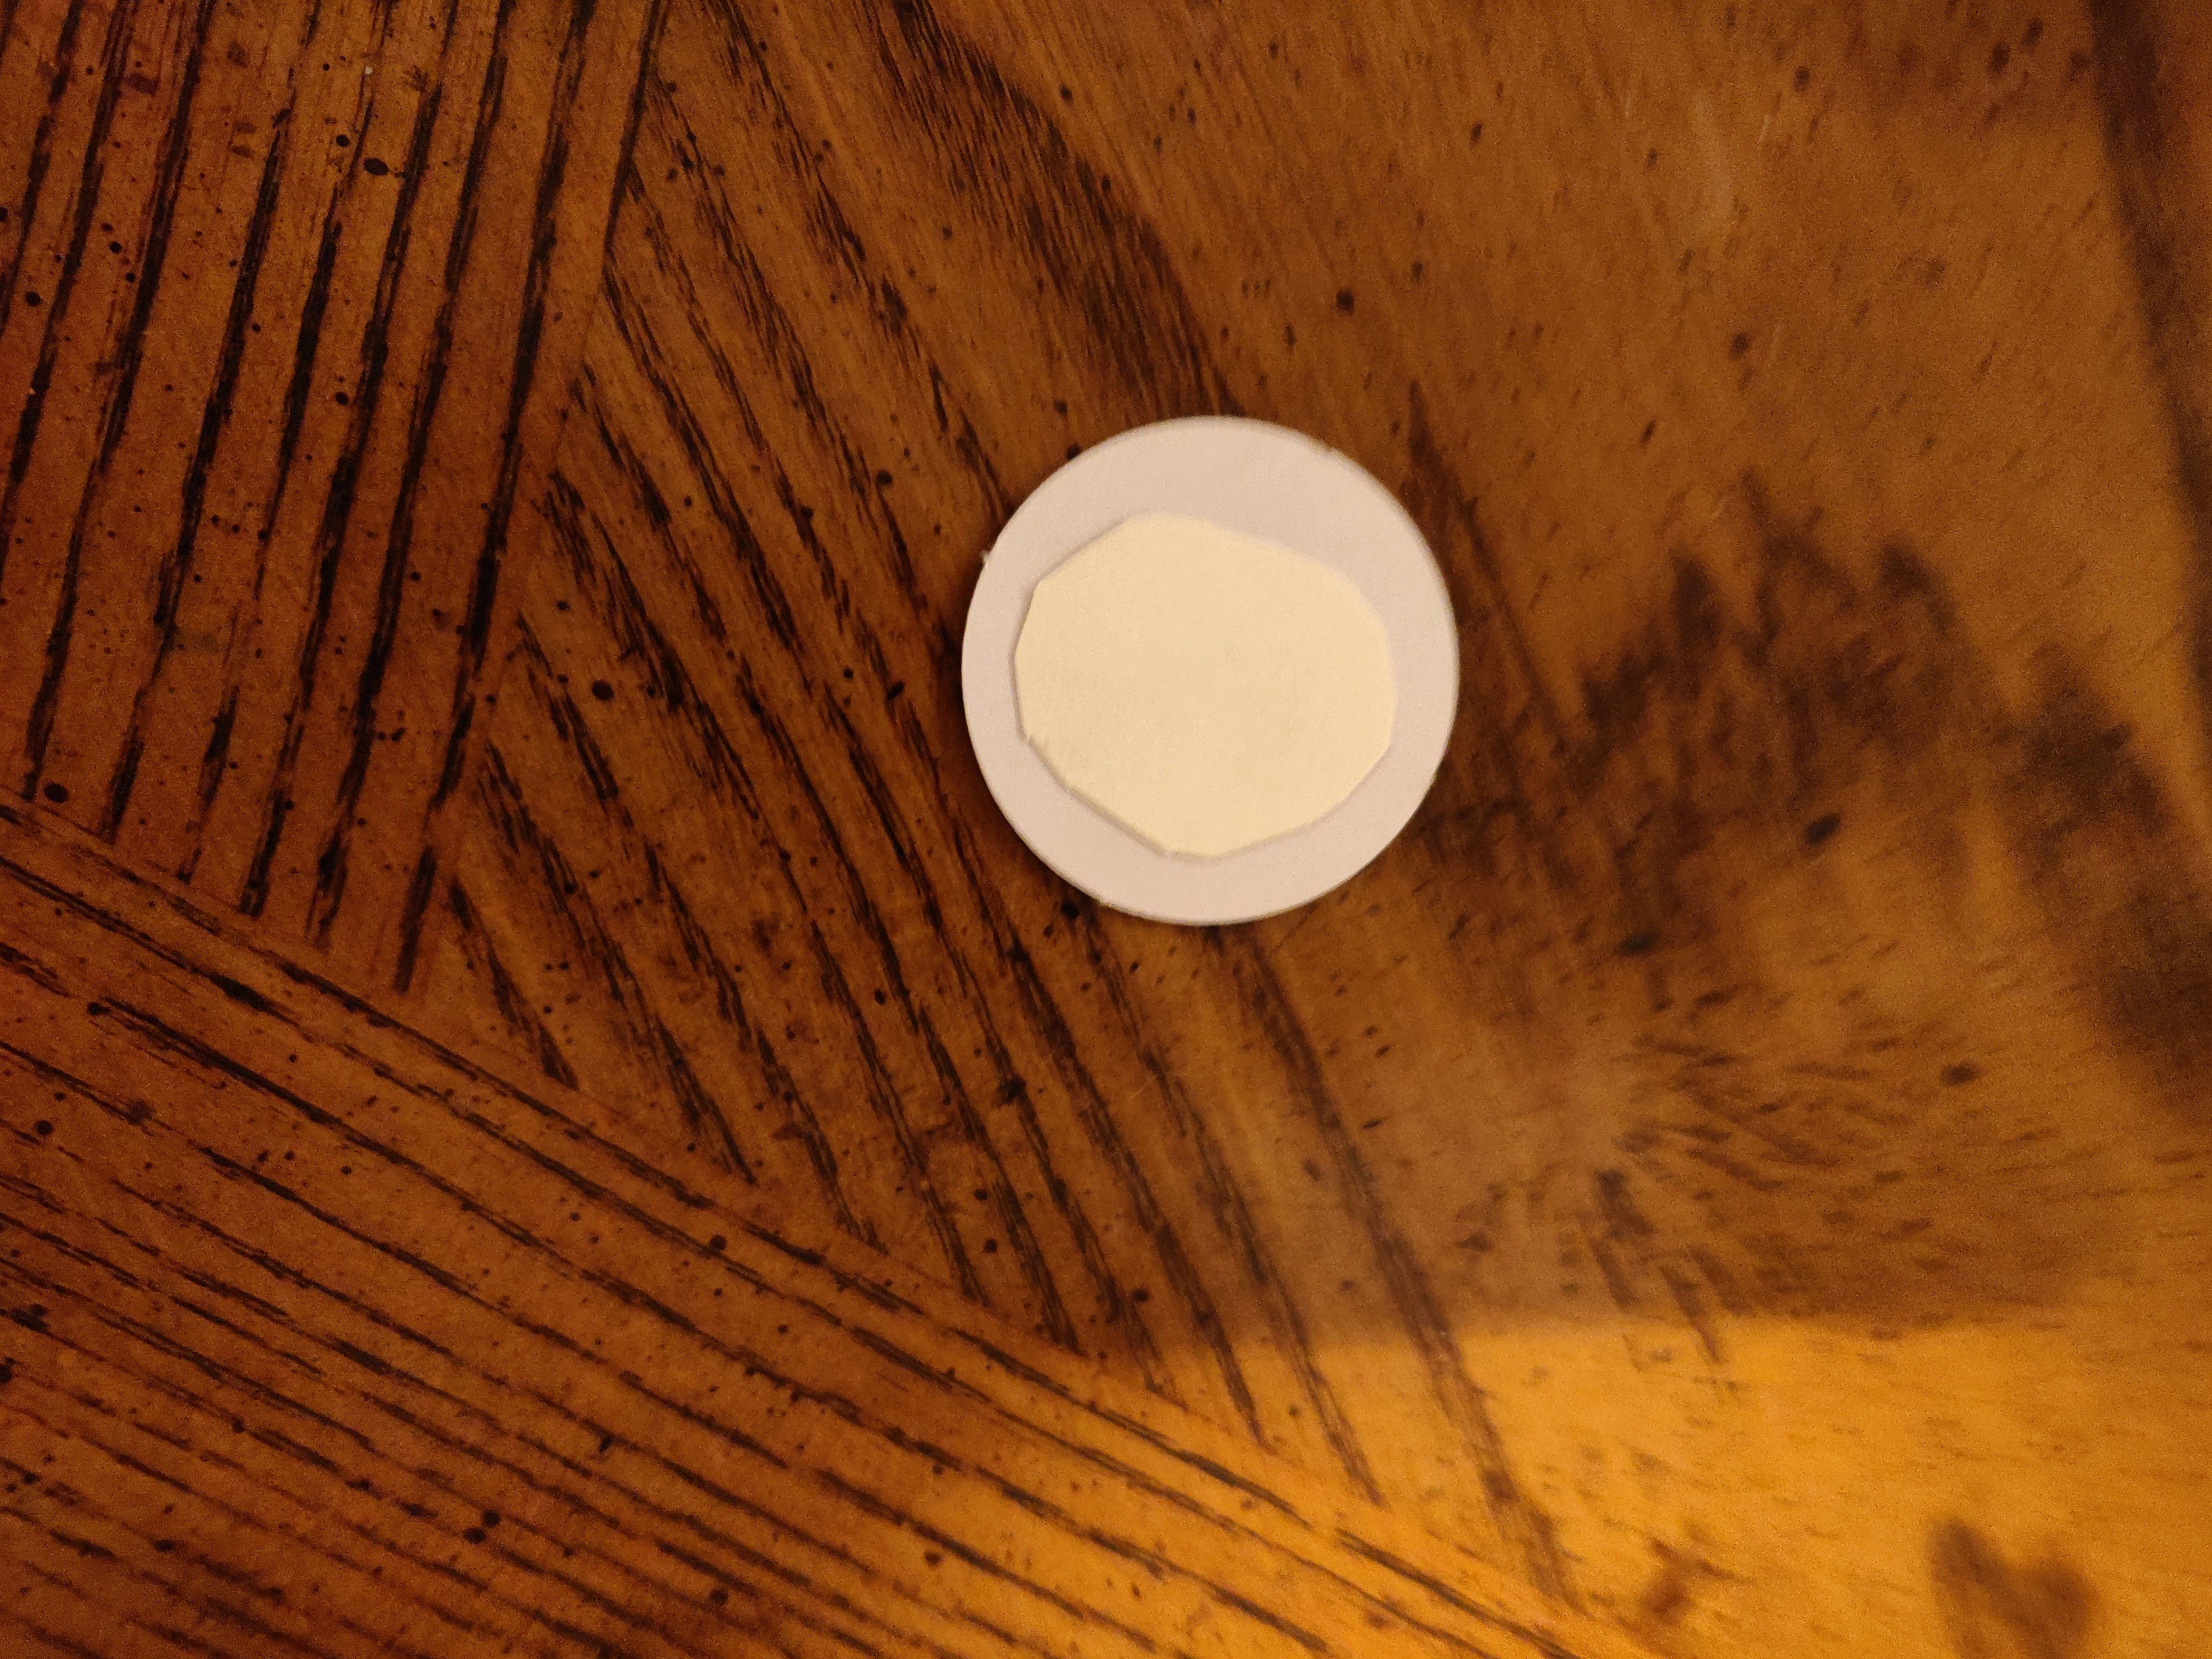
I measured the length of the shoulder and "inner cone" of the nose cone, and used a piece of BT-60 coupler to get the bulkhead in the right place and nice and square, and glued it in place with some titebond. The end of the stuffer will be right up against it, and the nose cone supporting it from the other side, so I think it'll survive ejection forces just fine. (Does anybody think I should drill the sides of the stuffer?)
Now it was time to build up the motor pod. I cut a length of BT-20 to the same length as the distance from the bulkhead to the bottom of Bertha's body tube. I built this as you would have done for the "stock" body tube, with just a bit more separation on the centering rings to leave room to wrap the 'chute. I left the forward centering ring a bit aft to allow room to loosely coil the shock cord to avoid tangling during ejection.
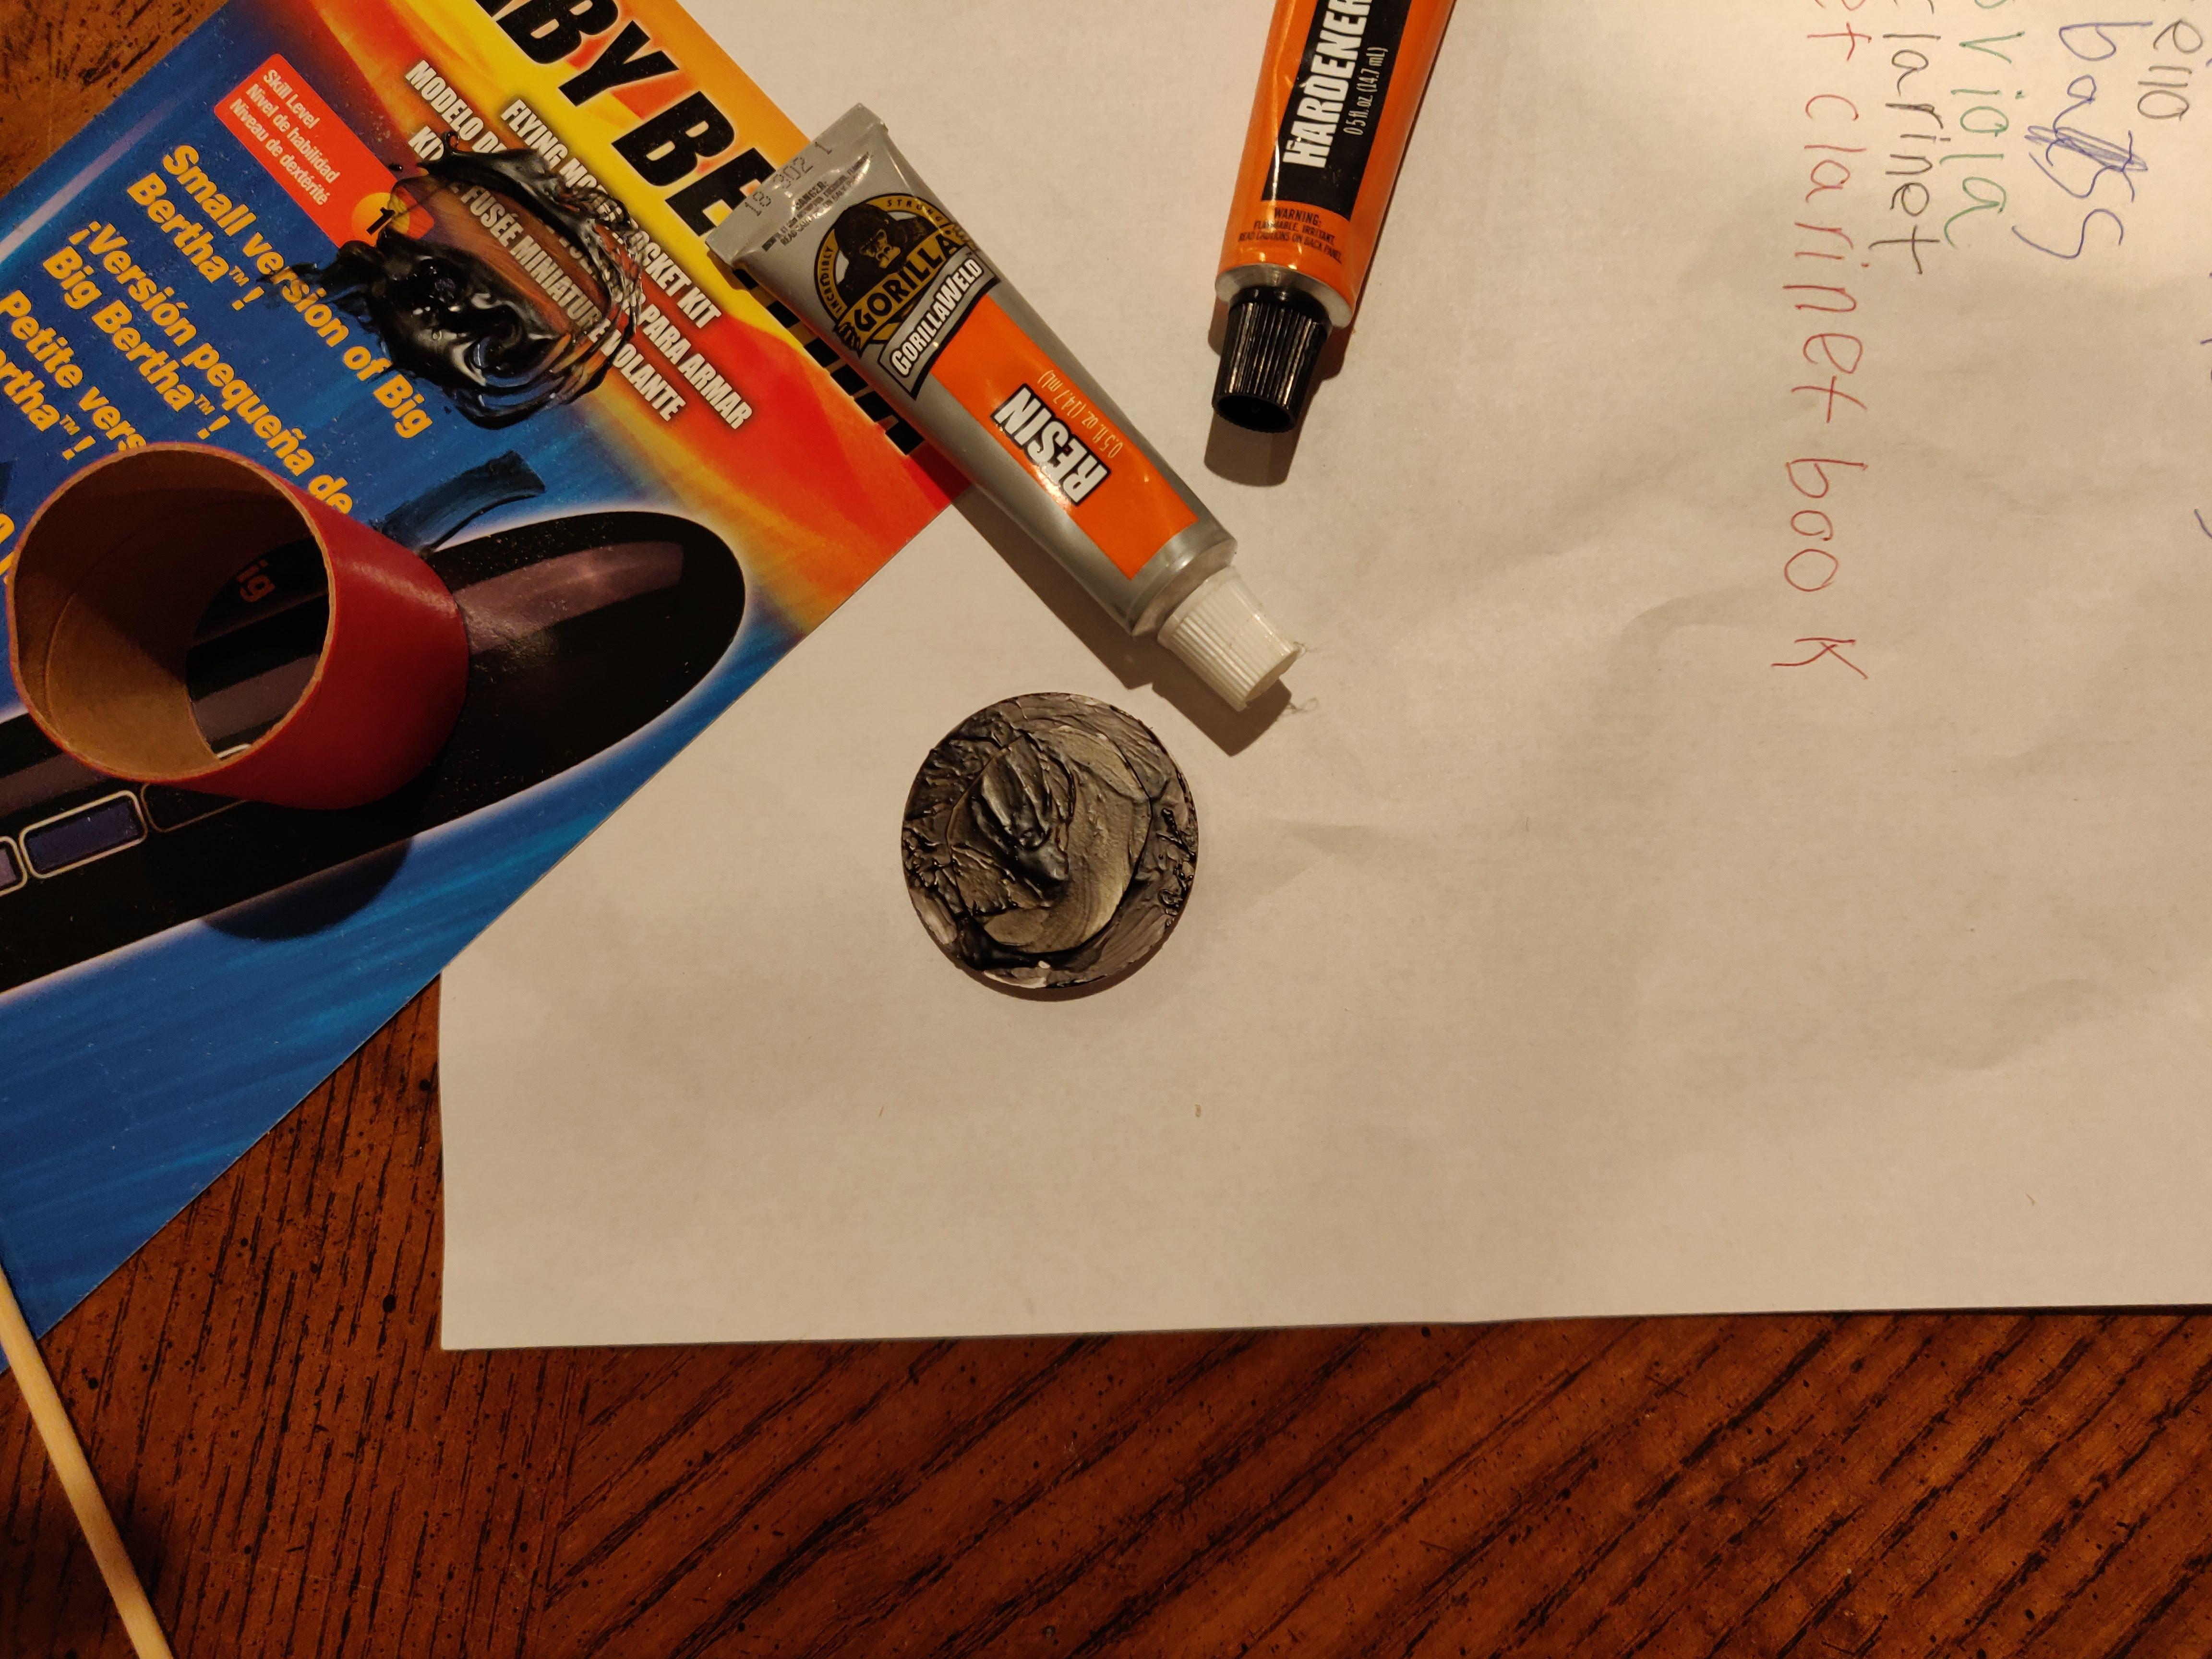
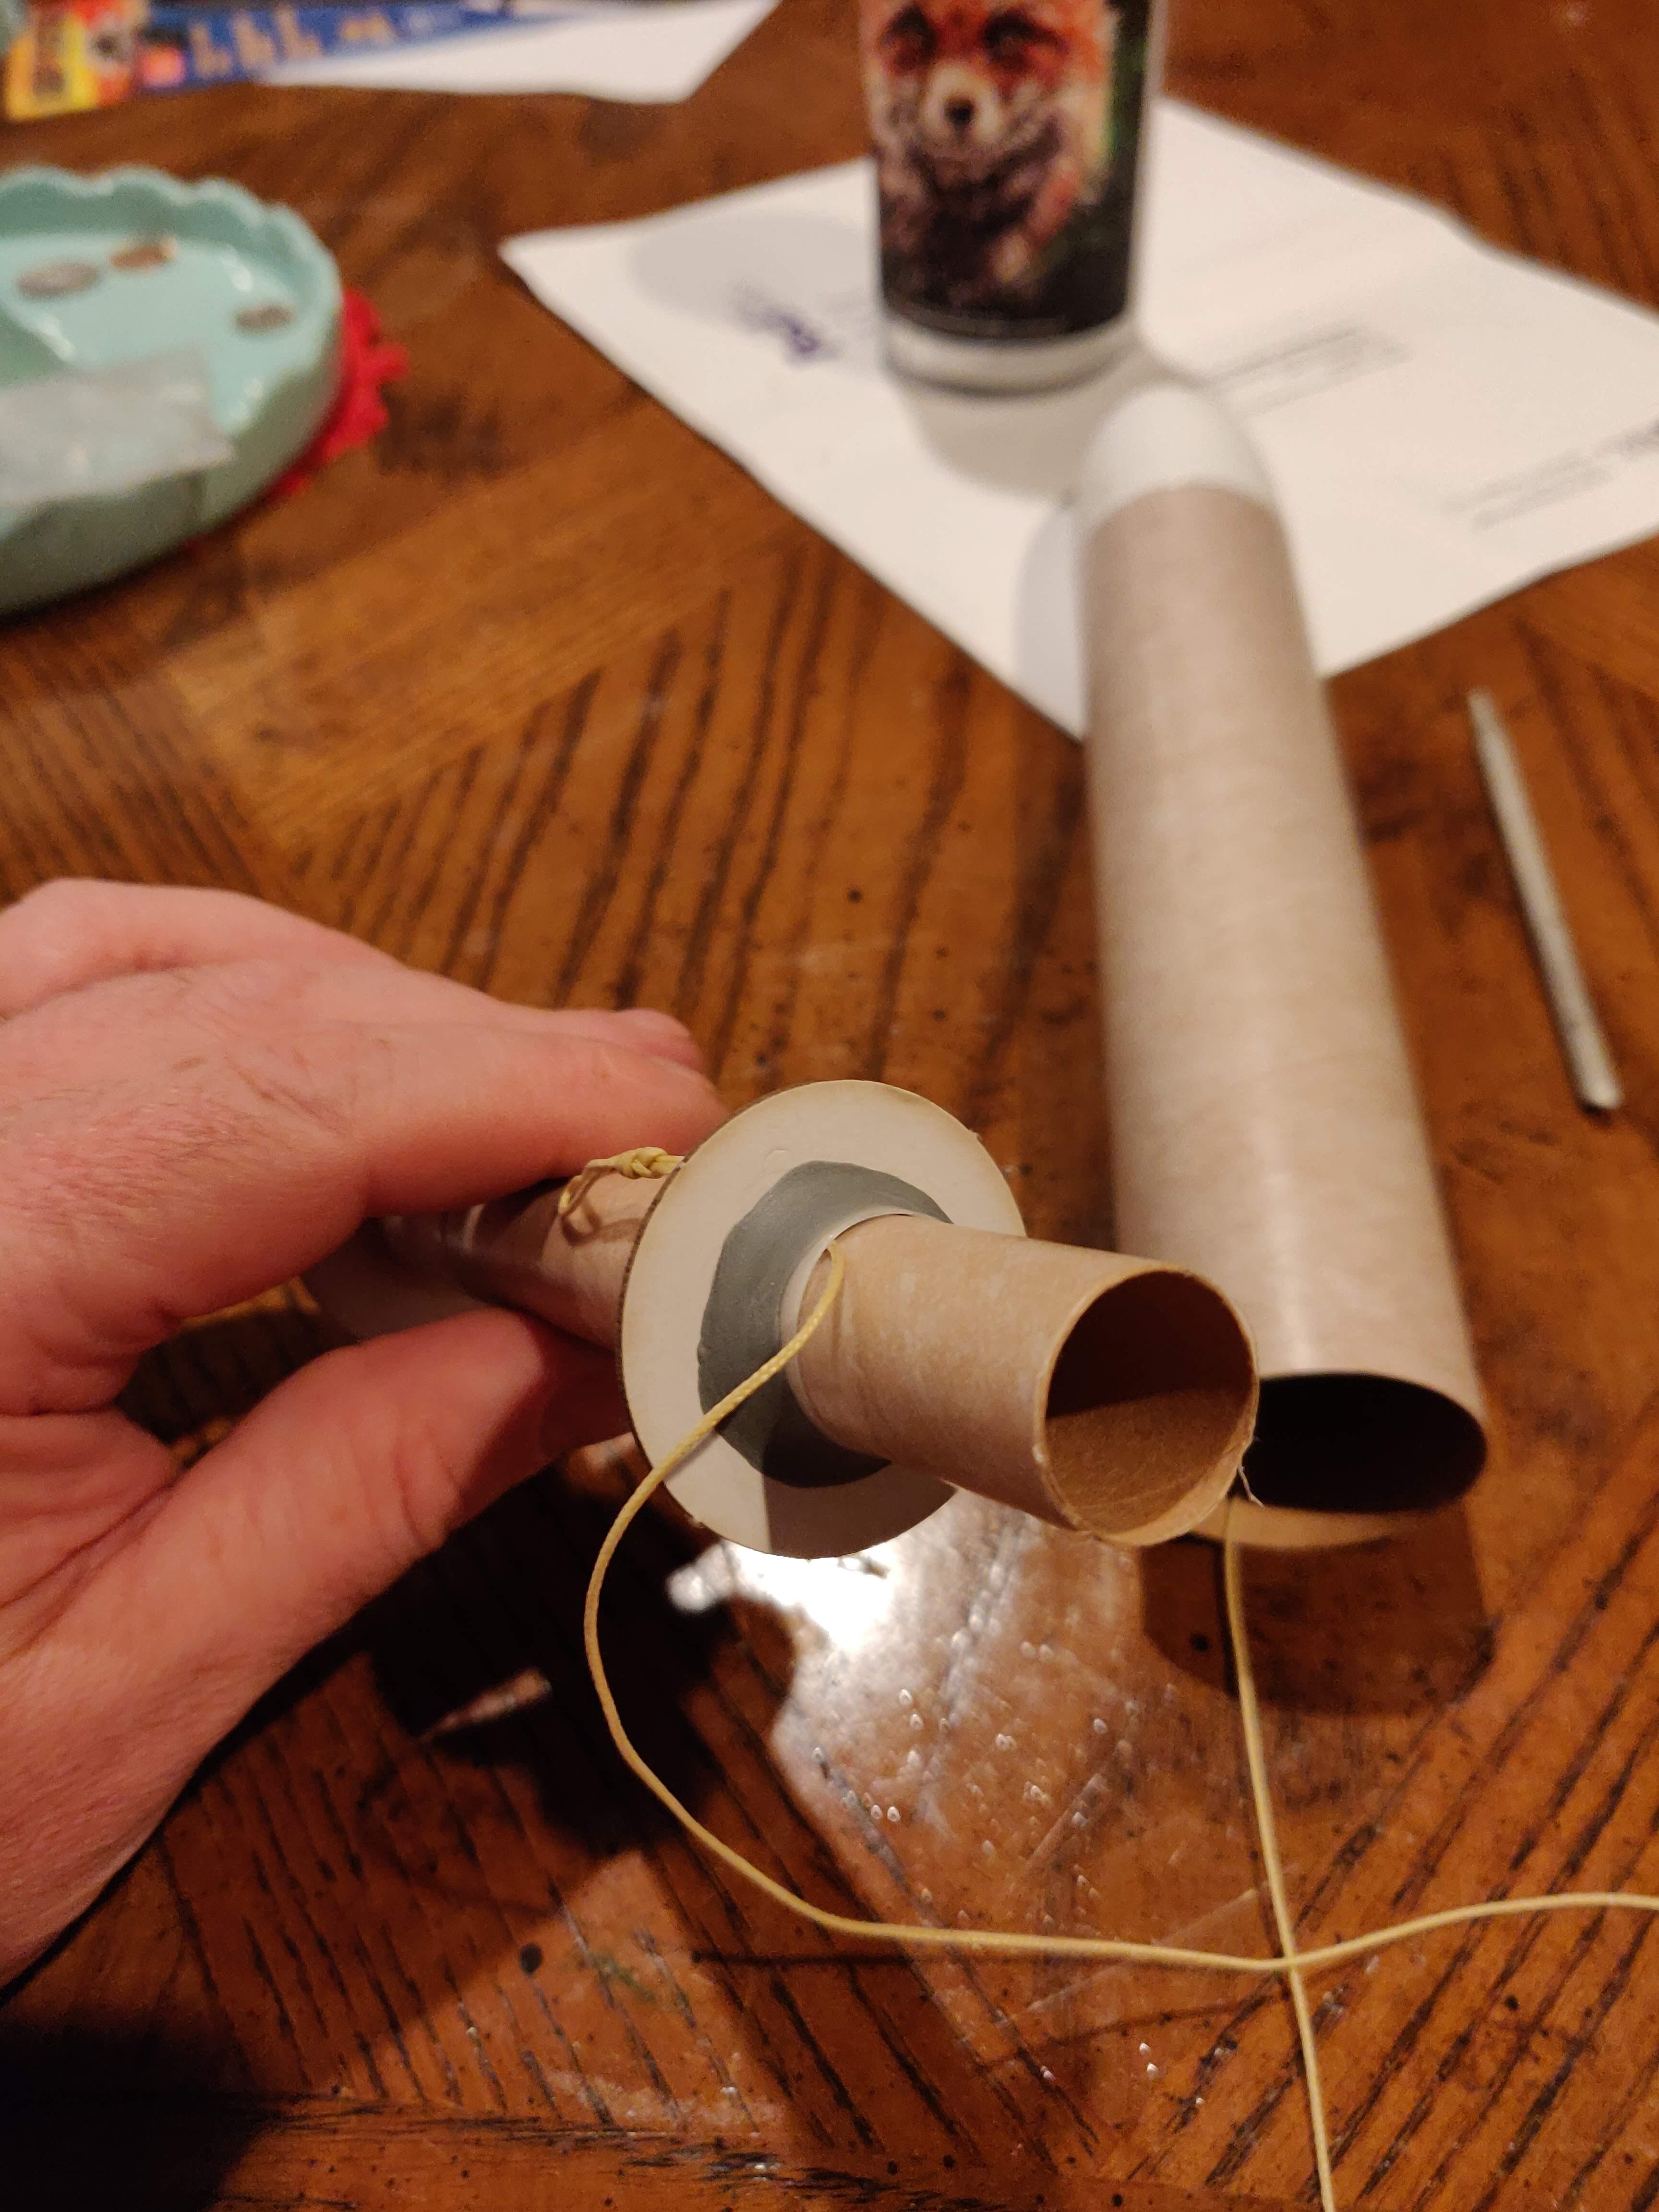
The "Peak of Flight" article mentioned that the forward centering ring can take a bit of a beating, so I added a motor clip retention ring on the forward side, feeding the kevlar underneath, and through a small hole I punched in the centering ring. I soaked some thin CA underneath to hold it all in place.
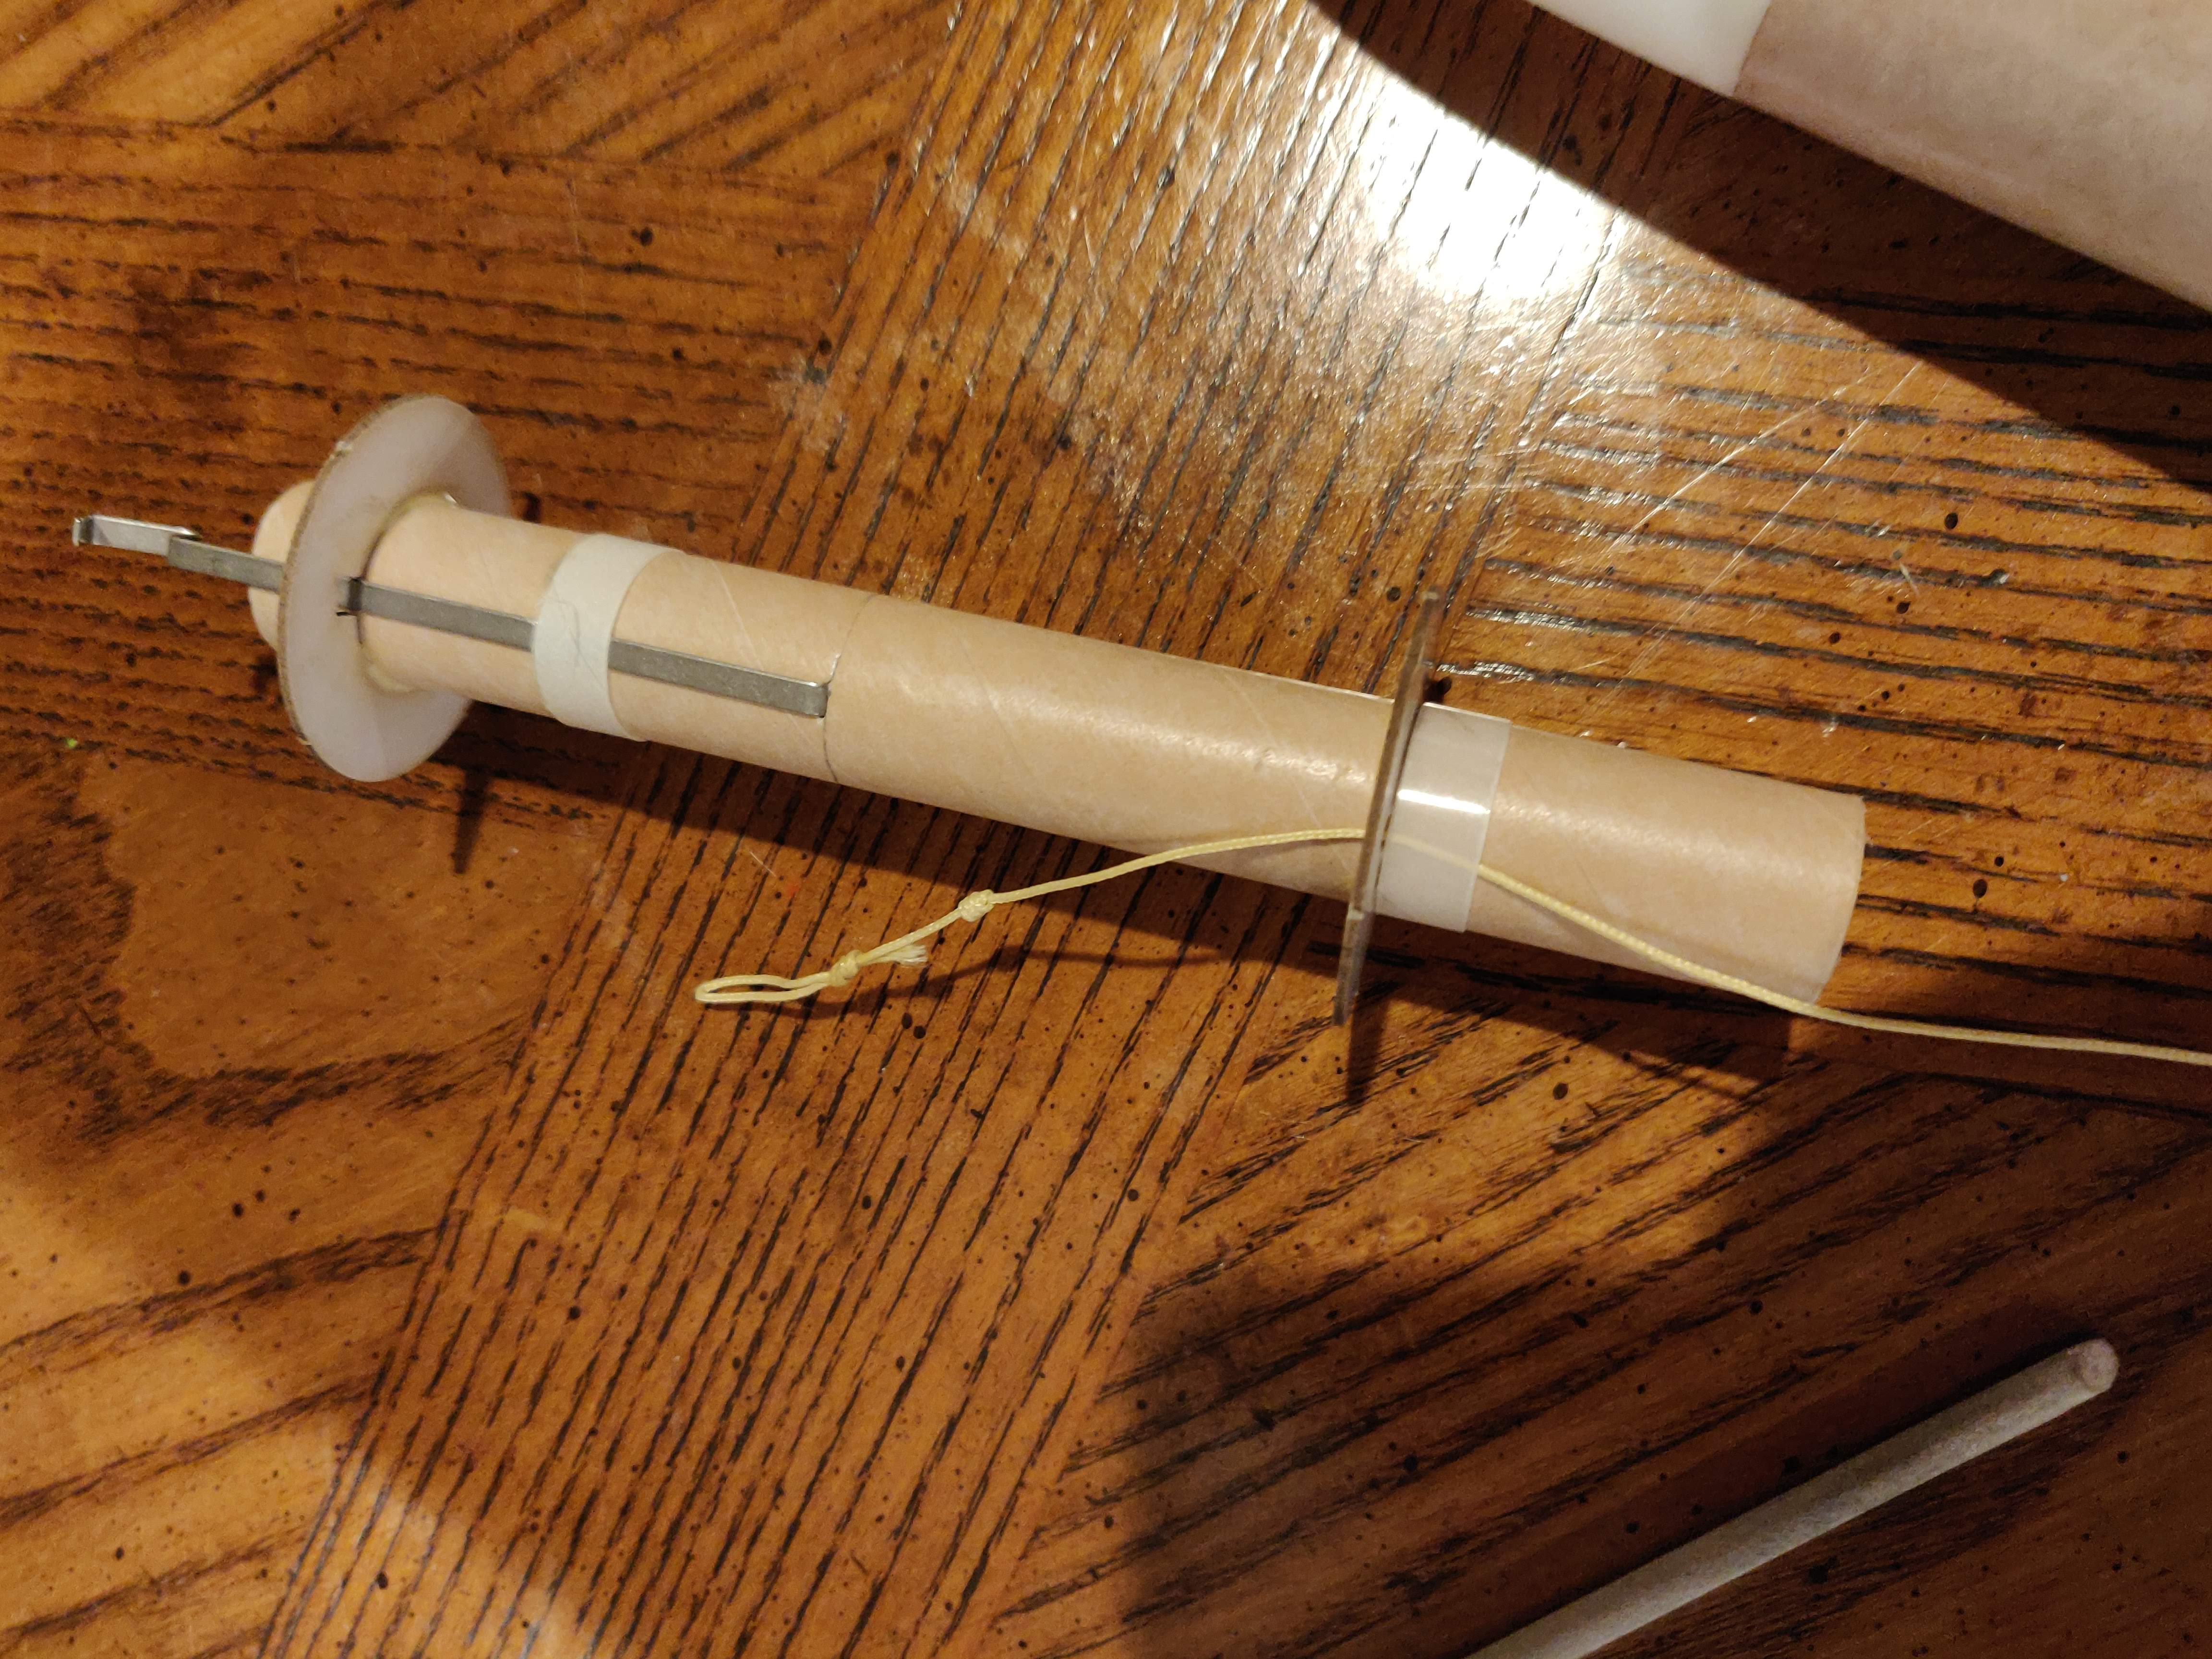
I added a fillet of "Fix It" epoxy to the forward side, and a bit over the shock cord on the aft side to hold it all solidly in place. (Note the "blood knot" in the kevlar in the photo above, that should anchor the shock cord nicely in the putty when it hardens.) I left a loop on the end for recovery device attachment.
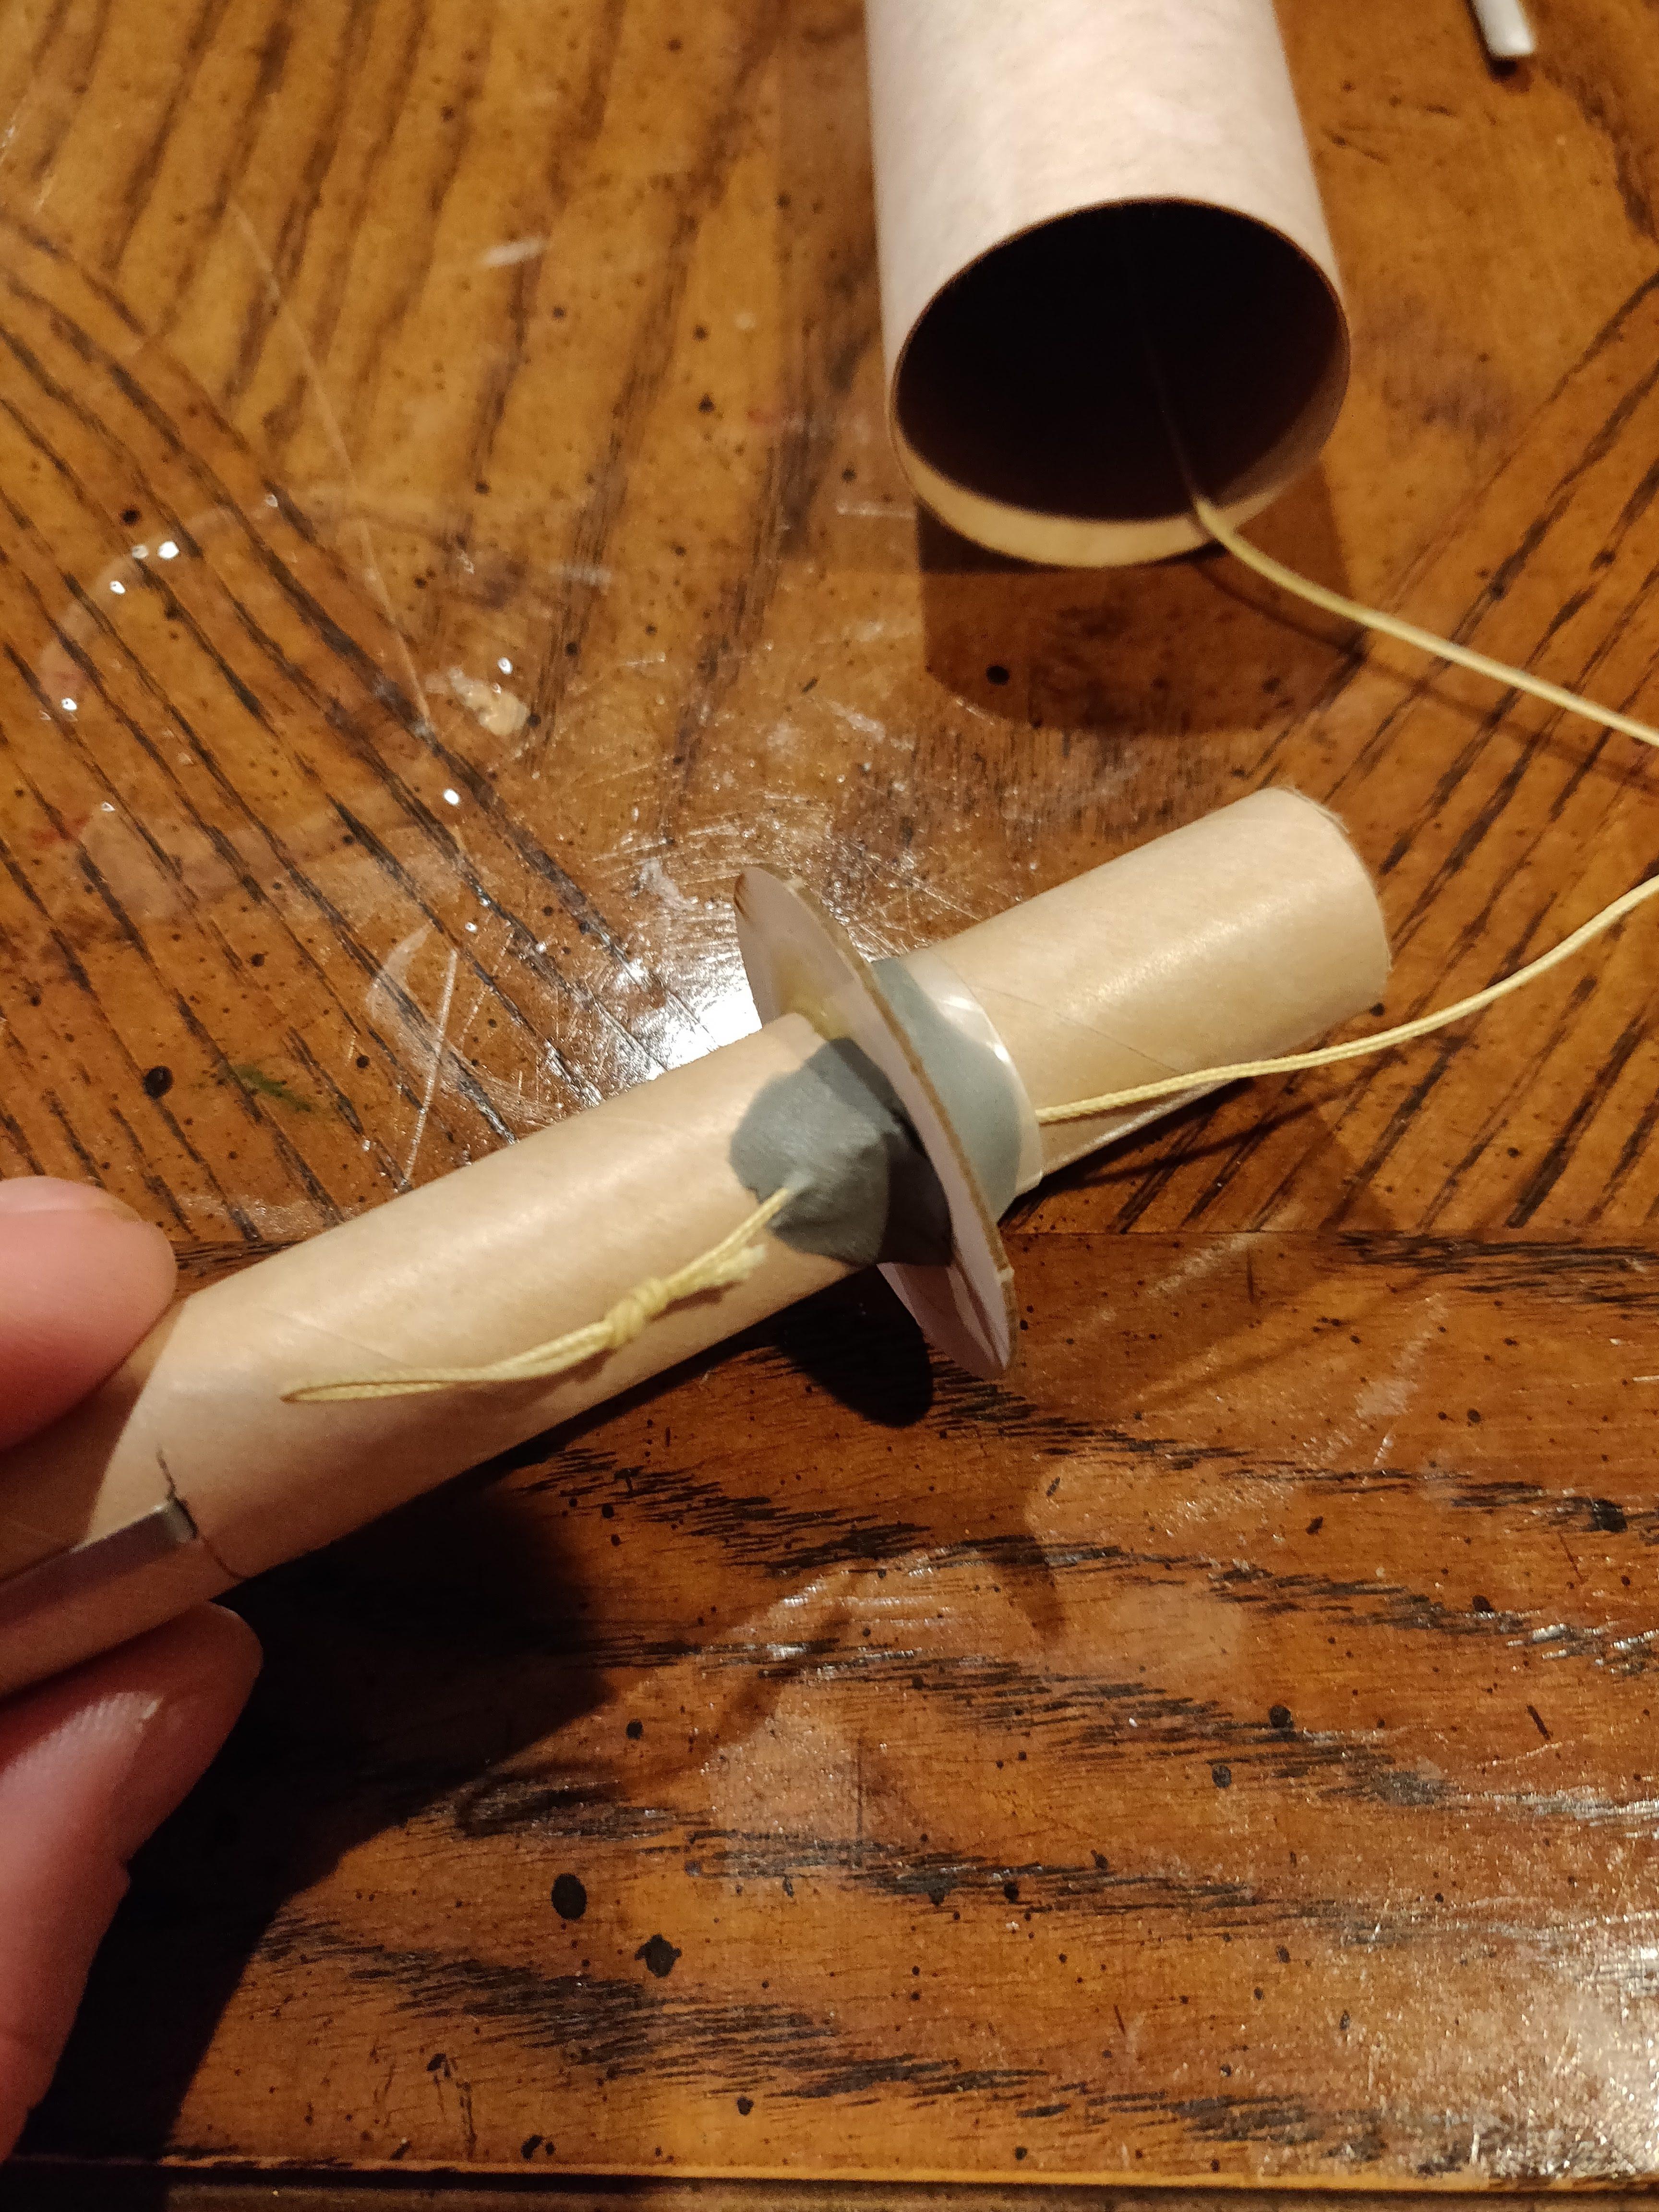
Here it is, ready for "stuffing". One nice thing is that if there's any hitches I discover about the motor pod design is that it'll be pretty easy to just get a new motor mount kit and build a new one pretty quickly (assuming the airframe survives...).
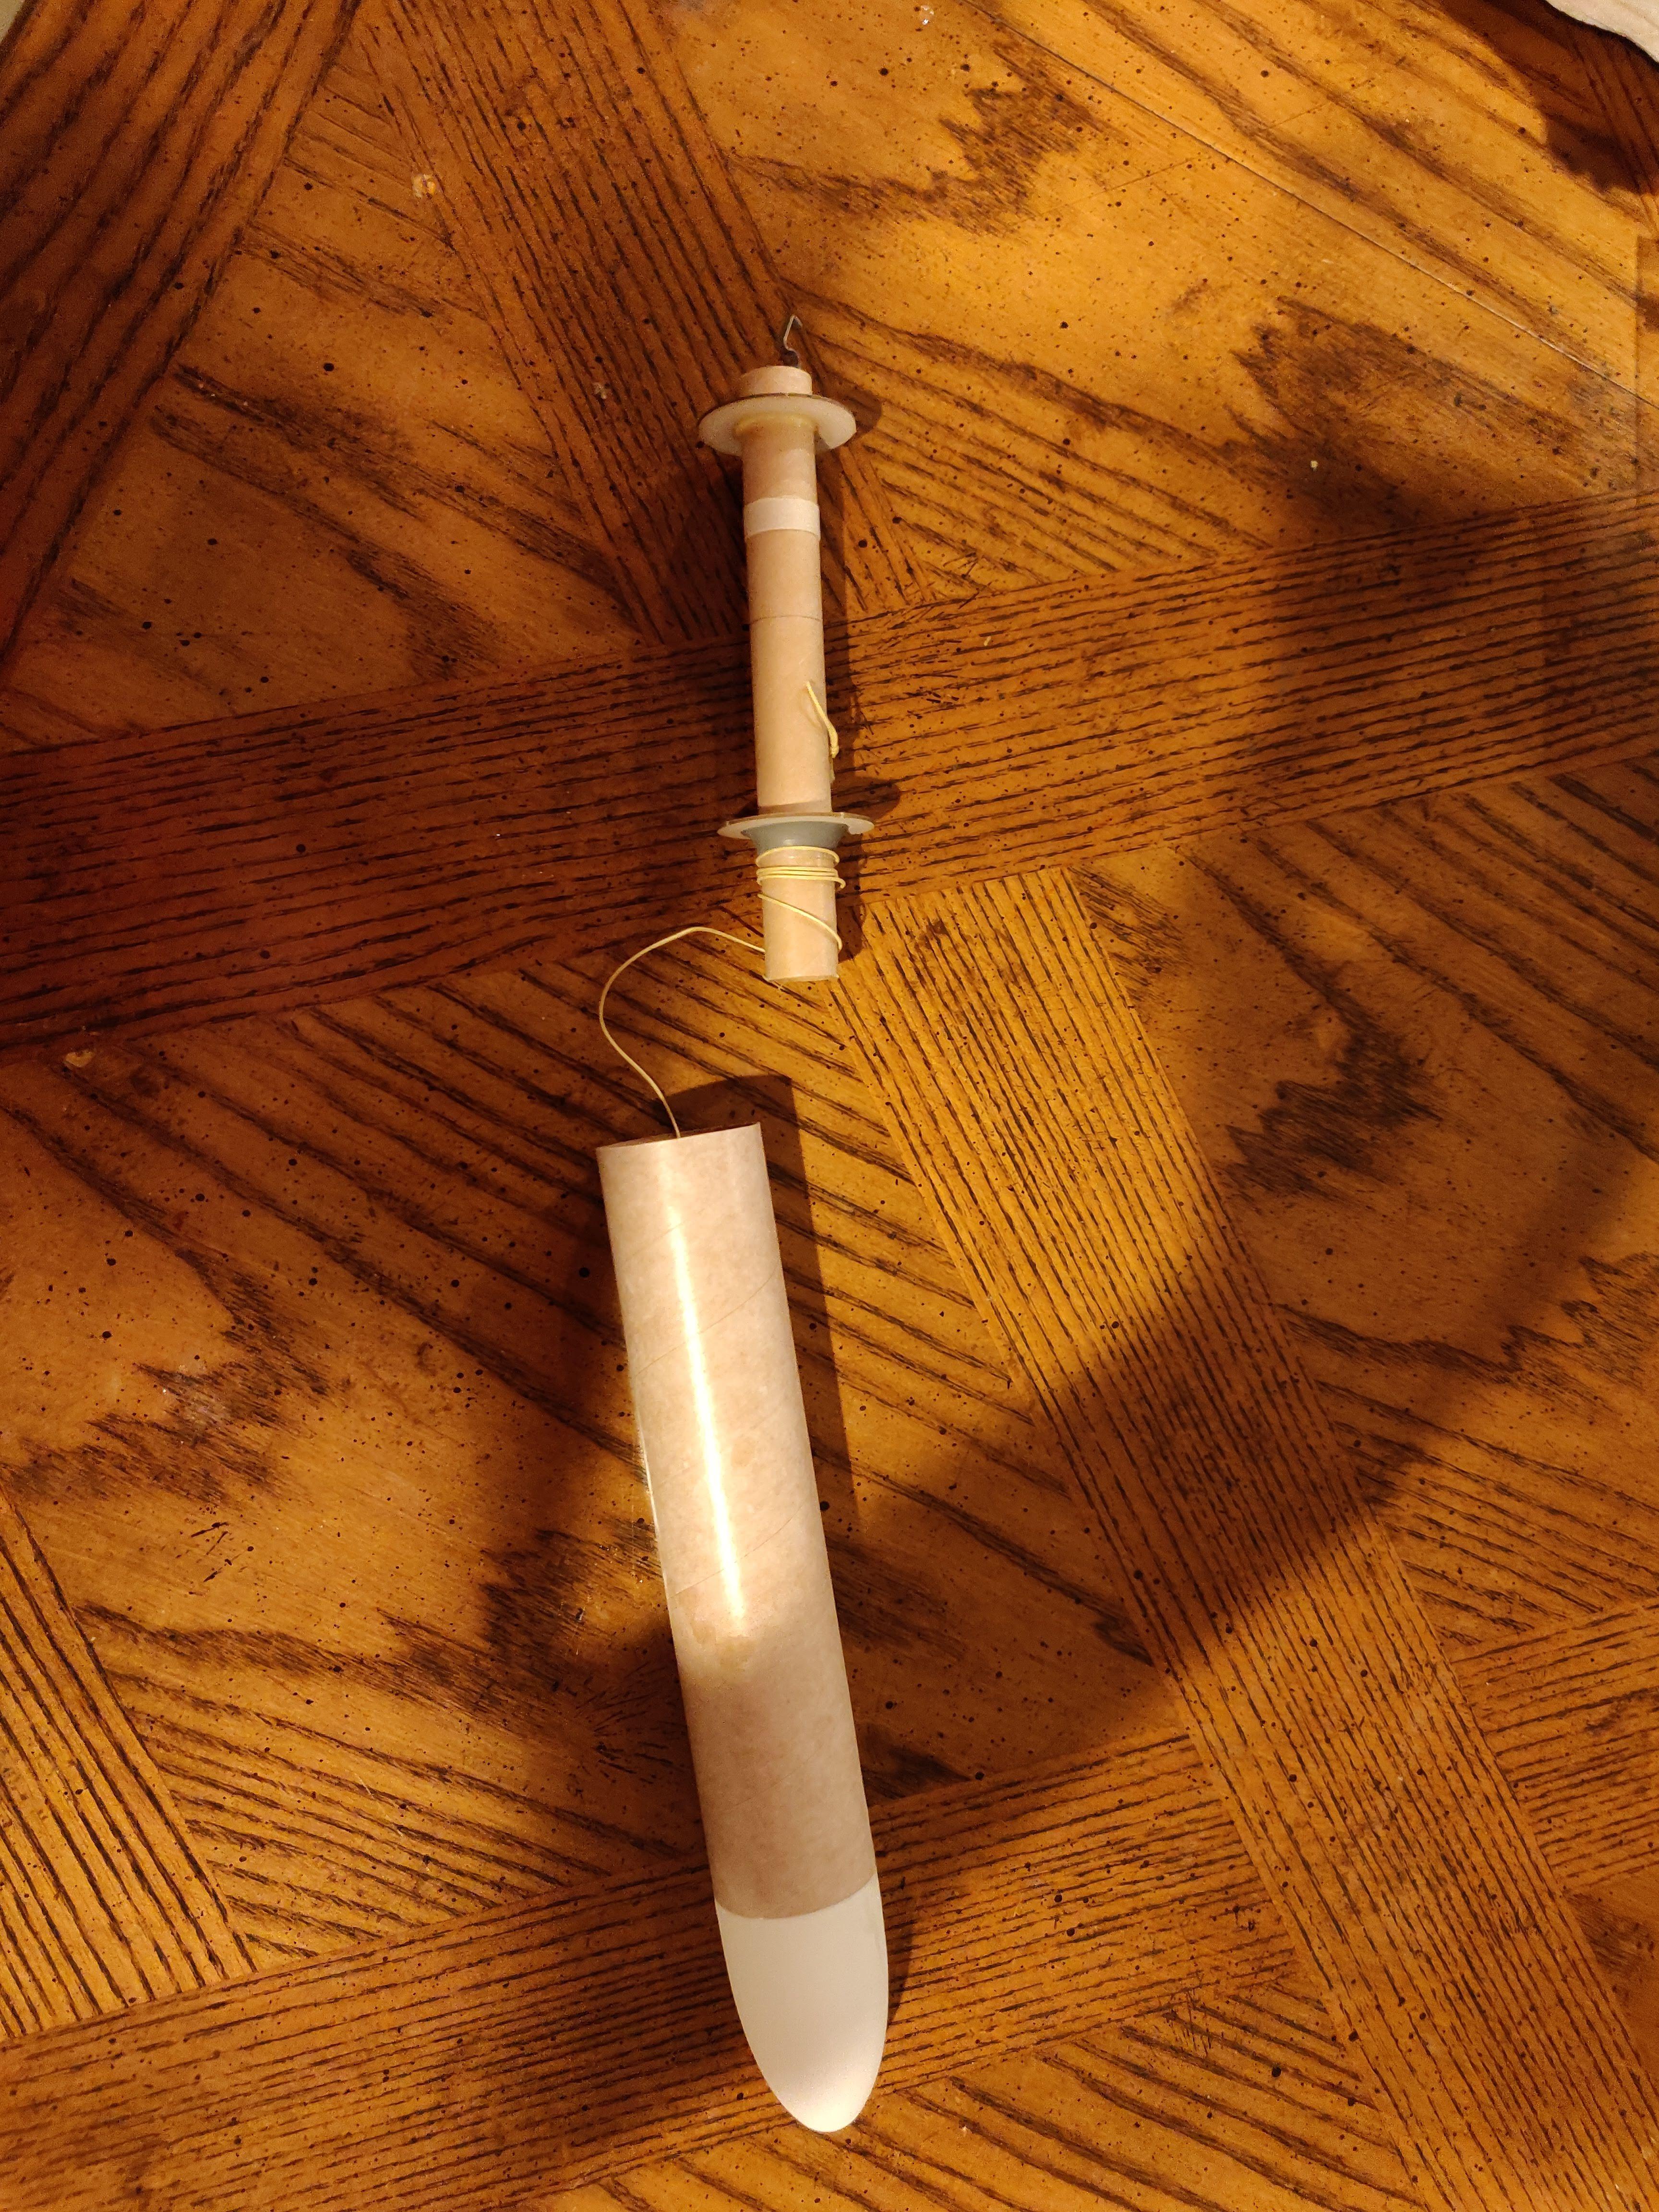
All that's left is fin attachment, and finishing! It's going to be a nice touch to have no seam at the nose cone to body tube junction.
I plan to do a static test before proceeding too much further. I'll post results of that along with the finished build in due time.
Ok ... so everyone's got (or has had) at least one member of the "Bertha Family". The Big Bertha and Baby Bertha are favorite smallish field flyers, and I've usually got one or the other, and sometimes both, in my fleet. My last Baby Bertha is on a nearby school roof, so I picked one up at a local shop recently.
I usually like to put some kind of "personal touch" on my kit builds, and thought I'd take a shot at modding this kit for rear ejection. I figured that with an 18mm motor inside the BT-60, that there'd be plenty of room to wrap the 'chute around the stuffer. I also hate having to use recovery wadding (really sucks when "oops, forgot the wadding" happens...), so usually take steps to make it unnecessary when I can. I'm a big fan of ejection baffles for "conventional" recovery deploys...
Peak of Flight issue #439 has an article on rear ejection that I used as thought fuel and hit the bench.
The only materials I needed that aren't already included in the kit were a length of kevlar shock cord, a couple of centering rings, a motor clip retention ring and a length of BT-20.
I tied off the shock cord to the nose cone, and cut off what looked like a sufficient length - I can always extend it later. I'll probably want to add a swivel anyway, and I don't have any at the moment.
I had considered just gluing the nose cone to the body tube and letting the stuffer-tube nest on the end of the inner cone, but I was concerned about what ejection gasses fired right at the nose cone might do to it (and the paint) over time.
I decided it'd be best to add a bulkhead, so I took a centering ring I had and glued a piece of cardstock over of the inner punch-out, and coated it in a light coat of 10-minute epoxy to harden it against the heat of the ejection charge.
I measured the length of the shoulder and "inner cone" of the nose cone, and used a piece of BT-60 coupler to get the bulkhead in the right place and nice and square, and glued it in place with some titebond. The end of the stuffer will be right up against it, and the nose cone supporting it from the other side, so I think it'll survive ejection forces just fine. (Does anybody think I should drill the sides of the stuffer?)
Now it was time to build up the motor pod. I cut a length of BT-20 to the same length as the distance from the bulkhead to the bottom of Bertha's body tube. I built this as you would have done for the "stock" body tube, with just a bit more separation on the centering rings to leave room to wrap the 'chute. I left the forward centering ring a bit aft to allow room to loosely coil the shock cord to avoid tangling during ejection.
The "Peak of Flight" article mentioned that the forward centering ring can take a bit of a beating, so I added a motor clip retention ring on the forward side, feeding the kevlar underneath, and through a small hole I punched in the centering ring. I soaked some thin CA underneath to hold it all in place.
I added a fillet of "Fix It" epoxy to the forward side, and a bit over the shock cord on the aft side to hold it all solidly in place. (Note the "blood knot" in the kevlar in the photo above, that should anchor the shock cord nicely in the putty when it hardens.) I left a loop on the end for recovery device attachment.
Here it is, ready for "stuffing". One nice thing is that if there's any hitches I discover about the motor pod design is that it'll be pretty easy to just get a new motor mount kit and build a new one pretty quickly (assuming the airframe survives...).
All that's left is fin attachment, and finishing! It's going to be a nice touch to have no seam at the nose cone to body tube junction.
I plan to do a static test before proceeding too much further. I'll post results of that along with the finished build in due time.
Last edited:
 )
)