What did you do rocket wise today?

The Rocketry Forum

Help Support The Rocketry Forum:

This site may earn a commission from merchant affiliate links, including eBay, Amazon, and others.
Finished squaring/truing the interstage coupler on my Nike-Apache and began priming some parts.
 
short-fin-designA.png

More playing around in CAD, trying work out if I can build this. The long fins on the RM10 were bugging me. Tried it out with the fins reduced by about 20%. It is more pleasing to my eye but I will need to do some experimentation with materials for numbers to feed into OpenRocket.

The Shapeoko has just enough cutting volume to mill molds for the airframe (a two part mold each for the fore and aft sections of the airframe), and I've got plenty of machinable wax. A quart of polyurea was delivered today. Hopefully I'll get a few hours in the shop this weekend or next, to see how easily it releases from the wax, and to measure its as-cured mass density.

19930084086-13b.png
 
Last edited:
I sanded the edges smooth on some 1/4" 12 ply Finnish birch fins to rebuild the booster on a rocket that managed to land on a farmer's plow blade......that plywood is tough stuff...
 
Got a mess of C11-5 and C11-3 motors from a flier who is done with LPR, in exchange for three G and two F composite motors I was never going to fly. We both came away from the deal feeling like we hadn't offered enough in trade.
C11.png
 
Started work on a T22 Assault Breaker, if not for UhClem I never would have known about this development of the Lance missle. Today so far has been turning the boattail and cutting fins, rings, airframes, and stuff. The airframe is BT80H from BMS, with a 29mm motor mount, due to the combination of relatively short length and the boattail it will need a fair amount of noseweight, I am also building it zipperless and dual deploy. It should be able to handle any CTI or AT 29mm motor currently made.

Edit: Added photos of assembled rocket, which I am calling the MGM-52X Lance Assault Breaker. The rocket uses a common bay design for all my BT80 based rockets. I created a drilling jig for the airframe so that each rocket could be drilled for push rivets in identical positions allowing a common bay to be moved between them. The rockets also can be flown as pop at the top recovery with the replacement of the AvBay with a coupler with laundry shelf and recovery anchor points which will allow the rockets to loose about 4ozs and fly on smaller motors if desired. The common bay approach has been used on all 5 of my recent BT80 and T300 based builds.

T22AssaultBreakerBT80H 01.jpg T22AssaultBreakerBT80H 02.jpg T22AssaultBreakerBT80H 03.jpg T22AssaultBreakerBT80H 04.jpg T22AssaultBreakerBT80H 05.jpg T22AssaultBreakerBT80H 06.jpg
 
Last edited:
Not much today but the postie brought this little eBay haul, should keep me going over the winter.
 

Attachments

  • 20181202_110536.jpg
    20181202_110536.jpg
    203.2 KB · Views: 100
It's fin beveling day for Mongoose 38. I considered several powered-sanding options, but decided to keep it simple. The fence sets the angle. The bar sander only has paper on the working end so the other end can slide on the fence without also sanding the fence. For small hard to hold parts, I prefer to hold the parts down and move the sander. This gives me more control and more leverage.

I'm still thinking on adjustable hold-down options but tape works pretty well for now. I rough sanded with 80 grit, then smoothed it with 120 grit. They'll get polished nice and shiny after a Jarvis-style resin wipe to fill in some surface pores.

rrcrfbC.jpg


41GrETV.jpg


tCtLYNF.jpg


xGEnqZo.jpg
 
Last edited:
I did a little bit of tinkering
1. Last time I launched my Estes Executioner on a D12 I forgot to put the spacer in there and burned the tail end of the motor mount tube. I cleaned it up and built up an outside extension so I could use a 24/40 in it.
2. I worked on a new motor mount for a very old rocket. This BT55 rocket was built for 18mm motors, back when the biggest motor Estes made was a B. We discovered FSI and they had a C motor but theirs were a bit bigger, maybe 20mm or 21mm. I cut out the 18mm mount, rolled a paper tube of the correct diameter for the FSI motors, and put it in. I still have the rocket but lost the original nose cone and broke off a fin. I glued on the fin and had since bought a replacement nose cone. I worked on a new 18mm mount to glue into the mount it has so I can launch it on 18mm C motors.
3. I have an unfinished Estes Big Daddy. I've read that the nose cone base causes problems with ejection so I chose to cut off the slanted portion of the cone and add an internal bulkhead with look for shock cord. I but off the nose cone and cut out a plywood disk. I'll glue in the disk when I get another block of time to work on it.
 
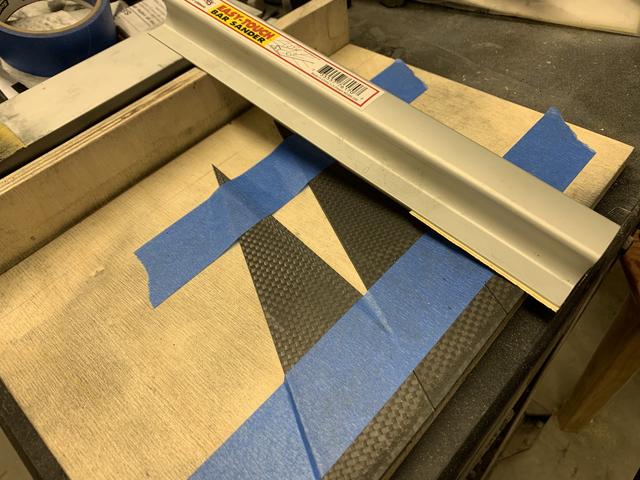
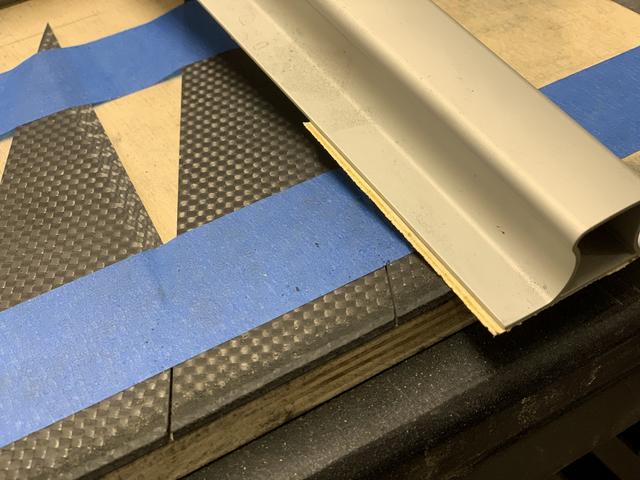
Double sided removable carpet tape works really well for shop jig hold downs (woodworking for the most part), I use it on my varous sanding jigs and "finger saver" extensions for small parts.

What I did today rocketry wise was assemble a Eggtimer Quantum and a Eggtimer Proton, then sorted my "extra" parts from all the kits I have assembled over the last couple of years from Eggtimer into separate bags, its amazing how often they come in handy for Egg builds.
 
Glued a fin that had detached intact from my Apogee Slo Mo (which is the only rocket I've touched in too long a time). Structural fillets later today and cosmetic fillets after that. I'd rather be working on something new or progressing on my L2 build, but it's better than nothing.
 
Had to rip out faulty shock cord mounts from my minimum diameter rocket... *twice*...
 
Last night: Repair and replace

Sprayed the replacement nose cone (after primer and sanding) of the Madcow (Rocket Warehouse) Mouse 38. Original nose was lost with the chute when the shock cord snapped. Replaced with a stronger shock cord.
IMG_20181203_041155.jpg

Glued the resized landing legs for the Dr. Zooch Falcon Heavy. Original template in the kit was WAY too big. Legs were overlapping badly.
MUCH BETTER NOW!
IMG_20181203_052915.jpg


Then relaxed with an E2X kit from the build pile. Fast 20 minute build.
IMG_20181203_042312.jpg
Laters!
 
Back
Top