Level 3 Build "The Grand Optimist" Ultimate Wildman

The Rocketry Forum

Help Support The Rocketry Forum:

This site may earn a commission from merchant affiliate links, including eBay, Amazon, and others.
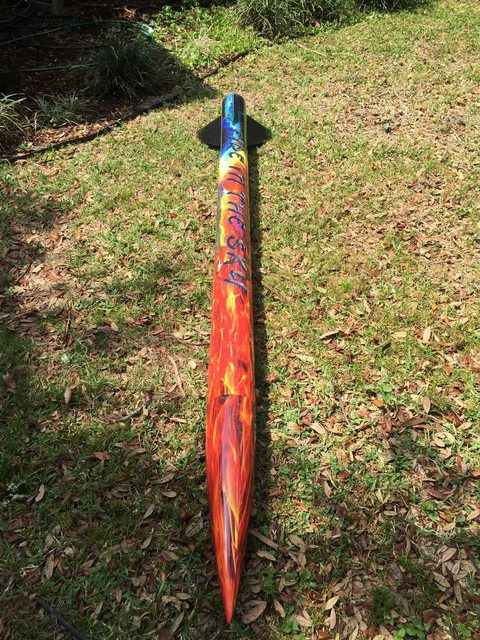
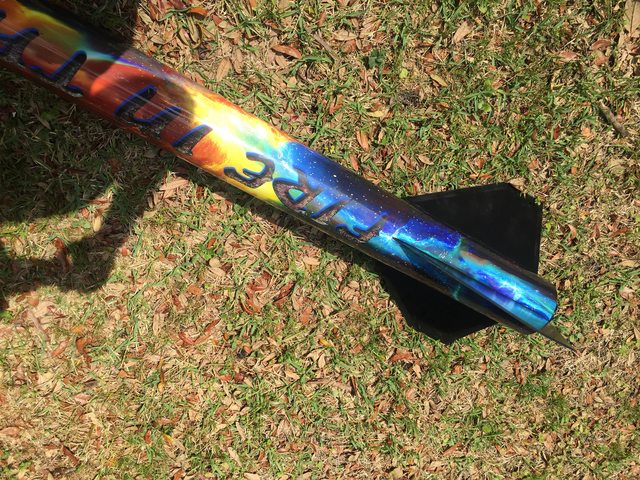
Planning on being there to fly rockets and take a ton of pics but no definite plans yet. You better be like Robert and get some car paint with stickershock on that rocket.

I actually enjoy doing the prep and painting myself, although this thing is a beast. Besides, for the price of a body shop paint job I can buy another M motor :headbang:
 
The wrap on my Ultimate cost more than my first M motor, but not that much more. :)
 
Yep it was a stickershock masterpiece:

lcu1mHHl.jpg

jyMn4Kgl.jpg
 
Marking and drilling the air frame and installing motor mount. Only top 2 rings will be epoxied at this point. Rear centering ring will be temporarily put in place for alignment of tube and then removed after epoxy cures. 1/4" hole in the 2nd CR is for epoxy to be applied between the 2 upper rings.

20160516_144741.jpg

20160517_102748.jpg

20160517_123824.jpg
 
On to the boring part. Nothing really unique about mounting the fins, I got the template at payloadbay.com and cut it from foam board. Worked great as usual and the fin measurements were dead on. I had a short debate on whether to foam the fin can or not because with 6 filets per fin the extra strength wasn't really a concern but I like the idea of locking everything together especially with the long run of all-thread between the CR's.

20160517_133427.jpg

20160517_134209.jpg

20160517_145717.jpg

20160517_193836.jpg

20160517_205758.jpg

20160518_071718.jpg

20160518_131237.jpg
 
Great progress. The ability to think about rail buttons after the fact is why I like those big wood CRs so much!
 
Great progress. The ability to think about rail buttons after the fact is why I like those big wood CRs so much!

That was a good catch on the rail buttons James, the 1/4 20 T nut is already installed, epoxied and foamed (forgot to take a pic) about 2" high on the inside air frame. I thought about using the CR but I like this method of having a solid backing better on heavy rockets. I also just finished epoxying and bolting down the rear CR so there is no turning back now :)

20160520_085800.jpg
 
Last edited:
Nice job with the foam and fillets I could never do a job like that on my fillets.
Wow poker already got a 2nd page after only a few days you're getting pretty pop here;)
 
Nice job on the foam! I used to argue with Darrell Mobley about the value of foam. I'm in favor. Not much strength in tension but quite a bit in compression. The large amount of surface area that gets wetted by the foam makes a significant difference in the ability of a rocket to withstand bending forces on the fin fillets.
 
I'm on to the sled layout and looking for some advice. It is mostly done with the exception of some wire routing and switch mounting.

First plan to was to mount 2 schurter switches to the sled and access them with a small screwdriver thru-the-wall which I have done many times. However the location of the all-thread is so close to the edge of the sled it won't allow this as it interferes with the rear of the switch. Okay, no problem. I'll just replace the schurter switches with the 2 of the flat Missile Works screw switches in the same location. While they do line up perfectly with the vent holes on either side I'm just not loving it. Another option is to mount the schurters in the air frame below the ports, that involves 1/2" holes through the air frame, not loving that either. I'm leaning toward the Missile Works on the sled but I am open to any other ideas.

20160520_120823.jpg

20160520_090101.jpg

20160520_120929.jpg

20160520_090035.jpg
 
Nice job on the foam! I used to argue with Darrell Mobley about the value of foam. I'm in favor. Not much strength in tension but quite a bit in compression. The large amount of surface area that gets wetted by the foam makes a significant difference in the ability of a rocket to withstand bending forces on the fin fillets.

I agree with you on the use of foam. It may not make a significant difference in strength but every little bit helps. The other argument has been the weight, although in a rocket this large I feel that the weight is inconsequential.
 
I used schurters mounted in the switch band, through the coupler and then just wired them on 18-24" of wire with an easy to connect/disconnect plug that I zip tie together when I'm packing up.
 
Looks awesome so far.

I love the M1350. The flight was lower performance than others I had in that range, and I even have hardware for that size and larger, but something about its grand show makes me want another one regardless.
 
On to the boring part. Nothing really unique about mounting the fins, I got the template at payloadbay.com and cut it from foam board. Worked great as usual and the fin measurements were dead on. I had a short debate on whether to foam the fin can or not because with 6 filets per fin the extra strength wasn't really a concern but I like the idea of locking everything together especially with the long run of all-thread between the CR's.

I'm not a big fan of foam filling the fincan on a rocket this large. Adds a bunch of weight, and the large amount of vibration over time tends to powder the foam. Great build, though.
 
I used schurters mounted in the switch band, through the coupler and then just wired them on 18-24" of wire with an easy to connect/disconnect plug that I zip tie together when I'm packing up.

Well this is exactly what I ended up doing James. All of the interior switch options meant some type of modifications to the sled or reworking the layout. The Schurters mounted to the switch band turned out great (pics are coming) and there was plenty of room. I usually use JST connectors which I secure with tape before launch but I found some wires from Dog House that are very similar but have locking tabs on the connector. I am replacing all of the wiring in the AV bay with these.
 
Last edited:
A quick late night update, I got a few small things done today. This is really coming together quickly now and I should be done with construction by next weekend.

I finished off the motor mount with a final application of rocketpoxy to the top CR, done with that.

Installed the (3) 8-32 pem nuts in the av coupler for securing to the payload section.

Decided on Drilling (2) 1/2" holes in the switch band for mounting the schurter switches on the outside of the airframe. Soldered the switches.

That's all for today.

20160521_124900.jpg

20160520_120553.jpg

20160520_120700.jpg

20160521_124817.jpg

20160521_165241.jpg
 
A quick late night update, I got a few small things done today. This is really coming together quickly now and I should be done with construction by next weekend.

I finished off the motor mount with a final application of rocketpoxy to the top CR, done with that.

Installed the (3) 8-32 pem nuts in the av coupler for securing to the payload section.

Decided on Drilling (2) 1/2" holes in the switch band for mounting the schurter switches on the outside of the airframe. Soldered the switches.

That's all for today.

I mounted my rotary switch exactly like you did in this build on my L2, but it's not fiberglass. I'll be building a FG one soon. What did you use to drill the 1/2" hole in the switch band? A regular drill bit?
 
I mounted my rotary switch exactly like you did in this build on my L2, but it's not fiberglass. I'll be building a FG one soon. What did you use to drill the 1/2" hole in the switch band? A regular drill bit?

Yes I used a regular drill bit. Be sure to drill a 1/8" pilot hole, that big bit tends to walk a little if you don't. Since I don't have a drill press I clamped down the coupler to my bench to get a good two hand grip on the drill.
I also cut a piece of 2x4 to the inside diameter of the airframe for a backing, otherwise the FG tends to splinter on the inside as the bit is coming through. You can see though the FG to position the block exactly where you need it. I do this on all of the holes.

20160522_081543.jpg
 
So I have some time on my hands and decided to get back to build only to realize...I'M DONE!

I still need to wire the electronics sled but other than that the main build is complete. I plan on doing ejection charge ground tests before I prime and paint and make it pretty but that brings up another problem. How do I seal off a 4" x 24" motor tube when I don't have any 98mm hardware? Hmmm, let me work on this one.

The final dry weight came out to be exactly 30 pounds according to my bathroom scale. I'm light about 4 pounds from my sim in OR but I do need to add epoxy and foam which will make it very close. I used about 2 1/2 pounds of rocketpoxy on the filets and centering rings and another 16 ounces of foam in the fin can. It's still at 1.49 cal in the sim fully loaded with the motor installed. Total weight at launch will be 46 pounds.

This is one big boy, thank goodness for high ceilings :)

20160522_121517.jpg

20160522_123109.jpg
 
��������(supposed to be the clapping hand emoji) very nice job on the build good luck with the finishing touches. Still that's pretty light for a rocket that size. Time for me to start planning my summer project for Airfest:)
 
30 lbs is light! My UW is shorter than yours and the pad weight (less motor) was about 32 lbs including the vinyl wrap, electronics, LIPO, and 10' chute.

I don't have any 98 hardware either; I crammed a bunch of rags and socks into the top end of the MMT and stuck a 75mm motor with adapters into the bottom, just anything I could do to take the space up. You could also tape a bulkhead over the top of the MMT, or stick a 4" nosecone in there or basically anything to occupy the space and resist gas expansion for a second.
 
30 lbs is light! My UW is shorter than yours and the pad weight (less motor) was about 32 lbs including the vinyl wrap, electronics, LIPO, and 10' chute.

The 30 lbs is completely empty. Fully loaded with recovery, electronics, and hardware it is right at 35.5 lbs. How long is your UW? I cut 12" off of the 60" booster before I started so the total length is only 11'. 48" booster, 48" payload, 6" switchband, and 30" NC.

I don't have any 98 hardware either; I crammed a bunch of rags and socks into the top end of the MMT and stuck a 75mm motor with adapters into the bottom, just anything I could do to take the space up. You could also tape a bulkhead over the top of the MMT, or stick a 4" nosecone in there or basically anything to occupy the space and resist gas expansion for a second.

Thanks, those are all good ideas. I found an old 4" payload section with coupler that I cut down a bit, fits perfect into the top of the motor tube.

Looks like rain today so i'll start the ground testing asap.

20160523_082118.jpg
 
So I have some time on my hands and decided to get back to build only to realize...I'M DONE!

I still need to wire the electronics sled but other than that the main build is complete. I plan on doing ejection charge ground tests before I prime and paint and make it pretty but that brings up another problem. How do I seal off a 4" x 24" motor tube when I don't have any 98mm hardware? Hmmm, let me work on this one.

The final dry weight came out to be exactly 30 pounds according to my bathroom scale. I'm light about 4 pounds from my sim in OR but I do need to add epoxy and foam which will make it very close. I used about 2 1/2 pounds of rocketpoxy on the filets and centering rings and another 16 ounces of foam in the fin can. It's still at 1.49 cal in the sim fully loaded with the motor installed. Total weight at launch will be 46 pounds.

This is one big boy, thank goodness for high ceilings :)

Wow, you're lucky to have such a high ceiling! :wink:
 
The 30 lbs is completely empty. Fully loaded with recovery, electronics, and hardware it is right at 35.5 lbs. How long is your UW? I cut 12" off of the 60" booster before I started so the total length is only 11'. 48" booster, 48" payload, 6" switchband, and 30" NC.


Thanks, those are all good ideas. I found an old 4" payload section with coupler that I cut down a bit, fits perfect into the top of the motor tube.

Looks like rain today so i'll start the ground testing asap.

Ah I see. Mine is stock (for a new one) at 60" booster and 30" payload, or just a few inches shorter than yours. I didn't foam so you may end up a tad heavier than me. What are you using for charge sizes?
 
Back
Top