Some Things I've Learned Recently, Paper Parts Wise

The Rocketry Forum

Help Support The Rocketry Forum:

This site may earn a commission from merchant affiliate links, including eBay, Amazon, and others.

TopRamen

SA-5
Joined
Aug 9, 2013
Messages
9,955
Reaction score
112
A recent project has me making a lot of paper parts from 110# Cardstock, which I buy at Walmart because it is only $4.95 or something like that for 100 sheets.
The paper, as it comes from the package, is treated with a surface finish which is likely great under most circumstances, like when you are not making structural parts out of it. For the purposes of this thread, we will focus on this particular brand and weight of cardstock, as I use this exclusively. Yes, there are other specialty papers available, that may not require the "Prep" that I am about to detail, but those will not get discussed here as they are not something you just go pick up at Walmart for $5. The stuff I'm using and have been using is Georgia Pacific brand 110# Cardstock.

Cardstock GP.jpg

A lot of kits come with some paper parts, namely the TLP kits with their paper hats and tail cones, but on those kits, I simply make copies of the templates and then file them away, making the actual pieces from this cardstock.
Recently, there has been a renewed interest here in paper parts, so hopefully this thread is timely, and someone will find the information contained therein helpful to some degree.
Some of this info, like making tabs to eliminate seams has been discussed at length before, but the issue I hope to focus on, proper saturation of adhesive into the paper, receives little mention if any.
To address this issue, I have begun preparing the cardstock in a different manner before cutting the shapes out, whether they be a transition or cone or whatever shape.
As illustrated below, after the print is made, I use 150 grit sand paper on my T-Bar sander to gently scuff the surface, using a circular motion to apply a nearly invisible degree of scoring/scuffing to the surface.
The first pic' shows that you can hardly tell it was sanded. The idea is to just open up the pores, not to wear through the paper, or even the ink that shows your part.

Paper Transitions #1 Pics 2002-12-31 014.jpgPaper Transitions #1 Pics 2002-12-31 001.jpgPaper Transitions #1 Pics 2002-12-31 002.jpg
 
Last edited:
In the past, I would just print the part, cut the part, then hold it over some steam to soften it slightly before shaping it and gluing my tab on.
Then, I'de assemble it, and soak it with the super thin CA to add rigidity.
I would get to that point, and then notice that the CA did not want to soak in in a uniform fashion, leaving "Bright Spots", runs, and patterns where I had better saturation in some spots than others. Applying more CA would only waste CA, as the spots were not missed in the initial application, rather they simply failed to absorb the CA.
You can see in these two pics' what I mean by this:

Paper Transitions #1 Pics 2002-12-31 003.jpgPaper Transitions #1 Pics 2002-12-31 013.jpg

The CA, if it penetrates the paper properly, should render the paper slightly translucent, as is visible in the second photo.
I actually sanded that cone, but not until it was already shaped, meaning I missed a couple spots.
 
Last edited:
It has been my experience in the past, that sometimes, most of the time actually, that the parts need a slight "Fine Tuning" once they are made, and this typically involves a few strokes of sanding here and there.
Having the paper thoroughly and uniformly saturated with the CA aids greatly in this step, and eliminates the risk of hitting "Soft Spots", where the CA merely formed a shell over the surface finish of the cardstock.

Having the pores of the paper be so receptive to absorption also means that I don't seem to waste any CA, that other wise would run and drip off onto whatever protected surface I have prepared to work on. The CA goes from the bottle, into the paper, then I stop, and smooth it in with my gloved finger.
Working with CA, I have found vinyl gloves to work well and safely. I ONLY use nice nitrile ones for epoxies and the like, but I was recently given a box of the vinyl exam gloves, and had to find uses for them. They tend to not stick as readily as the nitrile does, and as long as I exercise care not to tear them, I do not get any CA on my skin.
 
Last edited:
Another technique that I have been employing now is to poke a series of tiny perforations into my joining tab.
For joining the two ends of a transition or cone, I don't want an immediate bond set up like I get with the super thin, nor is it practical to use something so runny for precision application.
For this step I have been using the plain jane "Crazy Glue", commonly available anywhere. It allows me a couple seconds of working time, and thanks to the perforations, stays where I put it reliably, meaning I have more control over this operation. Sometimes without the perforations, the tab slips slightly.

Paper Transitions #1 Pics 2002-12-31 017.JPGPaper Transitions #1 Pics 2002-12-31 023.jpg


After this step, I like to burnish down the edges with the blunt end of my #11 X-acto handle.

Paper Transitions #1 Pics 2002-12-31 021.jpg

After that step, the standard practice of gently creasing the tab from the inside, on a scissor edge is done, and that makes for a join that is uniform as can be with the rest of the shape.

Paper Transitions #1 Pics 2002-12-31 025.jpg
 
Wow, you are the Paper Master amongst us grasshoppers.

You are too kind, and thank you, but I'm way too humble to harbor a sense of mastery of any of this.:blush:

I'm making a lot of paper parts lately, so I'm getting a lot of practice.:)

I just hope that some of my suggestions or methods can help other folks that want to make paper parts, as they are quite enjoyable once you get the hang of them.
 
Thanks for posting this, it's definitely a little different than other techniques I've seen. And it didn't involve glassing. :)

I have yet to do a single paper transition, but I'm planning on building an Acme Spitfire come wintertime, so that should initiate me into the club.

Oh, and I'm enjoying your regularly-updated avatars as well. :)


I'm glad you are enjoying it.

Don't forget, you can get started playing with paper transitions anytime by using Payloadbay.com's transition tool.
My scanner/printer is my most important tool in my building tool arsenal lately.

Keep in mind, one of the first things you should do when you get a kit that includes paper parts is scan them and/or make copies!!!
Then you can afford to mess a few up before settling on the one you use for your actual model.

I've become pretty proficient at making these, but what you don't see are all the ones I make that are not worth sharing pictures of.

It is all too easy to screw up or tear a paper part, or even just make an errant cut with the hobby knife when cutting them out that renders them unusable.
 
Last edited:
Very helpful Top!

I imagine with all the Apollo 11's that are going to soon hit the market, that there will be a lot of people looking for help with the paper parts (I know that my first go at one could have had better results).

+1 on copying paper parts.

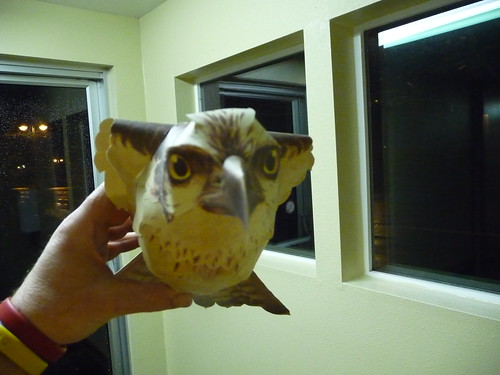
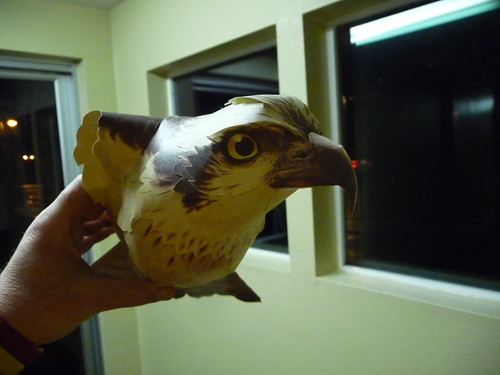
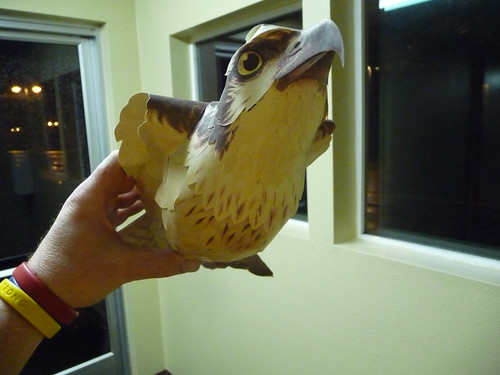
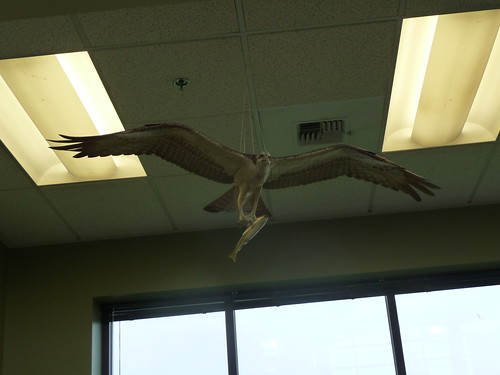
It's cheap insurance. I also make paper bird models, and I rapidly learned that a copy of the face to practice on resulted in a much better model. Sometimes, I didn't need to use the actual part (such as the osprey seen below) thus I have a spare in the event that it should ever somehow get damaged.


(The model does have a poseable head)
 
Last edited:
It has been my experience in the past, that sometimes, most of the time actually, that the parts need a slight "Fine Tuning" once they are made, and this typically involves a few strokes of sanding here and there.
Having the paper thoroughly and uniformly saturated with the CA aids greatly in this step, and eliminates the risk of hitting "Soft Spots", where the CA merely formed a shell over the surface finish of the cardstock.

Having the pores of the paper be so receptive to absorption also means that I don't seem to waste any CA, that other wise would run and drip off onto whatever protected surface I have prepared to work on. The CA goes from the bottle, into the paper, then I stop, and smooth it in with my gloved finger.
Working with CA, I have found vinyl gloves to work well and safely. I ONLY use nice nitrile ones for epoxies and the like, but I was recently given a box of the vinyl exam gloves, and had to find uses for them. They tend to not stick as readily as the nitrile does, and as long as I exercise care not to tear them, I do not get any CA on my skin.

Wasn't long ago, I got wised up about using CA on paper shrouds too. I think my 110# cardstock is a bit different than yours, but I have seen some areas that looked splotchy from poor absorption. Now, some ppl may say my CA application method can or could contaminate the bottle because I use Qtips dipped and brushed on the paper. It does create an even layer of glue. I'm not certain if it really matters or not, that some areas take more CA than others, and I usually don't have runs because I swab it on, because I get a pretty strong shroud all the way around. And I agree, there's always some sanding to do. Especially around the cut areas where tranny meets the tube.
 
Wasn't long ago, I got wised up about using CA on paper shrouds too. I think my 110# cardstock is a bit different than yours, but I have seen some areas that looked splotchy from poor absorption. Now, some ppl may say my CA application method can or could contaminate the bottle because I use Qtips dipped and brushed on the paper. It does create an even layer of glue. I'm not certain if it really matters or not, that some areas take more CA than others, and I usually don't have runs because I swab it on, because I get a pretty strong shroud all the way around. And I agree, there's always some sanding to do. Especially around the cut areas where tranny meets the tube.


I've used Q-tips, but then I need to use a little cup to hold the CA, and I felt it was wasteful.

I see your point about the contamination, and will keep an eye out for that. I had not even considered it before honestly, but will definitely keep my eye open to the possibility. Thanks for the heads up!

I blow the paper sanding dust off of the paper outside, as I'm sure you don't benefit by atomizing it in your own atmosphere.

K', those Bird Models are AWESOME!!!!!
 
Last edited:
K', those Bird Models are AWESOME!!!!!

Thanks!

The sole U.S. distributor of them is Northwest Nature Shop, in Ashland, Oregon (my home town). I discovered them when I was in high school with the owner's son. I made several models for them during that period, but I doubt that they have survived the almost 30 years that it's been since then (though several of the ones I bought from them then have survived in my collection). That Osprey is nearly 20 years old now, and on indefinite loan to the National Fish and Wildlife Service's Tualatin River National Wildlife Refuge's Wildlife Center, located just outside of Sherwood, Oregon.
 
Another tip I wanted to share but forgot to mention is that parchment paper, which has so many uses, is also great for setting your parts on while you treat them or setting them on to dry afterwards.
The important thing to keep in mind when using it however, is that any CA that drips onto it or otherwise is present on it's surface, will not absorb into it, and will remain wet, so while still wearing some kind of skin protection, you should blot up any unused CA puddles on it's surface before you take your attention away from the work.
You don't want to take any chances, especially if you have pets or children around.
I have six cats and a dog, so I have to be meticulous with my materials handling practices and clean up. My Son is 15, and I can only wish he'd hang out near my workbench.:wink: The cats however, you never know where they might decide to jump onto.
I try to do all my CA work out on the porch, and set things in a cupboard to dry if necessary, but doing tiny things like the tabs that only require a couple drips I sometimes do at the bench with a small fan going to blow the fumes away.

Either way, safety first, in case I have not mentioned it yet.:)
 
This morning I realized that I'll still need the Q-tip brush on method for some things, namely coating the inside of MMTs.
Can't have any drips solidifying in there and requiring sanding/removal to be able to accommodate the motor.

But if they do happen, a slightly undersized wooden dowel, double sided tape and sand paper will clean them up nicely.
 
Last edited:
Another tip I wanted to share but forgot to mention is that parchment paper, which has so many uses, is also great for setting your parts on while you treat them or setting them on to dry afterwards.

Another note of caution is that most cooking-type parchment paper is treated with silicone, and can transfer onto whatever you set on it. Nothing will stick to that area after that, requiring you to sand it down. Just ask how I know, having used it as a release membrane for marquetry...
 
Card stock is OK but I prefer Bristol Board. Doesn't have the problems noted above.
 
Card stock is OK but I prefer Bristol Board. Doesn't have the problems noted above.

I had not known about Bristol Board til' now, so I researched it quick and am interested in trying it.

Thanks for the heads up!
 
Update: The Bristol Board I got does not soak up CA very well at all, even if you prepare it with sandpaper, so until I can get some different brands of Bristol Board to try, I'm not sold on it for making parts.
 
Update: The Bristol Board I got does not soak up CA very well at all, even if you prepare it with sandpaper, so until I can get some different brands of Bristol Board to try, I'm not sold on it for making parts.

Hmmm, that's interesting, thanks. What brand Bristol Board and what brand of CA did you try? I mostly used yellow glue, don't remember any CA issues. And it seemed to take primer and paint better than cardstock. Well, do what works for you!
 
Hmmm, that's interesting, thanks. What brand Bristol Board and what brand of CA did you try? I mostly used yellow glue, don't remember any CA issues. And it seemed to take primer and paint better than cardstock. Well, do what works for you!

I got this one. Bienfang 146#. I used it to make a Fin Guide Jig for a 13mm model, but ended up gluing a piece of the 110# to the back of it to make it more plastic like.

Caliper 2002-12-31 005.jpg
 
The Bristol Board resists absorbing CA, even when scuffed up, yet the solvents in Bob Smith 20 minute Epoxy make it friendly and translucent.
Perhaps this will be the paper I use for the booster exhuast nozzles????
More to follow after parts making...
 
The Bristol Board resists absorbing CA, even when scuffed up, yet the solvents in Bob Smith 20 minute Epoxy make it friendly and translucent.
Perhaps this will be the paper I use for the booster exhuast nozzles????
More to follow after parts making...

Sounds like a perfect candidate for wood hardener! :D
 
Sounds like a perfect candidate for wood hardener! :D

I can't wait to get my hands on the Wood Hardener!!! I'm yearning for it!
I even added a new set or respirator cartridges to my ACE Hardware shopping list, since I'll need the 1/2 Gallon Sprayer.
Safety first! That's a lot of volatile solvents to play with, but it's nice enough outside lately to let the chemistry begin!!!
In a safe fashion of course.:wink:
Pets and Kids have to stay inside for stuff like this.
 
Last edited:
Back
Top