Build Thread: 307% Upscaled Estes Space Station Aquarius

The Rocketry Forum

Help Support The Rocketry Forum:

This site may earn a commission from merchant affiliate links, including eBay, Amazon, and others.

Fore Check

Well-Known Member
Joined
Sep 24, 2010
Messages
4,263
Reaction score
9
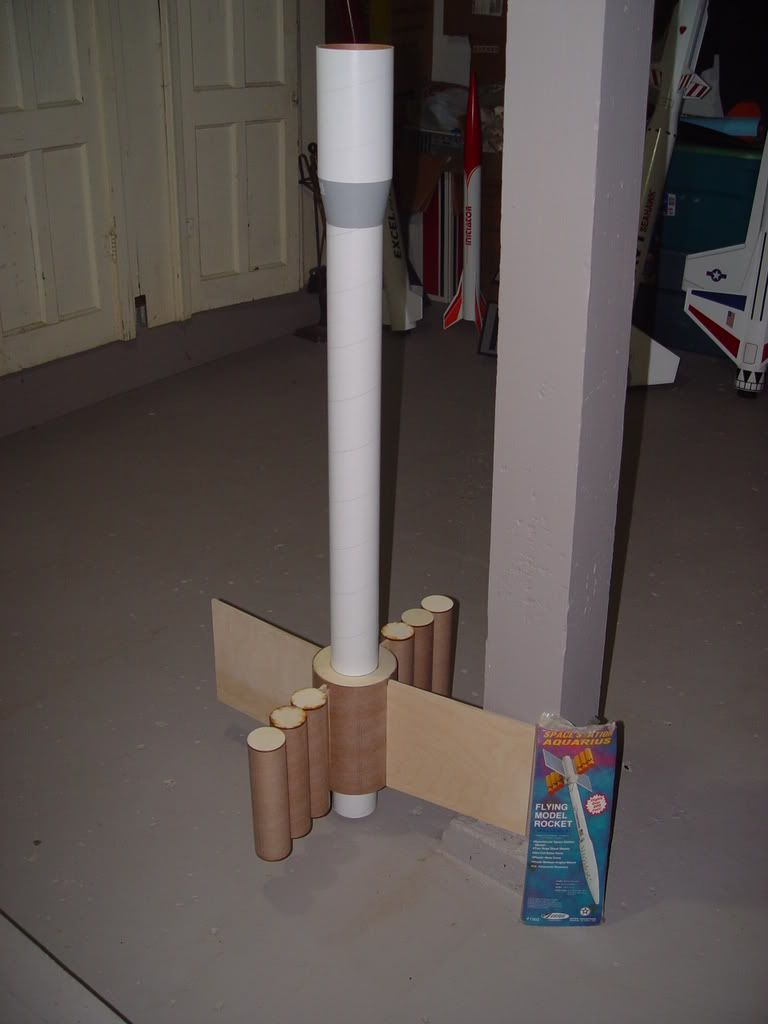
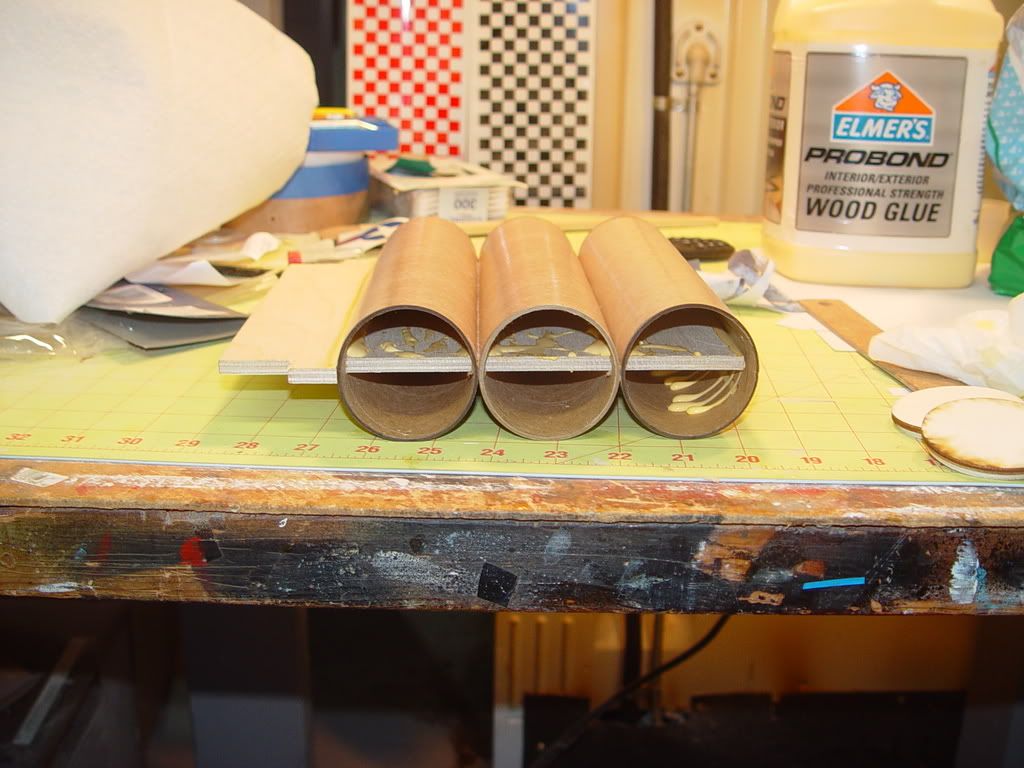
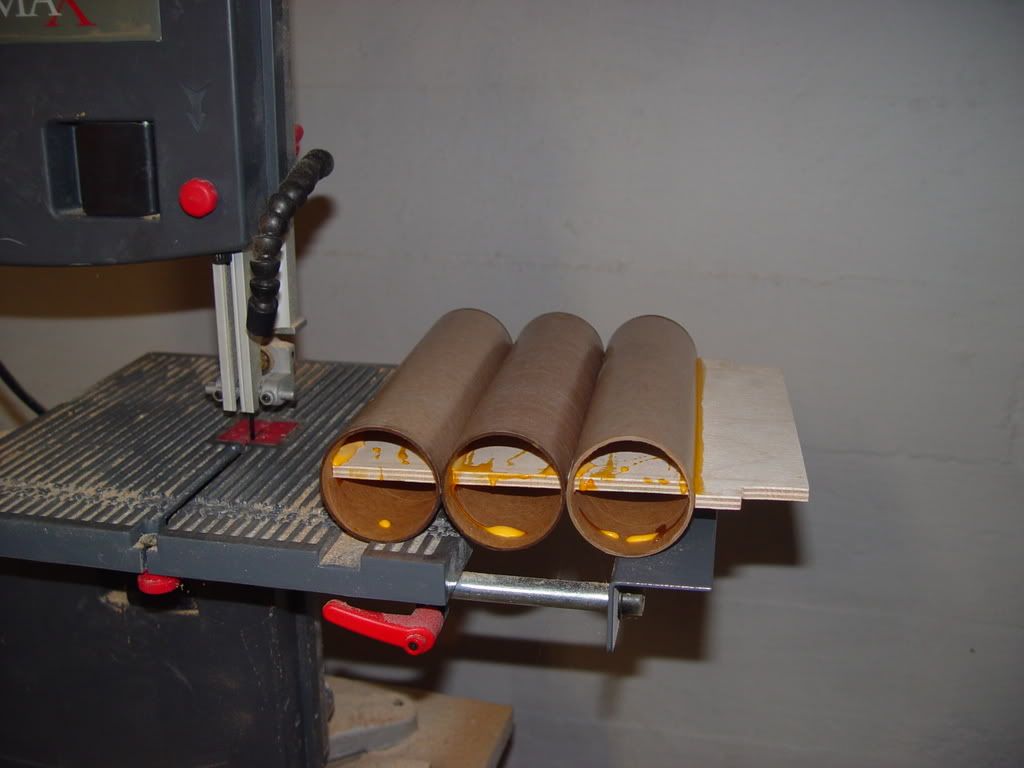
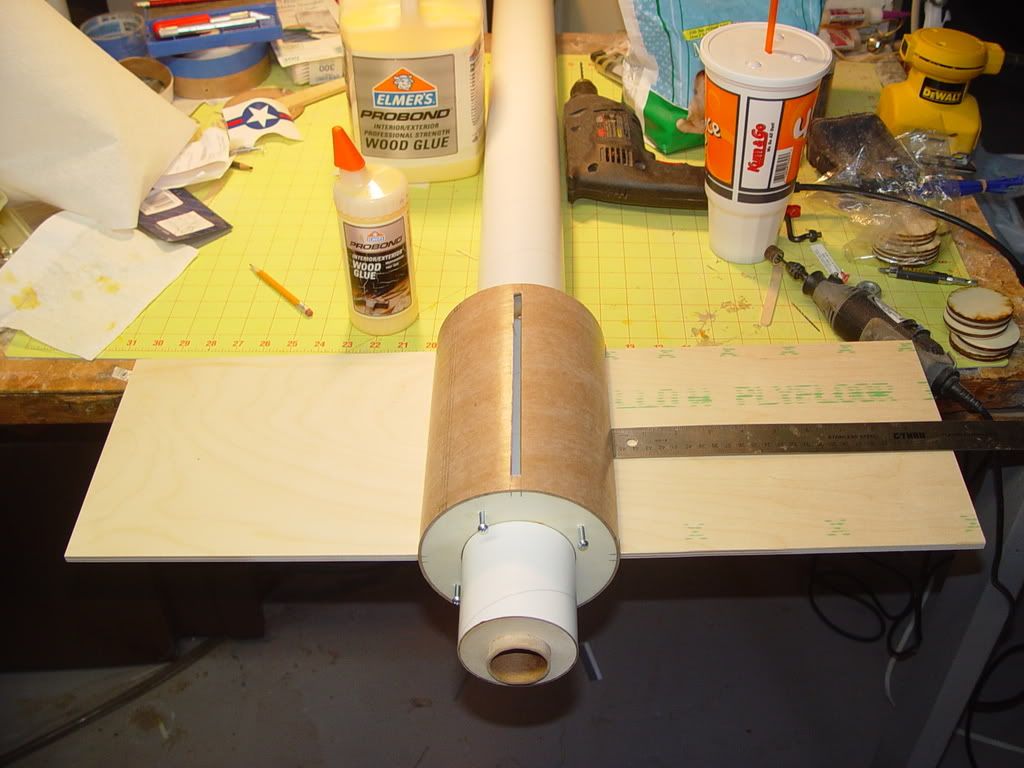
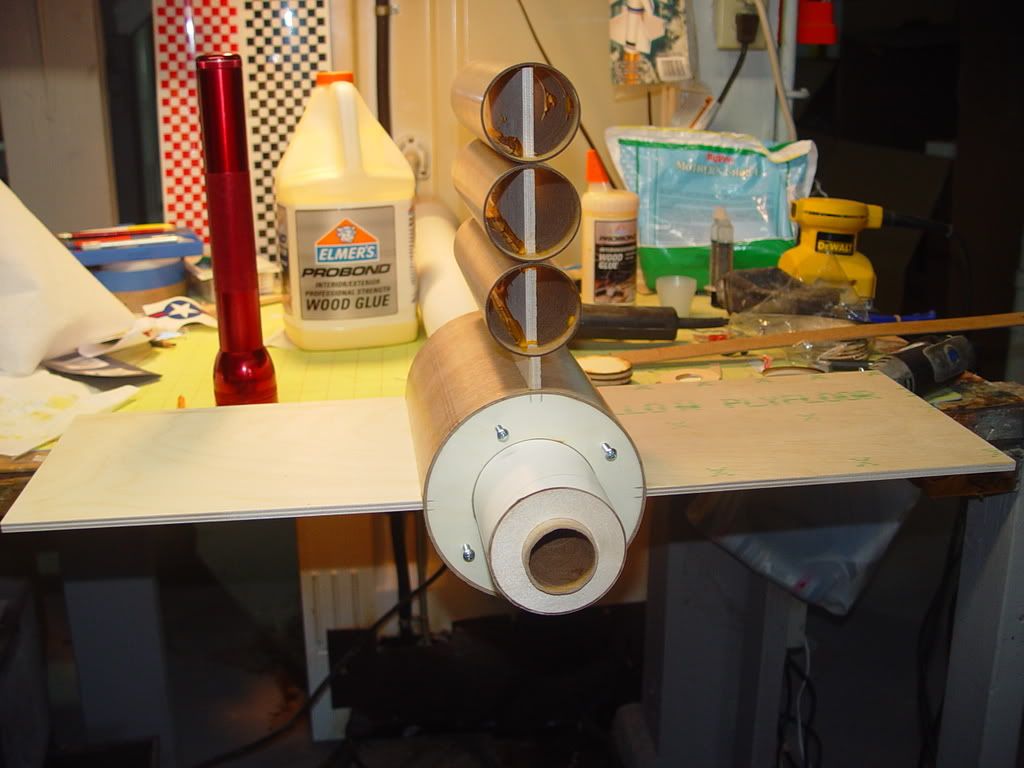
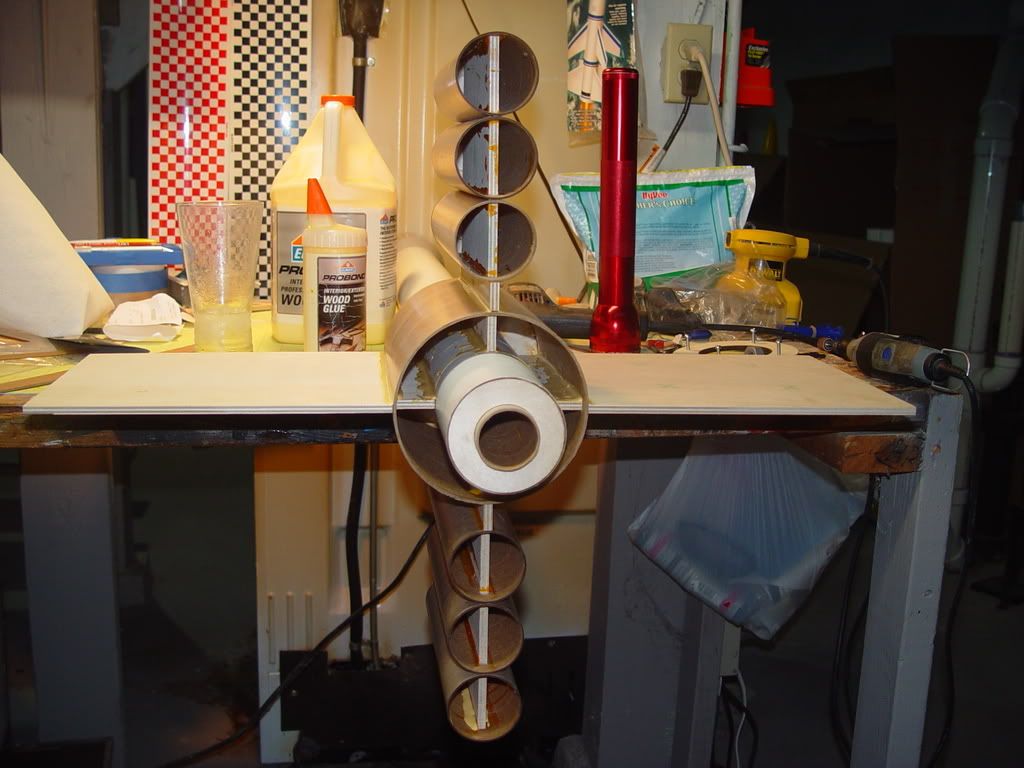
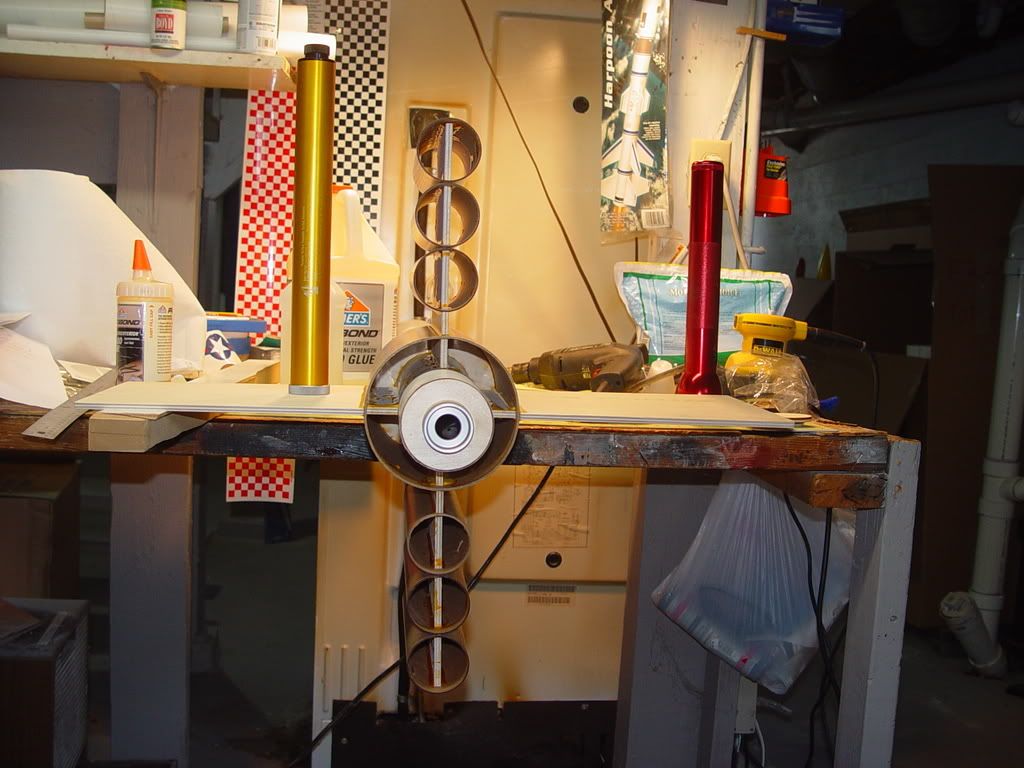
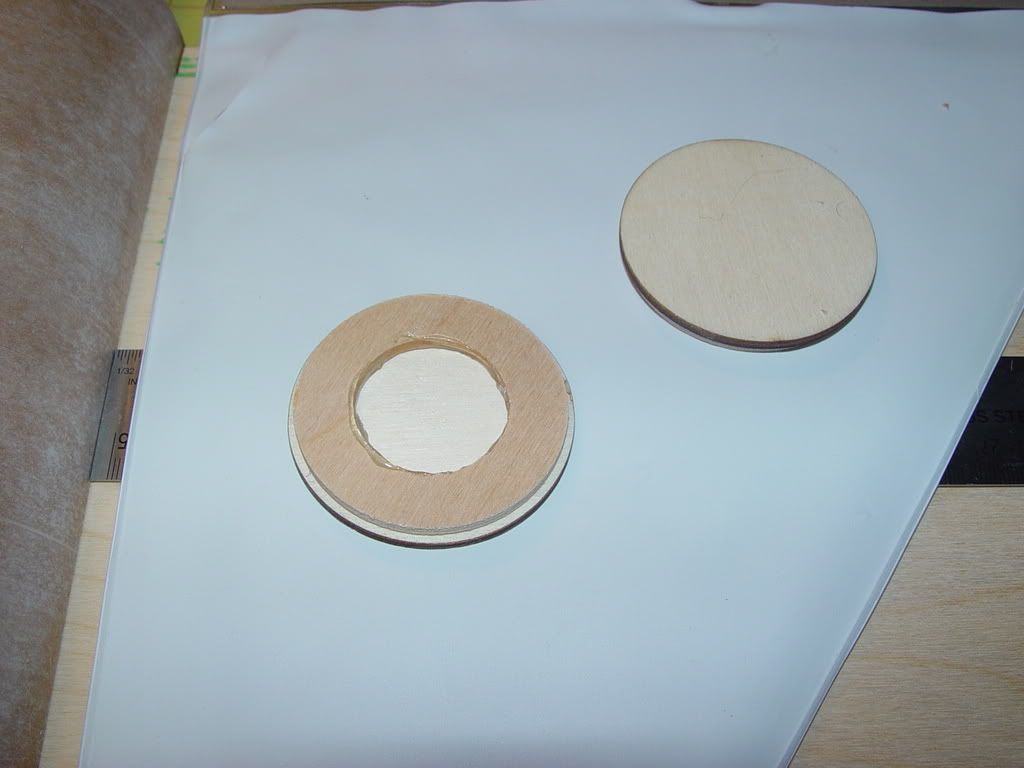
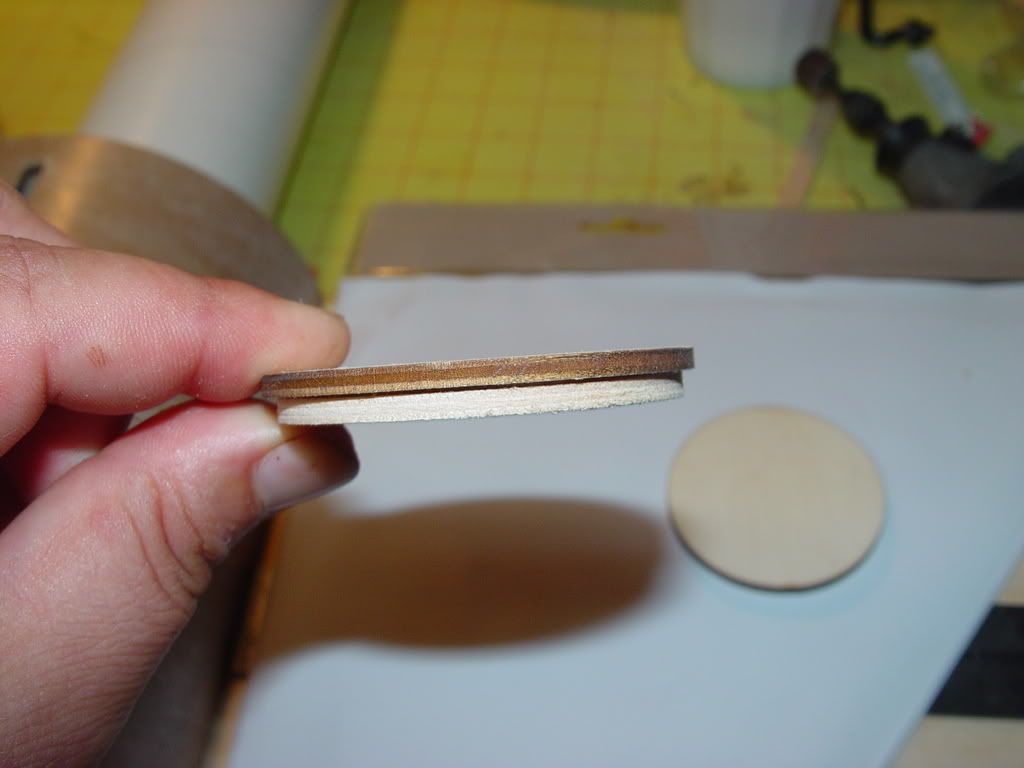
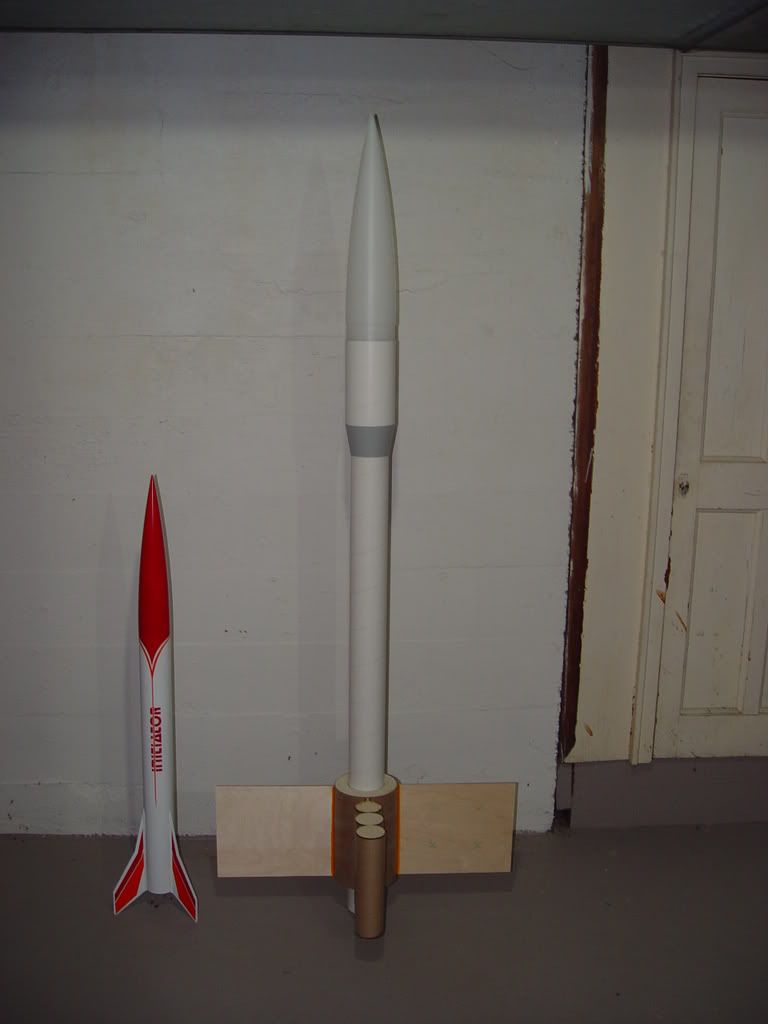
Well, I don't normally do build threads, so this is kind of a new one for me. I've been kicking this project around for a little while now, and am finally getting down to business.

When I consider an upscale project, I like to go for things with a bit of a challenge, and that I haven't seen done before. This one fits the bill.

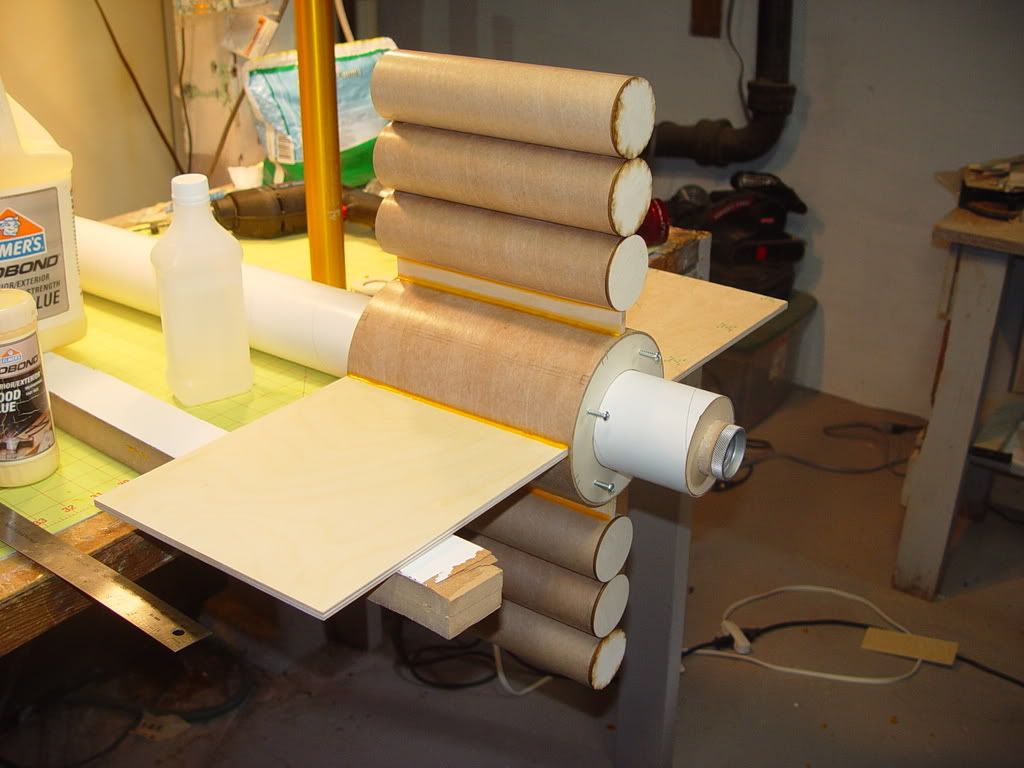
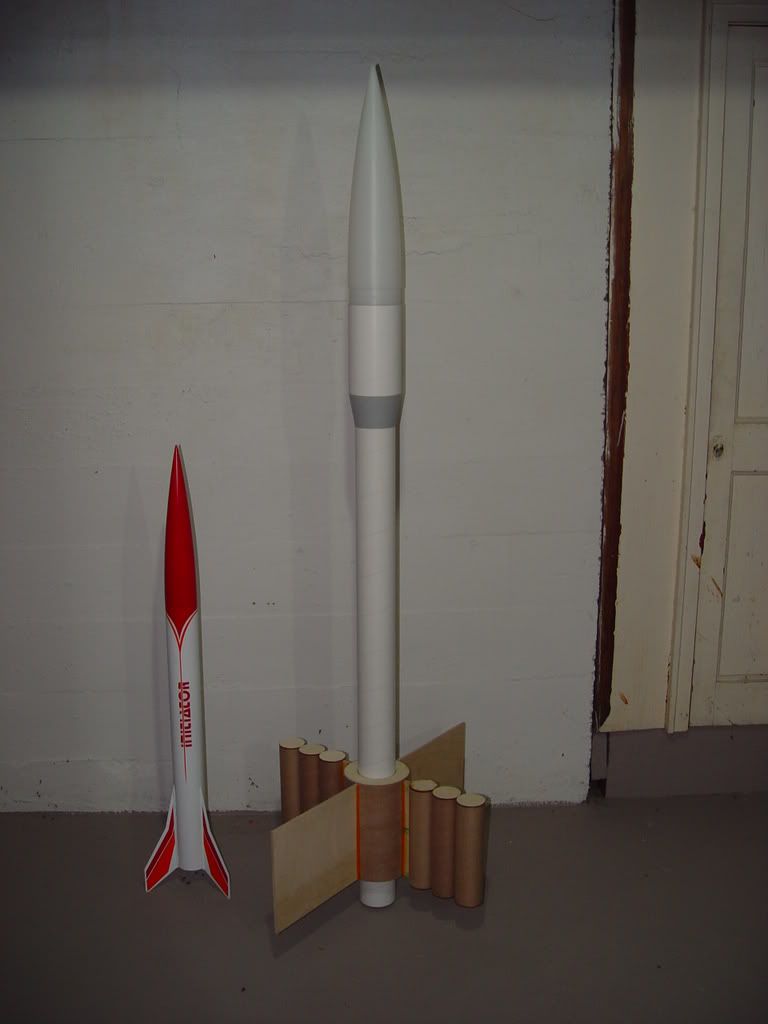
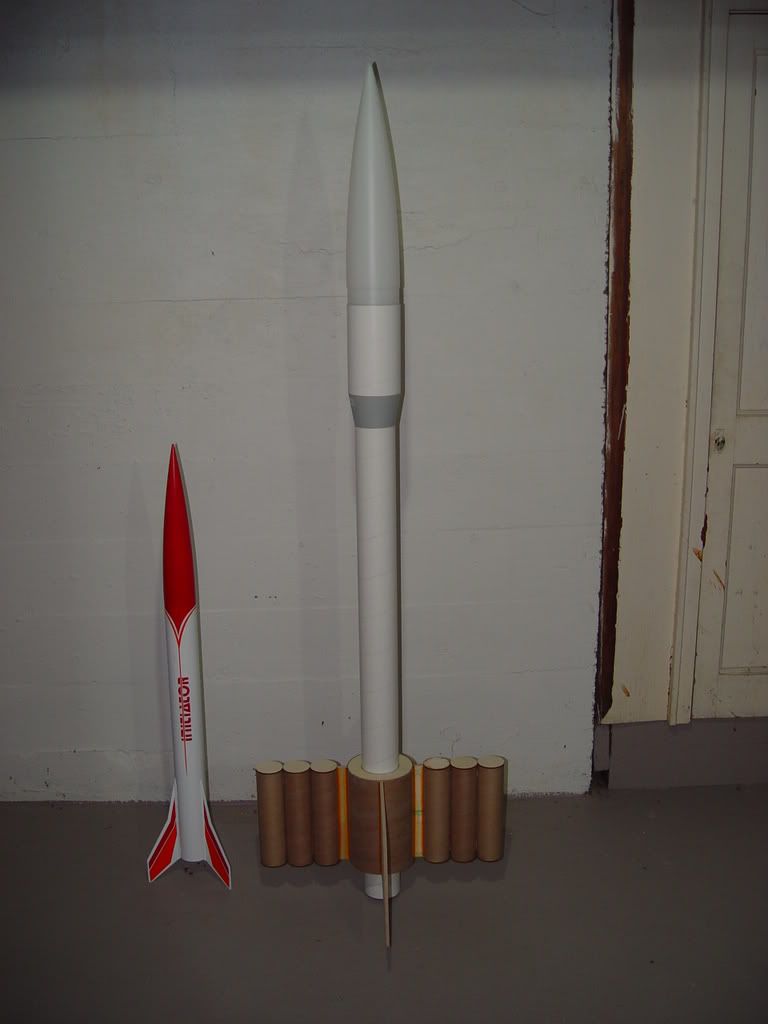
This is going to be a high-powered "model rocket." First, a RockSim v8 file.

View attachment 307 Space Station Aquarius 3D tube rendering design file.rkt
 
Here is some parts after some initial construction. The upper tube is a 6 5/8" long piece of 4" LOC tubing, then a LOC 4-3 reducer, then 40 3/8" of LOC 3" tubing, done with a 34" piece and a 6 3/8" piece. The "fin can tube" is an 8.75" long piece of LOC 5.5 tubing (thanks TeenRocketNerd) centered on custom rings from BMS. The LOC 5.5 tube hides the seam between the two pieces of 3" airframe tubing.

In this pic, a 17" long 38mm motor mount is already installed in the 3" tube, with 25' of 9/16" TN for shock cord attached to a forged eyebolt in the forward centering ring and a kevlar protective sleeve from Giant Leap.

The two sets of three "Tanks" are 8.75" long pieces of LOC 2.26 (54mm) tubing, slotted for TTW style attachment to the support fin that will be used (you'll see what I mean shortly.)

307&
 
The fins were cut from templates printed on RockSim out of 1/4" (6mm) Halex plyfloor, which is 6 ply birch. Very smooth, very sturdy, very solid. I really like it.

Here's a dry fit with the original bagged kit in the foreground for reference.

SSAqubuildpics004.jpg
 
Here's a couple of pics of how I've done the "tank fins." Two of the three 54mm tubes in each sets have two slots cut at 180 degrees from each other. The third has one. The first two are slid onto the support fin, then the third pushed on so that the end of the support fin is against the inside, outer edge of that last "tank." Then the tubes are glued on with full internal fillets of Elmers Pro Bond.

SSAqubuildpics005.jpg


And then flipped over for the other half of the fillets.

SSAqubuildpics007.jpg
 
In this pic, the big solar panel fins are tacked in place, TTW of the 5.5" tube to the 3" airframe. I laid a ruler on one fin to illustrate their size: 8.75" root and an over 10" span on these big slabs.

SSAqubuildpics010.jpg
 
Here's the tack of the first "tank fin" drying after the initial tack. In case you're wondering, the screws in the aft 5.5-3 centering ring are so that I can position it just right and remove it for internal fillets. Just for something I can grab onto. The screws will be removed later and the holes filled with wood filler.

SSAqubuildpics011.jpg
 
In this pic, the rocket is rolled over, the second tank fin tacked in place, and the first set of Pro Bond internal fillets applied.

SSAqubuildpics013.jpg
 
Here's another scale reference pic. That's a 38/720 case standing on the left solar panel - I anticipate launching this on an I600R. I threw another case up in the mount just because it looks cool. A 38mm AeroPack retainer will be added later.

SSAqubuildpics014.jpg
 
Now for the end caps on the "tanks." I got a dozen 29mm centering rings for 54mm LOC tubing. Then I had a dozen bulkplates made of 1/8" lite ply from BMS that match the OD of the 54mm tubes. I put the centering ring in flush with the end of the tube, then glued the bulkplate to the centering ring, centered over the end of the tube.

Here's the result:

SSAqubuildpics008.jpg


This gives a lipped cap, if you will, the pops right into the end of the tube. It also provides a shade more glue surface to keep them on after final installation.

SSAqubuildpics009.jpg
 
Here's a couple views with the end caps in place, but not glued in. I will remove at least the caps on the leading edge during the finish process so they can be painted flourescent orange.

SSAqubuildpics015.jpg


SSAqubuildpics016.jpg
 
Last pics for a while - I'll be out of town for a few days and will get to finishing work when I get back. After the fillets fully cured and with a Binder Design nose cone set in place for now. The real cone will be a custom turned fiberglass cone from Sandman to match the "Goblin" style profile of the original model. The cone will be about 16.5" from shoulder to tip. I'll post pics of it and how I put it in there when that happens.

In the following pics, the AT Initiator is just there for scale reference. The model will be about 5.5' tall, and this shows it pretty close.

SSAqubuildpics017.jpg


SSAqubuildpics018.jpg


SSAqubuildpics019.jpg
 
That's a very nice looking Initiator you have there.

What do you mean there is another rocket in the picture? ;)
 
I've been wondering what your use for that piece of 5.5" was going to be... and I can hardly think of a cooler upscale! This is a great build-can't wait to see the wrap up and flight report!!

Oustanding work, as always Simon... :D
 
That IS awesome, BTW. The regular kit doesn't do much for me...but the huge one is great.

But...far be it from me to stop you from spending $$, but that cone looks fine...and pretty darn close to the profile on the kit you show.

Is hyper-accuracy THAT important to you? I gotta think that a custom cone is gonna be $40+. What about, gee....a GOBLIN cone from Polecat??

:rolleyes:

If I could afford to fly L2 rockets I'd spend $40 for an accurate n/c. What the heck is wrong with that? It's like buying a Cadillac vs. buying a Ford. Sure they both do the exact same thing but one is more expensive because it's better. Beisdes, the 4" Goblin n/c looks to be too short for this scale which is 16.5" long.

-DAllen

1) I600 isn't level 2, and a reload costs about...gee....$45

2) $40-50 is more $$ than the sum of every other part used in this build...probby including the male-only Aeropak retainer piece.

3) with either cone, NOBODY would be saying "gee, something looks a little off" HE said he wanted a Gobliny one, not me.

4) I specifically prefaced my suggestion with "I don't wanna tell you what to do"...I didn't say there WAS anything wrong w/getting a custom code...so I don't think an eye-roll was justified.

Now it is.... :rolleyes:
 
1) I600 isn't level 2, and a reload costs about...gee....$45

Nope, it isn't L2 but he does have a L2 cert and L2 rockets. Check out his Quest Intruder Upscale thread. $45 is A LOT of money for a single flight for some people (like me.)

Look Deandome, you apparently think I was insulting you in my first post in this thread and for that I am sorry. The :rolleyes: thingy was over the top.

I would like to also apologize to ForeCheck for hijacking this thread. By the way, I LOVE this upscale.

-DAllen
 
I've been wondering what your use for that piece of 5.5" was going to be... and I can hardly think of a cooler upscale! This is a great build-can't wait to see the wrap up and flight report!!

Oustanding work, as always Simon... :D

Thanks for the help on this one!!

TeenRocketNerd saved me some dough on this part of the project, by selling me an 11" or so scrap of of the 5.5 tubing (so that I didn't have to shell out the $40 or so for an entire length!!)
 
1)
3) with either cone, NOBODY would be saying "gee, something looks a little off":


I would. :) That's why I went with the custom cone. Sandman is making it out of foam turned on the lathe, then covered in 'glass, completely epoxied and sanded and primed. I won't get into the costs involved, but lets just say the estimates on various things (above) are "off." No matter, though. We build and fly rockets according to and within our own budgets. If anyone really wants the cold turkey because they're interested in duplicating the project, send me a PM. ;)
 
Any chance of you kitting these upscales???:D

Seriously, that's one cool looking rocket.

Something tells me that kitting this stuff would be cost prohibitive. Not from *my* end, but from a "market and sell this at that price" end.

Unless, of course, I hade a warehouse full of parts that I got at a substantial discount.....

Imitation is the best source of flattery. I'll be happy to help out someone wanting enough information and detail to duplicate anything I do. That is, unless some venture capitalist wants to invest a bunch of dough and MAKE me kit this stuff. I'd be up for that!
 
What about, gee....a GOBLIN cone from Polecat??

By the way - from what I can tell, the PoleCat Goblin cone does not have a blunt, semi-ellipsoidal or semi-parabolic tip to it. Rather pointy.

That said, the PoleCat Goblin is *far* from a scaled version of the Estes K-55 Goblin. The only similarity is 4fnc, IMO.
 
The fins were cut from templates printed on RockSim out of 1/4" (6mm) Halex plyfloor, which is 6 ply birch. Very smooth, very sturdy, very solid. I really like it.

Here's a dry fit with the original bagged kit in the foreground for reference.

SSAqubuildpics004.jpg

My only question is how the heck did that rocket fit in that tiny little bag!;)


In all seriousness though - Outstanding Job! What an AWSOME Upscale of the Space Station aquarius! I can't wait to see the finished product!
 
Hey gang,

Just back home from an extended stay out-of-town. My nosecone that Sandman made for me was waiting (at the neighbor's house - they collected our mail while out. Nice folks!)

Anyway, it's really great looking and stout as all heck (made of fiberglass.)

Problem is: I can't post pics because my camera was either lost or stolen while we were on vacation! Not sure which, but alas - no camera!

What to do? Continue the build and post pics at a later date when I have a camera (thus ending the "build" part of a "build thread",) or stall the build until I get a camera in hand?

ACK!! :banghead:
 
I wouldn't stall the build just because of us! Continue and fill us all in later.
 
Back
Top