Updating post #20. Since the discussion about filleting, covering fillets, etc., thought it would be a good time to repost this comparison. Unfortunately, when TRF went through its "Upgrade", it killed all the links to the photos and took away the ability to edit/fix the links. So here they are again...
I had a good opportunity to exhibit a few different ways to skin a cat, or Magg, recently. Minie Maggs have long been a personal favorite...it was my third high power rocket back in the day, we drag race them all the time, and they're versatile enough to be flown as a BIG rocket at a little Class 1 (under 3.3lbs) launch, and tough enough to handle big I's and J's all day long. So when the downscales and upscale were released, I was all in!
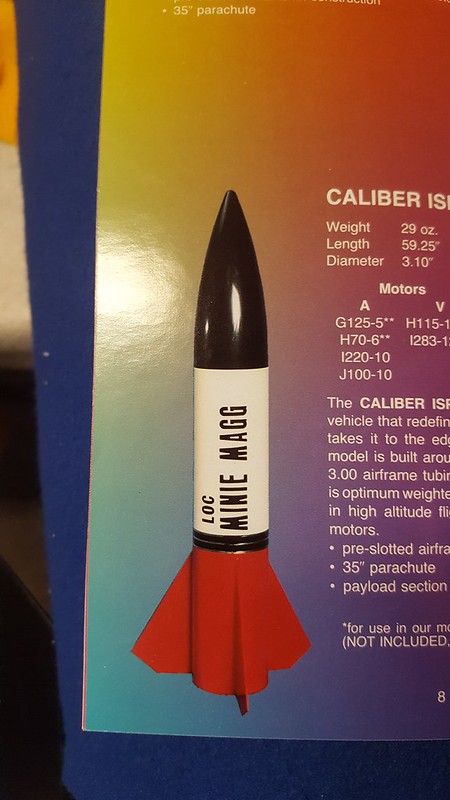
The scheme we're modeling for the
Magg Project is the 1989 Loc Catalog scheme; somewhat of a traditional, bold colored, retro scheme. Regardless of the path, the goal is to make all three Maggs resemble the following trim:
Minie Magg: Painted
I'll start with the original: the
Minie Magg. This particular Magg was a rescue from another long-time rocketeer. It was built quick, stock kit, no frills, launch lugs, and a lawn dart on the first flight. So it's a rebuild from the forward centering ring, up. Cut it off clean, added a new tube, faired and filled. I'll spare you photos of the step as most people know how to prime and paint a rocket (and that's not the focus of this thread). Considering the three color scheme, with two colors being on the airframe, the filling, priming, painting took a period of 1.5 weeks of on and off "work". Completed photo later in this post....
Micro Magg: Covered Pre-Construction
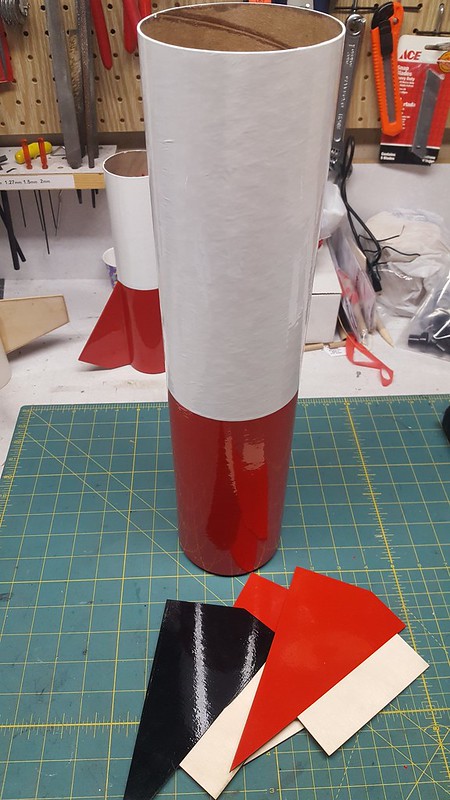
Next up is the 4" diameter
Micro Magg. This is covered with Monokote using the technique documented in the initial post:
covering the rocket prior to assembly. I used
8 pieces of Monokote film to cover this Magg; pieces as follow:
-1 piece White Airframe Top
-1 piece Red Airframe Bottom
-4 pieces Red fin sides
-2 pieces Black fin sides
My preferred method, cutting and covering took roughly 1.25 hours. Nosecone was primed and painted black (at the same time priming and painting the Minie and Nano nosecones). All covered and ready for assembly:
 Nano Magg: Covered Post-Construction
The smallest in the family is the
Nano Magg, at 2.56" in diameter. I built this one quickly in a hotel room while traveling for work...a fun little critter! I'd normally paint rockets that are already assembled, but Derek asked, so I'll attempt it. I covered this like one would cover a built-up R/C aircraft, covering the joints first, then the larger bays.
Thin strips are cut to cover the fin-to-airframe joint. They are applied using a hot iron.
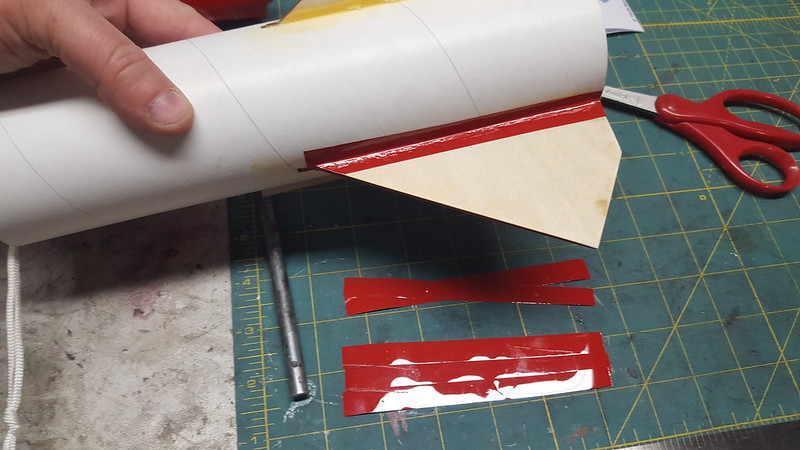
A strip is also cut and ironed in place for the launch lug...easier to cover individually than try to do the area between the fins and over the lug all in one piece.
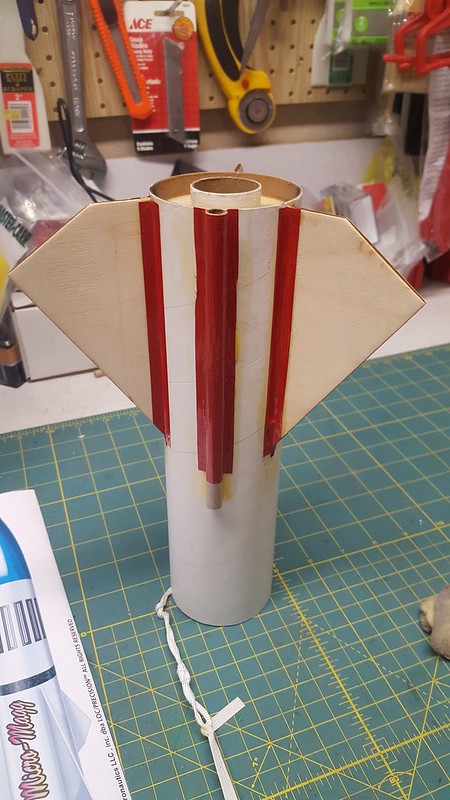
So far we're at 7 pieces of film applied.
Next, the area between the fins is covered. 2 pieces that surround the launch lug....

...and 2 pieces between the lugless sided fins.
The red on the lower part of the airframe is now complete.
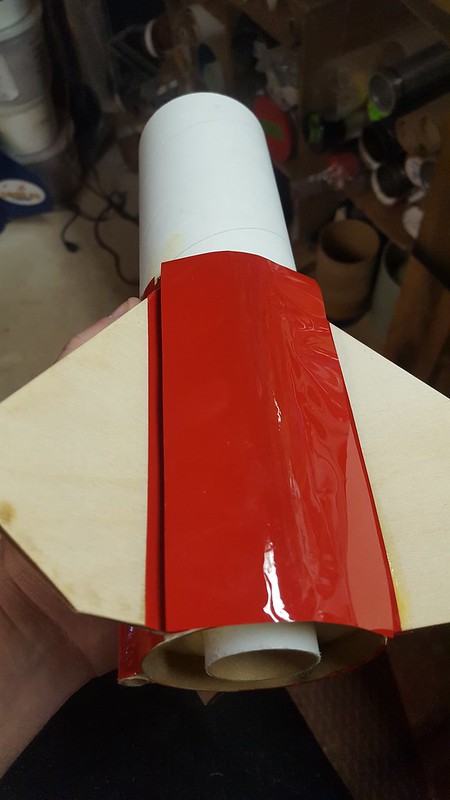
The fins are covered in red and black....another 6 pieces of covering: one for each side of each fin. Sorry, no photos of this step.
Then on to the white covering, starting with a small piece that's applied over the lug.
One more piece is applied; a wrap of white on the top half of the airframe.
Covering the
Nano after assembly used
19 pieces of Monokote covering. Not prohibitively difficult, but certainly more work than covering first, assembling after.
Summary
All three rockets had their nosecones primed and painted black; all three had the few decals applied after covering or painting.
The 5.5"
Minie Magg was painted; taking a little over a week of on and off work. Surface prep took more time here, as there was a bit of filling and sanding to get a nice surface finish.
The 2.6"
Nano Magg was covered after assembly, just like if it were to be painted. It took the most work of the three rockets in comparison.
Comparative Decision: I'd rather paint a Magg than cover it following assembly.
The 4"
Micro Magg was covered before assembly; different than most rocket people would do for adding color to their rocket.
Comparative Decision: this method took the least amount of time and work for the three rocket comparison. I'd rather cover a rocket pre-assembly than paint a rocket. I'd MUCH rather cover a rocket before assembly rather than covering it after assembly.
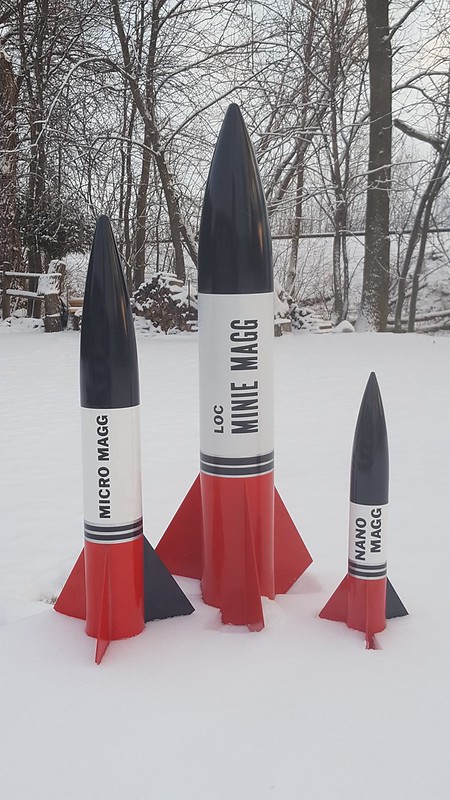
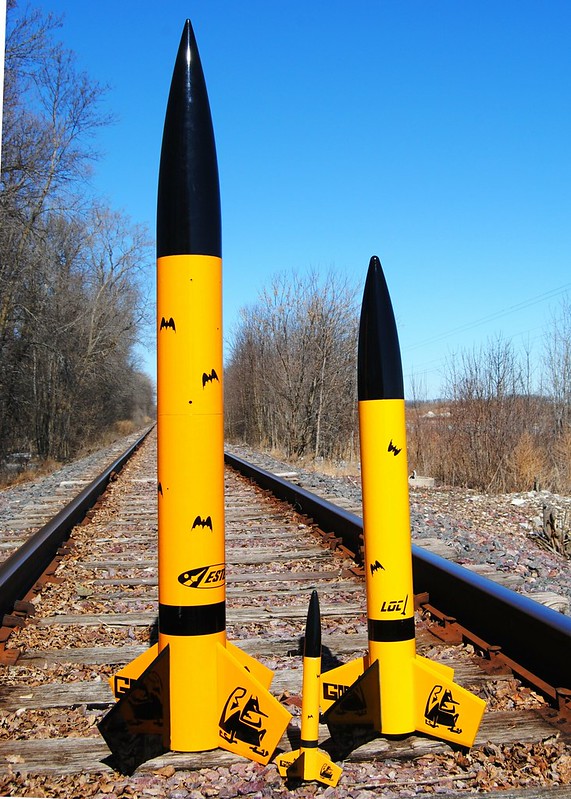
Final Result of the
Magg Trio:


")