Loc Big Cletus/ upscale Goblin quick build

The Rocketry Forum

Help Support The Rocketry Forum:

This site may earn a commission from merchant affiliate links, including eBay, Amazon, and others.

ECayemberg

Well-Known Member
Joined
Jan 21, 2009
Messages
2,877
Reaction score
849
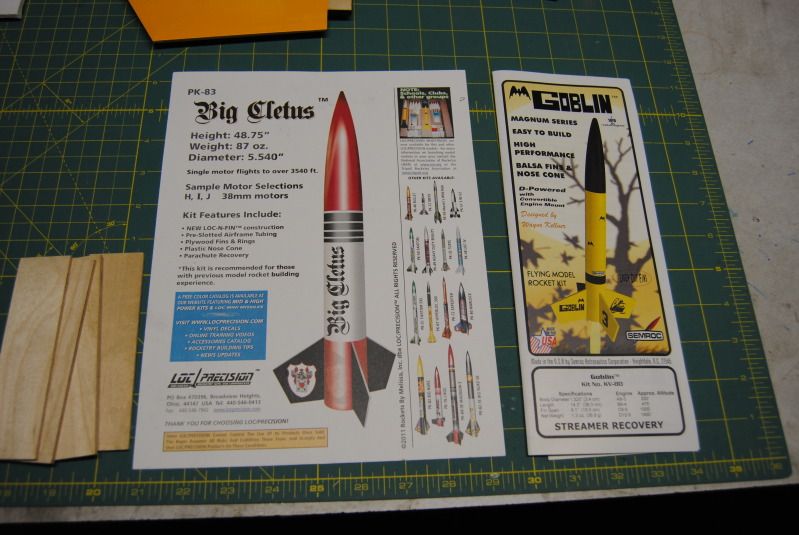
Prelude: I knew after seeing Loc's newest kit, the Big Cletus, that I had to have one! Love 5.5" Loc airframe, love the Loc PNC-5.38L, and love Magnum style fins. After Mark posted in his Warlock thread that the Cletus was available, a phone call to Loc took care of my want. Like the other cardboard rockets I build in the winter, this one will again be covered in heat shrink film; namely Ultracote/Oracover, Ultracote Supreme (ie: supremely clearance priced), and Black Monokote for one fin. Mark aka Stickershock23 provided the decals. This build will be very quick, very simple, and hopefully enjoyable. Speak up if I go too fast or mess up along the way!

Initially, I had full intentions of building the rocket completely stock; as Loc now provides most notably: a generous length of tubular nylon recovery harness, rail buttons, and a quality chute. The stock kit is somewhere in between a Minie Magg and an I-roc; 47" in length, 38mm mount, and 1/4" aircraft ply fins. However, fate intervened and I was "forced" to modify the stock kit just a bit.

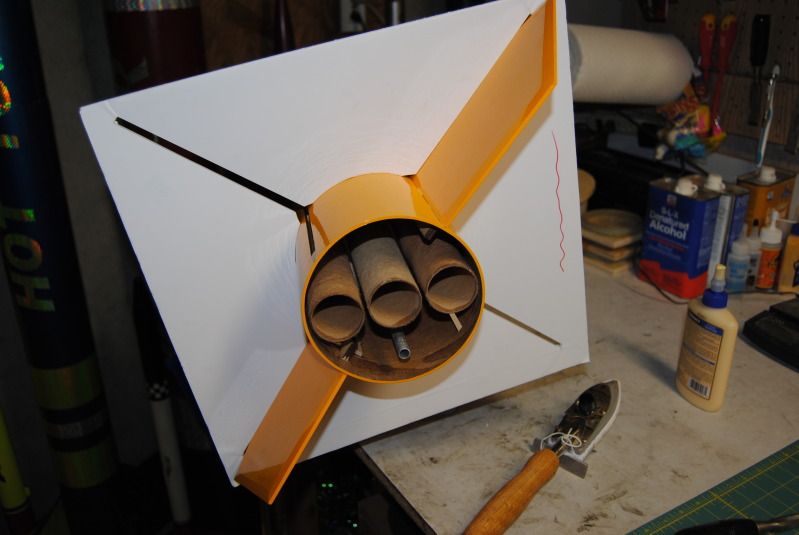
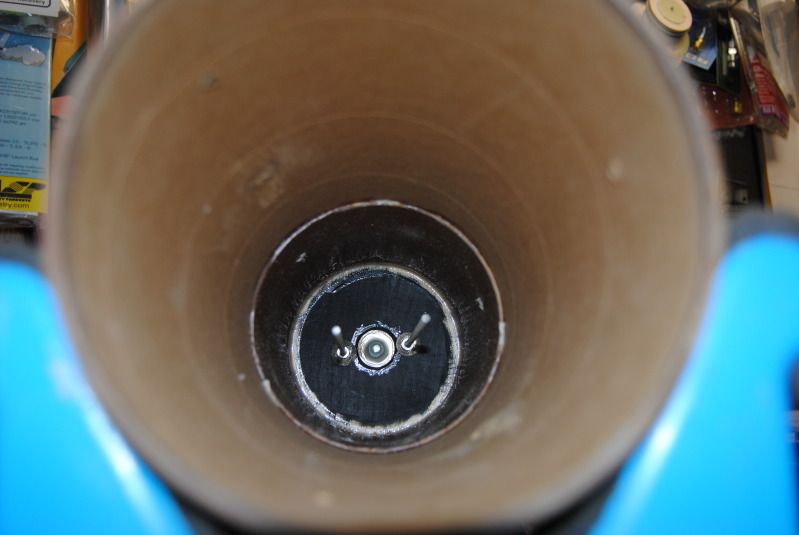
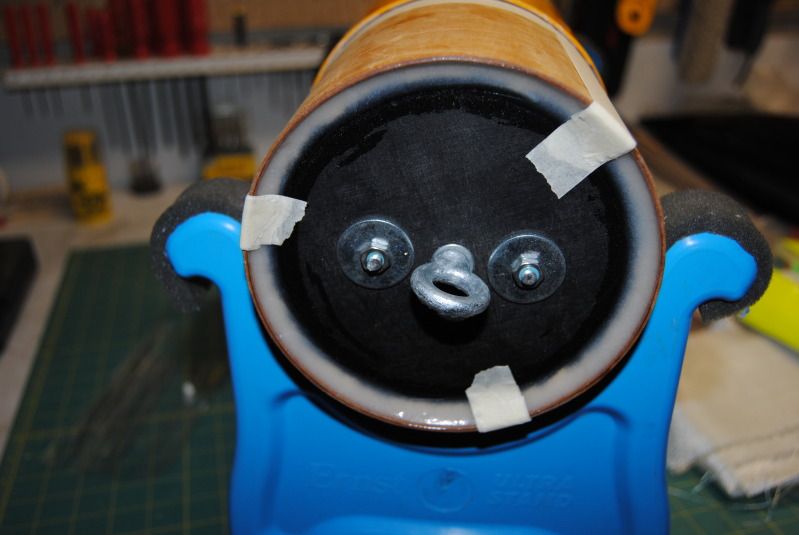
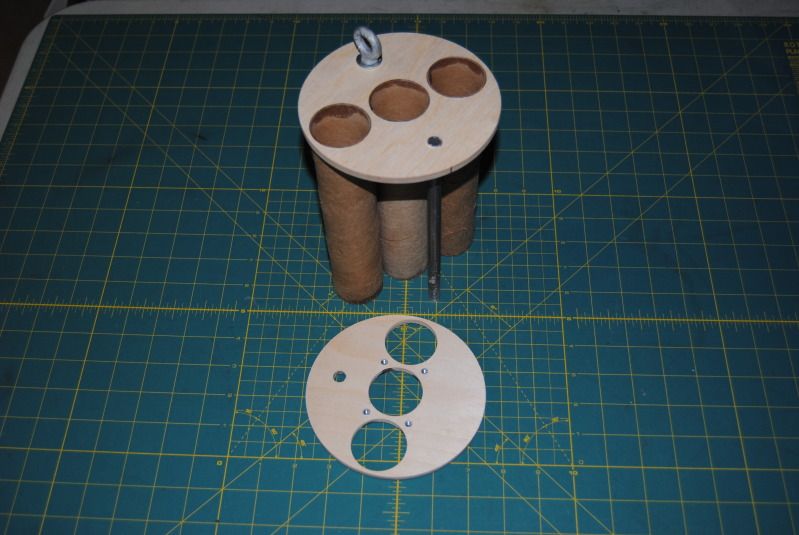
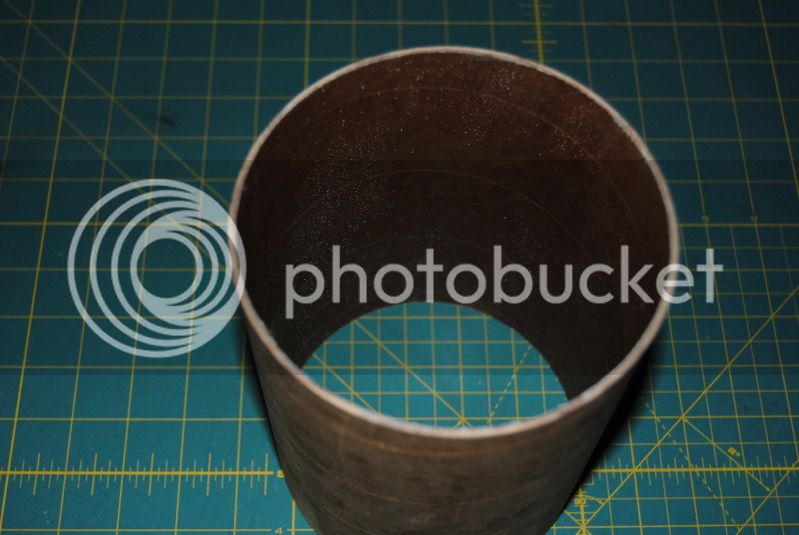
Discoveries: the Big Cletus arrived dressed nicely in the heavy duty box, standard for the several 5.5" airframe orders I've placed in recent years. Upon unboxing, I was surprised to find an "extra" 15" length of 38mm motor mount included: fate moment #1. Within a few days of the Cletus arriving, Justin generously provided me with a grab bag of goodies; upon unboxing the goodies, I discovered several centering rings cut for 5.5" airframe, and holding a trio of 38mm mounts in line: fate moment #2. Upon inspecting the fins, it dawned on me that these fins not only look a lot like Loc Magnum fins (one of my faves), but they also closely resemble the Estes #K-55/1255 Goblin fins. Checking a few dimensions, I discovered I'd need an additonal 13" of 5.5" airframe and a corresponding coupler to arrive at the correct 60" upscaled length of the Gobling. As fate had it, I have a 14" length of airframe and a coupler on hand. I'd be a fool to ignore all these signs; therefore the project quickly transformed into a 3*38mm equipped 4.19X upscale of the classic Goblin.

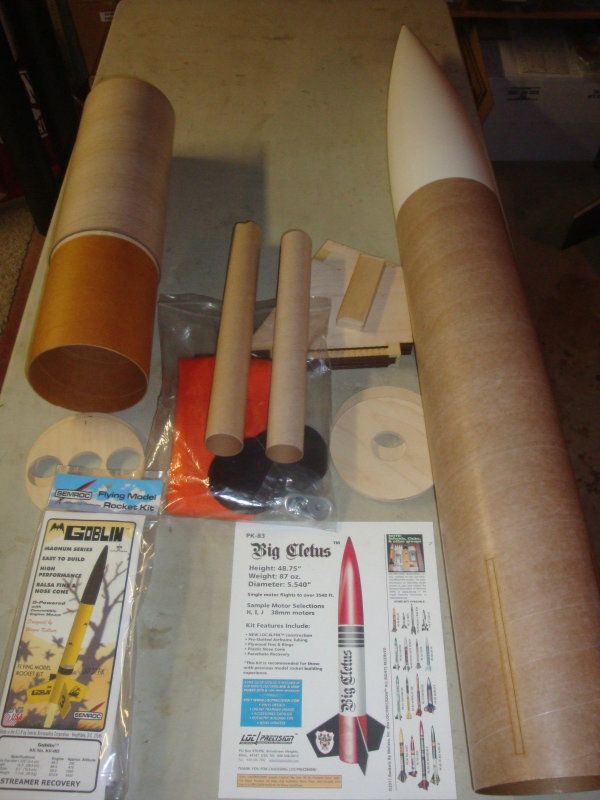
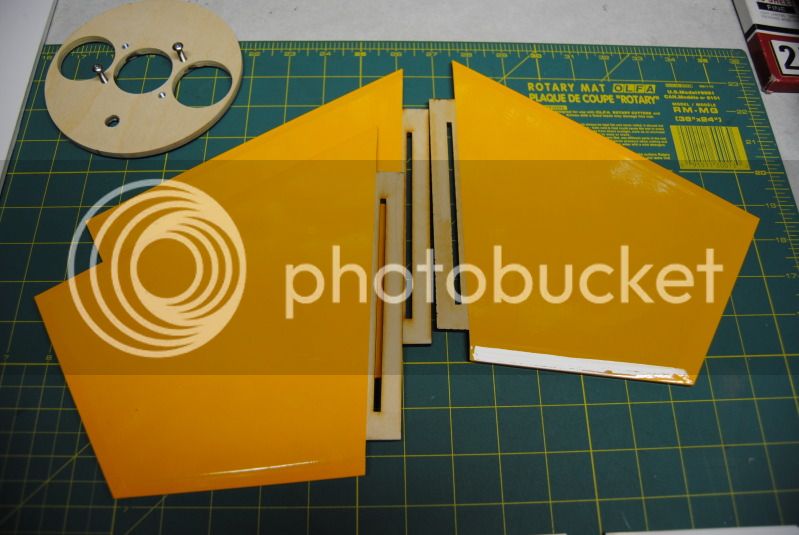
Thus, we have the parts on the table: on the middle and right are the stock components; on the left the extra airframe, coupler, centering rings, and a Semroc Goblin for inspiration:
parts.jpg


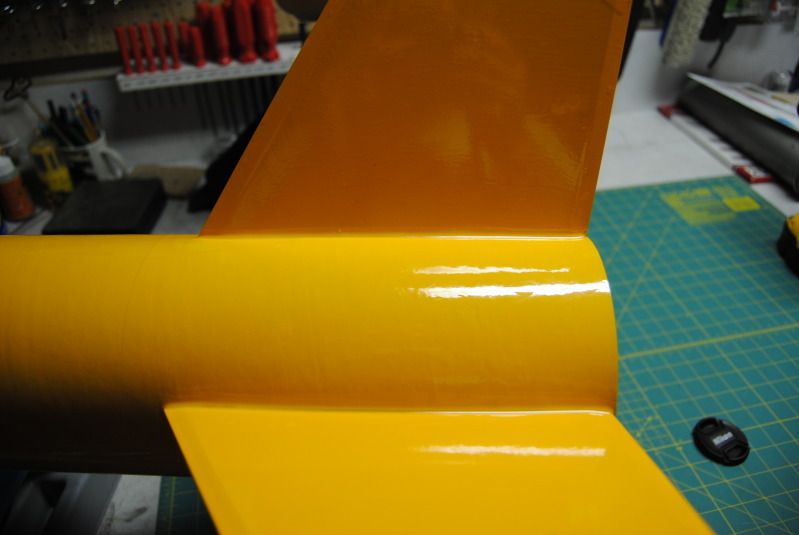
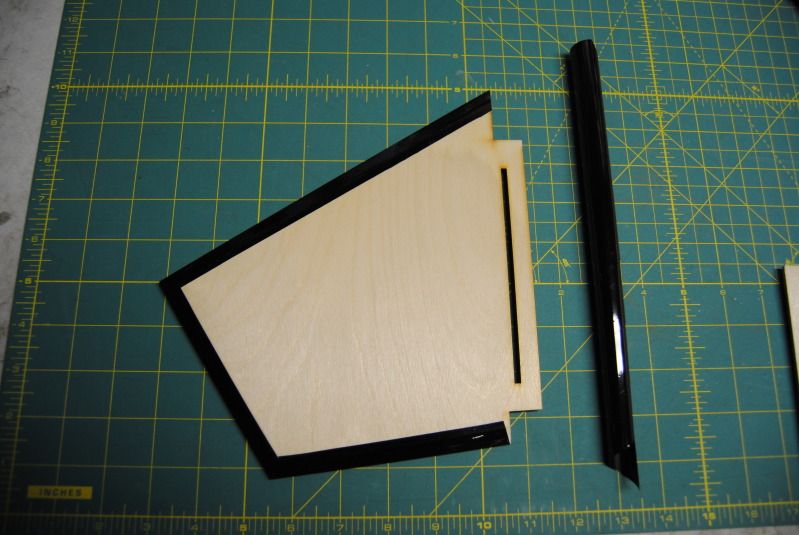
It should be noted that some new features were present in this kit, namely laser cut fin slots and fins. Quality stuff!

-Eric-
 
Motor Mount: I wanted to use the provided motor tubes for the cluster mount. The "extra" tube was 15" long, with a good-sized dent on one end (I suspect this is why it was thrown in as an extra). Cutting off the dented end, I had 14.5" of tube. Splitting it in half, I had a pair of 7.25" motor tubes. A quick check of the fin slots confirmed that this length was longer than the length of the fin tabs, so 7.25" became the length of the motor mount; the other motor tube was trimmed to the same length as well. A pair of 3/8" holes were drilled to accomodate an aluminum tube used for the passage of airstart igniter wires, and a 1/4" forged eye was added to the forward ring. Four PEM nuts were installed in the forward face of the aft ring for motor retention. The glassine layer on the motor tubes was removed and the ends sealed with thin CA. Then, the motor tubes were glued to the forward ring with Titebond II wood glue, and the wire passage epoxied to the forward centering ring(CR). The aft CR was temporarily installed to ensure alignment until the glue cured. Note that the LOC-N-FIN design requires access to the interior of the airframe for fin installation, so gluing both rings to the motor mount would probably be a bad decision.

The assembly looked quite a bit like this:

176.jpg


Coupler reinforcement: Much less verbiage here, just a quick note that the coupler I had on hand was of the Phlexible Phenolic Phlavor, which is "strong" but still a brittle and tear-worthy for my tastes. Therefore, the inside of the coupler was roughed up, attacked with a tack-cloth, and glassed using some scrap E-glass I had laying around; I believe 2 layers of 6 oz was used. This has to be be the least exciting photo ever posted to TRF, nevertheless I present to you the coupler after glassing and trimming the ends:

179.jpg


-Eric-
 
Last edited:
A few hours into the build, the project was put on hold, while I sorted out various issues with a new toy given to me for Christmas. The wife was nice enough to get me both a router and router table for Christmas, though the two weren't compatible with one-another. After getting it all sorted out, there was only one thing to do with the new table: bevel fins! I had to modify the table in order to produce satisfactory results on practice pieces, but eventually I arrived at a nice setup to consistently grind 15 degree bevels into unsuspecting fingers:y:, errr I mean fins. I decided against taking photos while simultaneously beveling, so no photos of that process, sorry. Sadly, I didn't take any photos of the bare wood after beveling either, but you'll see the edges as covered in the heat shrink film in subsequent photos. Note, there is much "meat" between the bevels, somewhat intentionally on this project; I'm after low-n-slow for this Goblin-Cletus, so the added drag is welcomed.

Using my trusty Top Flight heat iron, the four fins were covered. The black fin is covered in Monokote, the yellow fins are covered in a mix of Ultracote and Ultracote Supreme: both the same shade/color. Note on the "Supreme" product; I'm not sure if it's available anymore, but most in the r/c aircraft builder's arena despise the product; it is sticky on the back side much like Monokote trim, but shrinks up much like normal Monokote/Ultracote. I've found this "hybrid" product to work just fine on rockets!

Black fin with overlap onto back side (much like composites, delamination is a concern):

291.jpg


Three yeller fins: see, they do look a lot like Magnum fins, no? The slots in the fin tab are for the Loc-N-fin plates:

292.jpg


Speaking of the Loc-N-fin plates, here there eagerly waiting installation, sitting alongside a friendly pair of header cards. Note that the Big Cletus has four fins, despite the three pictured on the card.

290.jpg


That's probably enough for one day, eh?:)

-Eric-
 
Where is the avionics bay going to reside so that you can take advantage of the airstart wire pathway?
 
I was a bit concerned with the three fin / cluster arrangement, glad to see it has four. The fin slots and lock plates work really nice, and they are very precise. Lookin great man!
 
Somewhere along the line, I covered both sections of airframe in Ultracote. I didn't have a long enough piece to cover the full length of the main airframe, so I simply put the seam where the horizontal band wraps around the Goblin's body. Before gluing the fins, an X-acto is run around the perimeter of the fin and the covering removed where the fin root meets the airframe. This area is lightly roughed up as well to promote better glue adhesion (it would be better yet to remove the glassine, but I want to test out the effectiveness of the Loc-N-fin method). After trimming the covering, the naked fin root area is visible, along with the Ultracote's horizontal seam.

289.jpg


Almost forgot, before this step, I glued the motor mount into the main airframe, using Gorilla Glue after dampening the forward centering ring and ID of the airframe. Again, the aft CR was temporarily installed to ensure alignment. I found and modified the fin guide from my Tarantula build, and used it to hold the fins securely in place while curing. In an attempt to keep Barry and Mark at Loc happy, I used plain wood glue, applied to the fin root and Loc-N plate to secure the fins in place. Taking them one at a time, the precise laser cuts made assembly easy. The plates took some force to center on the fin (perpendicular to the fin), but once in place, the fins stood proud in alignment, without fighting the fin jig whatsoever. Nice. Here we are after the first two fins have been glued in place.

293.jpg


296.jpg


Since the fins were indeed Loc'd in place, there was no need to delay; all four fins were installed and Titebond II applied to the perimeter of the Loc plates and fin-to-plate joint. The glue was allowed to dry overnight in a nose-down attitude to allow any excess to flown to the aft end of the centering ring.

-Eric-
 
Where is the avionics bay going to reside so that you can take advantage of the airstart wire pathway?

They ride along in the coupler affixed to the payload section, a la typical electronics bay. I've always done airstarts that way and it seems to work just fine; of course they must separate with the sections at ejection, but that's easy enough to accomodate.

The electronics bay will be a tad unconventional for this particular build; nothing extraordinary, just a little different than the norm. I'll get to that a bit later.:)

-Eric-
 
I was a bit concerned with the three fin / cluster arrangement, glad to see it has four. The fin slots and lock plates work really nice, and they are very precise. Lookin great man!

Indeed, the three in line mounts work really well with the four fin arrangement! Extra motor tube + cluster centering ring = requisite cluster! I've never used the Loc-N-fin plates before; definitely different but so far so good!

Chad, I think you'd like this rocket; it's similar in dimensions to your Jorge Jalapeno Extend-o-Magg. A very nice offering from Loc for sure!

-Eric-
 
This one is definitely on my list, I was sold on the name as soon as I saw it - gick gick.:D Rethinking other plans, the Big C will likely be the host for that timer I picked up from you.
 
Neat! I've always dug the Goblin. Look forward to this progressing!


Later!

--Coop
 
I've put a ton of Monokote and Ultracote on planes. I never thought of putting the stuff on rockets.
Great work Eric!
I dig your methods.:pop:

JP
 
I love the name. It will sell better in the south.

You painted the fins brfore installing the. First time I have seen that done on a rocket this large.
 
Neat! I've always dug the Goblin. Look forward to this progressing!


Later!

--Coop

Thanks Geoff! In case I forget to mention, the fins are slightly smaller and have a slightly different shape (less trailing edge sweep if I remember correct) than an exact upscale, but I think you'll like the end result! This bird is all done; just need to catch the thread up to the actual build!

-Eric-
 
Eric,

Very cool! I look forward to seeing the end result up at the Bong in February.


Justin

Do I get to see the debut of Deadmouse5 as well??? Pretty please; plenty of room in the tube sunken nose cone for a tracker!!!;)
 
I've put a ton of Monokote and Ultracote on planes. I never thought of putting the stuff on rockets.
Great work Eric!
I dig your methods.:pop:

JP

JP, yessir! I have one of those wrapping paper containers mostly full of covering material from when modelers actually covered their own planes (and from a local HobShop that went out of business). The vast majority of the high power cardboard rockets I've built in the past several years have been covered in Monokote/Ultracote/Oracover. Different technique, but it works great and MAY save a lot of finishing time; see the next post to cwbullet...

-Eric-
 
I love the name. It will sell better in the south.

You painted the fins brfore installing the. First time I have seen that done on a rocket this large.

Chuck, definitely an interesting name with lots of potential!;)

Actually the only paint on the rocket is the nosecone; seam filled, primered, and painted as usual during a "warm" winter spell. The rest is all plastic heat shrink r/c model covering. The neat thing about it, is that I do most or all of the "finishing" (ie paint/decor) before assembly; with all that leg work done in advance, assembly of the actual rocket takes very little time. I spent a few evening working on the finishing, which created a rocket hobby version of an "ARF" that all the r/c aircraft people buy-n'-fly nowadays. Actual assembly of this rocket was in three casual evening sessions.

-Eric-
 
I see an NCR Big Brute!!!!


View attachment 113294

Oh, oh, I see it too! Jeff, I used to have one of those, the NCR by Estes version. Think it was missing parts or I sold it to someone. Anyway, agreed, the Big Cletus definitely strongly resembles the Big Brute! Is that a Fondy or Silica field I see there?

-Eric-
 
Small external fillets: Though the fin to airframe joint is secured together internally with wood glue and the Loc-n-fin plates, a very small epoxy fillet is applied to the fin to airframe OD joint, if nothing else to seal the edges of the covering. I used Zap 15 minute Z-poxy as it dries clear and smoothes nicely for filleting.

003.jpg


Cody approves! His filleting tool of choice is a 5/32" ball driver.:wink:

006.jpg


Before installing the aft CR, a hole is drilled for the aft rail button, and the button installed backed by a flat washer and hex nut. The nut was secured in place using a small amount of epoxy. The aft CR was installed using Titebond. A forward rail button was installed in the same fashion as the aft button, and the lower airframe was therefore functionally complete.

-Eric-
 
Last edited:
Do I get to see the debut of Deadmouse5 as well??? Pretty please; plenty of room in the tube sunken nose cone for a tracker!!!;)

A definite maybe... :) I'll have to see if I can get Emily to agree to a dual purpose day. Ya see, my Emily's last living grandparent resides in Union Grove, so I might be able to fly Deadmau5 if we visit granny in Union Grove once we are done flying for the day. There is plenty of room in that sunken tube for sure! I-180 skid for first flight? I-345 White Thunder?

Does the Big Cletus kit come with (4) fins or (3)?


Justin
 
The recovery portion of this ship has gone through several (mental:cyclops:) revisions before settling on this design. Initially, I was going to build it as a BDR, or Big Dumb Rocket, using caveman recovery, aka motor ejection. Super simple, but not at all elegant. After deciding to build it as a Goblin upscale, the additional 13" of aiframe gave me the opportunity to enhance the recovery. I knew that I now wanted a dual deployment setup with the addition of the cluster mount, as well as the need for airstart electronics. Without getting too exotic, I realized it would be difficult to place a main chute, recovery harness, etc. in the short space between the electronics bay and the base of the nose cone. I'd have roughly 5.5" of available length as shown here. Of course, I could have cut off the base of the nosecone, pushed the forward E-bay bulkplate aft, etc, but again, I wanted this to be a quick and easy build.

014.jpg


Furthermore, I didn't want to add the weight of an additional recovery system in this bird (remember it has a 38mm core motor). I've used the Defy Gravity tether succesfully in rockets big and small with great success (knock on wood). Turning the main chute into a temporary burrito seems like a good option, so that's the direction I'll head. Seeing as how there is only ~5.5" between the nose cone base and the top of the coupler, I determined that I could accept the additional volume and just make the entire length of the payload section an electronics bay. Doing so eliminates one or two bulkplates and possibly a few nuts and washers. A pair of #10-24 threaded rods were secured to the coupler bulkplate at the base of the payload bay. The electonics plate rides the rods and is secured in place with a pair of nuts. The threaded rods are NOT secured to anything on the forward end, they simply "float". They stay plenty rigid when the e-plate is in place and secured with a pair of nuts. If I was flying an accelorometer and hoping to collect accurate data on extreme flights, this probably wouldn't be the ideal setup, but for the relatively gentle flights the Big Cletus will encounter, it'll do just fine.

Looking aft into the payload tube:

013.jpg


And the coupler bulkplate with the threaded rod studs secured. Note: the plate is black because it was cut from a section of 1/4" baltic birch ply painted black; formerly a fin on Pyro Pumpkin I. The paint was ground off in the areas to be bonded, prior to bonding; I still need to drill a small hole for "initiator" leads to pass through.

008.jpg


For electronics, I'll initially be using a pair of Adept 22's for apogee and low altitude events, and a Perfectflight Minitimer3 for airstarts. I really like using both of these products; simple, affordable, and reliable!

-Eric-
 
Last edited:
A definite maybe... :) I'll have to see if I can get Emily to agree to a dual purpose day. Ya see, my Emily's last living grandparent resides in Union Grove, so I might be able to fly Deadmau5 if we visit granny in Union Grove once we are done flying for the day. There is plenty of room in that sunken tube for sure! I-180 skid for first flight? I-345 White Thunder?

Does the Big Cletus kit come with (4) fins or (3)?


Justin

Four fins.

Regarding DeadMoose: for contrast against the background; cloudy skies: I180 skid. clear skies: I345WT.

We'll be visiting my sister-in-law that day as well, so we'll see who comes with me to the launch and how long I'm allowed to stay:p.
 
Hi Eric....Nice build. How did you get this kit? I would love to have one. I would build it stock. Thanks Greg Olson

Hi Greg,

Loc has them in stock, just not posted on their website yet. Just give them a call at 330-745-9755 and they'll send one right out; pricing is the same as the I-Roc. I have no doubt you'd thoroughly enjoy this kit!

Hope to see you and Kristin on Feb. 16th!

-Eric-
 
Back
Top