You are using an out of date browser. It may not display this or other websites correctly.
You should upgrade or use an alternative browser.
You should upgrade or use an alternative browser.
BlackHawk Carbon 29mm Min. Diam. build
- Thread starter blackjack2564
- Start date


Help Support The Rocketry Forum:
This site may earn a commission from merchant affiliate
links, including eBay, Amazon, and others.
blackjack2564
Crazy Jim's Gone Banana's
Jordan.... mine isn't so light anymore. After doing away with the Estes style shock cord mount and going with the coupler and bp epoxied on. I'm up to 10oz. on the single version.
I can't imagine having my first rocket with avionics a 29mm minimum dia. one. Think I would have torn my hair out.
On the other hand, not being influenced by previous builds, looks like you have come up with some unique solutions to our limited space dilemma we have with these Blackhawks.
Is the battery and holder for a tracker? If so ., what kind?
JordanT
Well-Known Member
- Joined
- Aug 9, 2009
- Messages
- 780
- Reaction score
- 17
It certainly tested my ability to keep it all in my head - I almost broke down and made a drawing. I just wish I were a better machinist/had some competent tools. A $99 drill press and a set of hand taps makes for pretty limited metalcraft operations.
The battery is for deploy. I don't think the parrot is rated to fire pyros. I don't have the spare change for a tracker, and sims "only" take it to 7000' on a CTI 6XL little-I. I thought about a second LiPo battery, which would have been a lot sleeker, but then I'd have to get another charger, etc.
The battery is for deploy. I don't think the parrot is rated to fire pyros. I don't have the spare change for a tracker, and sims "only" take it to 7000' on a CTI 6XL little-I. I thought about a second LiPo battery, which would have been a lot sleeker, but then I'd have to get another charger, etc.
Last edited:
- Joined
- Jan 19, 2009
- Messages
- 14,980
- Reaction score
- 1,321
The battery is for deploy. I don't think the parrot is rated to fire pyros. I don't have the spare change for a tracker, and sims "only" take it to 7000' on a CTI 6XL little-I. I thought about a second LiPo battery, which would have been a lot sleeker, but then I'd have to get another charger, etc.
The Parrot's on-board battery is for powering the altimeter only. It does require a second battery for pyro.
I still need to get a LiPo for use in mine -- I don't want the bulk or weight of a 9V, although you have given me some ideas for how to carry one, if I need to.
They're just so bloody heavy!
-Kevin
JordanT
Well-Known Member
- Joined
- Aug 9, 2009
- Messages
- 780
- Reaction score
- 17
The Parrot's on-board battery is for powering the altimeter only. It does require a second battery for pyro.
I still need to get a LiPo for use in mine -- I don't want the bulk or weight of a 9V, although you have given me some ideas for how to carry one, if I need to.
Well, I plan on going with a low current igniter (probably Q2G2 or similar) which has an all-fire of somewhere in the sub- 200mA range. The A23 is a 12v battery
and I think it pushes about 700mA in a short circuit condition (I don't remember where I got that number from - I think I tried it on my meter) - more than enough to fire. The holder - intended for an N cell and about 99c from RatShack - is 3g and the battery is 12g.
- Joined
- Jan 21, 2009
- Messages
- 290
- Reaction score
- 339
The Parrot's on-board battery is for powering the altimeter only.I still need to get a LiPo for use in mine --
Yes the LiPo battry helps a lot when trying to fit everything.
https://web.mac.com/tennisace1/Site/Rockets.html#29
- Joined
- Jan 19, 2009
- Messages
- 14,980
- Reaction score
- 1,321
Yes the LiPo battry helps a lot when trying to fit everything.
https://web.mac.com/tennisace1/Site/Rockets.html#29
Which battery are you using, and where did you get it from? Looks like you've got one without the protective circuit; how are you charging it?
-Kevin
- Joined
- Jan 21, 2009
- Messages
- 290
- Reaction score
- 339
Which battery are you using, and where did you get it from? Looks like you've got one without the protective circuit; how are you charging it?
-Kevin
I got it form Adrian, and he even removed the protective circuit for me. Just give him an email ([email protected])
This is an emial from Adrian
::Note that for this cell to work for ejection charges, you have to remove the little cell protection circuit from the battery terminals. The cell protection circuitry's current limit is too low, and unnecessary for safety during deployments, but it also protects for overcharge, which is an important consideration. I leave the protection circuit on the Parrots so that if the Parrot's battery charger fails and tries to overcharge the battery, nothing bad will happen. I haven't seen a battery charger fail yet, but there's always a first time. If you go this route, you can charge both cells together using the Parrot's on-board charger by putting a wire from the arm screw switch to the Parrot's power screw switch while the deployment cell is connected. Just remember to remove the wire before flight so that the deployment charge doesn't drag down the main voltage and cause a brownout.::
Also read this
https://myforum.featherweightaltimeters.com/user/Discussion.aspx?id=128238
Use with out the protection circuit at your own risk....
Thanks for including all the caveats.
You can also buy it from www.all-battery.com without the protective circuit.
bobkrech
Well-Known Member
- Joined
- Jan 20, 2009
- Messages
- 8,352
- Reaction score
- 55
LiPo batteries do not like over-voltage conditions.
For small cells the protection circuit is not required if the cell is not connected to a voltage source greater than 4.2 volts.
Bob
- The maximum voltage that you can put into or float charge a LiPo cell without damaging it is 4.2 volts. (If you want your battery to last forever limit the charge/float voltage to 4.1 volts.)
- If you put more than 4.2 volts into a LiPo cell, you will begin to damage the electrode and begin to make lithium metal and generrate heat.
- The higher the excess voltage, the higher the current you push through the cell and the hotter you male it.
- At some point, the cell bursts, and the released material can catch fire when exposed to air and water vapor.
- Prevents voltage across the cell greater than 4.2 volts
- Prevents charging currents greater than the allowable charge current (usually speced as X C where X is the current multiplier to the A-hr rating of the battery, e.g. 2C for a 1 AH battery is 2 amps.)
- Prevents current drain greater than the recommend max recommended rate in units of C.
- Prevents the battery voltage from dropping below the 2.7 to 3.0 volts. If you let the battery discharge below 2.7 volts, you change the chemistry and the battery can be damaged during recharging if the current is too high. If you want the battery to last forever, do not discharge below 3.0 volts.
For small cells the protection circuit is not required if the cell is not connected to a voltage source greater than 4.2 volts.
Bob
JordanT
Well-Known Member
- Joined
- Aug 9, 2009
- Messages
- 780
- Reaction score
- 17
I'm tempted to fly it plain, but don't have a free weekend soon, so it will probably get a clearcoat before the maiden flight.
For those who have, should the body/fins be sanded smooth prior to the clearcoat, or will I end up with a nasty, unCF-like gray rocket?
I've taken the nose to 1000grit and presume it will gloss up under a clear coat, but I'm less confident that the CF patterns will re-emerge after the clearcoat is applied. (I don't have an extra piece to test)
blackjack2564
Crazy Jim's Gone Banana's
I just used a green Scotchbrite pad on mine.
No need to sand the fins at all, they are already perfect. Just buff the shine off so the clear will stick. The tube is also pre-ground as part of the truing process, so just buff it or use very fine paper...320 -400. A few light coats of clear for a base, then a good solid one. Let dry a day or two, buff out the imperfections....hit it with one final coat = mirror finish.
Don't worry and don't overdue it. When you apply the clear it will all show up just fine.
Like This Duplicolor Auto Clear rattlecan....
Last edited:
- Joined
- Jan 19, 2009
- Messages
- 14,980
- Reaction score
- 1,321
I have a tower launcher question ... How long dose a tower launcher need to be for a 41 inch long rocket ?
Depends on the acceleration from the motor -- the tower needs to be tall enough to provide guidance until the rocket reaches sufficient velocity for the fins to work their magic.
-Kevin
rockie
Well-Known Member
- Joined
- Jan 24, 2009
- Messages
- 84
- Reaction score
- 0
Thought id post how far i have come on my ebay for the 29mm BH.
Its my first ebay but its starts to take shape, the only thing that still makes my head spin is the power switch. There is so little room, its almost impossibe to make something fit and be accessible hehe. I am now trying this small microswitch with a homemade pin-activator. It does not fit lying down so it has to stand up. Some epoxy should make it stick pretty well hopefully.
All fiberglass is cut from the fin alignment guides.
Testing switch, looks like a mess i know.
Btw Nice looking builds guys, lots of inspiration to find here")
[YOUTUBE]KCxaccDvbHA[/YOUTUBE]


Its my first ebay but its starts to take shape, the only thing that still makes my head spin is the power switch. There is so little room, its almost impossibe to make something fit and be accessible hehe. I am now trying this small microswitch with a homemade pin-activator. It does not fit lying down so it has to stand up. Some epoxy should make it stick pretty well hopefully.
All fiberglass is cut from the fin alignment guides.
Testing switch, looks like a mess i know.
Btw Nice looking builds guys, lots of inspiration to find here
[YOUTUBE]KCxaccDvbHA[/YOUTUBE]
Is that a motor tube?
rockie
Well-Known Member
- Joined
- Jan 24, 2009
- Messages
- 84
- Reaction score
- 0
Nice work rockie. Where did you find the aluminum coupler ?
Thanks,
Its a motor casing i dont use anymore, a Rousetech/MM 29/120 casing to be exact.
More info,
Battery is a 12v A23 i think, dont need alot of power for the phratt charge canisters (light bulb filaments).
5 batteries for like 10$ so not very expensive either as far as specialty batteries goes.
Last edited:
dixontj93060
Well-Known Member
- Joined
- Feb 19, 2009
- Messages
- 13,083
- Reaction score
- 45
Its a motor casing i dont use anymore, a Rousetech/MM 29/120 casing to be exact.
Probably a bit heavy, but a good looking option!
Last edited:
rockie
Well-Known Member
- Joined
- Jan 24, 2009
- Messages
- 84
- Reaction score
- 0
Probably a bit heavy, but a good looking option!
Yes its pretty heavy, but according rocksim it will actually fly higher on an I motor becouse of the extra mass ? The ebay wired and ready with batteries is 123gr.
I put railbuttons on, one low and the other at CG when loaded with an I200 (according to rocksim). They are only screwed on so i can remove them for towerlaunch.
She is almost ready now, few details still to do then on to the groundtesting.
The only thing i am still a bit confused about is what i should use for shearpins ? What do you guys use ?
And i didnt get that ultrashine i was after but mayby that tamayia clear aint for that. I tried a few different methods, many very light and misty coats and then i tried some wet coats. Guess i can polish it later.
I will add more clear to cover the decals (silver strips) too. Dont want them to get riped off hehe :neener:


dixontj93060
Well-Known Member
- Joined
- Feb 19, 2009
- Messages
- 13,083
- Reaction score
- 45
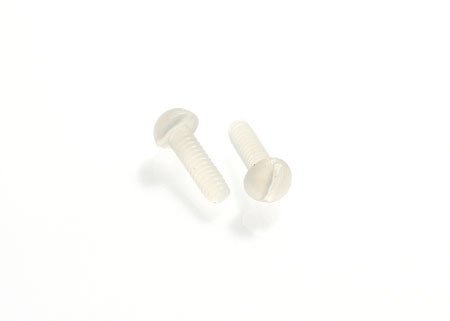
The only thing i am still a bit confused about is what i should use for shearpins ? What do you guys use ?
For that size rocket 2-56 nylon screws:
rockie
Well-Known Member
- Joined
- Jan 24, 2009
- Messages
- 84
- Reaction score
- 0
Very nice looking rocket, Rockie! Love the paint job.
Thanks, i tried to make it simple but good looking. Tamayia colors are nice too, love the metallic ones
The stripes are silver DYMO label, had some left from another build.
Viperfixr,
Its mostly custom or modified parts. The switch is a "Lever Microswitch" rated 3A 125v. I removed the lever and made some custom parts from a small brass tube and a thin plate from an old tobacco box
I glued the tube to the (bent)plate and screwed it to the switch becouse gluing it onto the switch is risking the button getting glued aswell. Now i can unscrew and replace the switch if needed. Sprayed it with the tamaiya red for nice color.
The pin is actually a old multimeter testprobe i cut in pieces and attached a "remove before flight" flag that can be bought at varius rocketshops.
Attached a quick scetch on how the switch works
dixontj93060,
Thanks, how many do you think i should use on one section ? I guess it can be calculated somehow..

dixontj93060
Well-Known Member
- Joined
- Feb 19, 2009
- Messages
- 13,083
- Reaction score
- 45
Thanks, how many do you think i should use on one section ? I guess it can be calculated somehow..
Yes, it should be calculated. For the typical calculation steps, I have attached an excerpt from my L3 documentation. The referenced charge calculator can be found here. The force required to shear pins of various sizes can be found here.
View attachment Recovery Excerpt.pdf
The only thing i am still a bit confused about is what i should use for shearpins ? What do you guys use ?
For 38mm and smaller, I don't use shear pins. I did some experimenting with 2-56 nylon shear pins on some 38mm birds and wasn't happy with how much powder was required to break them. There's just not that much area working for you in those sizes, so I use friction fit tuned with masking tape, and make sure my sections have small vents for pressure relief.
dixontj93060
Well-Known Member
- Joined
- Feb 19, 2009
- Messages
- 13,083
- Reaction score
- 45
For 38mm and smaller, I don't use shear pins. I did some experimenting with 2-56 nylon shear pins on some 38mm birds and wasn't happy with how much powder was required to break them. There's just not that much area working for you in those sizes, so I use friction fit tuned with masking tape, and make sure my sections have small vents for pressure relief.
Adrian, I would be interested in your experience here as you have built more minimum diameter rockets than I have, but a 38mm x 12" payload and 40 lbs of force (or so) to shear a 2-56 pin requires only 0.25g of BP. To achieve margin in my larger rockets I will up the calculated number by a third and close to double it for 2.1" airframes or below, but still only 0.5g or so?
Adrian, I would be interested in your experience here as you have built more minimum diameter rockets than I have, but a 38mm x 12" payload and 40 lbs of force (or so) to shear a 2-56 pin requires only 0.25g of BP. To achieve margin in my larger rockets I will up the calculated number by a third and close to double it for 2.1" airframes or below, but still only 0.5g or so?
That sounds like a small charge, but be sure to ground test thoroughly. I needed more BP than that for my ground tests, but perhaps I had extra friction working against me because of the specifics of my configuration. Also, my tubes were extra thin and I was getting to the point where I would damage the tube before I would break the shear pins.
With a precise, low-friction coupling joint and strong tubes, shear pins could work. But my own opinion is that 40 lbs is just way more force than necessary or desirable for holding on either the 29mm nosecone or the 2 body tubes. In the former case, with a decent-length shock cord you shouldn't see more than about 10 Gs when the shock cord loses its slack. A 29mm nosecone should be around a quarter pound or less (maybe much less), so the restraint should only need about 2 lbs to prevent a premature main deployment. Put a bunch of margin on that, and it's still right in the sweet spot for what you would get with a normal friction fit.
The apogee separation needs even less. You only need to prevent separation from drag and from atmospheric pressure differential. If the cavity has a vent hole, you don't need much restraint at all. I would recommend a fit that is tight enough to hold the front section on when you hold the rocket upside down, but loose enough that you can shake the 2 sections apart. If you put shear pins on the apogee deployment, then when you put margin on the BP for breaking the pins, you're going to need --and get--- a huge blast to get the sections apart, one that is almost certain to twang the shock cord, meaning now the nosecone restraint has to be strong enough to withstand 50-100 Gs rather than 10.
A ballistic re-entry is a lot more dangerous than a premature deployment, so I like to have a factor of 3 or more on the deployment force. So for a nosecone's medium friction fit with tape, you're looking at 6-10 lbs separation force, whereas with the shear pins you're looking at more like 120 lbs to get the same margin. And the pressure required for 120 lbs separation force in a 29mm tube is around 100 psi. Compare that to a normal rule of thumb of 1 atm (15 psi) for separating larger tubes. And 100 psi applied to a light nosecone will accelerate it like crazy, multiplying the energy (proportional to V^2) that everything will need to absorb when the slack gets taken out.
Shear pins are great for 54mm and up, but for little birds like 29mm, I think it's a lot better to scale up Estes-style techniques up than to try to apply the techniques for a 4" bird down to these small sizes.
Threemorewishes
Well-Known Member
- Joined
- Feb 23, 2009
- Messages
- 425
- Reaction score
- 18
...The switch is a "Lever Microswitch" rated 3A 125v. I removed the lever and made some custom parts from a small brass tube and a thin plate from an old tobacco box
Great idea rockie! I am in need of a similar set up and will incorporate this ingenious idea into my current project. Well done.
5x7
Well-Known Member
- Joined
- Jan 19, 2009
- Messages
- 948
- Reaction score
- 119
Shear pins are great for 54mm and up, but for little birds like 29mm, I think it's a lot better to scale up Estes-style techniques up than to try to apply the techniques for a 4" bird down to these small sizes.
I have used 1/16" styrene rod for a 54mm min diameter glass rocket and would not hesitate to use it on something smaller. Styrene also leaves nothing out in the air stream, but the pins can be sheared by twisting the NC if the rocket needs to be opened after it's pinned. No messing with friction fitting. I think they are a good balance point between HPR nylon pins and tape.
Similar threads
- Replies
- 106
- Views
- 8K
- Replies
- 43
- Views
- 5K
- Replies
- 83
- Views
- 8K
- Replies
- 30
- Views
- 3K