Painting a round and tapered nose cone

The Rocketry Forum

Help Support The Rocketry Forum:

This site may earn a commission from merchant affiliate links, including eBay, Amazon, and others.

cjp

Well-Known Member
Joined
Oct 29, 2009
Messages
1,229
Reaction score
10
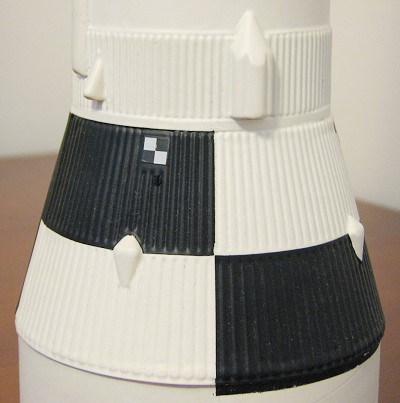
I bought a BMS Gemini Titan nose cone for a scratch build Gemini Titan rocket,whats the best way to paint it?Having a hard time masking it off to paint the upper half black and the lower white.Any tricks on how to do this?I can't get a straight line with the blue painters tape.
 
last time I painted a 2 tone nose, I used vinyl electricians tape and stretched as needed.
rex
 
Paint the whole cone the color of the tip, then make a perfectly circular tube of paper and place it over the tip of the nosecone for masking.
 
My plan for paining the NC Tip on my BH-29 is liquid mask. The rest is being clear coated,... so I can't do the tip color first technique.
 
I'm assuming you have the entire capsule painted white.

1) Measure the diameter of the capsule at the point where you need the color change. That should be at the interface between the Gemini and the retro section.
2) Use a shroud drawing program to draw a shroud whose smaller diameter matches what you measured. The larger diameter shouldn't matter.
3) Cut out and form the shroud.
4) Carefully slide the shroud onto the capsule until you have it lined up correctly.
5) Hit the capsule with a light coat of white to seal the shroud / capsule interface. After this dries, paint the top of the capsule black.
6) When dry, remove the shroud, and admire your work.

Thank you for that information,I want to thank everyone who has responded.I have the nose cone primered white,and thought about painting it white. I don't know if I have a drawing program but will check with my daughter who might have what I need to finish this part.
 
Thank you for that information,I want to thank everyone who has responded.I have the nose cone primered white,and thought about painting it white. I don't know if I have a drawing program but will check with my daughter who might have what I need to finish this part.

You can use the Transition Tool at PayloadBay.com to create the shroud.

-- Roger
 
I looked everywhere for a picture but could not find one. But below is a picture of the large transition of a Saturn V build.

estes-saturn-v-1st-2nd-stage-coupler.JPG


I saw somewhere a hint for how to draw that line around the center of the transition by attaching a pencil to a wood block set at the correct height and applying marks around the girth (both the transition and the block are place on the same flat surface). It would seem that you could employ a similar technique to mark the location of where the small opening of above-described shroud would be located. The pencil mark would ensure you have the shroud on straight.
 
The simplest method for me is using a scrap centering ring. Drop it over the nose, eye level it, then run masking tape around the perimeter of the ring..,,,attatched to paper, plastic, whater is long enough to drape down and cover the rest from overspray. Gives a clean edge and no tedious measuring.
 
You can use the Transition Tool at PayloadBay.com to create the shroud.

-- Roger

Thanks,I have the drawing from BMS of the Gemini Titan nose cone I bought from them and put in the diameters but it still come out short.Don't know what I'm doing wrong.Tried 5 different times.
 
Thanks,I have the drawing from BMS of the Gemini Titan nose cone I bought from them and put in the diameters but it still come out short.Don't know what I'm doing wrong.Tried 5 different times.

Adobe Reader or your printer may be scaling the printout incorrectly.

After selecting "File" then "Print" from Adobe Reader's menu, make sure "Fit to Page" and/or "Print Scaling" is set to "None." This fixes the problem most of the time.

I've added a 1" line to some of the printouts which helps you calibrate the tool. It's at the bottom of fin wrap templates, but I'm nto sure if it's in the shroud/transition one yet. You can measure it to see if your printout is correct. The distance between the vertical lines should be 1".

If the line still isn't 1" long, click the "Properties" button after "File"/"Print." The dialogs that appear vary with your printer. Look for a "Scaling" option and set it to "None" if it is set to something else. If it is none, try setting it to "Zoom" and enter a value like "101%" if the line was too short or "99%" if the line was too long.

-- Roger
 
Thank you,that helped.Now I need some warmer weather to paint.
 
Painted my nose cone today,came out great.Want to thank all who responded with your advice.This would not have turned out as nice with out your ideas on how to do it.Thanks again,cjp.EPM010 014.jpg
 
Thanks Jim,great news on your Level 2.Nice flight and beautiful job on your build.
 
A little late, but take a piece of plastic sheet (heavy ziplock bag, poly drip cloth, etc) and cut a circular hole in the middle slightly smaller than you need. Slip it over the item being masked and pull it so it stretches to the line where you want to mask and tape it down so it doesn't creep back up. If the starting hole is small enough the plastic will form a "wall" that can be carefully trimmed with a sharp x-acto or razor blade to the exact line you want. Once the paint is on and has tacked enough not to run cut the plastic off (DON'T pull it off unless you like smears) and you'll end up with a razor sharp demarcation line. The stretched plastic seals down tight - as long as he area being masked is smooth, that is.
 
Back
Top