no more kneeling or squatting

The Rocketry Forum

Help Support The Rocketry Forum:

This site may earn a commission from merchant affiliate links, including eBay, Amazon, and others.

BABAR

Builds Rockets for NASA
TRF Supporter
Joined
Aug 27, 2011
Messages
11,638
Reaction score
6,286
Picked up a reeaally simple device online that adapts a standard camera tripod to accept a 1/8" or 3/16" rod. Can't believe nobody has sold this before. Rocket is at chest level, rod tip WELL above eye level, swaps out 1/8 and 3/16 easier and faster than portapad, adjusts direction and launch angle quickly and securely, is steadier than portapad, and with my collapsing camera tripod actually fits in my car better. No I am not a paid spokesperson. But I do really like this doohickey. It is called the "Adeptor" from Odd'l rockets. If you fly low power rockets it is really slick.

Review here
https://www.rocketreviews.com/oddl-rockets-adeptor-other-by-tom-markel.html
 
Thanks Tom!
I appreciate the review!
The Adeptor was made for people like me who don't want to kneel down in wet grass to connect up micro clips.

My concern using a camera tripod to launch model rockets is a higher center of gravity. I don't extend the tripod legs all the way out to the full length. Usually opening two out of the three leg extensions will set the launcher up high enough for easier access.
I tie the (micro clip) cable around the tripod's angle ajustment handle for strain relief and less pull on the igniter.

I remember the old Enerjet catalog where Larry Brown was launching off a (adapted) Centuri Altimeter Tripod. That was the inspiration behind the Adeptor design.
Some have taken the plastic center pieces from Estes launchers and permanantly epoxied them onto a camera tripod.
After a launch the Adeptor is removable and the tripod can be used with a camera again.
The ADEPTOR can be used with a flat metal deflector, ceramic BLAST deflector and RAISE spring for a complete new launch system.

I get better launch pictures with the rockets launching higher up.
I feel a little more "professional" flying off a launcher that doesn't have lightning bolts on the legs.
(That's not a slam against the Estes launcher, my hobby has grown up and now my launcher has too.)
 
Last edited:
Some tripods have a hook located below the head where weight can be hung for increased stability.
 
Great Find Tom!

Most of us Old timers have been using similar Add-ons for a long time. Like you mentioned since most Camera tripods use a standard 1/4-20 attachment screw wondered why noone has marketed an adaptor before now.

For those out there that are Do-it-yourselfers The adaptor is simply a 1/4-20 Steel Rod coupling with a smaller 10-24 or 8-32 threaded thumb screw tapped in one side to lock the rod in place.

KEWL find.
 
Can't believe nobody has sold this before.

Actually, I remember buying one when I first did rocketry. unfortunately, this means sometime in the 60's (I'm not old, really... maybe...)
I think either Estes or Centuri sold it, but I'm not sure (Memory is the second thing to go. I forget the first)
 
I simply epoxied the center hub section of an Estes Porta-Pad onto an extra "shoe" plate of the tripod (it fits with about 1/16" clearance -- almost like it was designed for that purpose). The hub is designed with slots to accommodate 1/8 and 3/16 rods, and a 1/4 rod will work in the 3/16 slots (you just have to crank the wing nut an extra half turn) so the tripod will handle pretty much anything I am conceivably likely to launch.

I used high-strength epoxy so the hub is mounted on the shoe pretty good. I think the plastic hub section would break off before the shoe pulled off.

As far as ensuring pad stability for heavier/higher-power rockets, I drive a tent stake into the ground underneath the tripod, then stretch an elastic bungee cord to the tripod to clamp it down. Since I started doing that, I have rarely even had the pad even wiggle during launches.
 
Last edited:
As far as ensuring pad stability for heavier/higher-power rockets, I drive a tent stake into the ground underneath the tripod, then stretch an elastic bungee cord to the tripod to clamp it down. Since I started doing that, I have rarely even had the pad even wiggle during launches.

Brilliant idea! I will definitely have to do this the next time I use the camera tripod launch stand.
 
. . . For those out there that are Do-it-yourselfers . . .

Didn't you once correct about rolling my own MMX engine mounts?
So much for me being a "do-it-yourselfer".
(Don't get me started on the MMX Honest John paint scheme.)

I offer this product for those who don't have a workshop or the time to make one.
Unless you have a spare coupler, you'll probably have to buy them in bulk.
You'd be lucky to find this coupler in most hardware stores. I've looked.
Couplers in the ADEPTOR half length size don't exist and have to be cut in two.
Tapping threads into steel isn't easy.
That and the thumb screw is also cut down so the ceramic BLAST deflector can fit over it.

Unless you've done some metal work before, I think the price of the ADEPTOR is reasonable.
And, I guarantee it'll change the way you fly rockets.
 
I did this, but bought quick-release plates so I can swap rods in the field without undoing the set screw. Oh, and one of the rods is a 1010 rail. I captured a 1/8 plate between the coupler and the adapter, too.

I actually don't use it in regular tripod mode, though. The two trips I have both have legs which will splay out close to 80 degrees, so I extend them fully and push the center column down until it hits the ground. Super stable, enough capacity I can stand on it, and with the Az-El mount it's easy to adjust for changing wind direction.
 
Making sure the base of the pad is stable and anchored down is something a lot of people forget/neglect to do.

I was looking at some super-slow-motion launch videos on YouTube (for a completely different reason), these were just LPR rockets, B and C motors, and on some of the launches, when the motor ignited and the exhaust was directed down on the blast deflector plate, the plate angled off at a 45 degree angle and the entire pad -- rocket, rod, blast plate, legs and base and everything -- skittered maybe six inches sideways before the rocket slid up the launch rod, which was flexing back and forth pretty good after the rocket left.

The entire launch rod sliding several inches sideways in the space of a tenth of a second or so cannot be good for the directional flight of the rocket, so after seeing those videos I have made extra sure my tripod pad is strapped down pretty good before I launch.

I was already using bungee cords because several years ago I had a larger rocket kick the pad completely over during a launch and it ended up heading off almost horizontal, but even on smaller rockets it makes sense to strap it down good. It only takes about 30 seconds to pound in a tent stake and bungee it down.
 
Heh, trying to drive a tent stake into the ground here is like trying to drive one into concrete. If you do manage to get one in you may never get it back out again!
 
OH Chris:
No Actually I corrected about the absurd EXCESS mass that was being added by the Way you were rolling those MMX motor mounts. Making tubes or mounts yourself was never the problem.

But back to your issues here.
Apparently you have not looked around very well for your materials.
What workshop? All that's needed is an Electric Drill, Drill bit, Tap and tap handle. Currently Drill tap & die sets run 8.99 to 14.99 @ HarborFreight #96570 or #39384. A small vise or clamp would help but not absolutely necessary. Time? all of 5 to 8 minutes for the entire operation. Guess I should have looked to see who was offering this "adaptor" as I didn't mean to bruse anyone's delicate ego.

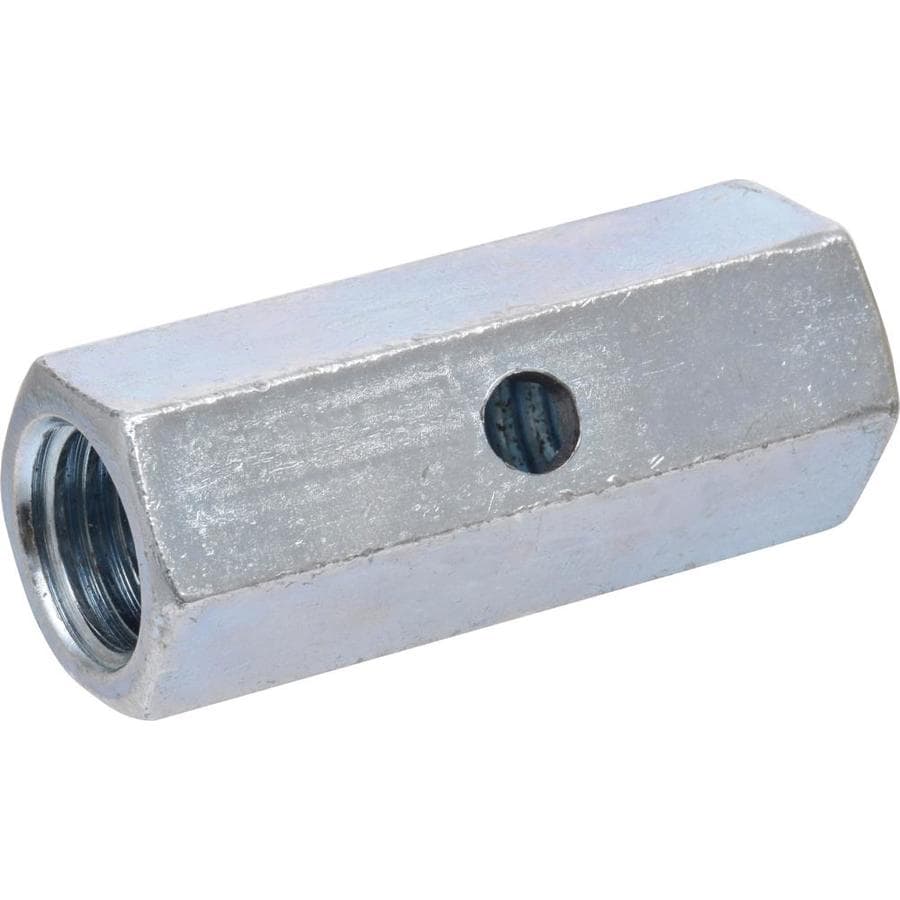
BULK BUY? REALLY! LOL!!!! ARE YOU KIDDING! Zinc Plated Steel 1/4-20 Rod couplings are available individually or in 2-Packs at just about ANY hardware, Home improvement or industral supply store for next to nothing. Currently one can purchase 1/4-20 Steel Rod couplings from Lowes in 2pks #142056 Expensive at 2.73/pk or from McMaster-Carr #90264A-435 Qty 1-9 for .23each, or 18-8 Stainless Steel #90268A325 Qty 1-9 for .76 each. Ditto for thumb screws in various materials including NYLON which would be a better choice as Nylon has a higher friction coefficent then steel for rod retension.

While it is true one needs a tap handle,Tap and drill bit sized for whatever thumbscrew your using. Tapping the flat side of a hex coupling is easy enough for a 10yr old to do... I know cause my Daughter did it often on many custom launch equipment projects. Down to 2-56 size machine screws. A little WD-40 or better spray cutting oil makes the job a snap.

My offering for the Do-It-yourself folks was simply because this is such an Quick and Easy addition to just about any type Tri-pod it's something most anyone can make for themselves for under 2 bucks.

STILL: IT IS A NICE for purchase PRODUCT! Whatever your charging i'm sure is OK. Thanks for taking the time to offer these coupling to those who don't make their own launch equipment.

Multi-Use MMX Launcher Base-c_Bottom Plate View_03-31-02.JPG

Multi-Use MMX Launcher Base-j1_AngleClip&Screws_03-31-02.JPG

Multi-Use MMX Launcher Base-o_on 10segment Tripod_03-31-02.JPG

b1-sm_drill&Tap .375in bass nut w 8-32thumbscrew_07-27-03.jpg

LaunchRod Stops-h-sm_finished 2 -1.25in & 2 - 2in_06-22-07.jpg
 
Last edited:
Heh, trying to drive a tent stake into the ground here is like trying to drive one into concrete. If you do manage to get one in you may never get it back out again!

Well, if the ground is rock-hard and tent stakes are not practical, other people have lugged cement blocks around to use as launch pad anchors. Just loop the bungee cord through one of the cement block holes and you are good. Big (5-gallon) water jugs work as well and are helpful if you need extra water on hand for possible fire prevention.
 
I used a halogen light stand to avoid getting the squats...

Thread --> here

Wow, that was 2 years ago?

Since then, I have also adapted it to accept my rail. I have also made another (larger) one, that I have to get pictures of yet. Both can switch between rod or rail in about 30 seconds.
 
To Mr. Micromeister,
Quote:"Apparently you have not looked around very well for your materials."
Don't assume I don't do research to find the right vendors. My new fin alignment tool took two years, five vendors and a dozen burns to get it correct.

To quote you: "BULK BUY? REALLY! LOL!!!! ARE YOU KIDDING!
Another insult. I'm not kidding. I went to three different hardward stores and didn't find them in the height I was looking for.
I bought my couplers in bulk to get the appropriate size needed.

To quote you: "Time? all of 5 to 8 minutes for the entire operation."
I'd like to see that. The couplings are cut to a better, usable size. They are leveled, then drilled and tapped.
It takes me over 30 minutes to put one together. My product worksmanship is clean.

Another quote:
". . . it's something most anyone can make for themselves for under 2 bucks.
Gee, thanks for giving it away!

You show a MMX adapter (a little too complicated for me) and and an equivalent to my Odd'l Rockets RAISE spring.
Again, don't assume I didn't look for my materials. I went through another five vendors to find the right one to fabricate the Raise spring product. (1,500 sold so far by the way)

Your responses make you sound like a "Know it all" to many. Who knows how many you have alienated.
Your insults aren't insulting anyone but yourself.
You are now blocked. Congratulations, you are the only forum member to attain that.
Touche'.

Chris Michielssen
 
Last edited:
There are those of us who do not have the tools or the skills to make something like this, or who lack the ability even if we did. My hands are becoming arthritic and I'm having more and more difficulties working with smaller items. For someone like myself the Adeptor and Raise are ideal. Both are on my list of support items I still need to get as a matter of fact.
 
Prices are funny things. I was happy to pay what I paid, and I picked up a Raise, a CorkScrew, and a couple of nice BT-80 tubes. I was quite happy with the products and the price.

There are somethings I am a do-it-yourself, like building a custom nose cone out of a toilet paper roll (https://www.rocketreviews.com/umm-me-uranus-explorer-2-scratch-by-tom-markel.html)

Other things I am willing to pay the prices to let someone else do it for me. I guess my definition of a Rip-off is where the product you receive is not up to what you expected based on the advertisement. In this case I paid exactly what I was told, and I got exactly what I was told. And I am a happy camper. Could I have done it myself? I guess so, but I prefer tp spend my time on things like the SR-73, the Whopper Flopper Chopper, the Mayday, the Gone Fission, the Gyskelion, and the Uranus Explorer.
 
I prefer a stand-off using a clamp on the pan handle. That way the tripod is still presentable after a lot of firings.
Doesn't work for a ball-and-socket-only stills tripod, though.
 
When I saw the "Adeptor" online I knew right away that:
1. It was the greatest thing sinced sliced bagels
2. It would save me having to grovel in the mud while trying to hook up my my ignitors
3. I just had to have one!

And now having mounted it to a sturdy photo tripod it is proving to be an amazing little device. I slide a rocket in place on the launch rod, wind the tripod head up nice and high in order to attach the micro clips to the ignitor, wind the tripod head back down so everything is nice and stable, check the range, check for continuity, check the range, give the countdown, hit the switch and watch my little baby fly upwards while I gaze in wonder, all the while appreciating that my knees, elbows and chest don't look like I've been playing rugby all day.

As for a blast deflector, I found a heavy gauge aluminum cake pan in the kitchen cupboard that was looking lonely and forgotten, so I drilled a hole large enough for the tripod head bolt to poke through and I screwed the "Adeptor" down onto this. Even though with this particular setup the "Adeptor" is exposed to the exhaust it seems to work great! And so far my wife hasn't even noticed that the cake pan is missing!!:wink:
 
I made my own adapter from a small piece if 1x2 pine. I drilled a hole for the mount screw, one for the launch rod and an intersecting hole for a set screw. It didn't cost me a dime and it works great.
 
....other people have lugged cement blocks around to use as launch pad anchors. Just loop the bungee cord through one of the cement block holes and you are good. Big (5-gallon) water jugs work as well and are helpful if you need extra water on hand for possible fire prevention.

Or, if you are using a relay ignition system, you can use your pad battery (like a 12V auto batty) to hang from the launcher to anchor it to the ground
 
I never have considered using a camera tripod for the exact reason someone else mentioned. Higher center of gravity. It just looks way too topheavy to me. And I'm stubborn enough that if 100 out of 100 people love it, I still wouldn't use it. Mainly for the chance an odd wind gust could blow it over and damage a rocket. BUT, Tarasdad mentioned a simple fact that if I needed one could totally change my opinion. The hook in the center to hang the weight on. I've got a couple of camera tripods and have used the hook on telescope tripods with good success dampening movement/shaking. I built my own for less than ten bucks a couple of years ago and for the life of me looks exactly like the Pro Series II Estes is selling for around fifty bucks. Very stable and fairly high off of the ground. Still have to kneel though. I've got an old Estes Bigfoot that I cut the wires off of and used with an Estes E launch controller that I just keep for a spare now that I like the homemade one so much. But as I get older and the back continues to degenerate I'll gladly go the camera tripod route. As long as I can hang about five to eight pounds from the little hook I wouldn't care to launch D & E powered rockets off of it.

Stratos283

Some tripods have a hook located below the head where weight can be hung for increased stability.
 
High Center of Gravity issues are ridiculously easy to fix... Either stake the legs down, or simply take a gallon jug of water, or other weight (concrete block, whatever) and suspend it from a small rope tied to the top of the tripod, suspended just above the ground between the legs of the tripod.

Later! OL JR :)
 
My only problem with the Adeptor is that when I made my first one, 1962-3?, I didn't patent it.

Mike
 
Yes, it's 6 years later . . .

All the "Adeptor" is is only a long "all-thread nut", drilled and tapped to add a side thumb screw . . . You get TWO of them in the package . . . 64 CENTS EACH !


https://www.lowes.com/pd/Hillman-2-Count-0-250-in-Zinc-Plated-Standard-SAE-Nuts/1000035181


038902103239.jpg
 
Price of all thread nuts .64 cts.
Price of tap and die set $30
How often you use a tap and die set: Once every ten years?
Price of adeptor: $12.69 (current)
Seems like a bargain to me.
IMG_20190228_141301.jpg
 
Price of all thread nuts .64 cts.
Price of tap and die set $30
How often you use a tap and die set: Once every ten years?
Price of adeptor: $12.69 (current)
Seems like a bargain to me.

For those of us who already have a tap & die set, the cost, including the thumb screw, is about $1.25 +/-.

For those of us who don't, another $7.00 +/- gets the job done . . . So, that's TWO adapters for less than $10.00 !

https://www.lowes.com/pd/IRWIN-HANSON-2-Pack-SAE-Tap-and-Drill-Set/1000363547

So, a 1000% markup from $1.25 to $12.69 ( not including shipping ) . . . Do the math !
 
Back
Top