fox_racing_guy
Well-Known Member
- Joined
- Jan 18, 2009
- Messages
- 624
- Reaction score
- 1
I'll start this by telling everyone that I work at LOC/Precision and that I have talked to many of you on the phone or met in person at various launches. My main duty is manufacturing all of the recovery components but I do a bit of everything. I was a parachute rigger in the US Navy and I'm very comfortable around industrial sewing machines and various cutting tools.
Earlier this year we purchased a new laser cutter and it is much more user friendly than our CNC and I've been pretty busy writing files and putting it to good use. You will slowly see more laser cut parts show up in kits and/or if you just order components from us.
Now that's out of the way lets build a Warlock. I already had one of these previously built but our salesman suffered a cato this past summer and neglected to bring me the remains. It had flown on a steady diet of 38mm J loads and was on it's 17th flight when the motor failed.

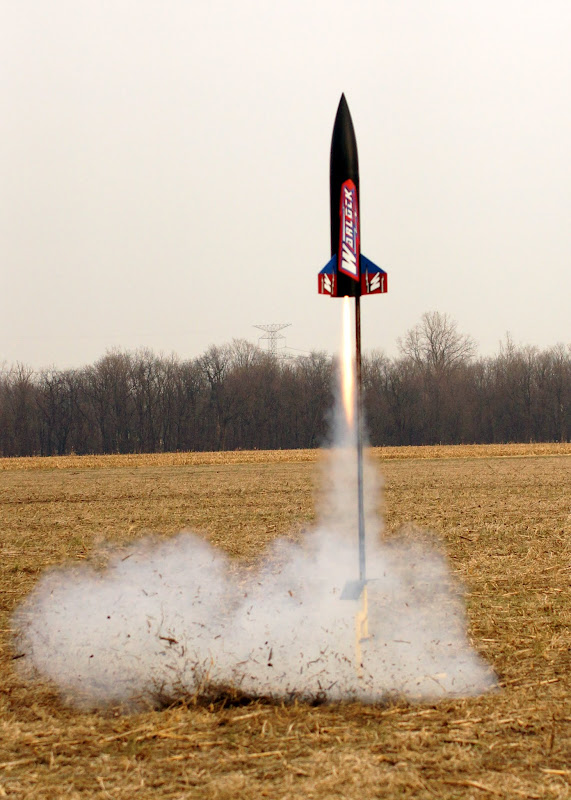
This is my original Warlock.

Lifting off on a J350M

Here are the components for the new build.

Closer shot of the components and laser cut body tube.

Here is the products I used to build with, yes wood glue only and my previous Warlock was built identically. The Krylon is the original formula, when I heard they changed it and the new stuff was not as good I stocked up heavily in my favorite colors. The Bull Dog adhesion promoter is used on the nose cone.

Before gluing I like to peel the glassine off the motor tube, you could sand it off if you like but this takes me all of 15 sec to do. You should do this whether you use wood glue or epoxy.

I found a forged eye bolt in my junk box at home so I used that for my recovery harness anchor. I used some construction adhesive on the threads to keep the nut from backing off.

Next I glued the top ring to the motor tube.

Next I dry fitted a fin.

All 3 fitted with the LOC-N-Fin method.

I did my exterior structural fillets first.

Another angle.

Dried.

Next I glued the LOC-N-Fin.

Here is a pair dried, notice that I didn't use globs of glue only what is necessary.

One more shot.

Next I glued the rings and motor tube in, I found a cut of section of coupler tube at the office so I glued it against the top ring, this also helped me place the ring and tube square in the body tube.

Then I glued the aft centering ring in and glued my Aero-pac on, for the Aero-pac you need to use original JB Weld, NOT the quick setting kind.

Titebond molding & trim glue used for the "beauty" exterior fillets.

Another view.

All the gluing is complete so I gave everything a light sanding then primer. On the nose cone I washed it with dish soap the shot it with the Bull Dog before priming. I personally don't go nuts filling spirals but give it 2 coats of primer with sanding between coats.

Next I shot it with the Krylon Black.

Earlier this year we purchased a new laser cutter and it is much more user friendly than our CNC and I've been pretty busy writing files and putting it to good use. You will slowly see more laser cut parts show up in kits and/or if you just order components from us.
Now that's out of the way lets build a Warlock. I already had one of these previously built but our salesman suffered a cato this past summer and neglected to bring me the remains. It had flown on a steady diet of 38mm J loads and was on it's 17th flight when the motor failed.
This is my original Warlock.
Lifting off on a J350M
Here are the components for the new build.
Closer shot of the components and laser cut body tube.
Here is the products I used to build with, yes wood glue only and my previous Warlock was built identically. The Krylon is the original formula, when I heard they changed it and the new stuff was not as good I stocked up heavily in my favorite colors. The Bull Dog adhesion promoter is used on the nose cone.
Before gluing I like to peel the glassine off the motor tube, you could sand it off if you like but this takes me all of 15 sec to do. You should do this whether you use wood glue or epoxy.
I found a forged eye bolt in my junk box at home so I used that for my recovery harness anchor. I used some construction adhesive on the threads to keep the nut from backing off.
Next I glued the top ring to the motor tube.
Next I dry fitted a fin.
All 3 fitted with the LOC-N-Fin method.
I did my exterior structural fillets first.
Another angle.
Dried.
Next I glued the LOC-N-Fin.
Here is a pair dried, notice that I didn't use globs of glue only what is necessary.
One more shot.
Next I glued the rings and motor tube in, I found a cut of section of coupler tube at the office so I glued it against the top ring, this also helped me place the ring and tube square in the body tube.
Then I glued the aft centering ring in and glued my Aero-pac on, for the Aero-pac you need to use original JB Weld, NOT the quick setting kind.
Titebond molding & trim glue used for the "beauty" exterior fillets.
Another view.
All the gluing is complete so I gave everything a light sanding then primer. On the nose cone I washed it with dish soap the shot it with the Bull Dog before priming. I personally don't go nuts filling spirals but give it 2 coats of primer with sanding between coats.
Next I shot it with the Krylon Black.


") Warlock's are great; and the speed, simplicity, and finish of yours is awesome! Do I get to see this bird fly in two weeks? Zoey looks great with the rockets; which always present better with models!
Warlock's are great; and the speed, simplicity, and finish of yours is awesome! Do I get to see this bird fly in two weeks? Zoey looks great with the rockets; which always present better with models!