LOC BIG NUKE 3E BUILD

The Rocketry Forum

Help Support The Rocketry Forum:

This site may earn a commission from merchant affiliate links, including eBay, Amazon, and others.

neond7

Sky Pirate
TRF Supporter
Joined
Feb 15, 2012
Messages
1,334
Reaction score
142
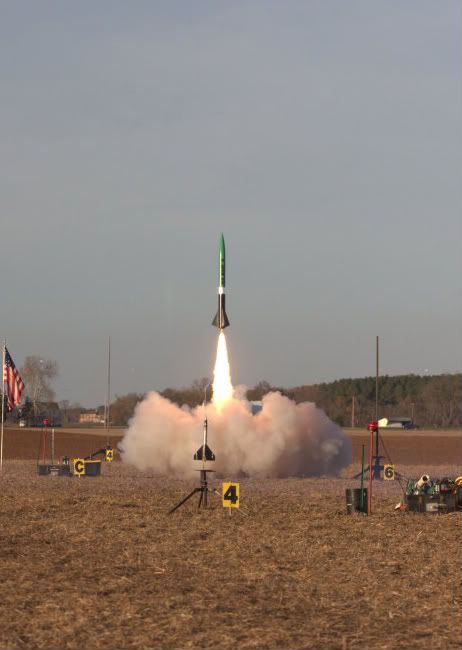
I recently started my LOC Big Nuke 3E build. Thank you Barry from LOC Precision for allowing me to order a custom kit - he allowed me to substitute a 54mm MMT in place of the standard 75mm MMT. This shouldn't limit me in any way, as a K700W will still put this beast up well over a mile which is about as high as you want to go on our smallish Florida fields.

I'll preface this build thread with the statement "Yes, I"m building this rocket heavy". My main goal of building this rocket (besides saving the world by burning off as much of that dangerous Ammonium percolate as I can) is to use it as a test bed for a possible L3 build later in the year.

I feel I already had a pretty good handle on glassing tubes (thanks tfish and others who have helped me along!), but I'm still seriously lacking in the electronics department. I'll be using dual PerfectFlight SL100 altimeters in this build, with an av-bay topped off on both sides with some gorgeous Blast Caps.

Any TAPS or others who have any suggestions, please feel free to chime in! So, here's the pics you have all been waiting for:

1. I was very happy to see this box show up on my front door!

2. Unboxing time. At this point I didn't notice the motor tube was too long, luckily I picked up on it later in the build during a dry fit before it was epoxied in place. Always dry fit the parts!!!

3. I just wanted to see how tall this rocket was - my tallest one so far.

4. The business end of the MMT gets an Aeropack motor retainer. I sanded off the glassine and put some small nicks in the tube for the JB Weld to soak into. I applied the JB Weld up to the line of the top of the rear CR so the CR will get a good bead as I slide it into place.

5. The finished product. I usually use way too much JB Weld and end up with a huge fillet, I was a bit more conservative this time. A popsicle stick does a good job of shaping the fillet.

141.JPG

143.JPG

144.jpg

145.jpg

148.jpg
 
Cool! Look forward to seeing this build progress...


Later!

--Coop
 
I'll be watching closely, as I was considering this rocket for my L2...
 
Now the real fun begins! All laminating was done with West System 105 epoxy resin and 206 slow hardener. For the body tubes, I used a 2x wrap of 5.6oz "4533 S-GLASS Cloth" from Aircraft Spruce and a 1x wrap of 3.08oz "120-38 STANDARD E-GLASS FIBERGLASS CLOTH" as a veil layer. My previous build (LOC Warlock) I had skipped the veil layer and spent LOTS of time filling pinholes.

If I could do it over, I would probably have only applied a 1x wrap of each, the 2x wrap of S-glass seems to have been a bit of overkill - these tubes are now UBER STRONG. Once nice thing about the S-glass vs regular fiberglass is "S-glass is 30% stronger and 15% stiffer than E-glass and retains these properties up to 1500° F". On the downside, its also twice as expensive at $16.50 a yard.

The final weights came out to 44oz for the booster and 32 oz for the payload tube. I had forgotten to weight the booster tube before laminating, but I did weigh the payload tube before and after - it added 10.35oz so I'll guesstimate ~12oz was added to the booster.

And here is the pics!

1. I found two tables and a PVC pipe make a good place to work. I forgot to take a pic of all the cloth I had measured out and cut.

2. Here is the payload bay, both wraps of fiberglass on the tube and a wrap of Teflon release film applied. I didn't get any pictures during lamination due to epoxy covered gloves not playing well with cameras. Keeps the wife happy if I keep the epoxy off the camera.

3. The epoxy cured quickly in the Florida heat. About 2.5 hours of cure time, the Teflon release film was pulled leaving a very nice finish that will require very little finishing work. I also trimmed the overhang from the edges of the tubes while the epoxy was still green and flexible. It cuts like butter.

4. Here is the freshly laminated booster section, the Teflon release film had just been pulled after a 3 hour cure. I had also laminated the av-bay switch band (not shown).

5. And here are the two finished tubes! The booster section had two very minor spots that will need a dab of Bondo, but these are my best two tubes yet. Practice makes perfect!

One thing to note that I will take to heart on future builds - if the instructions say "lengthen and widen the fin slots", do it BEFORE you laminate the tubes. I spent about 2 nasty hours yesterday lengthening and widening these fin slots, which wore out 2 Dremmel cutting wheels. This would have been a 10 minute job on plain cardboard tubes. Once the fiberglass goes on, things get exponentially more difficult.

151.jpg

152.jpg

155.jpg

156.jpg

158.jpg
 
Last edited:
Looks like great progress. Not sure if you seen my L3 build thread, I used three inch wide Kevlar at the top of each tube and then one layer of fiberglass. I didn't go the switch band at all. I also learned the cruel lesson if the fin slots. I went through at least 5 getting them wider and longer. If you happen to make them too wide, use 5 minute epoxy gel to fill in the gaps. Tape off the gaps and put the gel in the gaps and smooth it all out. I used a fake credit card I got in the mail. After about 2 minutes, take the tape off and let it cure. After that, you can do your external fillets.
 
This should be one heck of a high flier. I like the fiberglassing between two table.
 
What did you use to hold the tubes in place when you 'glassed them?
 
What did you use to hold the tubes in place when you 'glassed them?

I used two of the included centering rings, I just pushed one in about 8 inches from each side of the tube to balance it on the PVC pipe..... no epoxy gets to them so you can pull them back out once its fully cured. Whats nice is they force the tubes into the proper round shape during glassing. I won't tell you how I know what happens if you use another method...... ;-)
 
Great flying rocket. I built mine with a central 54mm MM and (3) 29mm MM for Air Starts.

IMG_7458-2-1.jpg
 
I used two of the included centering rings, I just pushed one in about 8 inches from each side of the tube to balance it on the PVC pipe..... no epoxy gets to them so you can pull them back out once its fully cured. Whats nice is they force the tubes into the proper round shape during glassing. I won't tell you how I know what happens if you use another method...... ;-)

I am building a Magnum 3E and I am going to 'glass it. I have the motor mount all put together. I guess I could just put the motor mount in through the top of the tube.
 
I made slow but steady progress this weekend on the build.

Here are the descriptions for the pictures:

1. After dry fitting the motor mount and av-bay, I realized the MMT tube was too long and there wasn't sufficient clearance between the top CR and the u-bolt on the av-bay. I downloaded the RockSim file and used that data to find the correct length for the MMT, ending up with 5 inches being removed. I had this kit modified for 54mm MMT, so this shouldn't be an issue with the regular 75mm kits. It ALWAYS pays to fit check everything first.

2. The included bent hook eye bolts are cute, they always me laugh when I thrown them in the junk drawer and then reach for a stainless steel u-bolt. The extra hole drilling and installation onto the top CR was uneventful.

3. Two paint cans made a great way to support the fin upside down so I could apply a bead of 30 minute Devcon epoxy to the fin root.

4. The first fin carefully tacked in - I like those uneventful installation steps. I was very careful to not get any epoxy between the body tube and fin which would make the fin can removal a difficult chore and possibly damage it.

5. As for now, all 3 fins are tacked in place with a full bead of 30 minute epoxy at the root.

My next steps (hopefully tomorrow) will be to extend the fin slots all the way to the back and then slide out the fin can. I will then secure the middle CR to the top of the fin tabs with Aeropoxy ES6209 structural epoxy. I haven't decided yet if I will just make generous Aeropoxy fillets along all the fin roots and CR's, or if I will instead use a dual layer of Rutan fiberglass along the fin roots. Either way should make the fin can strong enough that the materials will fail before the bond fails.

IMG_1229.jpg

IMG_1231.jpg

IMG_1238.jpg

IMG_1241.jpg

IMG_1245.jpg
 
I like what you did. I think I will try that same method on my build. As for the fin root, I would do both the fillets and the fiberglass for added security.
 
I like what you did. I think I will try that same method on my build. As for the fin root, I would do both the fillets and the fiberglass for added security.

I'm considering that - I can't do any more construction on it until Wednesday so I'll figure it out before then. I probably should, as practice for for an L3 build. It might be overkill on this rocket - I just need to decide if its worth the extra 5 or 6 ounces it will add to the rocket.
 
I had a free evening, so I put it to good use on rocket construction. And here are the pictures I know you are all looking forward to! ;)

1. The fins are all tacked in, cured for over 24 hours, and ready for the next step.

2. A Dremel with a cutting disc will save you lots of time.

3. Extending the fin slots took seconds.

4. All three fin slots are extended, ready to pull out the fin can.

IMG_1249.jpg

IMG_1251.jpg

IMG_1252.jpg

IMG_1253.jpg
 
Once I had the fin can out, I started on fillets using Aeropoxy ES6209 structural epoxy. I used a digital scale to measure out the epoxy and stirred it well. Prior to acquiring the scale, I had tried to "eyeball" a 50/50 mix on a previous build and I think I had the ratio off as it never seems to fully harden. The Aeropoxy is still fairly runny compared to the West Systems epoxy (mixed with colloidal silica and high density filler) that I am normally used to working with. It also has a long cure time, so I generally wait a full 24 hours between work steps when using it.

And *drum roll* here are more pics:

1. I applied a healthy bead of Aeropoxy to the MMT and top of the fin roots - I slowly twisted the CR as I slid it down to mate with the top of the fin roots.

2. I then applied a fillet to the top of the center CR.

3. More fillets to the fin root/MMT.

4. Here is the fin can next to an Aerotech 54/1706 motor. I plan on using a K550W for the maiden launch. Future plans include acquiring a 54/2506 case so I can fly it on a K700W.

5. I attached the top CR, once again, plenty of Aeropoxy.

This should give me my rocket building fix until my next building opportunity on Wednesday. The next step will be to epoxy the fin can into the body tube as is, or add some fiberglass to the fin roots. Decisions, decisions....... Either way, it will get tip to tip fiberglass on the fins once its permanently mounted in the body tube using one layer 6oz S-glass and one layer 3oz E-glass.

IMG_1254.jpg

IMG_1255.jpg

IMG_1256.jpg

IMG_1262.jpg

IMG_1263.jpg
 
Once I had the fin can out, I started on fillets using Aeropoxy ES6209 structural epoxy. I used a digital scale to measure out the epoxy and stirred it well. Prior to acquiring the scale, I had tried to "eyeball" a 50/50 mix on a previous build and I think I had the ratio off as it never seems to fully harden. The Aeropoxy is still fairly runny compared to the West Systems epoxy (mixed with colloidal silica and high density filler) that I am normally used to working with. It also has a long cure time, so I generally wait a full 24 hours between work steps when using it.

And *drum roll* here are more pics:

1. I applied a healthy bead of Aeropoxy to the MMT and top of the fin roots - I slowly twisted the CR as I slid it down to mate with the top of the fin roots.

2. I then applied a fillet to the top of the center CR.

3. More fillets to the fin root/MMT.

4. Here is the fin can next to an Aerotech 54/1706 motor. I plan on using a K550W for the maiden launch. Future plans include acquiring a 54/2506 case so I can fly it on a K700W.

5. I attached the top CR, once again, plenty of Aeropoxy.

This should give me my rocket building fix until my next building opportunity on Wednesday. The next step will be to epoxy the fin can into the body tube as is, or add some fiberglass to the fin roots. Decisions, decisions....... Either way, it will get tip to tip fiberglass on the fins once its permanently mounted in the body tube using one layer 6oz S-glass and one layer 3oz E-glass.

You're using way too much: that's why it's running. Half the amount of epoxy will suffice, easily. If it all soaks into the wood, then you're good to go.
 
You're using way too much: that's why it's running. Half the amount of epoxy will suffice, easily. If it all soaks into the wood, then you're good to go.

It is an easy lesson to learn. You can also add a little CF or chopped FG to thicken it and make the bond stronger.
 
You're using way too much: that's why it's running. Half the amount of epoxy will suffice, easily. If it all soaks into the wood, then you're good to go.

I appreciate the advice. To clarify, I wasn't having an issue with it running, I was just comparing it to the peanut butter consistency of the thickened West epoxy I normally use. I just checked it after it sat overnight and everything stayed put. :)

I feel a few extra grams of epoxy won't hurt, I'm definitely wanting a rocket that will stand up to the punishment a K700 or possibly an "L" motor. This is all just practice for an L3 build.
 
Great photos and well documented.
I'm new to Big Rockets and your rocket sure is Big!
I sure hope you post us a nice video of this bird going up.

I've got a table like yours too. One day when $ allows itself,
I'll break mine out and probably build a Magnum. A Big Nuke
would probably be my 4th or 5th build.

Thanks for posting your build neond7.

JP
 
I am building a Magnum 3E and I am going to 'glass it. I have the motor mount all put together. I guess I could just put the motor mount in through the top of the tube.

Post some pictures! I'm considering that kit one day in the future. I would prefer one large MMT vs clustering...... burning 3 motors in one shot really tears a hole in the wallet. My wife is cool with my hobby, but we still have to eat!!!
 
I started a thread on it. I haven't done much lately. I have to get the laminating epoxy.
 
I have now completed my third set of internal fiberglass reinforcement for the fin can. This was done with a two layer strip of 6 oz S-glass applied to each end to secure the centering rings to the motor tube and the fin roots. In the interest of building light, I only applied 6 inch strips on the top and the bottom vs the whole length of the fin root. Fully wetting out the fiberglass used less than .8 oz of epoxy (the West metered pumps dispense .8 oz with each pump) for each of the three fin sets. This whole process added roughly 2.2 oz total to the build, something I can live with.

And now, the pictures!

1. Using two kitty litter containers and a straight edge, I made a stand to support the fin can. I had previously used the straight edge to mark red lines from the outer edge of each centering ring so I would know where stop with the fiberglass and not interfere with the body tube installation.

2. I measured and cut out two layers of 6 oz S-glass for the rear of the fin can. The first fin set was done with Rutan fiberglass (not shown), but it frays so heavily I discontinued using it.

3. The top of the fin can go the same treatment.

4. Fiberglass applied, ready for epoxy.

5. Fully wetted out fiberglass.

I'll give this 5 or 6 hours to cure. My next step will be to install the fin can and rail buttons, I'll have to get the fin can partially installed so I can get the backing nut for the rear rail button behind the first two centering rings. The top rail button will be an inch above the top centering ring so I can install it later.

036.jpg

048.jpg

049.jpg

050.jpg

052.jpg
 
Progress is slow today..... finally got hit with the flu bug that is going around. But I did get a few things done.

1. I like the 1010 rail buttons I got from Apogee, they are great for rockets where you can get behind the body tube to insert the backing plate. Originally I was going to use wood blocks attached to the centering rings for the rail button screws to bite into, but I found an extra set of these in my rocket box. Even better!!

2. I drilled the holes first, then installed the fin can past the middle centering ring. I then reached in from behind and pushed the backing plate up through the hole.

3. I left the fin can out a few inches after I installed the rail button. I then put a bead of filled West System epoxy (mixed with colloidal silica and high density filler) in front of the front centering ring and along the underside edges of the back of the body tube.

4. I slid the fin can the rest of the way into the body tube, this pushed the front and rear centering rings into the bead of epoxy and formed a natural internal fillet. I reached in though the front of the tube and shaped the fillet around the front centering ring with the back of a plastic spoon, then flipped the body tube over and added some epoxy along the back and shaped it. I did my best to fill in the gaps left when the fin slots were opened all the way to the rear. I'll be doing a tip to tip fiberglass on the fins, so there is time to fill in these sections more and smooth them later.

5. I applied some clamps to keep the body tube pressed against the centering rings while the epoxy cures.

If I'm able to still function tomorrow with a massive dose of sinus & flu meds, I'll try and get some fin fillets completed. After that, tip to tip fiberglass on the fins..... In the meantime, the av-bay needs work. First, I'll epoxy in the stiffy tube, then I need to cut a bigger sled - the av-bay came with a unbelievably small sled. There is plenty of room for a bigger one, and I'll be mounting dual SL100 altimeters. I also need to epoxy the switch band to the av-bay and then give the rest of the outside of the av-bay a coating of CA followed by some sanding. Anyway, I'm calling it quits for the day and going to bed. NyQuil to the rescue.....

IMG_1281.jpg

IMG_1282.jpg

IMG_1284.jpg

IMG_1288.jpg

IMG_1291.jpg
 
Interesting idea with the clamps to hold the tube...I might have to do that sometime.
 
I've used a large hose clamp to hold the BT in. Also if you put a piece of tape over the open slot you'll get a nice smooth fillet when you epoxy the outer bottom CR.
 
The build is going well, but this flu bug is really slowing me down - I had intended to finish all the fin fillets yesterday. Instead, the second set was completed this morning and hopefully I'll get to the third set later today.

1. Blue tape is essential for straight fillets and avoiding getting epoxy where you don't want to get epoxy. Prep work is important.

2. I used two pumps of West Epoxy and mixed it with two heaping spoons of West Colloidal Silica and two heaping spoons of West High Density filler. Its my "go to" fillet recipe and never lets me down. It makes a nice, no-run peanut butter consistency and shapes nice with the back of a plastic spoon. Previously I had only used the Colloidal Silica. It works well, but lacks the smoother "flow" the High Density filler adds. It leaves a much smoother finish when I mix the two different fillers.

3. After the tape is pulled, they fillets are almost razor straight.

4. The epoxy is very smooth and will require very little finish work - in this case, it isn't as important as they will be covered under tip to tip fiberglass. But the smoother the better.

5. I'll let it sit for about 6 hours or more and then try and get the third set finished later tonight.

I'm stuck running errands for a good part of the day, so my work on the av-bay is further delayed. Hopefully I'll have time tonight to epoxy in the stiffy tube and epoxy on the switch band. Oh, and cut the new sled. So much to do..... Also, I ordered a bunch of two wire quick disconnect wires so late this week I should be able to start wiring.

012.jpg

015.jpg

018.jpg

020.jpg

023.jpg
 
Back
Top