L3 Build: LOC 5.5" Sandhawk

The Rocketry Forum

Help Support The Rocketry Forum:

This site may earn a commission from merchant affiliate links, including eBay, Amazon, and others.
I've been building LOC kits for 30 years. Even 5 minute epoxy is stronger than the plywood and paper parts. The base materials break before there's an epoxy failure.
BTW, here's my 7.5" Goblin (32 lb. prepped but no motor) on a L1930G :) (44" drogue, 15 ft flare chute main.)


Very nice! I've been eyeing the 735" Goblin since it came out, and it might be added to my build pile once I get this build out of the way. This project is my first LOC build, and I am impressed with what I have seen in it, even though I am ditching a few of the stock parts and adding new ones.

Very nice build, Kris. You’re doing a great job of anticipating things. The backing for the rail buttons and the spacers for the thrust plate were nice. I’m not a fan of thrust plates from a function perspective, but they look nice.

Thanks, Steve!
 
Made a little more progress today. I permanently installed the motor mount into the booster airframe section, and I installed the first fin.

The motor mount was installed with a bead of epoxy around the three centering rings prior to being slid into place. Once all four fins are permanently installed, I will lock in the forward centering ring with epoxy from the top, and the middle centering ring will be locked in place by drilling two holes just above it, and injecting epoxy with a syringe. The aft centering ring will be locked into place from the rear. Once the mount was in place, I put screws in the rail button holes to keep everything in place.

Next, it was time to install the first fin. Prior to this, I drilled four .125" holes in the tabs of each fin. These holes will be a path for epoxy to transfer from one side of the fin to the other, creating yet another method to lock the fin in place once the epoxy is fully cured.

IMG_9048.jpg

Prior to inserting the first fin, I mixed up two 20ml batches of US Composites 150 epoxy. I poured the first 20ml into the fin pocket, and then I inserted the fin. Once the fin was fully in place, I pulled it back out and checked to see how the epoxy traveled up the sides of the fin tab, and also how it was pushed up inside the pocket. I saw that I needed more epoxy, and I added 10ml from the second batch. I repeated this one more time, and saw that the epoxy was just starting to touch the inner surface of the airframe, so I added the final 10ml of epoxy and inserted the fin for the final time. I then slid the fin alignment guides in place, and now to let it fully cure. I will be doing one fin a day in order to allow the epoxy to fully cure before I rotate the booster around to install the next fin.

IMG_9069.jpg

IMG_9070.jpg
 
If you would like to speed things up a electric heater un the room to bring the temp up to 80°F will speed the cure of USC150 to a solid set in about 2 hrs or so. Anytime I am doing composite layups I like to crank up the temps a bit.
Looks good so far.
 
If you would like to speed things up a electric heater un the room to bring the temp up to 80°F will speed the cure of USC150 to a solid set in about 2 hrs or so. Anytime I am doing composite layups I like to crank up the temps a bit.

I've thought of that, but when I tried it a year or so ago, the heater kept tripping the breaker for the garage. So I will make do with patience!
 
That’s not good. What’s the rating of the breaker? What’s the rating on the heater.
You could do two smaller heaters on different circuits.

I'd have to go look at the breaker panel. All I know is that our house was wired by an idiot when it was build in the early 80's. There are several things, such as two switches that control one room. Usually that is common, and one switch is on one end of the room, and the other switch is at the opposite end, by another entrance. Well, these two switches are three feet apart from each other! We are just renters, so I am not too worried about it. But we are thinking about buying the house from our landlord (my father in law) in the near future, and if we do, I am already planning on a complete revamping of some things.
 
The second fin is now in place and curing. I figured that this project needed a little brother, so a new addition to my build pile arrived today!

CFF9BEDF-FAA3-44D6-A10D-2F8187CCC329.jpeg

The LOC 3” Sandhawk joins this build, and the 1.5” LOC Parkflyer Sandhawk that I still need to build as well... I’m thinking when I fly this beast, the two little brothers will be there as well!
 
Fin #3 went in today with no issues, just like the first two, and while I am waiting for the epoxy to cure before I install the last fin, I started thinking about the steps to follow. I plan on reinforcing the fin joints with strips of fiberglass, and I am currently planning on using strips that extend 2" out into the fin span, and 2" onto the body tube. One question I have now is do I put the fiberglass on over the fillets, or do I apply the fiberglass then the fillets? I have seen it done both ways, but I am probably going to go over the fillets. Any thoughts?
 
Its easier to get the FG to lay properly if you put a fillet down first just like doing tip to tip. Tfish has a great video of doing tip to tip as does John Coker iirc, I prefer Tfish's.

 
Its easier to get the FG to lay properly if you put a fillet down first just like doing tip to tip.]

X2

composites (carbon, fiberglass, Kevlar) do not "like" hard bends. by this I mean they will lose some strength and as such you will negate the primary reason that you are adding the reinforcement in the first place. that said, the fillets do not need to be real pretty, just enough to allow for a transition from fin to airframe.
 
The past two days have been extremely busy at work, but I was able to install the fourth and final fin last night.

IMG_9110.jpg

IMG_9112.jpg

This afternoon, I pulled the fin guides off, and started to get it prepped for fin fillets and injection of epoxy to fully lock in the centering rings.

IMG_9130.jpg
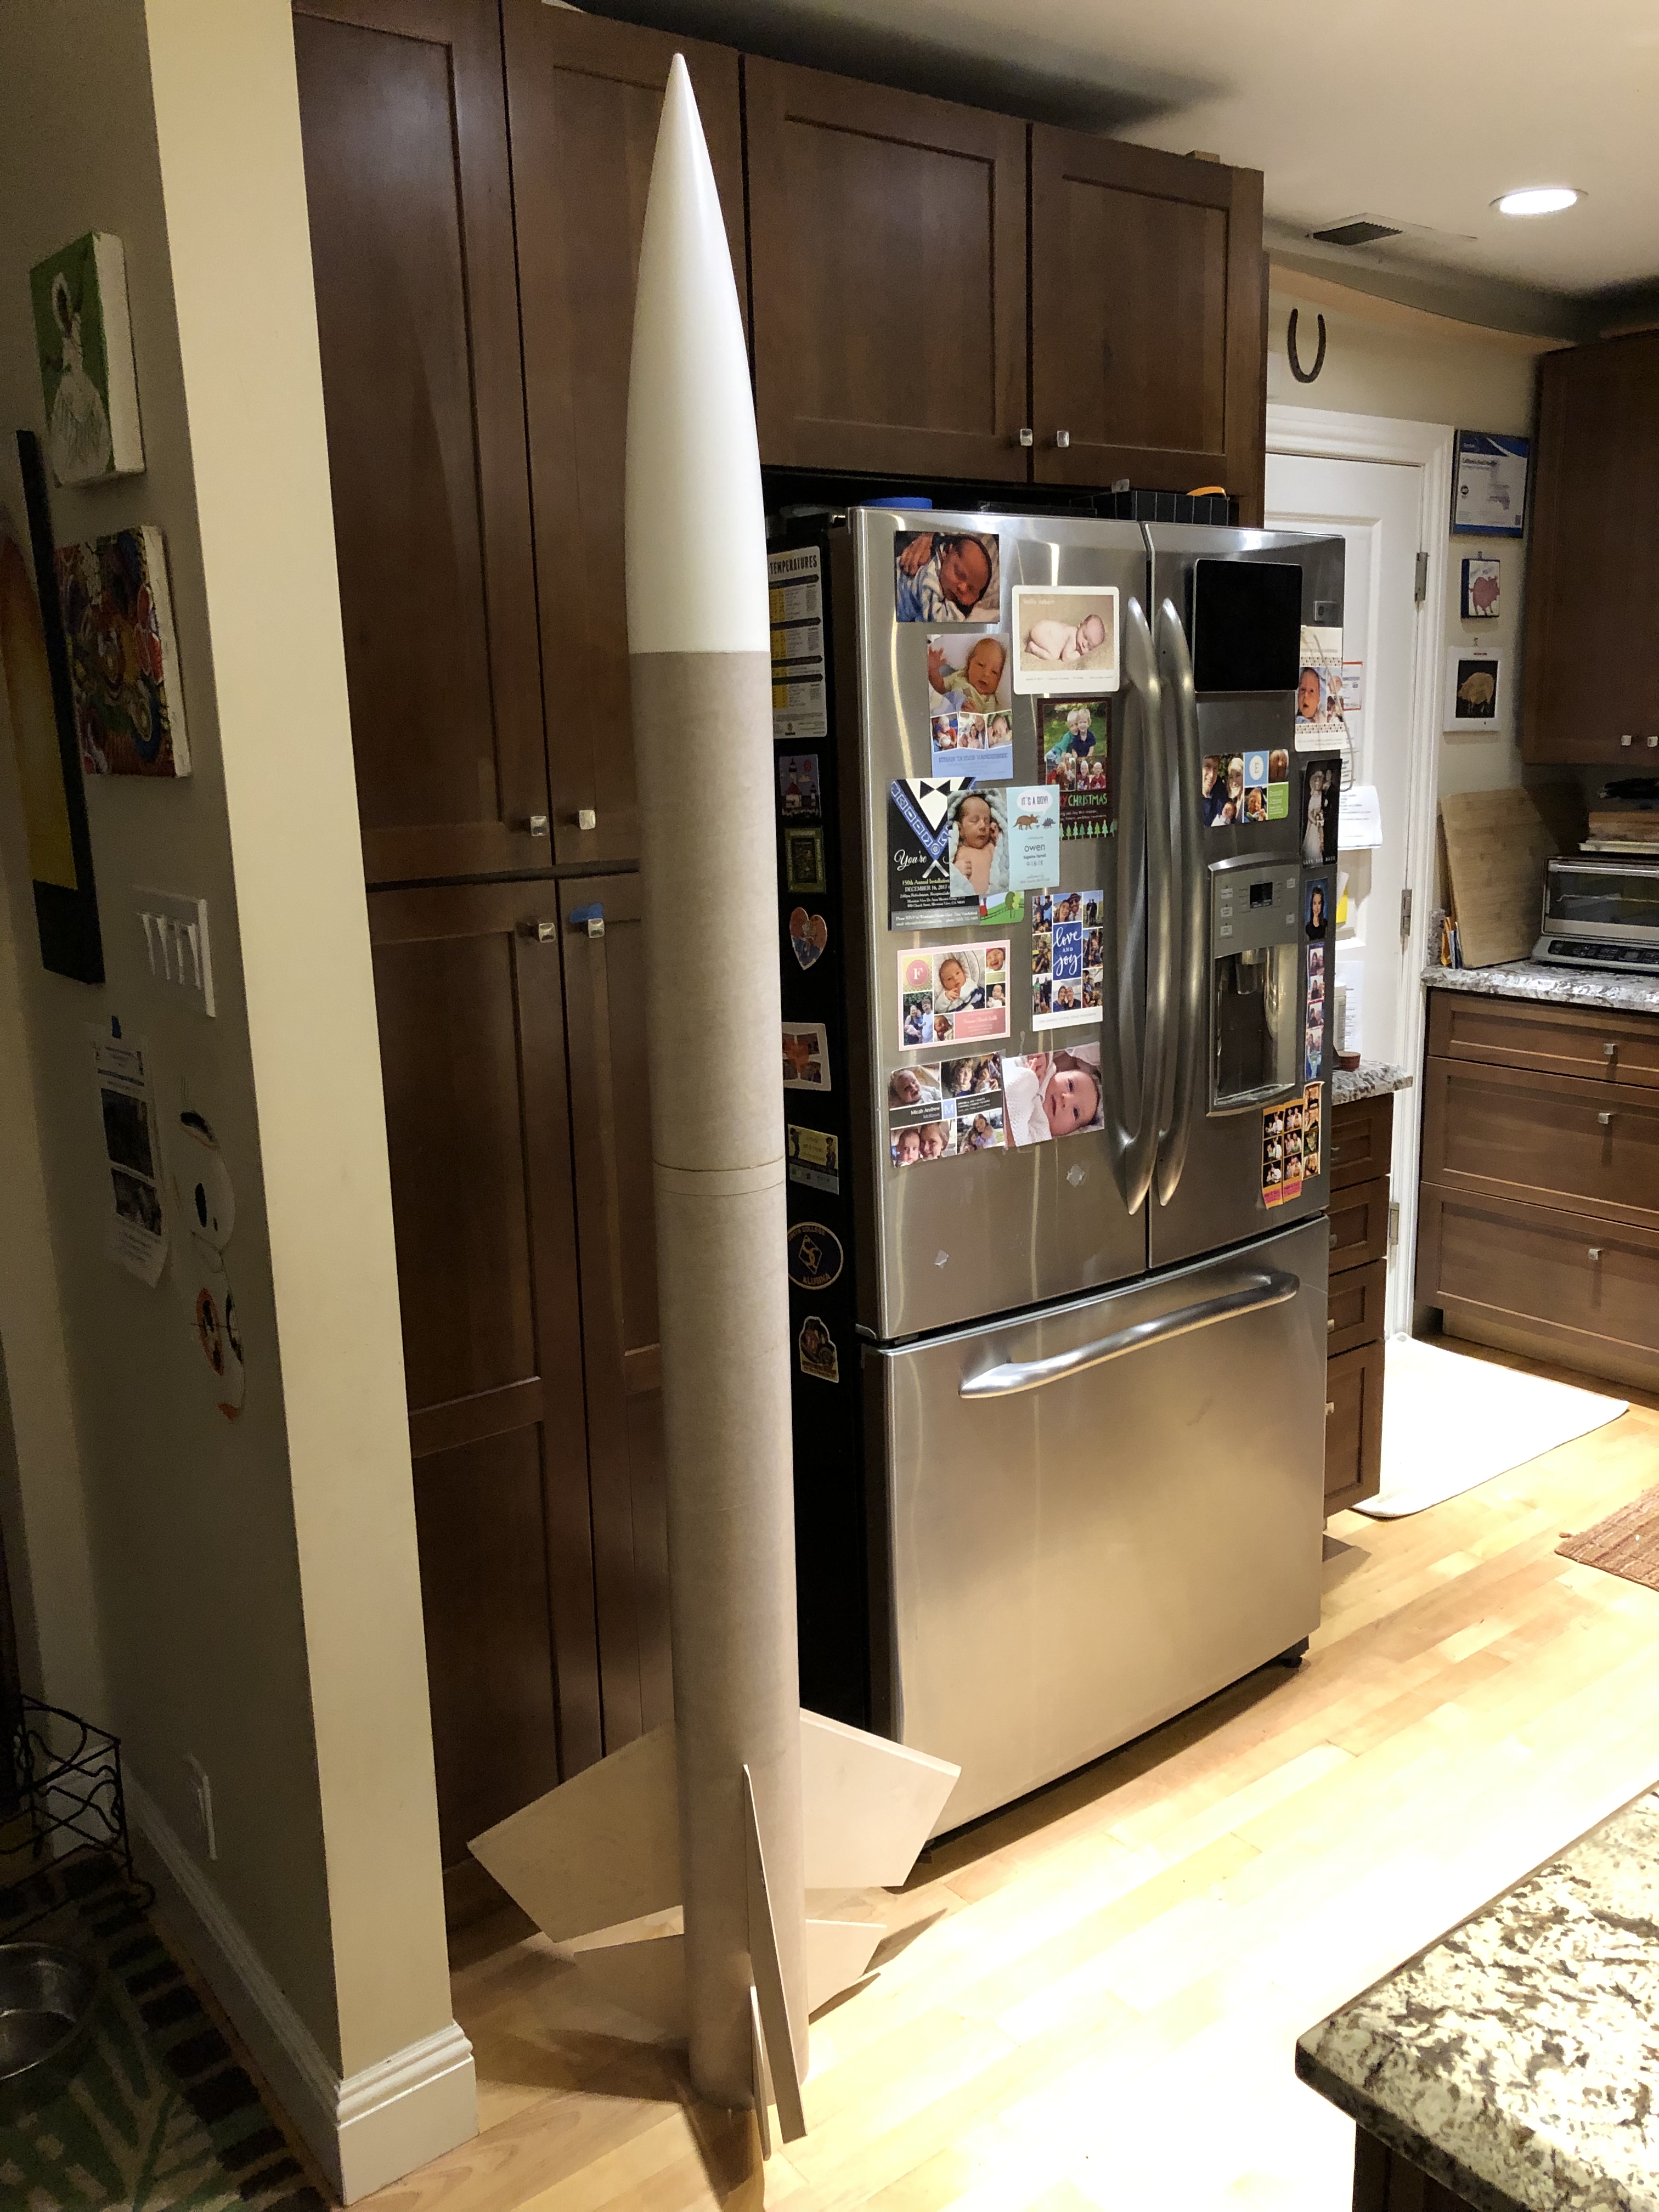
Of course, I had to stand the fin can up in front of something to show the scale of it!
 
Last night I decided to do some more work on the Sandhawk after the 10 month old daughter went to bed. I drilled a hole just above the middle centering location, then I injected 10ml of epoxy into the hole, twisting the airframe at an angle as I injected it. I then slowly rotated the airframe, while still holding it at an angle, to make sure that the epoxy evenly coated the entire airframe/centering ring mating surface. I then added cabosil to the remaining epoxy, and used the thick mixture to plug the hole.

Another batch of epoxy was mixed up, and was painted on the inside of the airframe, coating the entire area above the forward centering ring. A Madcow 5.5” filament wound couple was then inserted fully, butting up against the top of the centering ring.
372F8100-E494-4286-8D95-419B9C57E566.jpeg

Of course this morning, after the epoxy was cured over night, I had to test for the Y harness that was made for this project by Teddy at OneBadHawk.

Next, I drilled the hole for the forward rail button, and tapped the coupler for the screw. The inside of the coupler will see the end of the screw faired over with epoxy, as it doesn’t stick out much at all.

A55747E0-360B-4316-8B13-F5744D45B77C.jpeg

The airframe was then turned over, and I locked the aft end of the aft centering ring in with epoxy, I also installed the mounting spacers for the thrust plate at this time.

9BED4CCE-0DD9-438D-849E-90D29C57CDD6.jpeg

Finally, I started work on the tracker bay for the nosecone. For this, I will be using a short length of 54mm fiberglass tube, a wood centering ring, a fiberglass centering ring, and a fiberglass bulkhead. I lined up the two centering rings with the bulkhead plate, and clamped them together and drilled four holes for screws. I then pulled them apart, and installed threaded inserts into the wood centering ring.

43263067-929B-4903-ABE3-794167649381.jpeg

C16DF65D-F89D-47C8-B480-148DF200D7BD.jpeg

Next, the centering rings will be epoxied to the section of 54mm tube, then the nosecone assembled. I do have a question, though. For securing the nosecone to the recovery harness, I was planning on using a u bolt secured to the main G10 centering ring. But now I am wondering if I just add 4 more screws to the assembly, and use a forged eyebolt, if that would be strong enough to use as my primary attachment point? The only loads on the nosecone will be the nosecone itself.

I realized I do not have enough epoxy left for the fin fillets, so I ordered more from US composites, but it will not arrive for 10 days, so I think I will start working on the avionics bay next, while I wait for the shipment to arrive.
 
Making steady progress on the build. I was originally going to use the US Composites 150 epoxy mixed with a combination of cabosil and milled fiber to create the fin fillets, but since I am out of that epoxy, and my newly ordered batch will not arrive for almost two weeks, I decided to use Rocketpoxy instead. Prior to applying the fillets, I thoroughly sanded the body tube between the fins and then cleaned the surface with alcohol. I then took a length of PVC pipe, and tried using sharpie to mark the locations of the fillets on the fins and the tube. The sharpie did not work, however, so I tried another method. We have a couple of bottles of gentian violet from when my daughter had thrush a few months ago, and I poured some of that out into a small cup, and dipped the end of the pipe in the dye, and used that to mark the fillet locations. It worked perfectly!

IMG_9152.jpg

IMG_9153.jpg

I then applied tape to the marked lines and used that as a guide for my fillets.

IMG_9154.jpg

Taking a guess on the amount of epoxy needed for two fillets, I mixed up a batch of 80 grams of Rocketpoxy, and poured it equally onto the fillet area one section of airframe. Using the PVC pipe, I then smoothed out the fillets to a perfect size and shape.

IMG_9167.JPG

IMG_9169.JPG

The end result:
IMG_9157.jpg

IMG_9158.jpg

After four hours, the Rocketpoxy was cured enough that I was able to go back out and mix up another 80 gram batch of epoxy, and fillet another section.

Hopefully tomorrow, I will get the other two fins filleted. I am still contemplating applying fiberglass reinforcing strips that will extend from two inches onto one fin, across the body tube, and two inches onto the other fin, but at this point, I am not too sure if that is overkill or not, and if it will just add unnecessary weight. Any thoughts?
 
It will add strength and damage resistance for a low weight penalty, probably worth doing.

That is how I am heavily leaning... The teflon release material I ordered from Aircraft Spruce should arrive in a couple of days, and by the weekend, I should be ready to start the fiberglass reinforcements. I figure one a day should get me finished by next Monday.
 
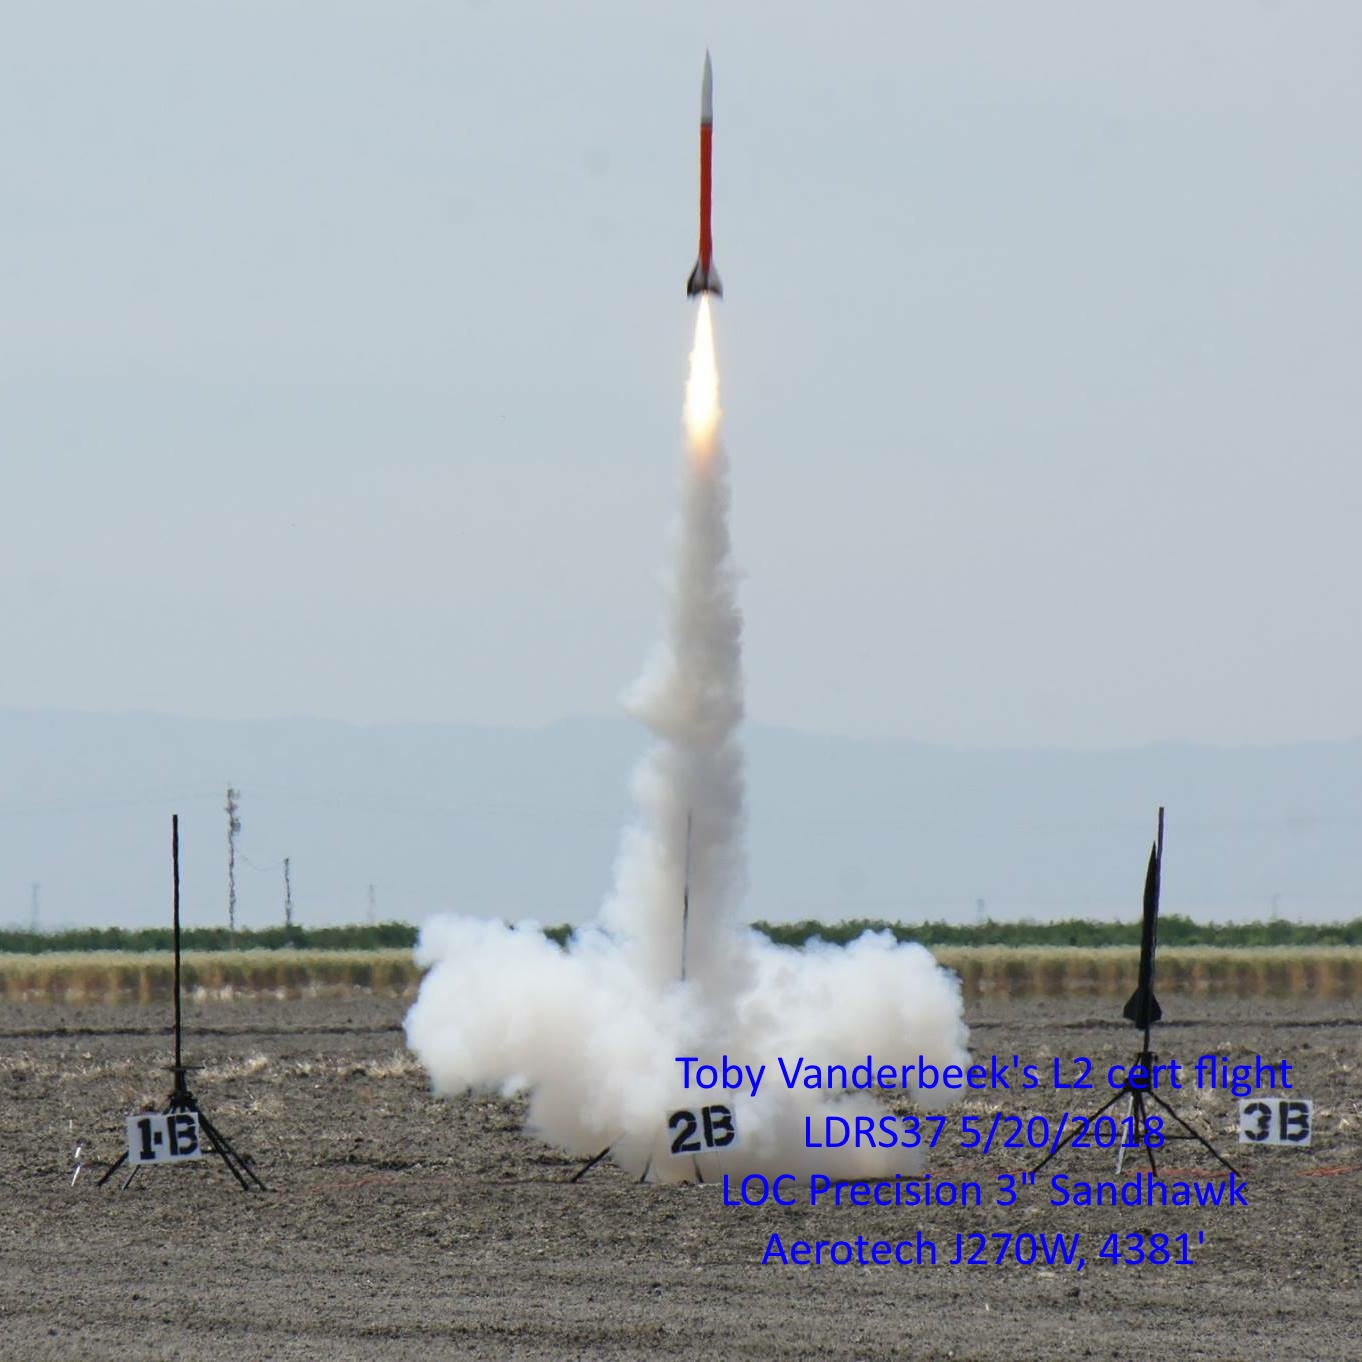
I'm working on the 5.5" AMW White Wolf which was kitted by LOC Precision. The kit is very much like your Sandhawk in terms of components. I am not going to use it for my L3 but I am certain it will fly on an M some day, especially the 11.5s burn M650W. First flight should be on a K550W. I am working with LOC to kit a 7.5" version for my L3. Just wanted to show you my LOC 3" Sandhawk which I used for my L1 and L2. I'm going to launch it on a J825R this weekend or next. Mach or bust!
Toby%20Vanderbeek%27s%20L2%20launch.jpg


And here is my White Wolf. I just epoxied in the fins. I'm going to foam the fin can with X-30 from Tap Plastics. Then I will probably fiberglass the fins tip-to-tip.
2019-01-23%2019.17.38.jpg
 
It will add strength and damage resistance for a low weight penalty, probably worth doing.

X2! especially when considering the swept nature of the fin. a weird landing on one of the fin edges will put a good amount of stress on the joint and could lead to a cracked fillet or worse. glass away!!!!
 
I think I saw a OneBadHawk Y harness up there. ;)

That you did! All of the recovery gear, minus the chutes are from Teddy... In fact, once I cert L3 with this build, all of my certs will have been on OneBadHawk recovery gear... Cant ask for a better setup!
 
Mixed up two more big batches of Rocketpoxy for fillets today.
IMG_9178.jpg

I applied the last two pairs of fillets today, and now to just wait for them to cure. The next step with the fin can will be add the fiberglass reinforcements to the fins, while not a full tip to tip, I have decided to extend the glass to about half the span of the fins for a little more support and strength. Once my order of teflon release arrive from Aircraft Spruce, I will get started on that.

In the meantime, I assembled the components for the nosecone tracker bay.

IMG_9181.jpg
Once these are cured, I will fabricate a sled from G10 and epoxy it into the coupler section on the right, and then the assembly on the left will be epoxied into the nosecone, and the nosecone assembled.

After that, the only remaining major task is to tackle the avionics bay, and figure out my switch arrangement on the outside of the bird.
 
Last edited:
So now that all of the fillets are completed, I am just waiting on the teflon release I ordered to arrive tomorrow, and I will start on the fiberglass. I am now seriously debating doing my first tip to tip application on this build, instead of the previously planned simple reinforcement strips. To that end, I cut out a fin template to use for cutting the fiberglass.

IMG_9188.jpg

I then turned my attention to working on the nosecone and its integral tracker bay. As seen in previous posts, I had built up a compartment made from a couple of centering rings and a section of 54mm tube. I was originally going to have the mounting location for the nosecone to the harness be a forged eye bolt on the hatch for the bay, but I decided that was not the best idea, so I moved the eyebolt to the main bulkhead assembly.

IMG_9190.jpg

As a result of this change, a quick modification was required to the bay hatch. I marked out were material needed to be removed to fit around the eye bolt, and then made quick work of it with my Dremel.

IMG_9191.jpg

I then moved onto the sled for the bay. Last summer I had purchased a couple of .125" G10 sheets from Madcow, and this was a perfect use for part of them. I cut a section out, and then epoxied it into the coupler that is mounted to the hatch.

IMG_9192.jpg

IMG_9193.jpg
A standard eye bolt is attached to the assembly to use as a handle to easily grab it for removing and installing it in the nosecone.

Next, I epoxied the whole centering ring assembly into the nosecone, followed quickly by the coupler to serve as the nosecone shoulder. A internal fillet was then applied around the mating surface. Once it cures, the nosecone assembly will be completed! All that will be left is mounting the MissileWorks RTx tracker and a battery.

IMG_9194.jpg

As
 
I recommend if doing a full tip to tip making a single pattern the that covers both fins and the airframe between the fins. When applying the glass lay it across the fins first then turn it back half way and apply epoxy to the one fin and half of airframe, once the first half is laid over the wet epoxy fold the second section back and apply epoxy to that side, once it is laid back in place finish fully wetting out the fabric once it is fully wetted the applicator brush (I use cheap Harbor Freight 1" brushes, bought by the box and that have the tips trimmed off evenly) can be used to drag the fabric around fairly easily. Depending on temperature of your work space the epoxy may start to thicken a bit towards the end of application. After epoxy is applied I crank the heat up in my workspace as much as possible.
 
I recommend if doing a full tip to tip making a single pattern the that covers both fins and the airframe between the fins. When applying the glass lay it across the fins first then turn it back half way and apply epoxy to the one fin and half of airframe, once the first half is laid over the wet epoxy fold the second section back and apply epoxy to that side, once it is laid back in place finish fully wetting out the fabric once it is fully wetted the applicator brush (I use cheap Harbor Freight 1" brushes, bought by the box and that have the tips trimmed off evenly) can be used to drag the fabric around fairly easily. Depending on temperature of your work space the epoxy may start to thicken a bit towards the end of application. After epoxy is applied I crank the heat up in my workspace as much as possible.

Believe it or not, that is exactly the method I am thinking of using.
 
Given the large areas a laminating roller might be useful as well. Not sure where you are located in relation to Fiberglass Supply but they are in the Seattle area and have lots of stuff we use.
 
Given the large areas a laminating roller might be useful as well. Not sure where you are located in relation to Fiberglass Supply but they are in the Seattle area and have lots of stuff we use.

Never heard of that company before. Looks like they are an hour or so north of me up in Burlington. I’m up there every once in a while. I’ll have to check them out sometime.
 
It looks like the reflon release I ordered won’t arrive today like it was supposed to, so I might not be doing the tip to tip tomorrow. Oh well. It will arrive when it arrives.

I finished up the tracker compartment today.

99B8B73B-9CB6-4C48-82DA-078F3429C327.jpeg

A5D8BF8A-29E2-4FA5-AEEA-4A7D1630910C.jpeg
 
Back
Top