


Ez2cDave
Well-Known Member
117 mm and yes, 1/8"" thick.
Edit: This for the Star Orbiter but now me thinks you're asking for the other rocket...
Nope . . . It was for the Star Orbiter . . . Thanks !
117 mm and yes, 1/8"" thick.
Edit: This for the Star Orbiter but now me thinks you're asking for the other rocket...
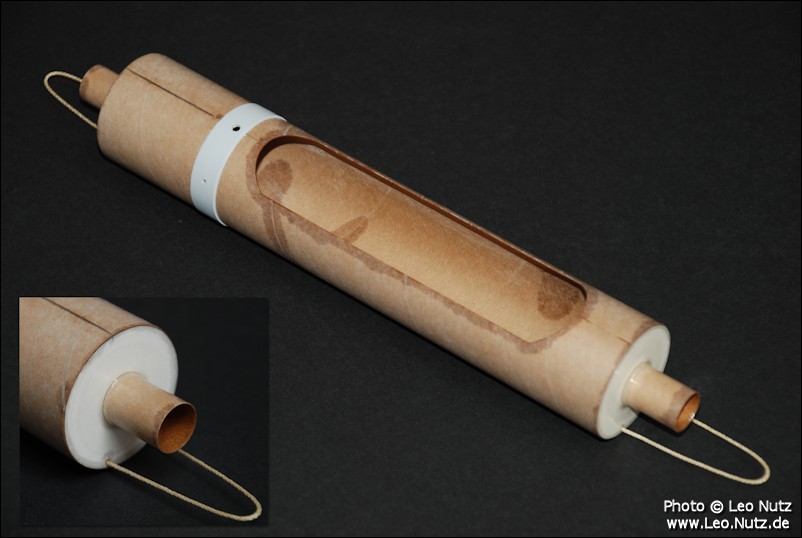
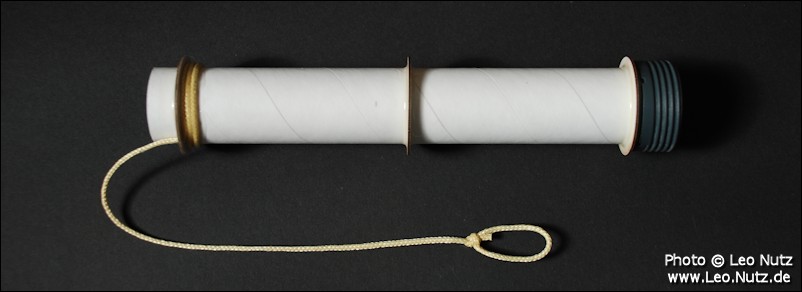
The electronics bay build is complete. I used a BT-60 body tube, cut one side so that it fits nicely inside a BT-60 body tube.
Two ejection charge holders were glued in place. The same goes for the Kevlar shock cord holders.
The Ebay is now ready for painting.
End of part five.
Hey Leo,
This is an amazing thread and I think I've read it probably 5 times now. I just got my Star Orbiter and I'm looking to make it my first dual deploy rocket. I have some questions on a few of the steps. My first is on the engine block. Is there a reason Estes doesn't include one? It seems like the motor would just fly right up through the engine mount so I'm super curious how it doesn't without one. I'm assuming to make one you're just using a piece of cardboard tubing correct?
My next question is around your e-bay. From the pictures, it looks like you are starting with a BT-60 body tube, cutting it lengthwise, overlapping a small portion of tube so that it fits just inside of a BT-60 tube and then supergluing it to itself. Once the glue dries, cutting the big hole in it for the avionics and putting the blocks in the ends. Is this correct? Is there a youtube video or forum post you can point me to on how to do this?
My 3rd question is around the nose cone/payload assembly. Is that the stock nose cone just with the bottom cut off? It looks like you are friction-fitting the nose cone into a section of BT-60 tubing, then gluing a body coupler into that section of tubing with the paper disk. Is that correct? How does the nose cone stay on with just friction? It would seem like the ejection would pop it off? Is it just super tight?
My last question is around dual-deploy in general. I'm new to the entire concept and have gone back and forth between doing a standard build (with payload section for an altimeter) and doing a jolly logic chute deploy, or doing something like what you're doing here. For somebody who's never done dual deploy, what is your recommendation?
Hopefully I'm not asking too much but this thread has really inspired me to try this out! Thanks!
Casey Levinger
Use a narrow strip of masking tape around the rear of the engine. It will prevent it from moving forward.This is an amazing thread and I think I've read it probably 5 times now. I just got my Star Orbiter and I'm looking to make it my first dual deploy rocket. I have some questions on a few of the steps. My first is on the engine block. Is there a reason Estes doesn't include one? It seems like the motor would just fly right up through the engine mount so I'm super curious how it doesn't without one. I'm assuming to make one you're just using a piece of cardboard tubing correct?
Casey Levinger
The Star Orbiter and the Super Big Bertha don't use a motor block so that you have choices for other motors.My first is on the engine block. Is there a reason Estes doesn't include one? It seems like the motor would just fly right up through the engine mount so I'm super curious how it doesn't without one. I'm assuming to make one you're just using a piece of cardboard tubing correct?

Since I'm not going to use the Estes trifold shock cord holder I went and mounted a Kevlar shock cord to the engine mount:
What size Kevlar are you using here?
Heres' mine. I modified the decals.
View attachment 408016
I have slightly modified all my Star Orbiters. One thing, I fabricate my own thru the wall plywood fins. Kevlar shock cord, sleeved, Nylon chute, epoxy, andRumor has it that originally they were going to be plywood. But they changed it before production. They wanted it to really only fly on the 29mm BP motors. With the balsa fins, it really can't handle the big motors.
I think it was a bad choice from a rocket sales perspective, but a good one from motor sales perspective.
Enter your email address to join:

")