Build thread for Radical Rocketry's Tau Zero Christine

The Rocketry Forum

Help Support The Rocketry Forum:

This site may earn a commission from merchant affiliate links, including eBay, Amazon, and others.

Bill S

Well-Known Member
Joined
Aug 6, 2019
Messages
1,720
Reaction score
1,435
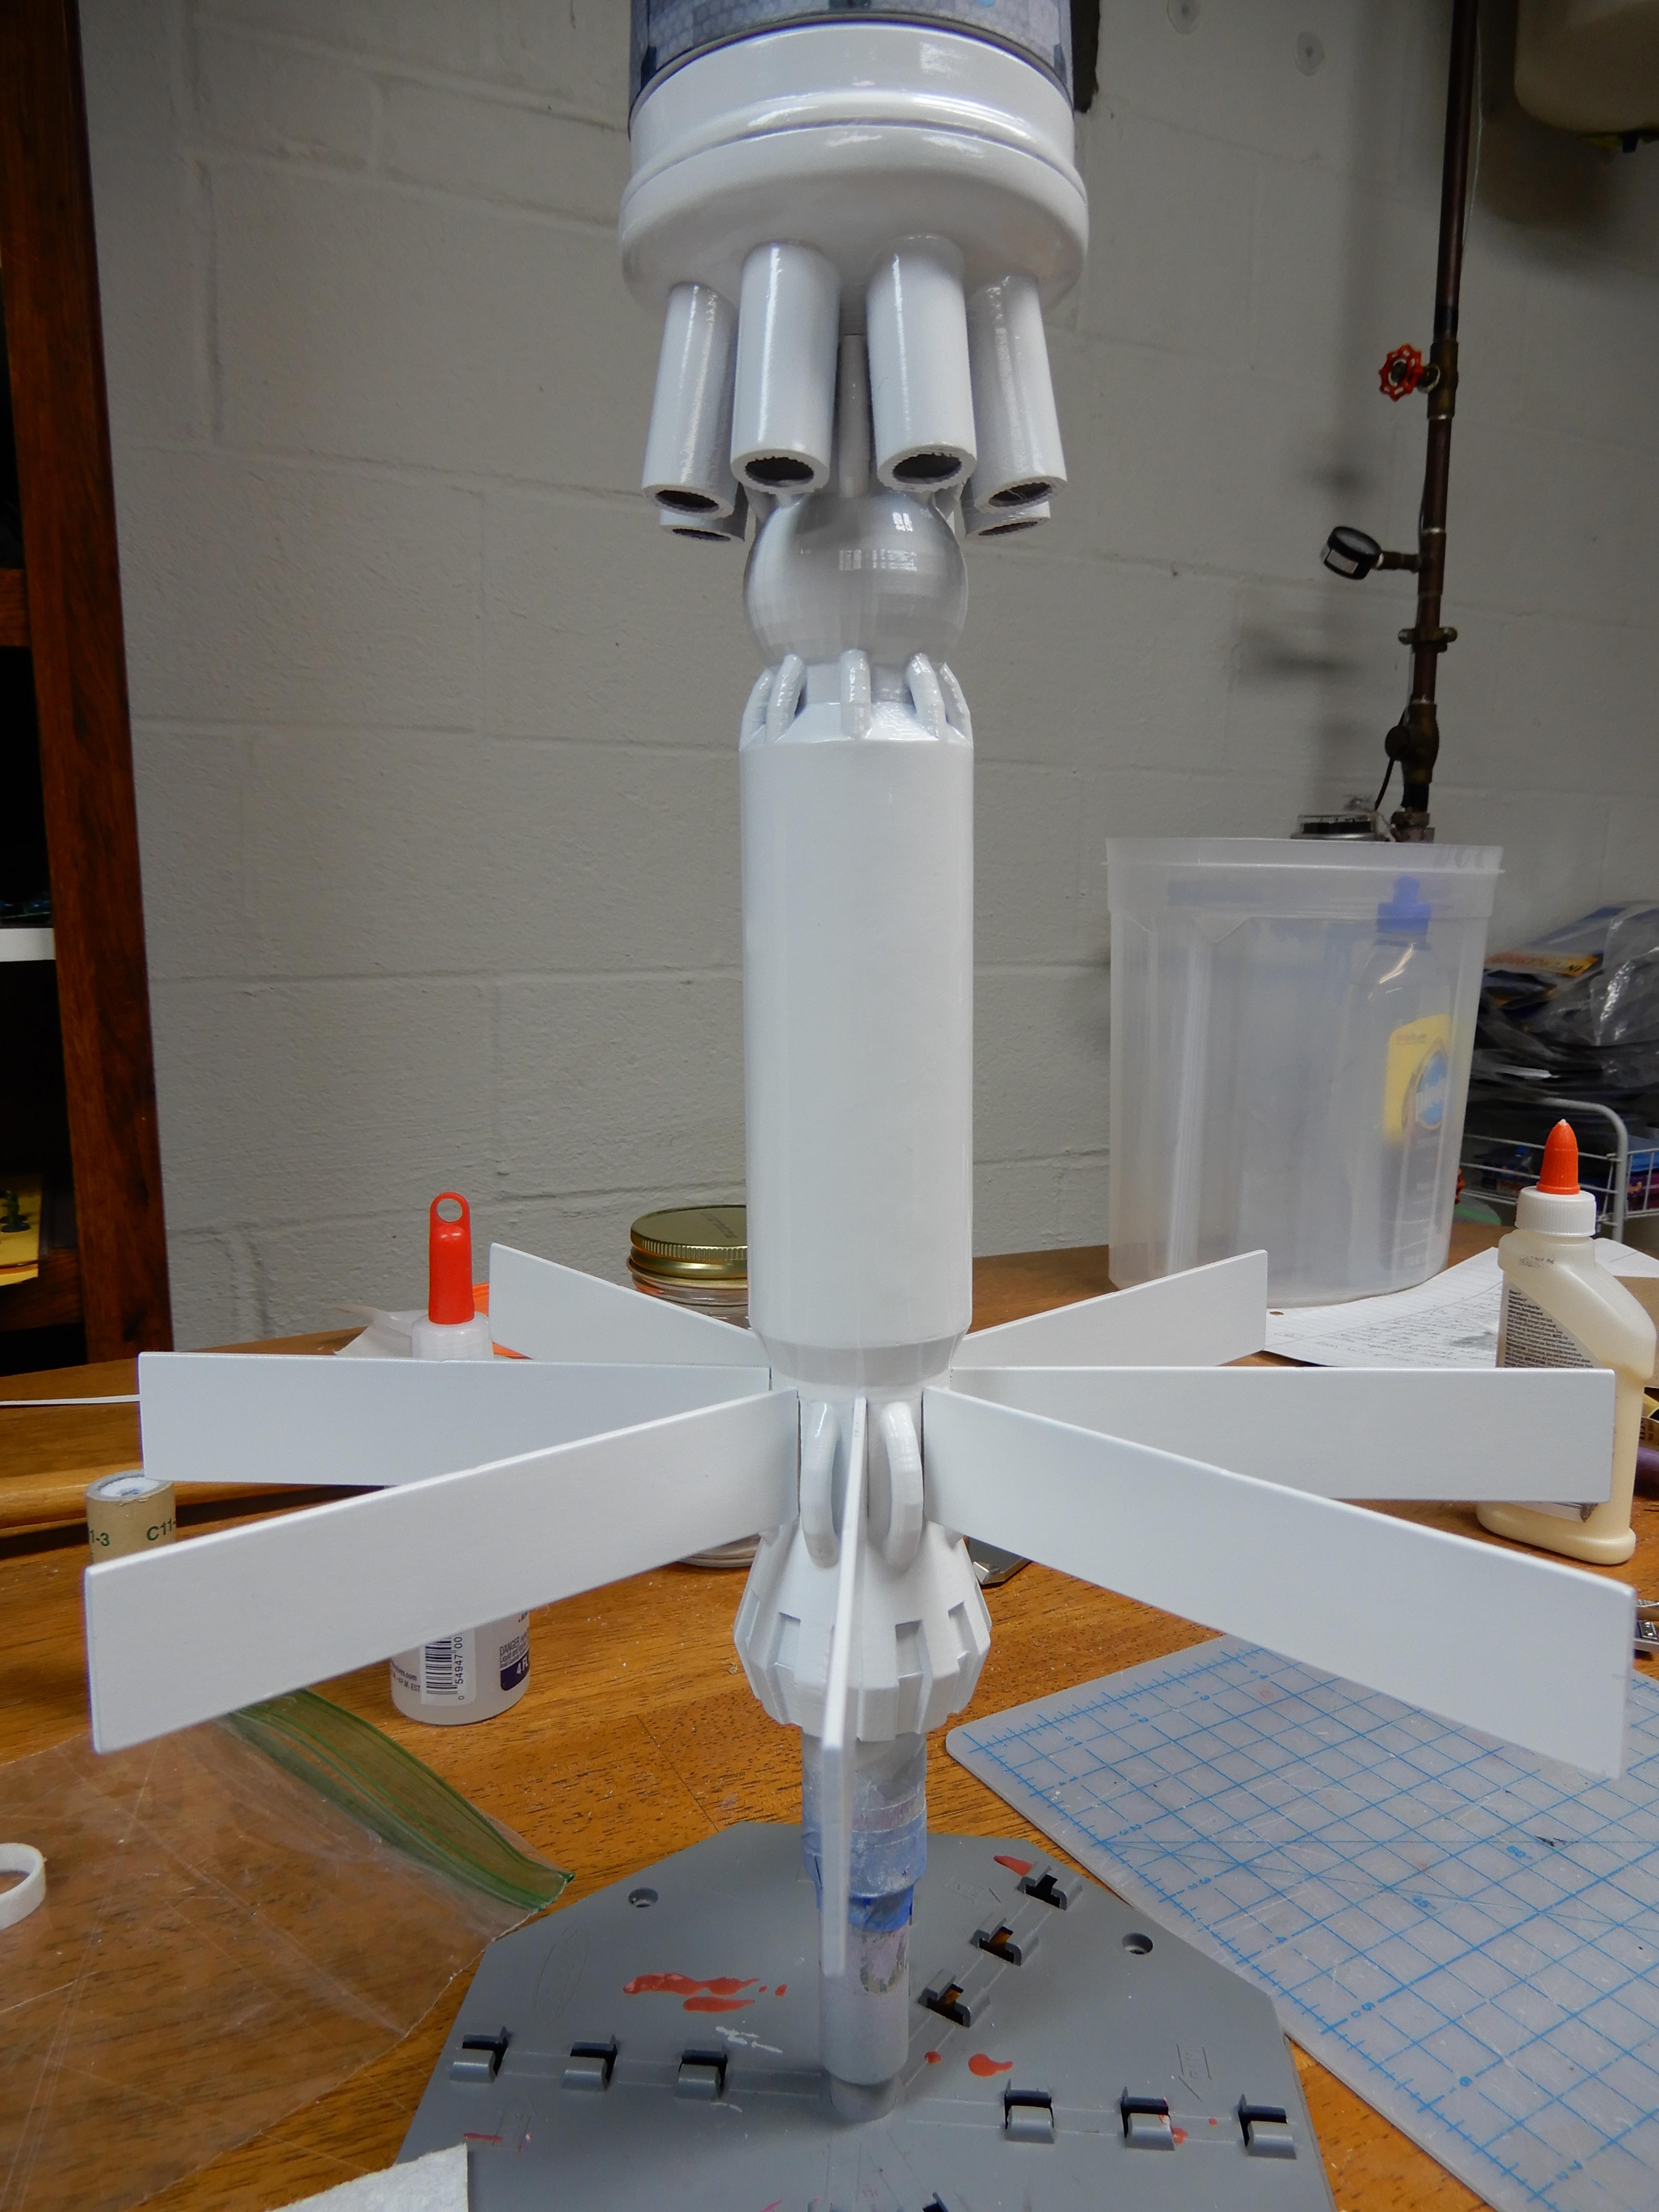
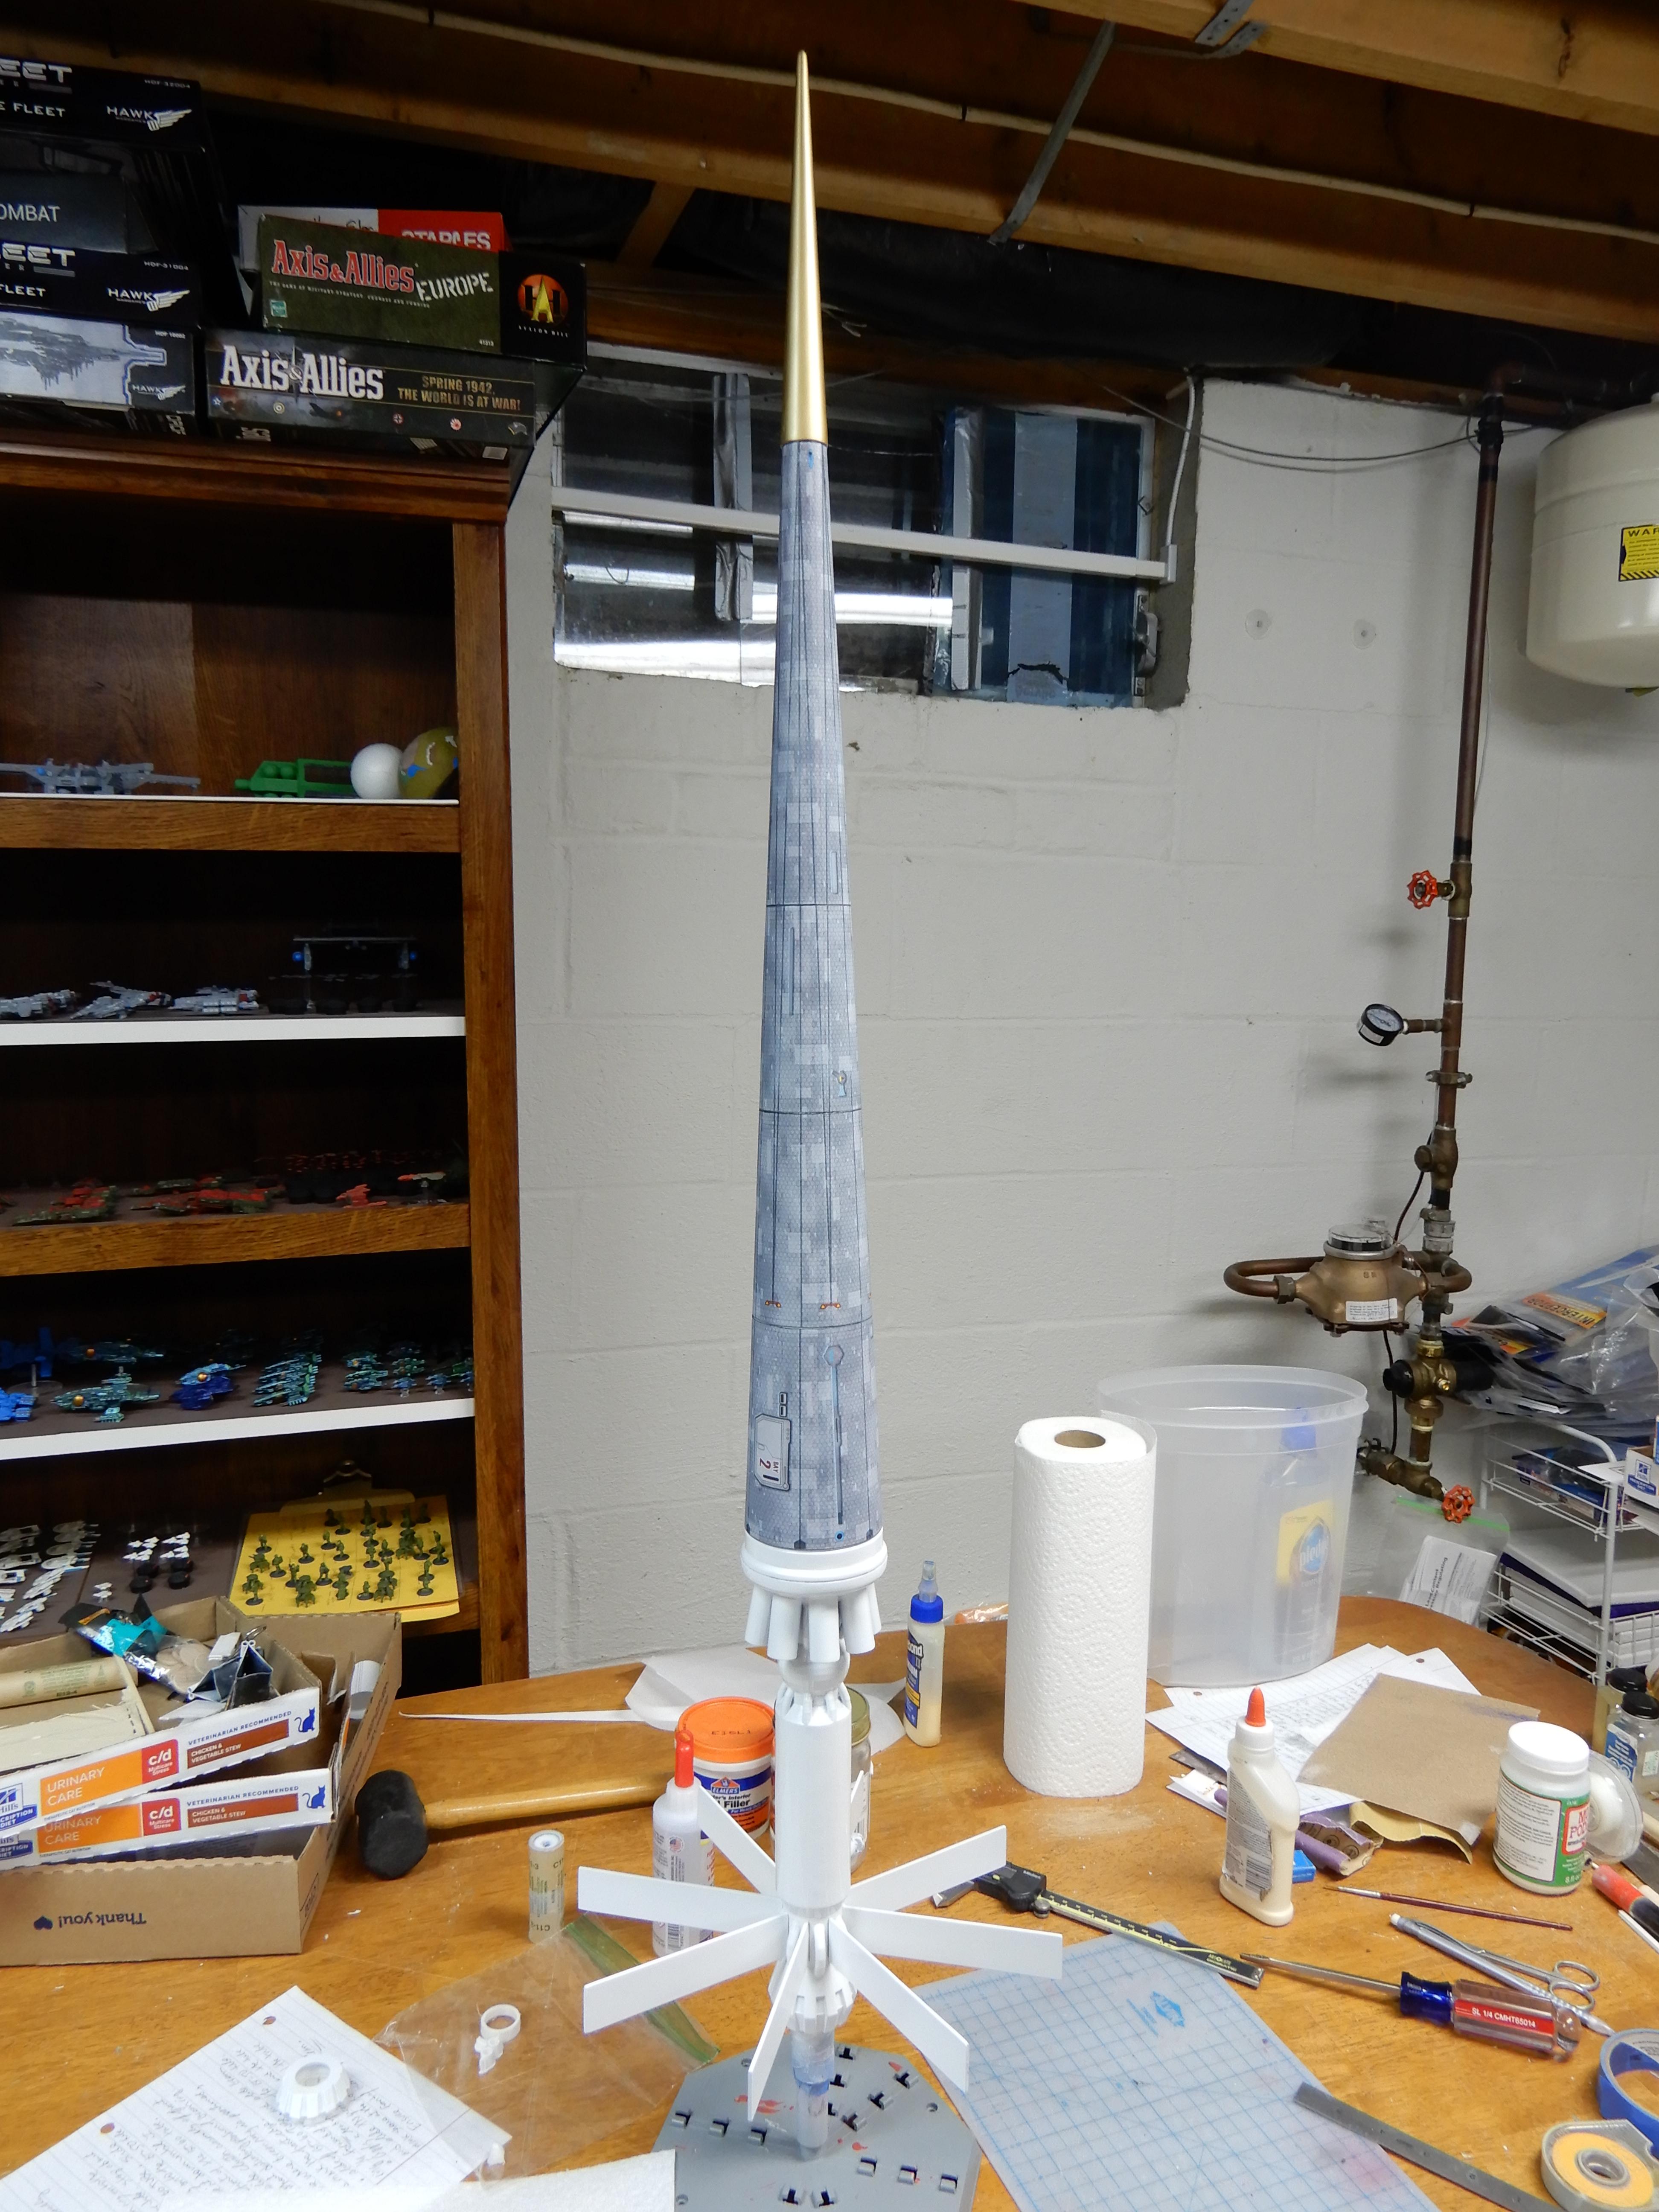
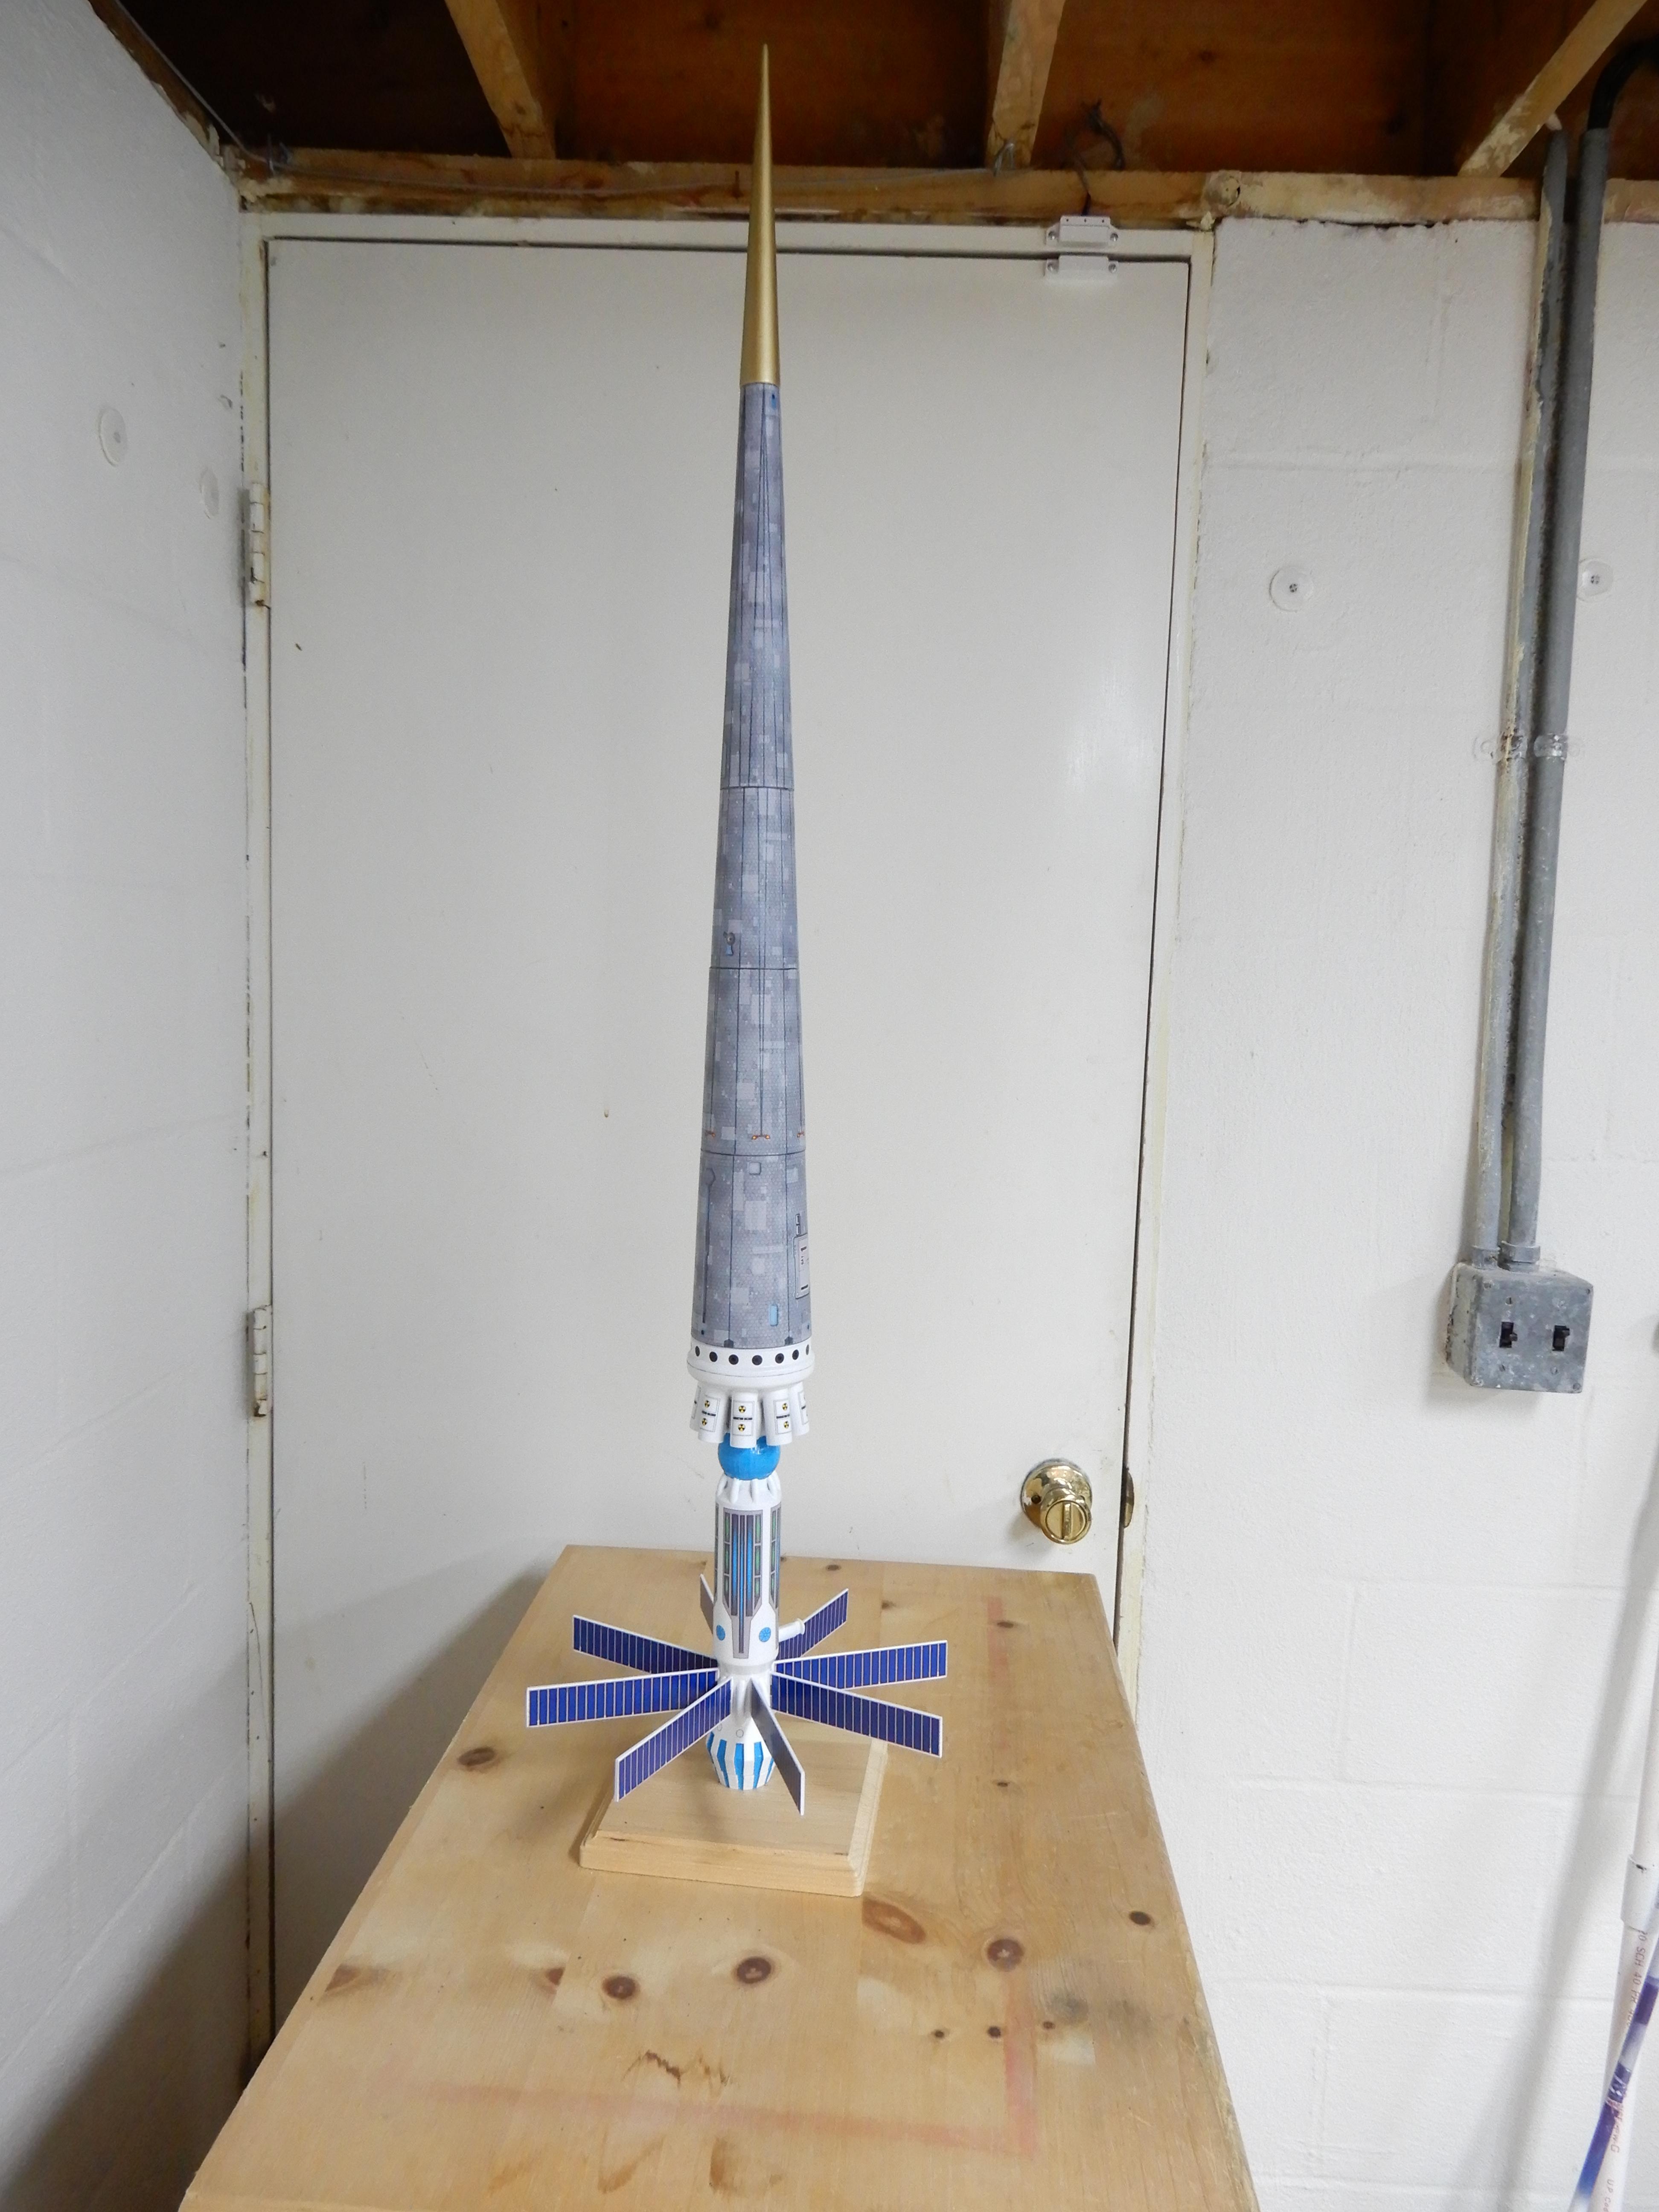
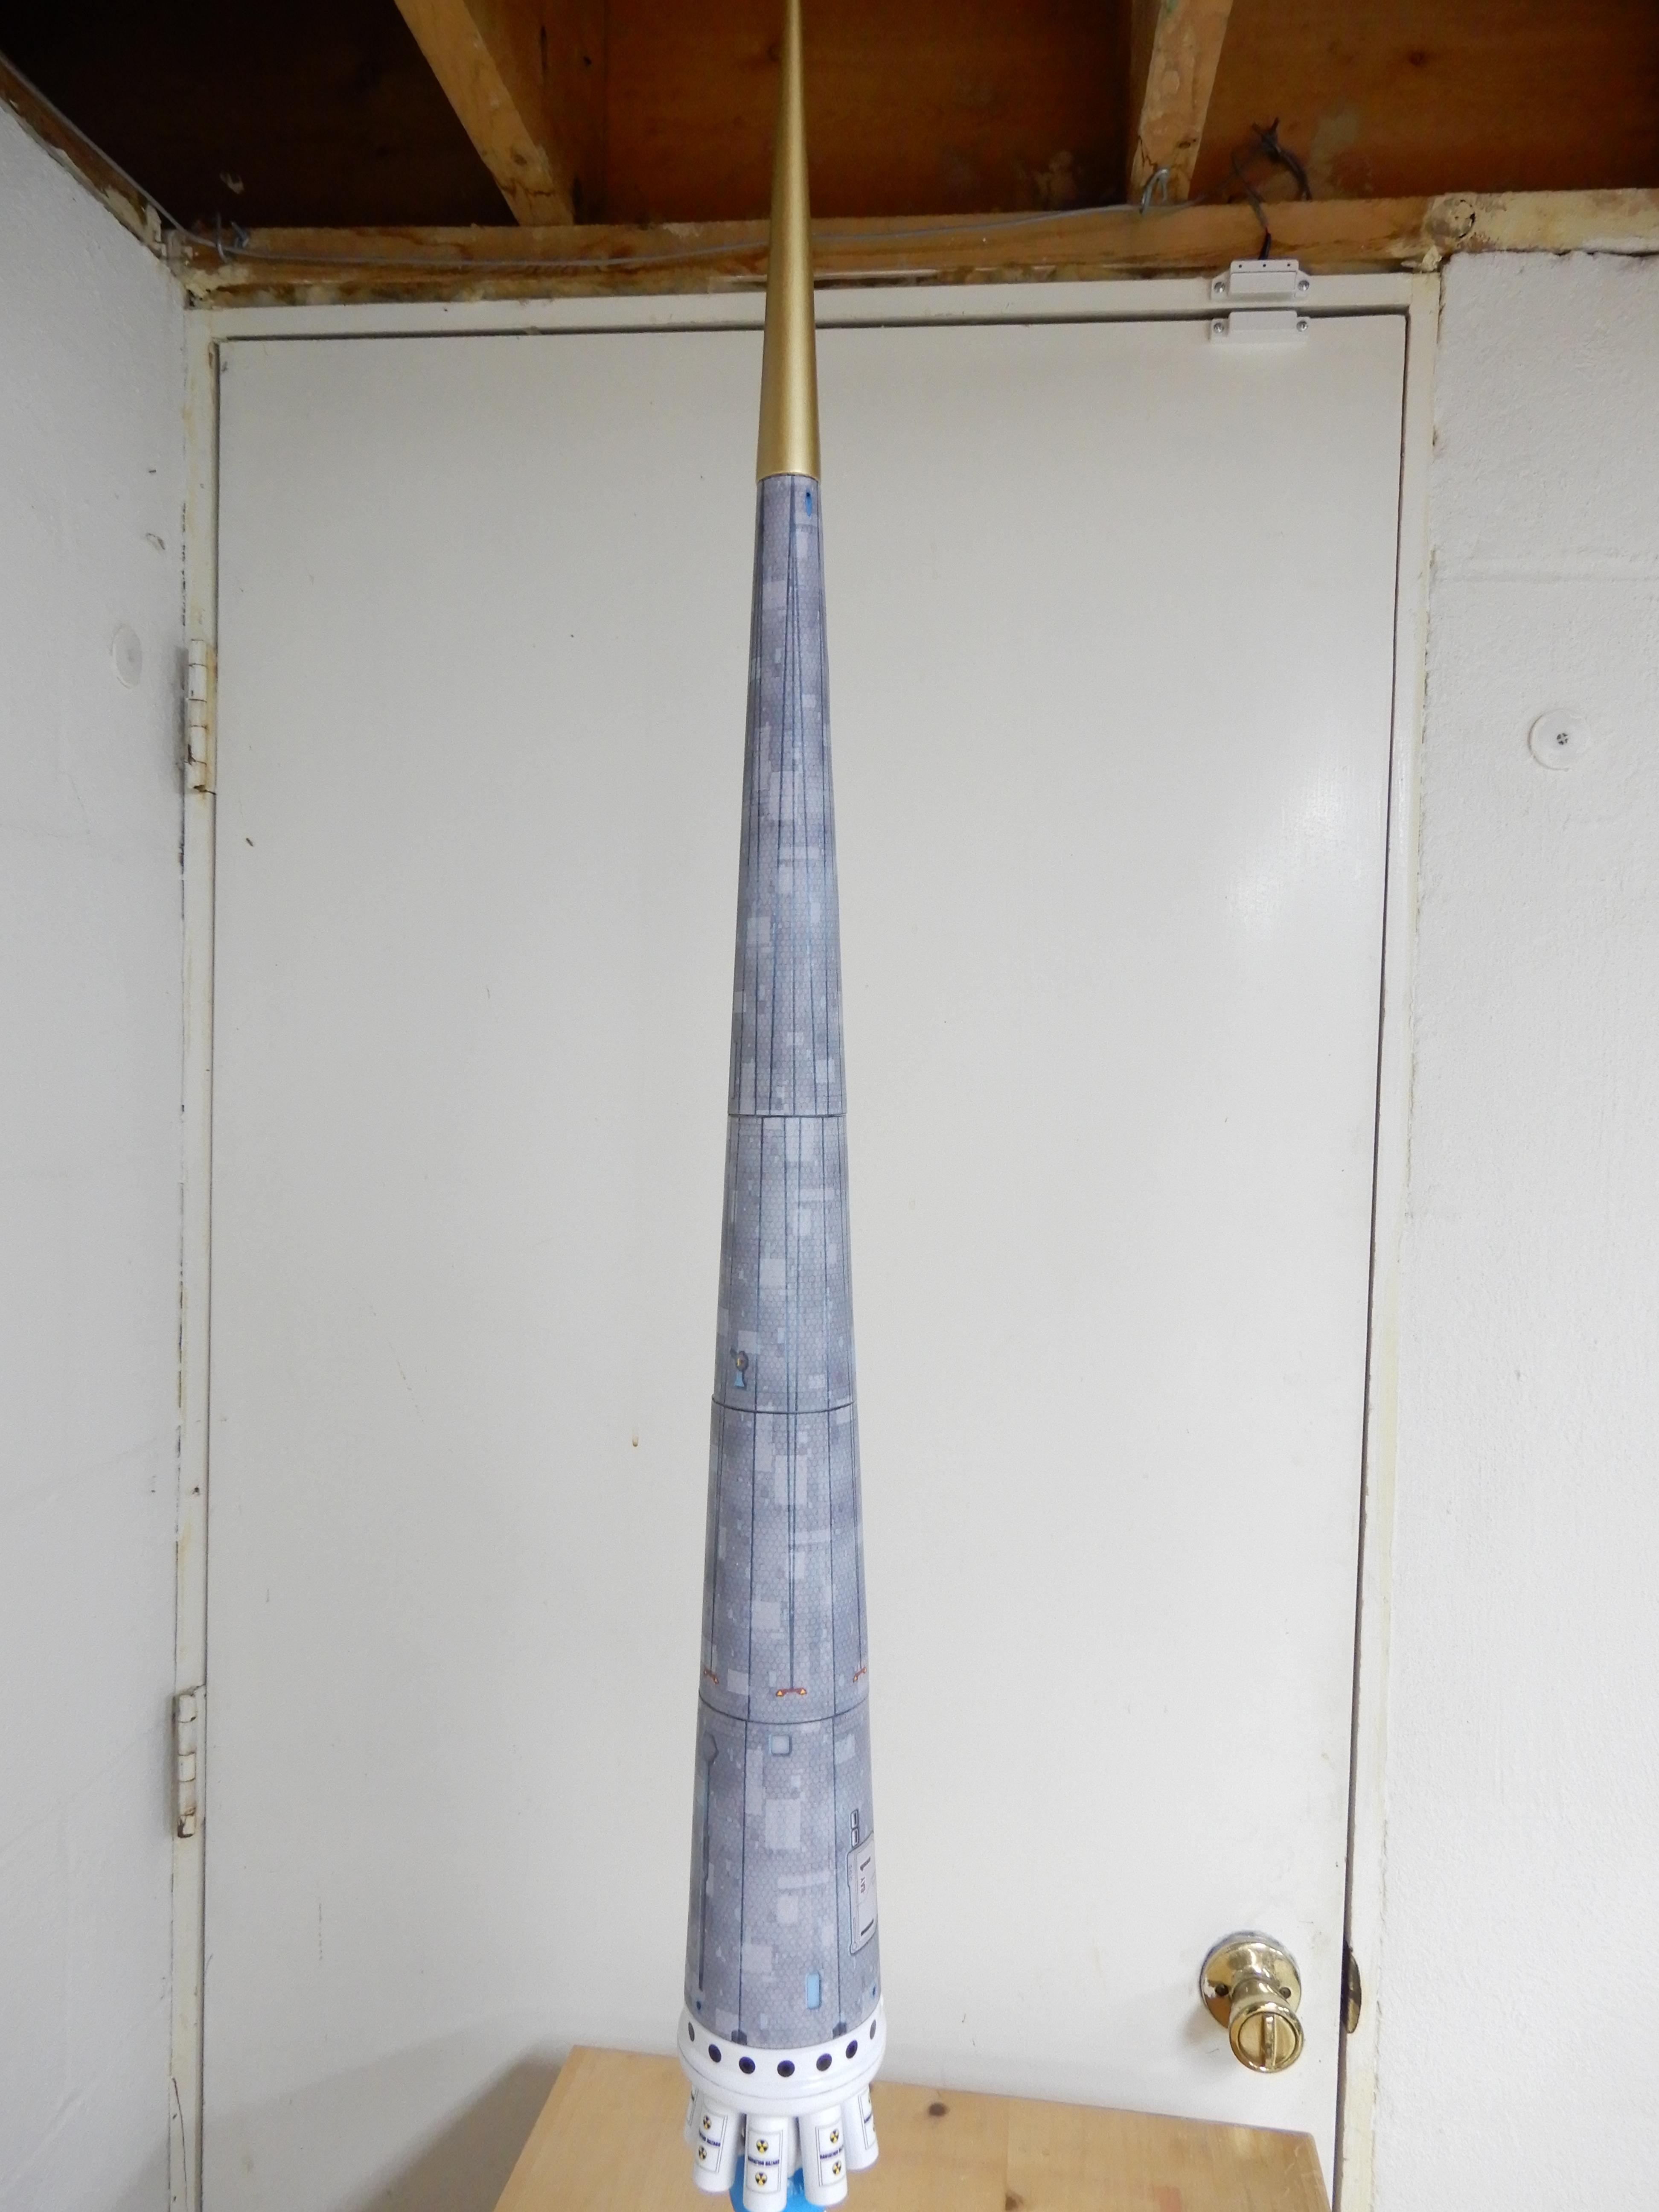
I've started construction of one of Radical Rocketry's Tau Zero Christine, with 3d printed parts by our very own BigMacDaddy. After reviewing the directions, I decided that I needed to sit down and try-fit everything and see if the results matched up with the directions. This is the result...

Pre-construction, I sanded most of the 3d printed ABS parts smooth; I decided I didn't want to mess with the using ABS bits and acetone to smooth everything.

In addition to what was provided in the builders kit, I also needed 3 x Estes green centering rings (BT-50 to 55), and an 24mm engine block.

One also needs the following body tubes:
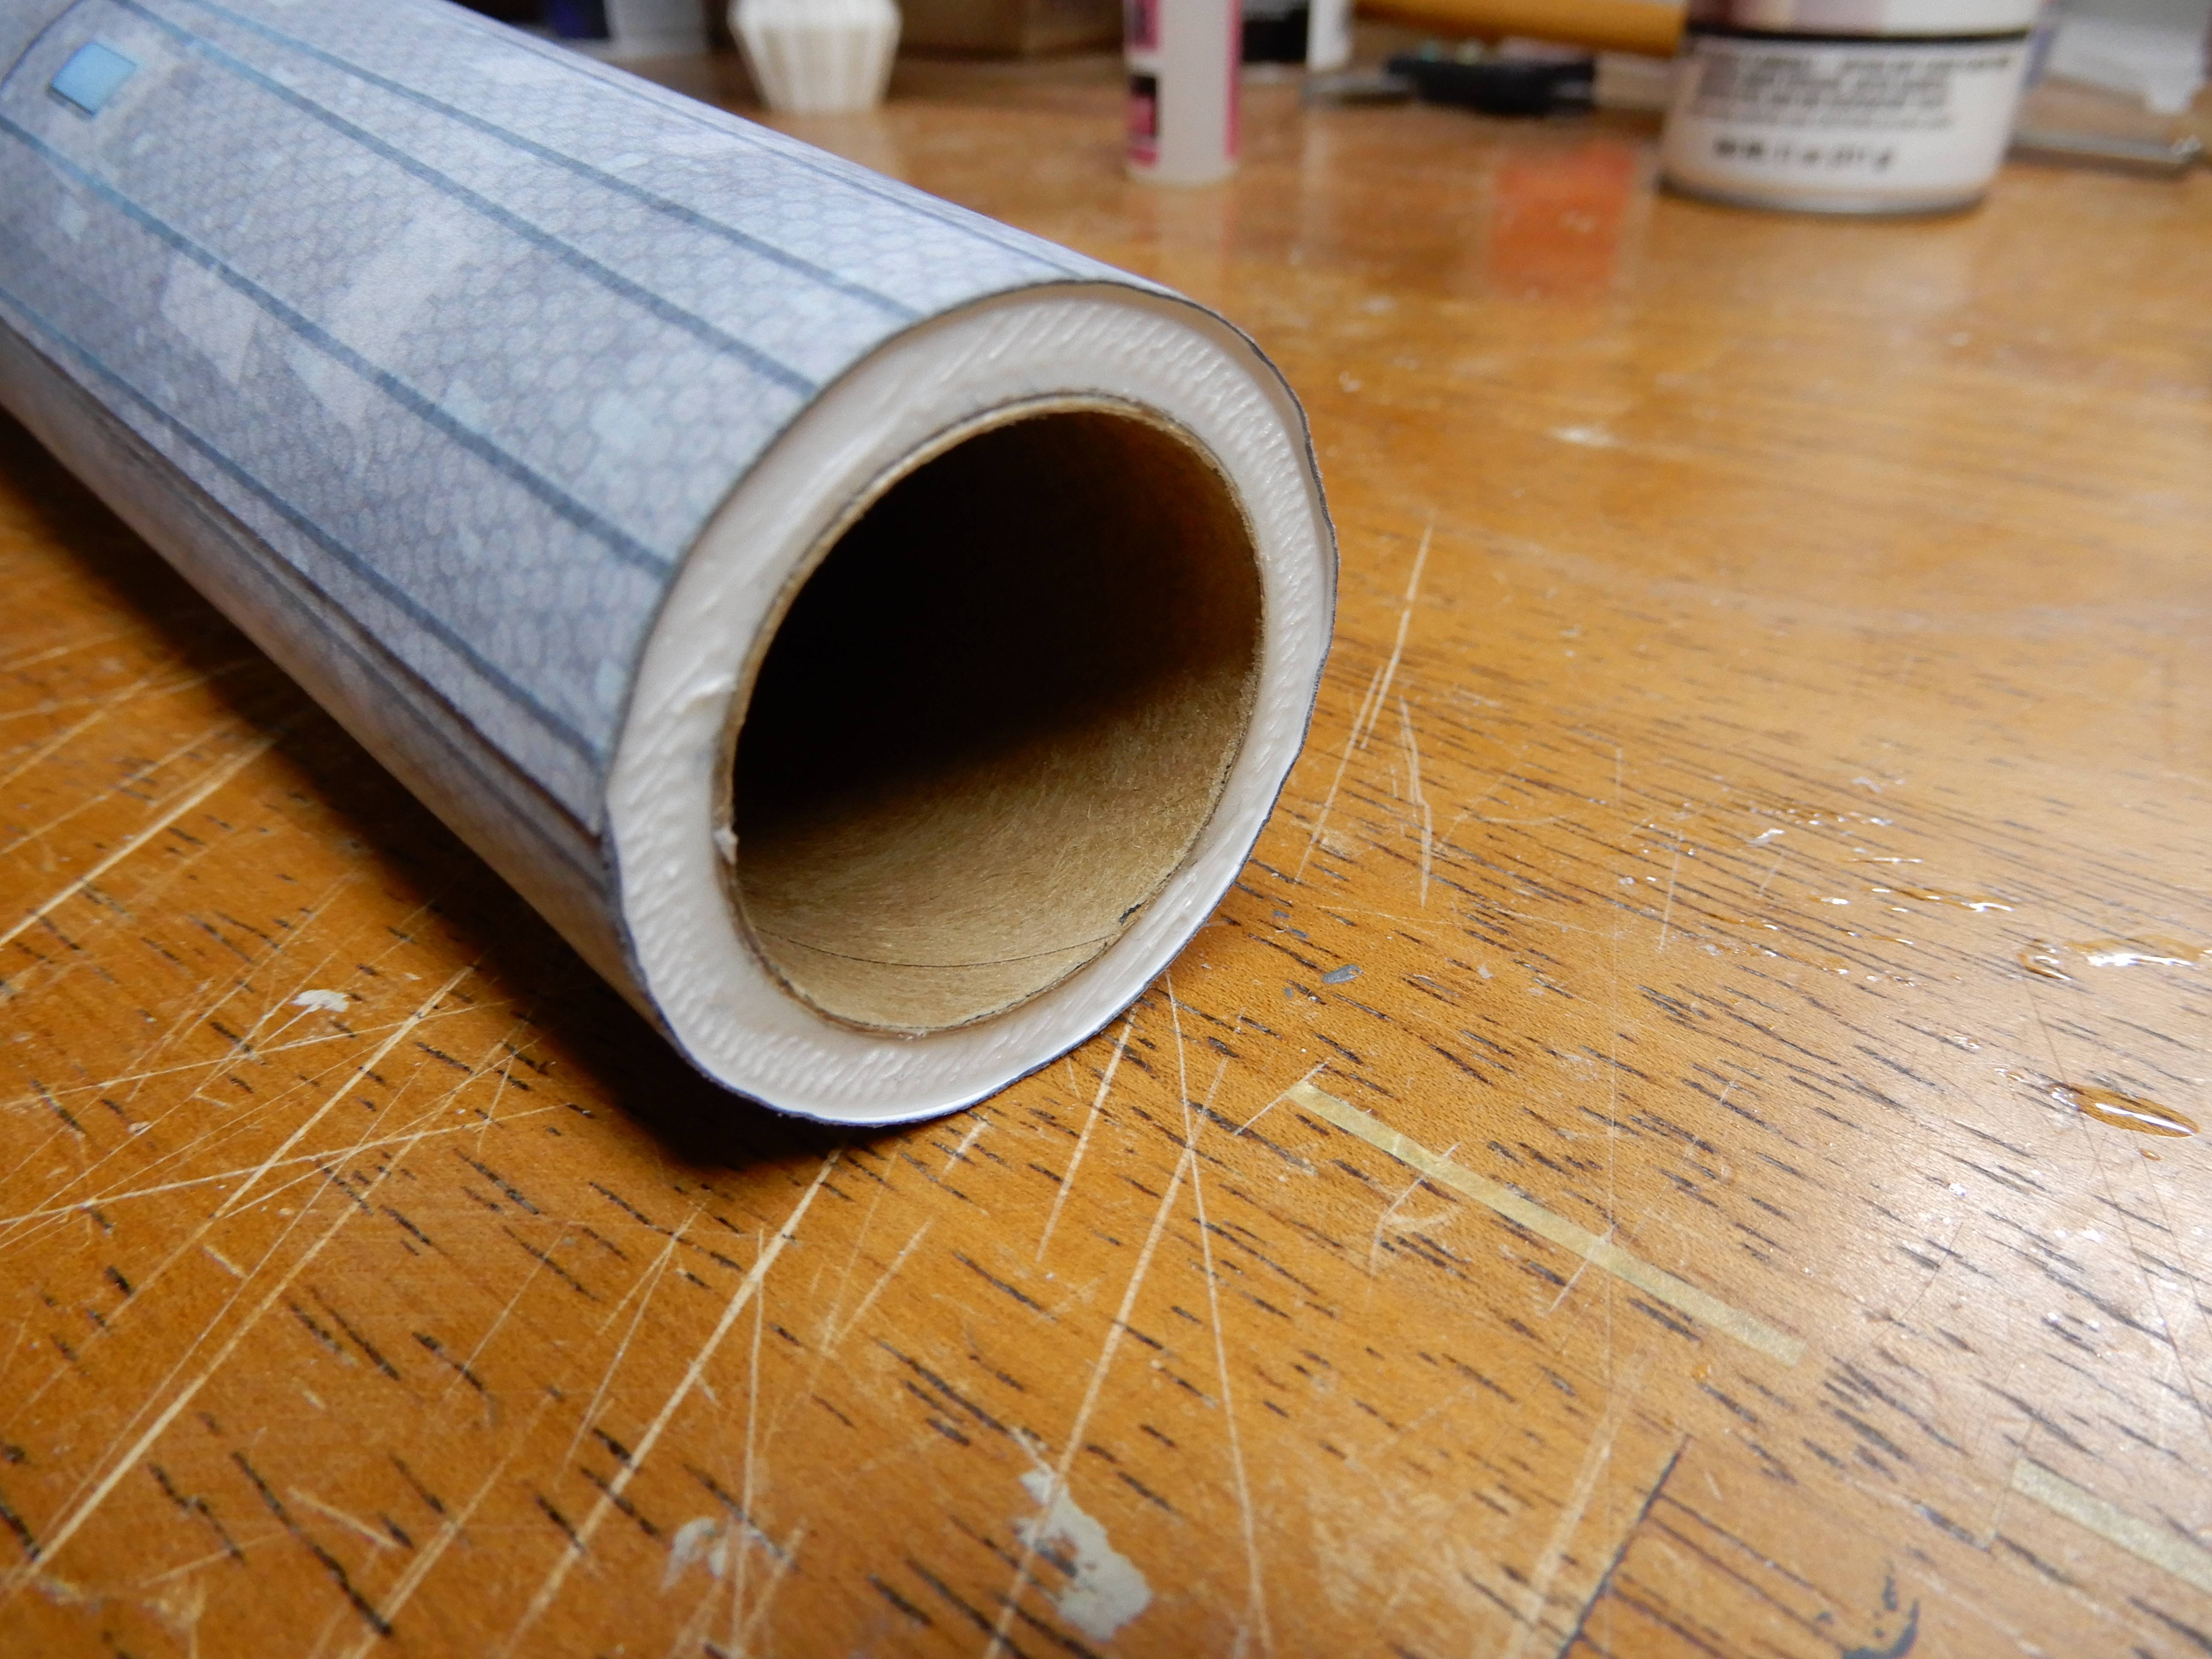
BT-20 approx 9 7/16" long, BT-50 approx 11 7/8" long, BT-55 approx 12 1/4" long (leave a little extra (1/2"? ) on the length for reasons that will become apparent later), and BT-60 4" long. Sand all of the tubes to remove the glassine.

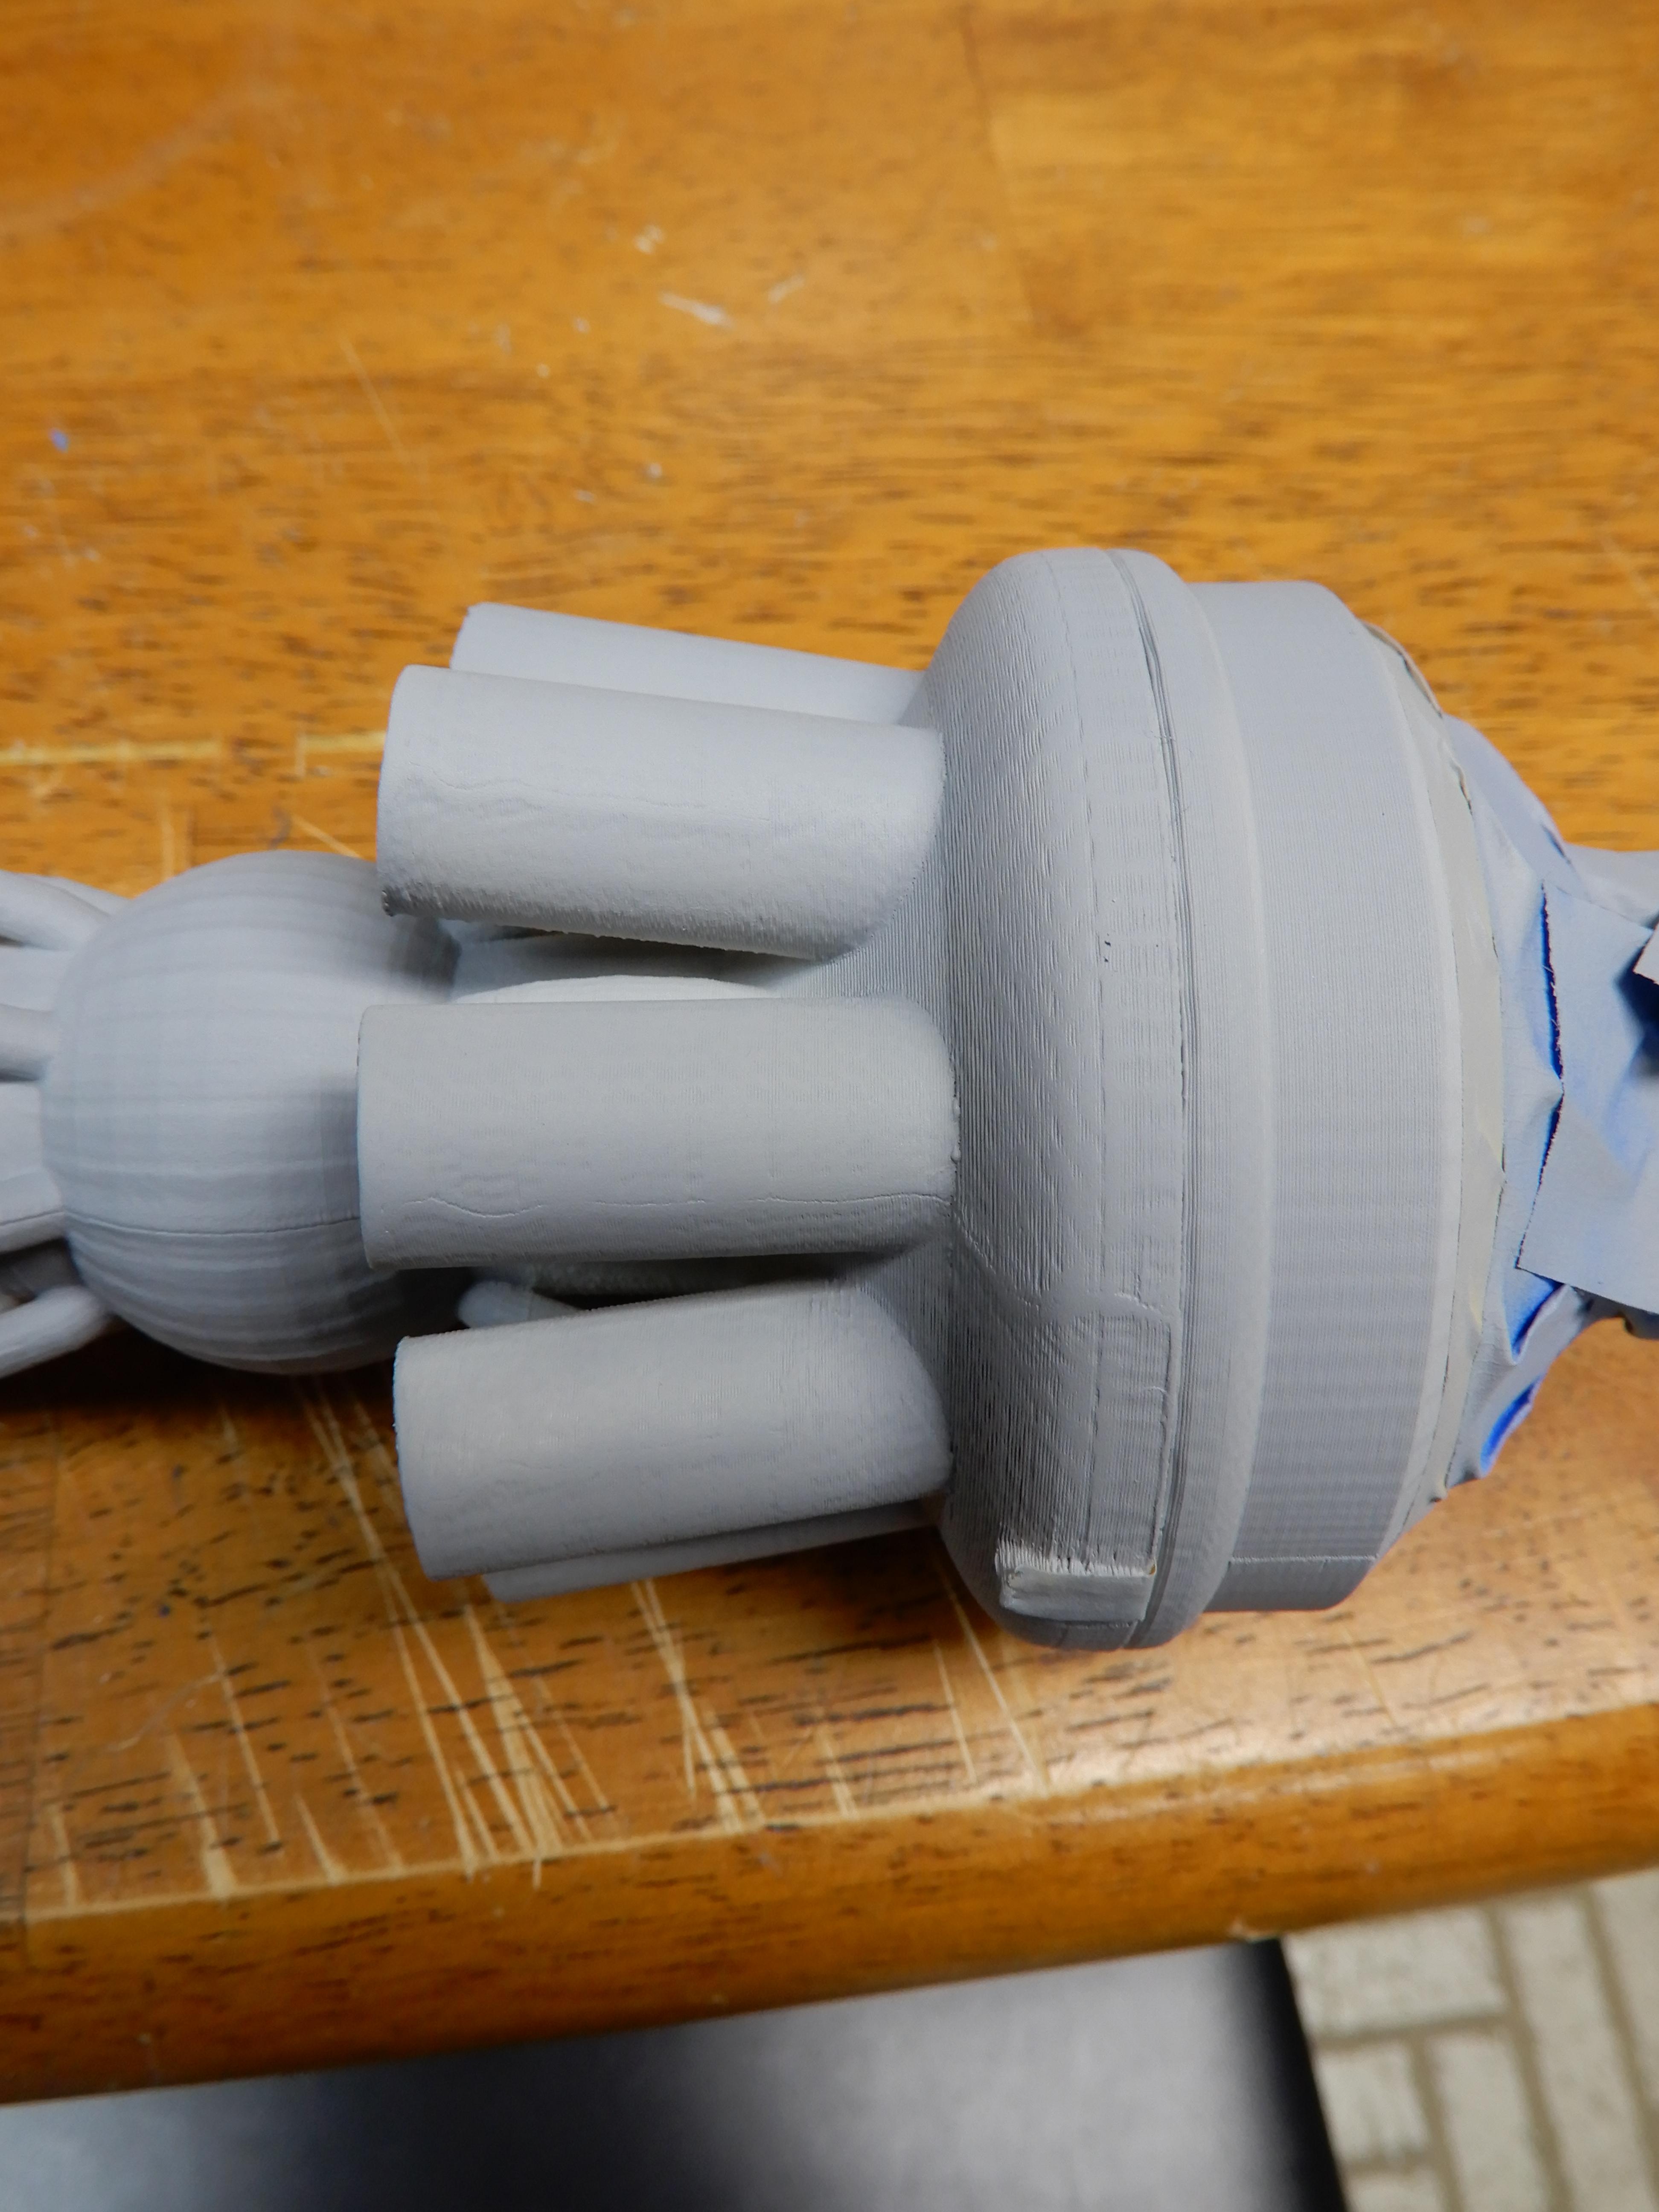
I started with the rear assembly that holds the motor. The directions show where you could attach the motor tube to the motor tube, so its up to you how you want to do it.

Start with the rear retainer cap. Put in the longest motor you plan to use in it (in my case, an E12). Press into the rear, making sure it goes all the way into the cap.

yts6Ri8.jpg


AXA7oHS.jpg


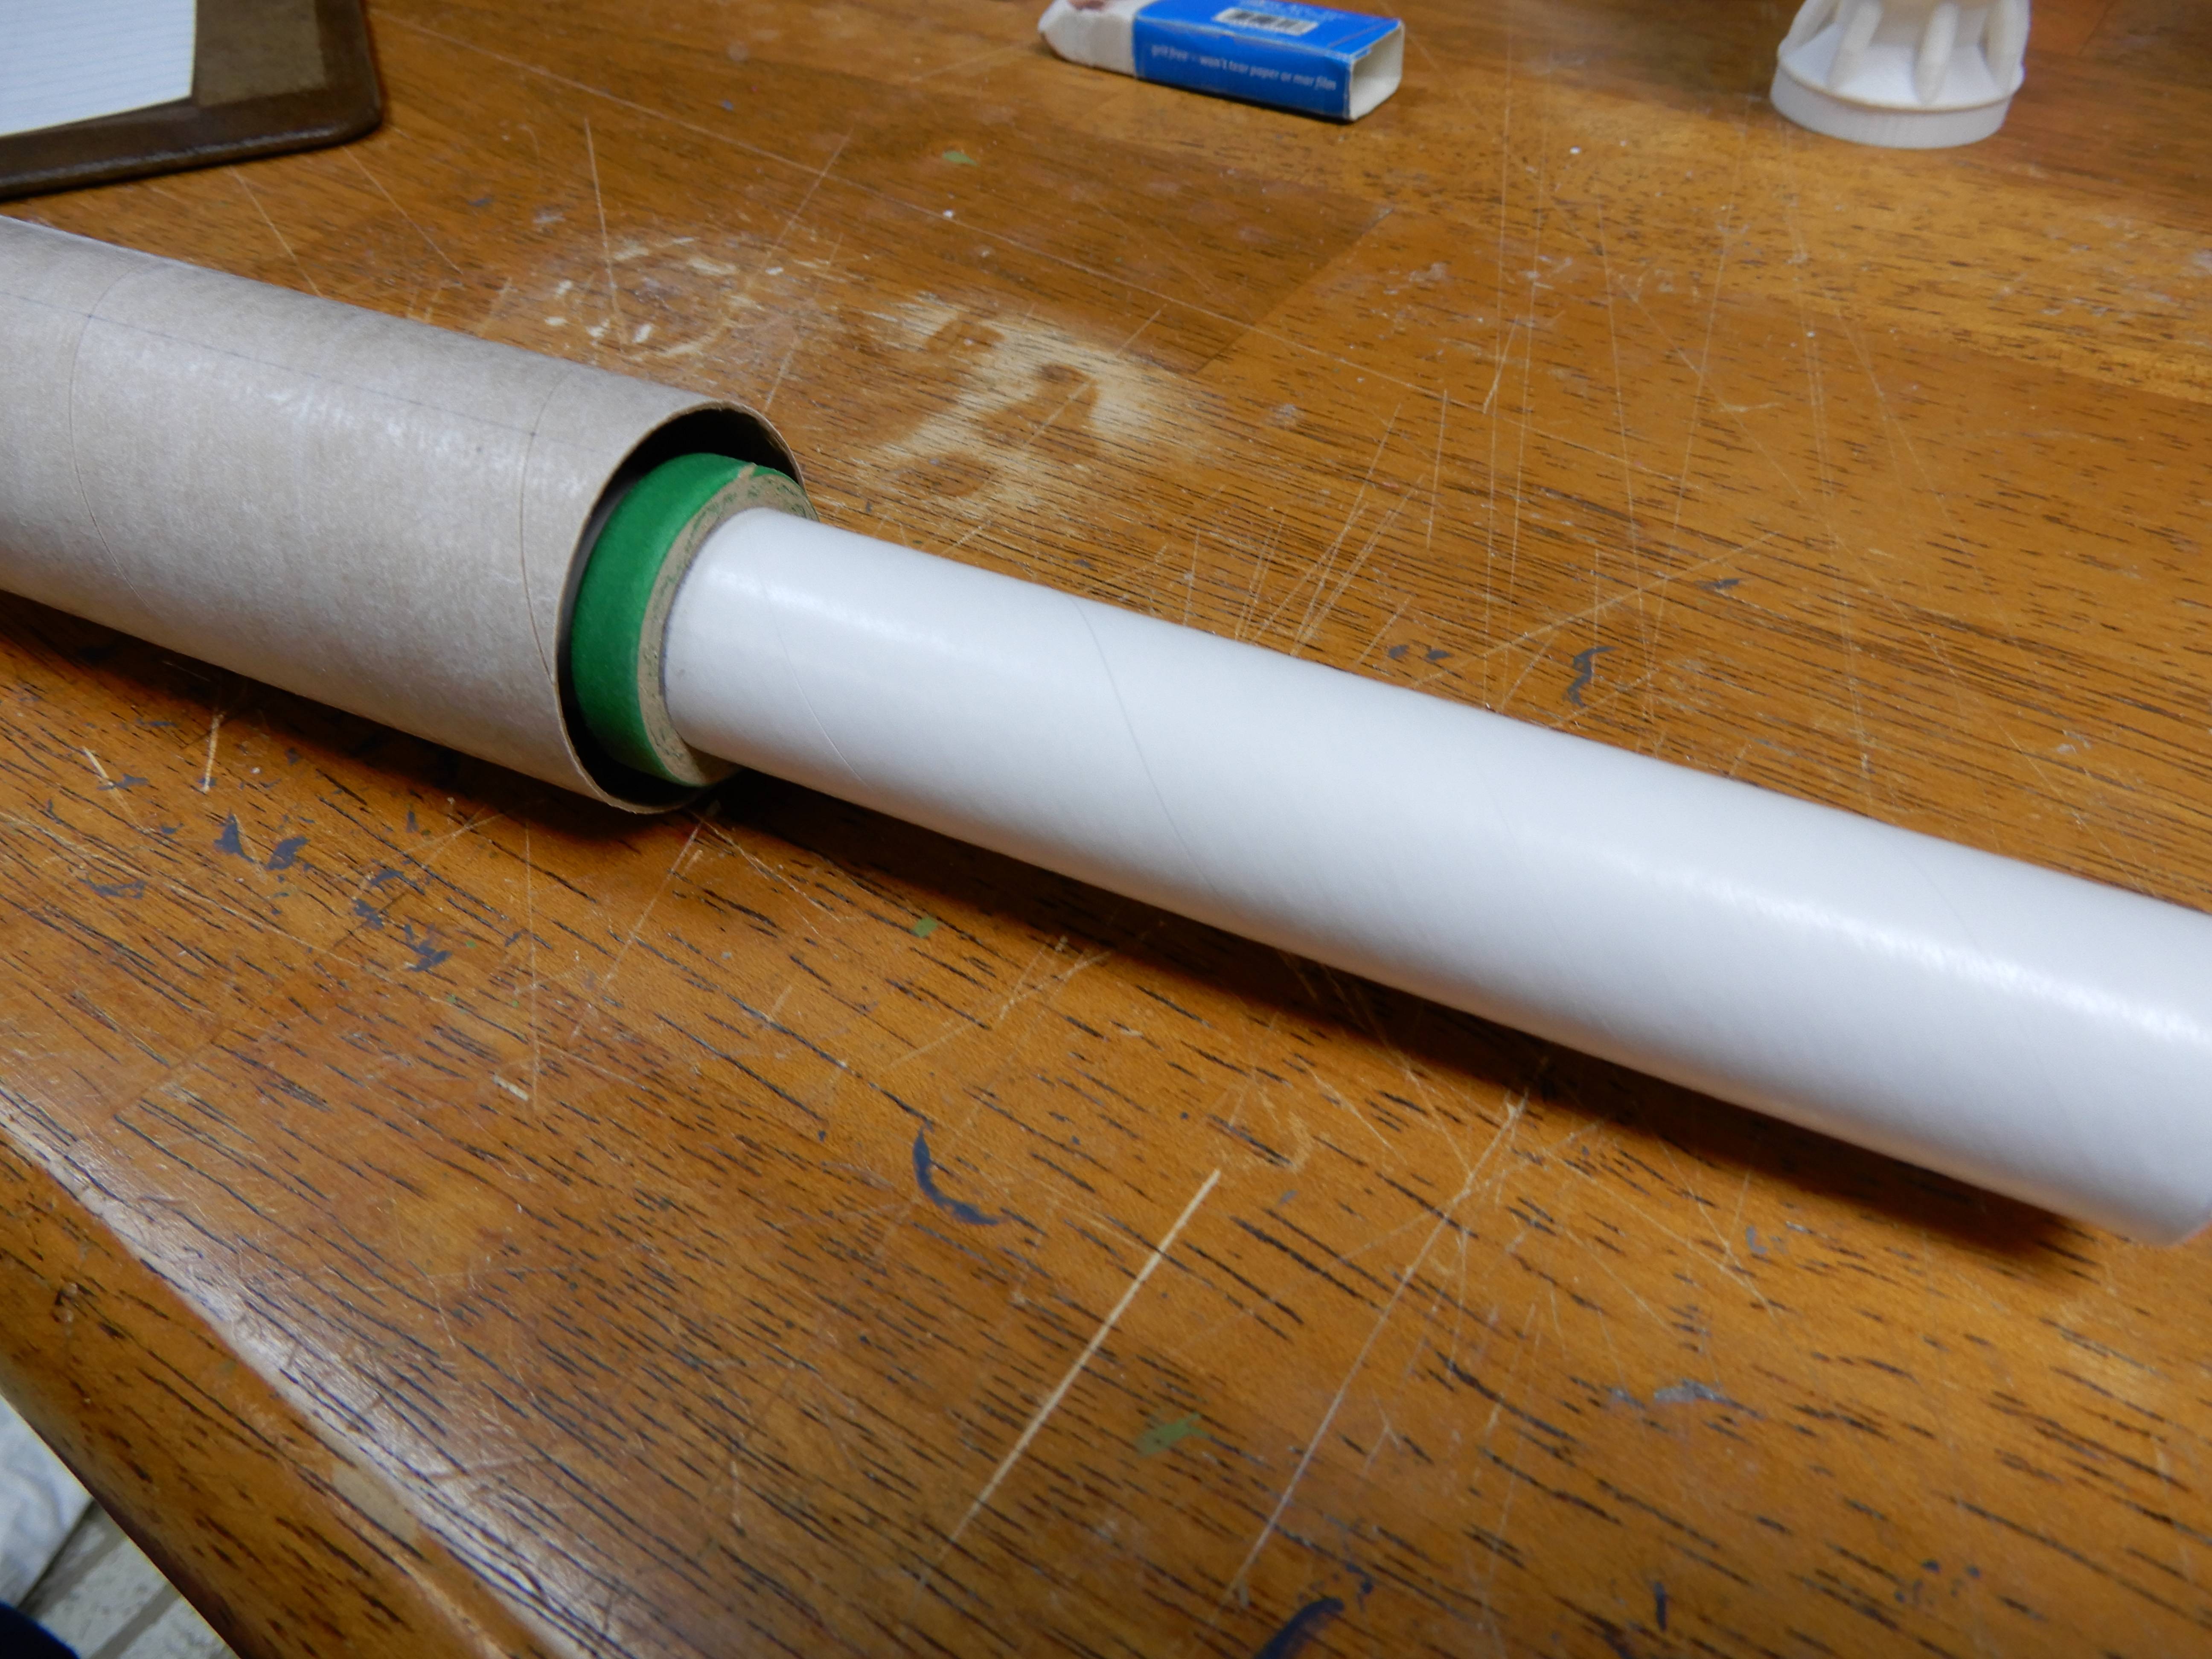
Take the BT-50 motor tube, and put a pencil line around the outside of the tube .75" from the end. Take one of the BT-50 to 55 green rings and slide it on the motor tube, leaving it about an inch in front of the pencil line. Put a line of wood glue all the way around the tube just ahead of the mark, and slide the ring onto the glue, ending up with the rear of the ring at the mark. Gotcha: make SURE that the front end of the ring is free of glue, as you will be using epoxy to attach it to the 3d printed rear assembly shortly. Let dry, and then add a bead of wood glue to the REAR of the ring to add strength.

ONIjugm.jpg


FnxaHGH.jpg


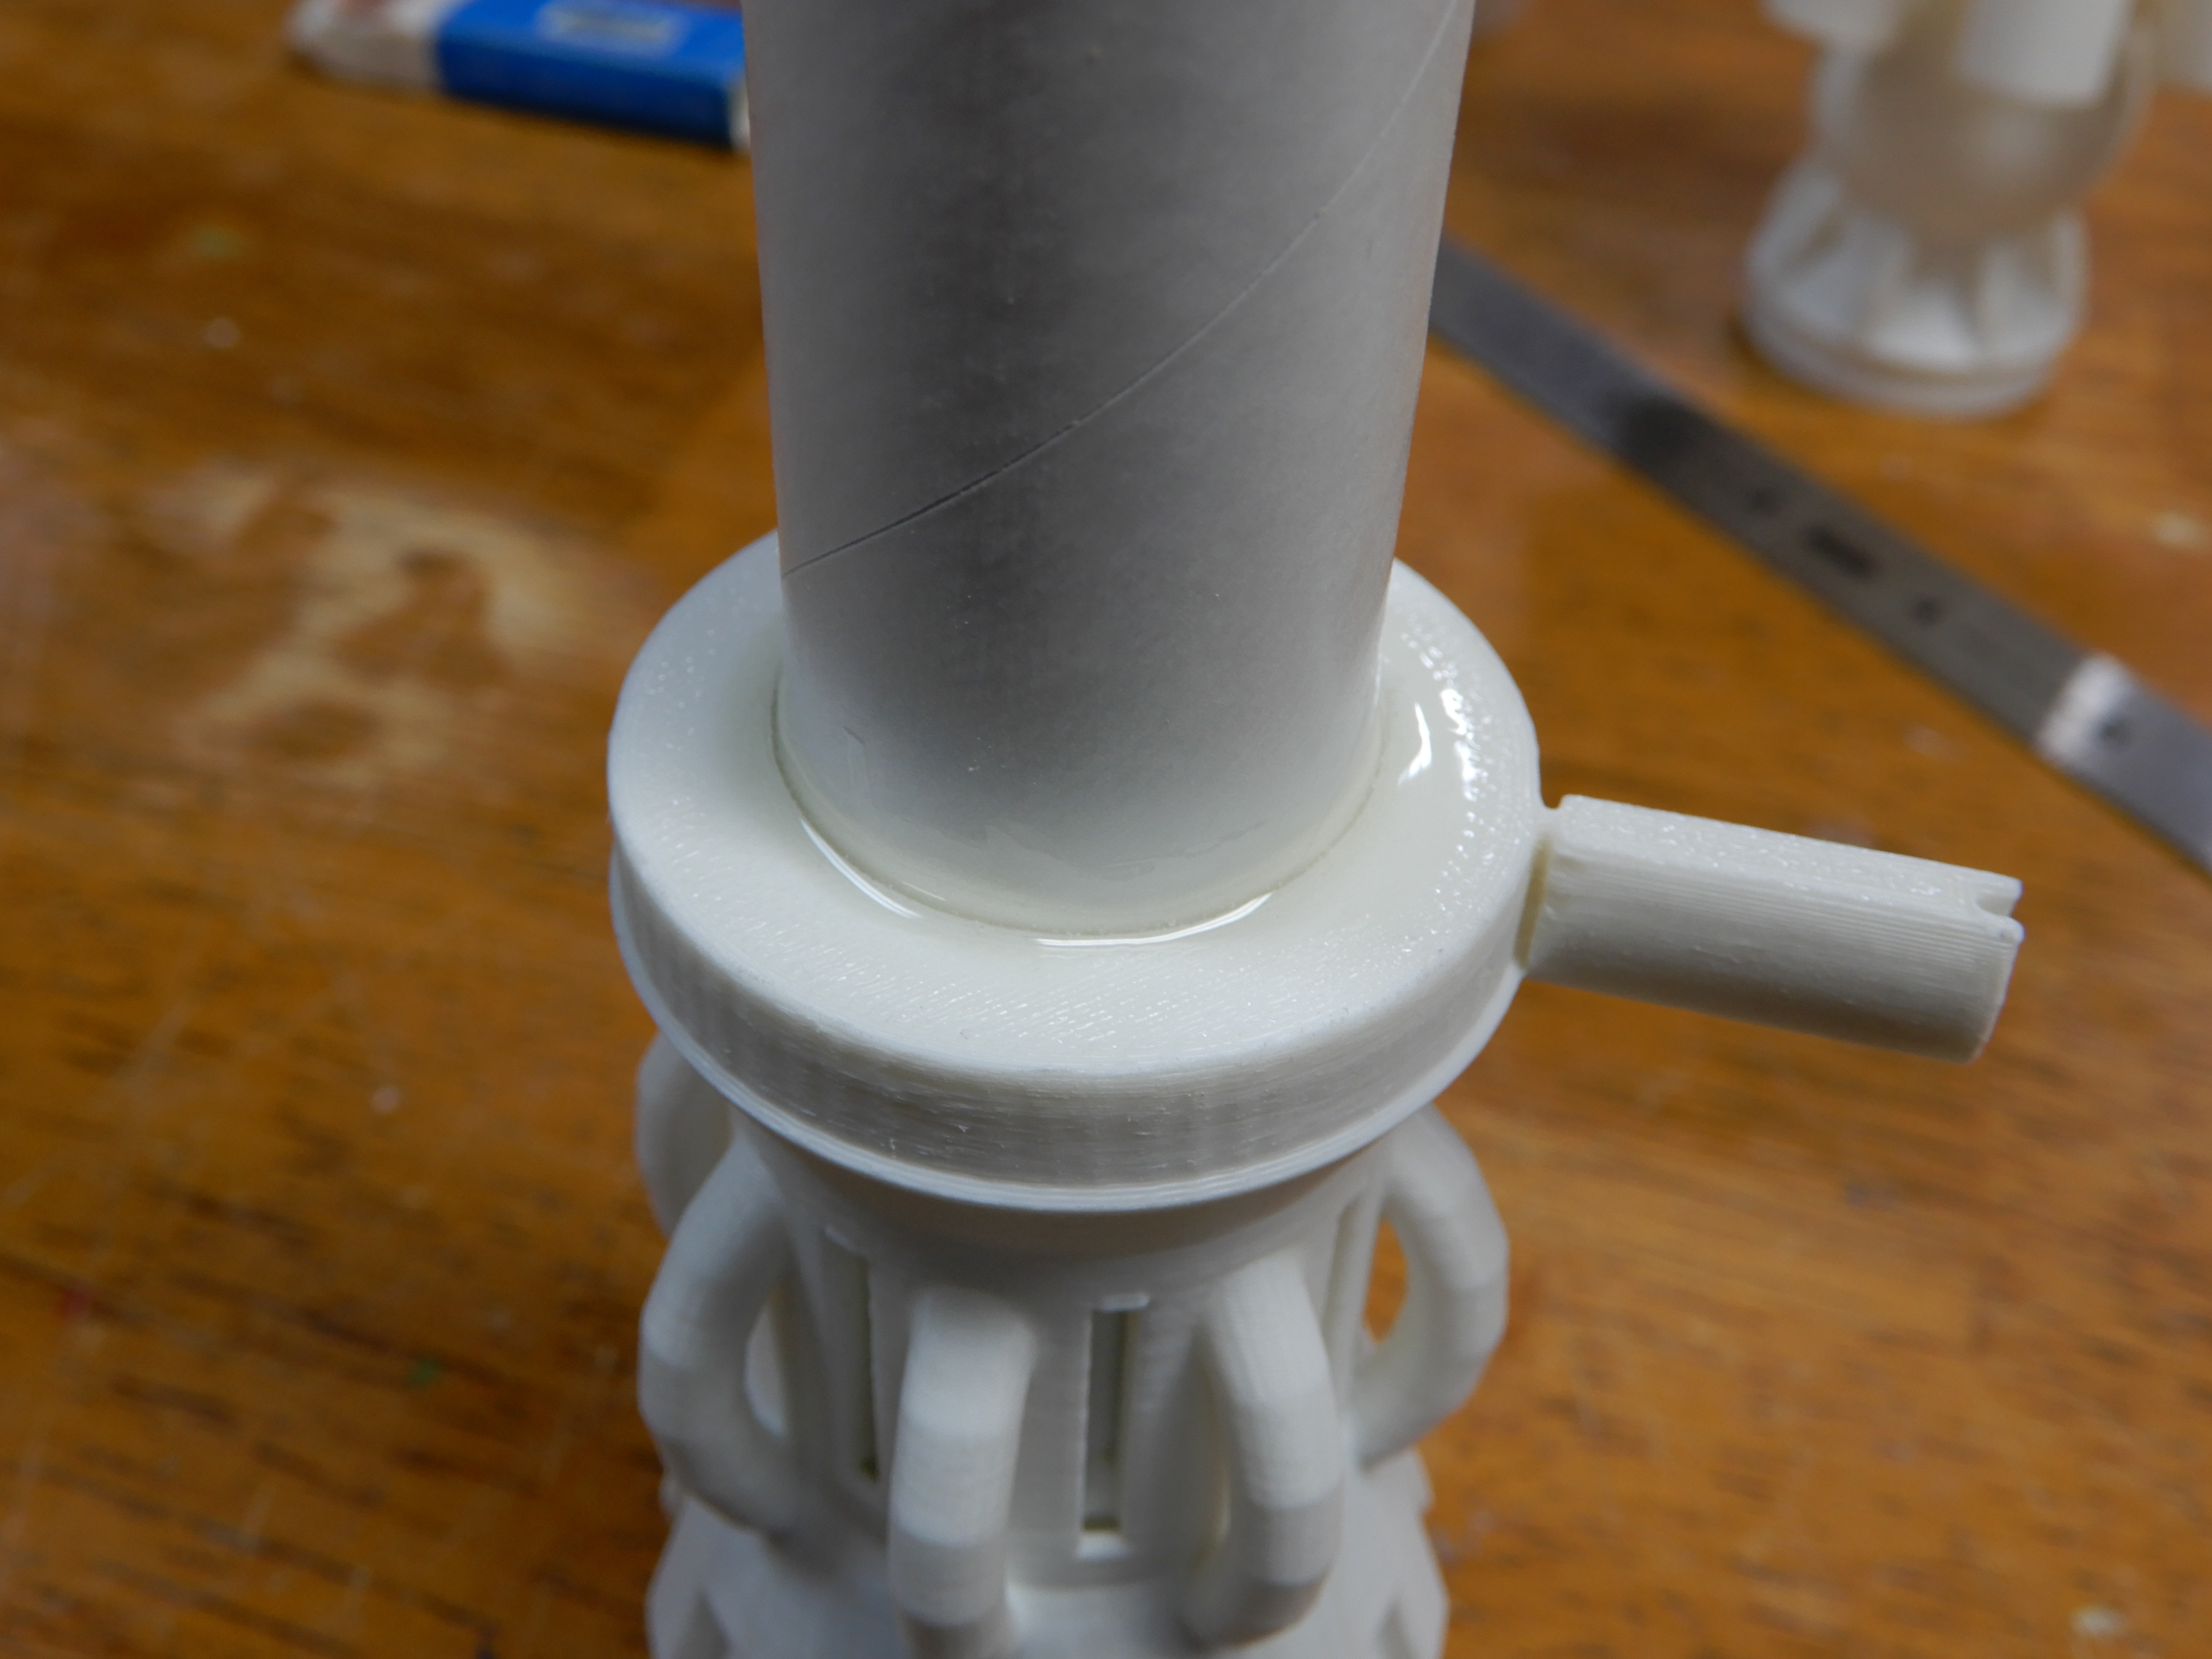
Next, put a bead of epoxy (15 or 30 minute preferred for more strength) on the front lip of the green ring. Slide it carefully into the rear opening of the rear engine assembly, and push all the way in. Using the engine retainer cap with motor inserted into it, slide the engine into the motor tube, turn the retainer cap to lock. Leave the retainer cap and engine in place, and stand the whole thing up so that the epoxy can flow downwards onto the 3d printed part. Let dry.

Turn the rear engine assembly over and put a bead of epoxy where the tube meets the front of the engine assembly to keep the tube from moving backwards. Let dry.

rEQqphm.jpg


Put a line of wood glue on the inside of the motor tube, 3 1/4" from the rear end. Using the retainer cap and engine, push the 24mm engine block into place, and remove the engine+retainer so you don't glue it into place.

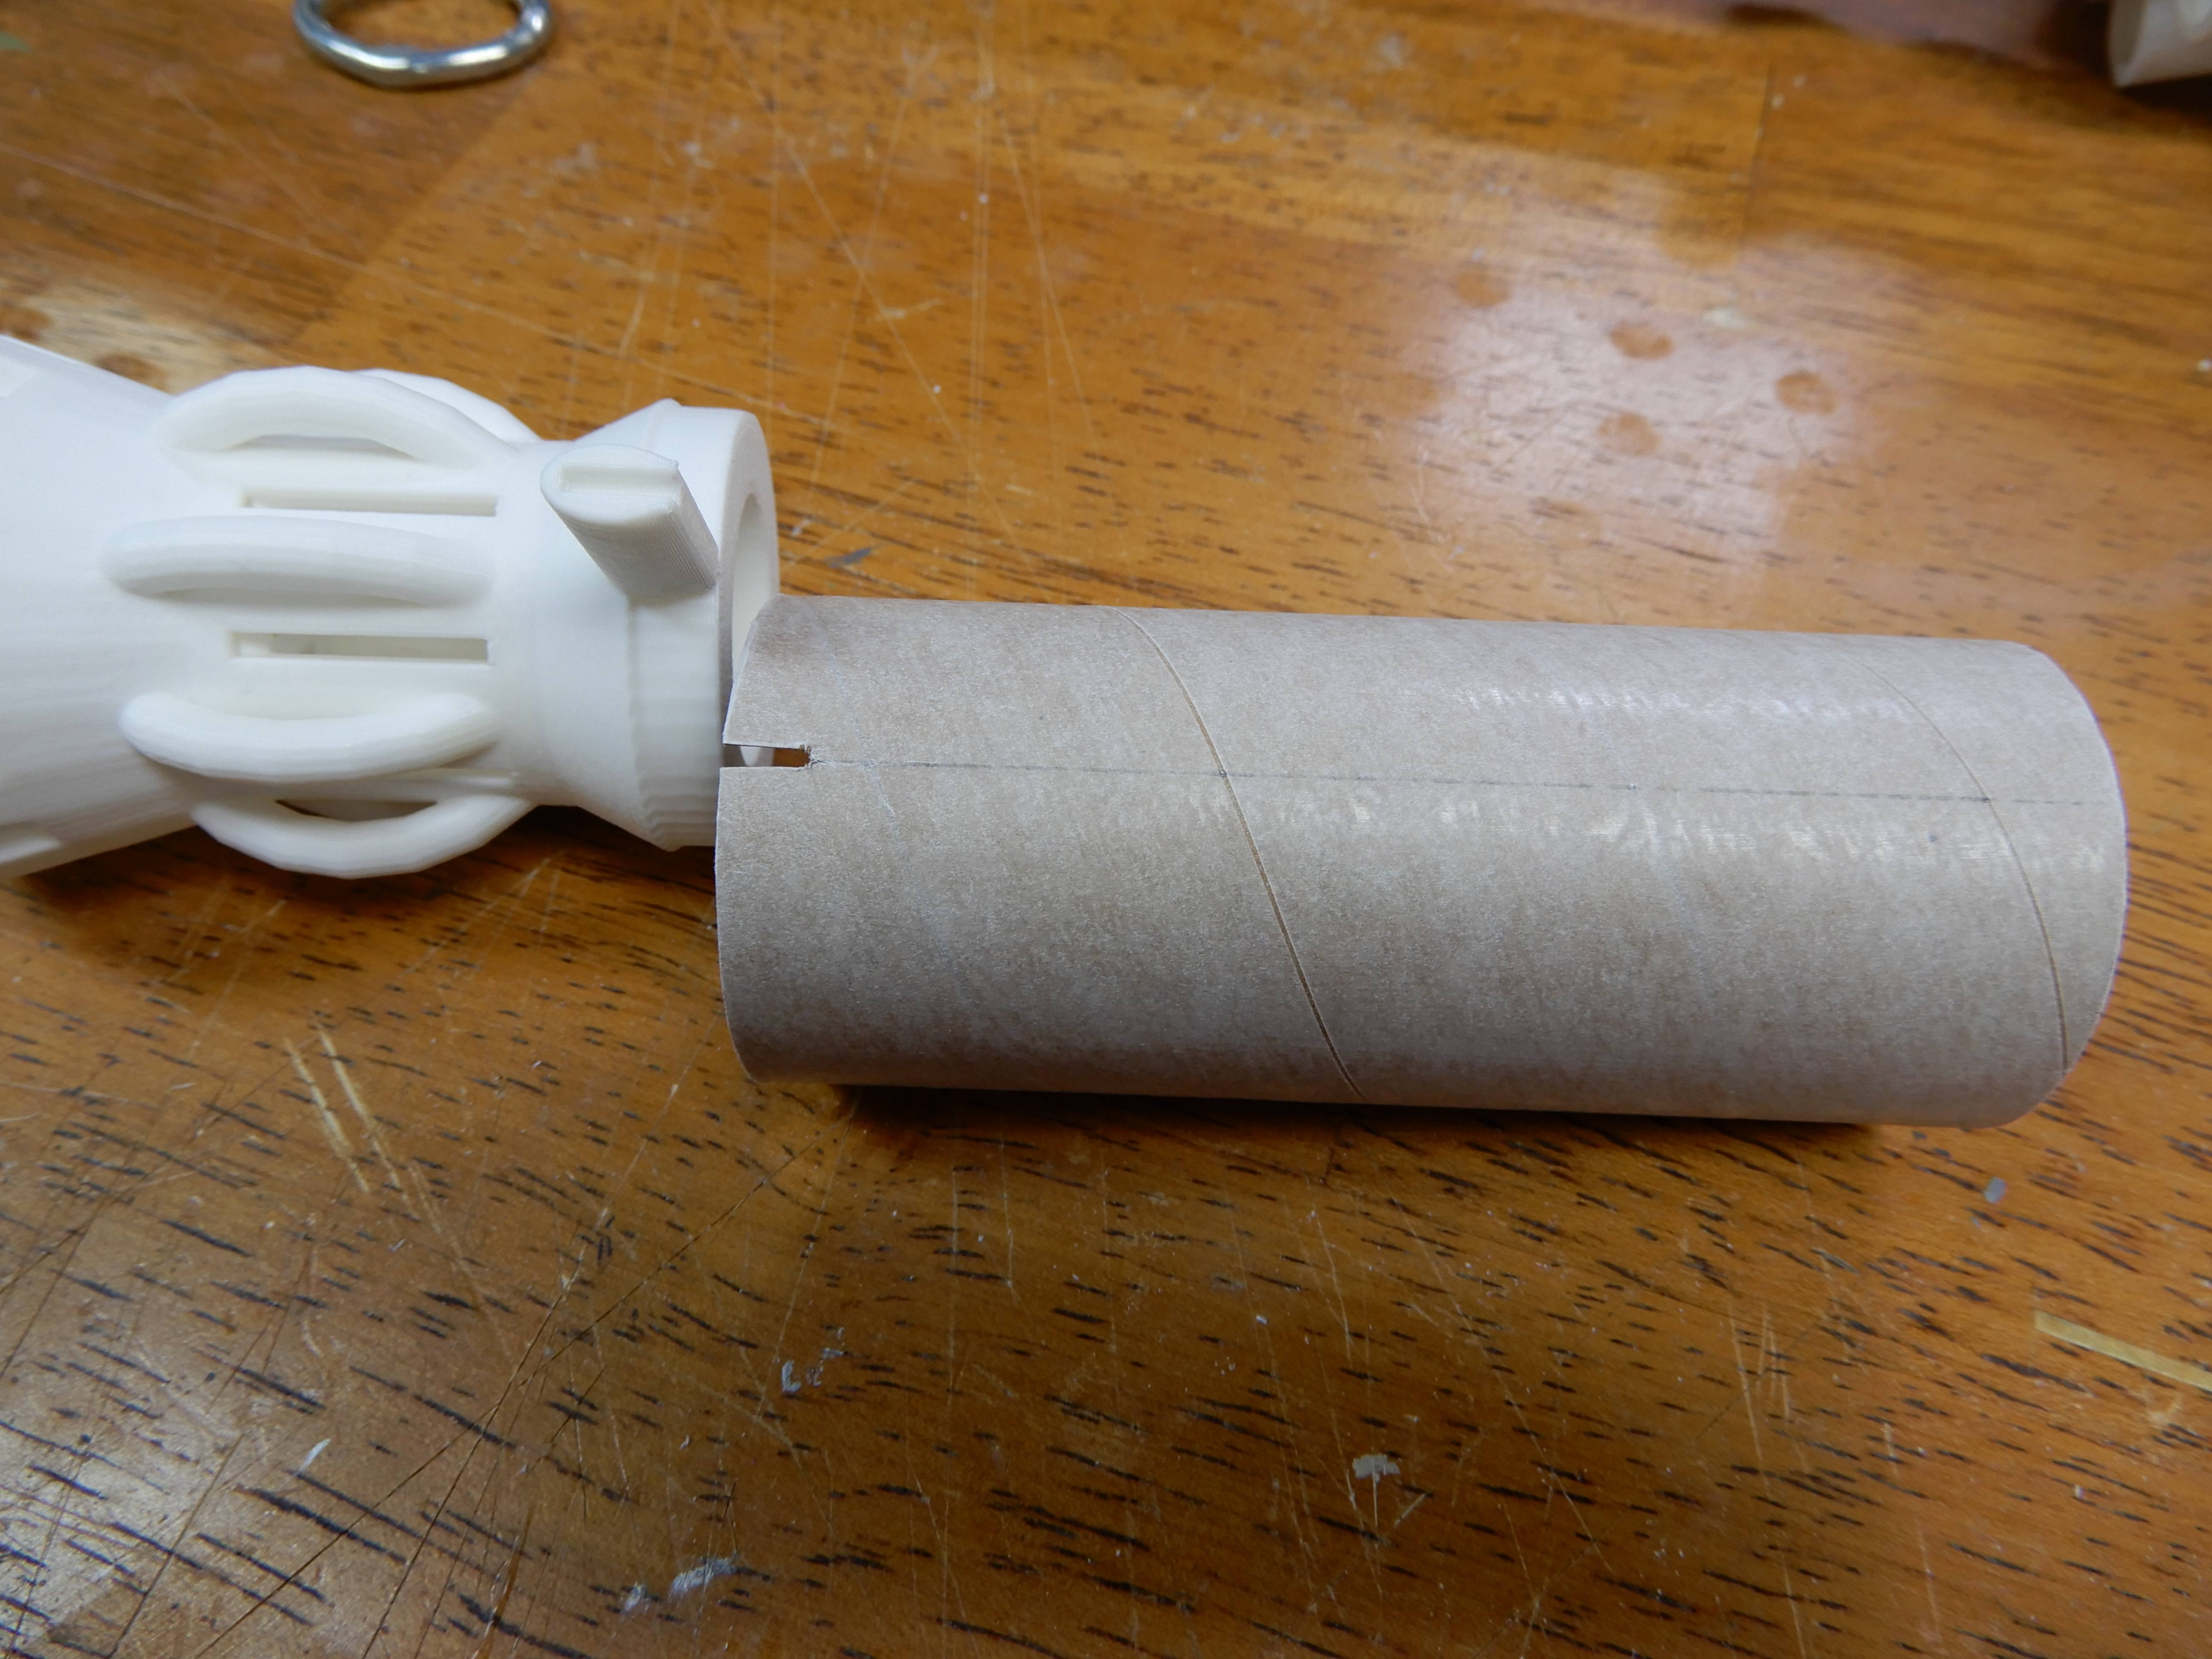
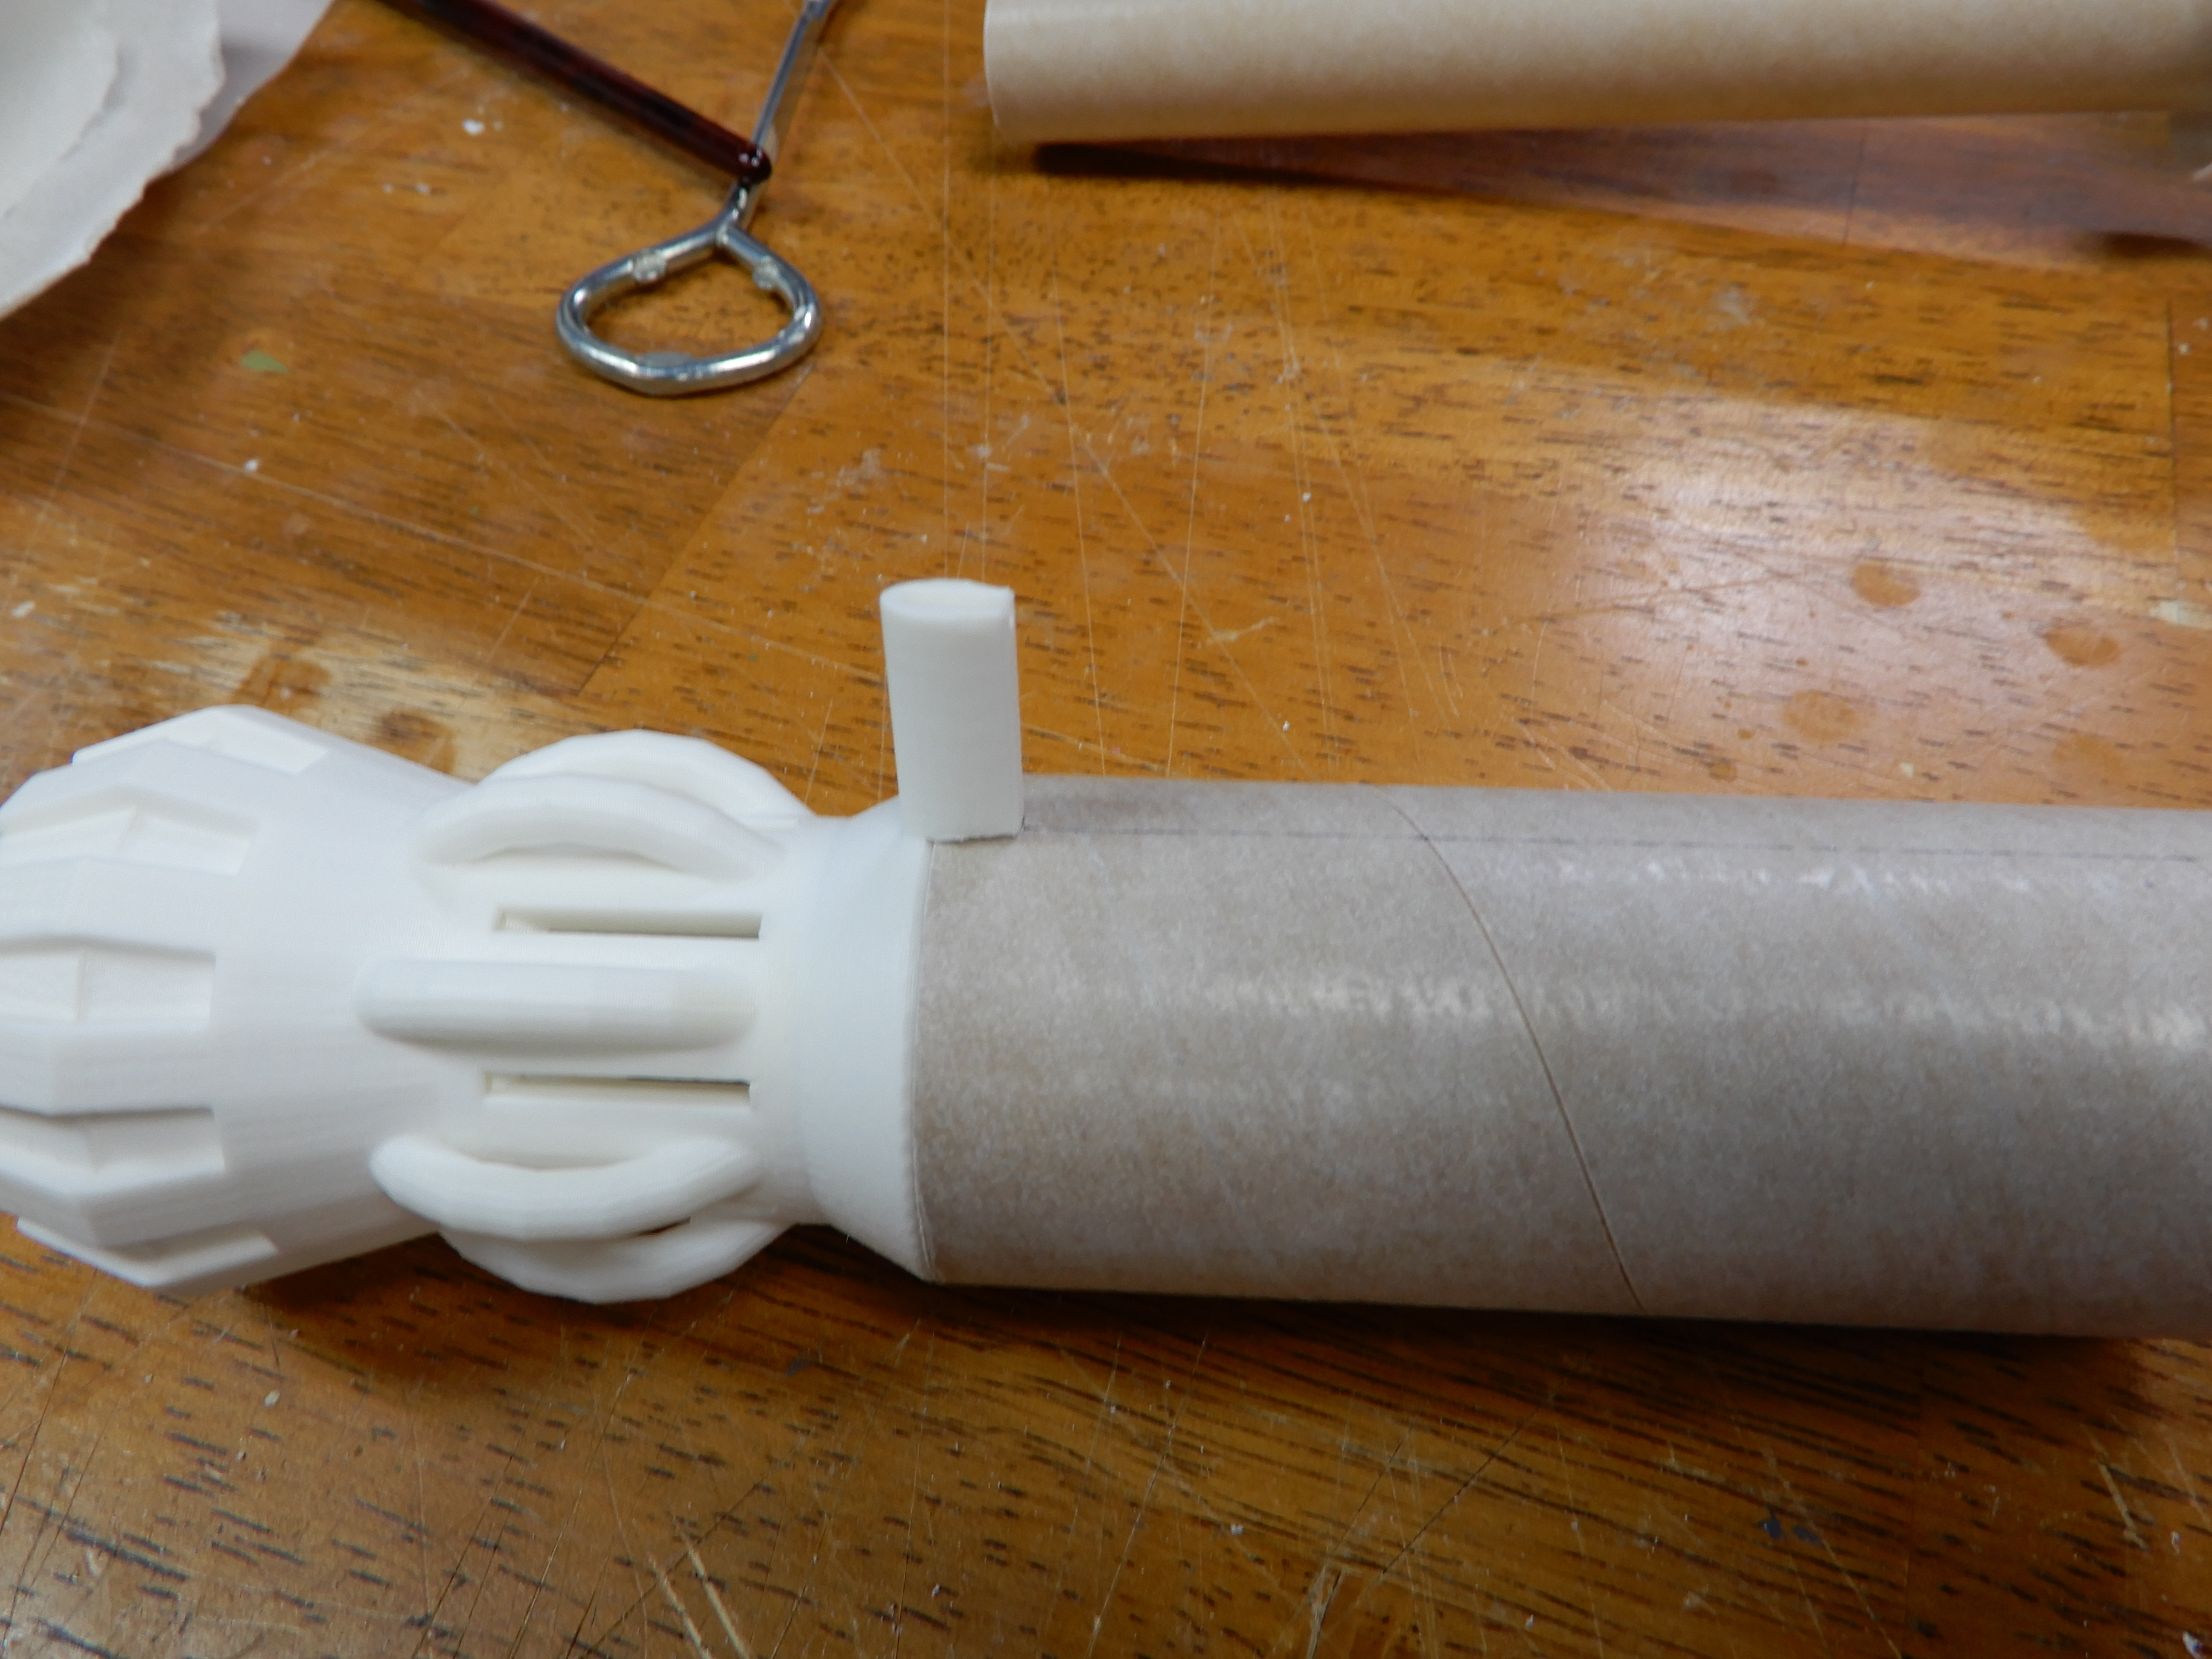
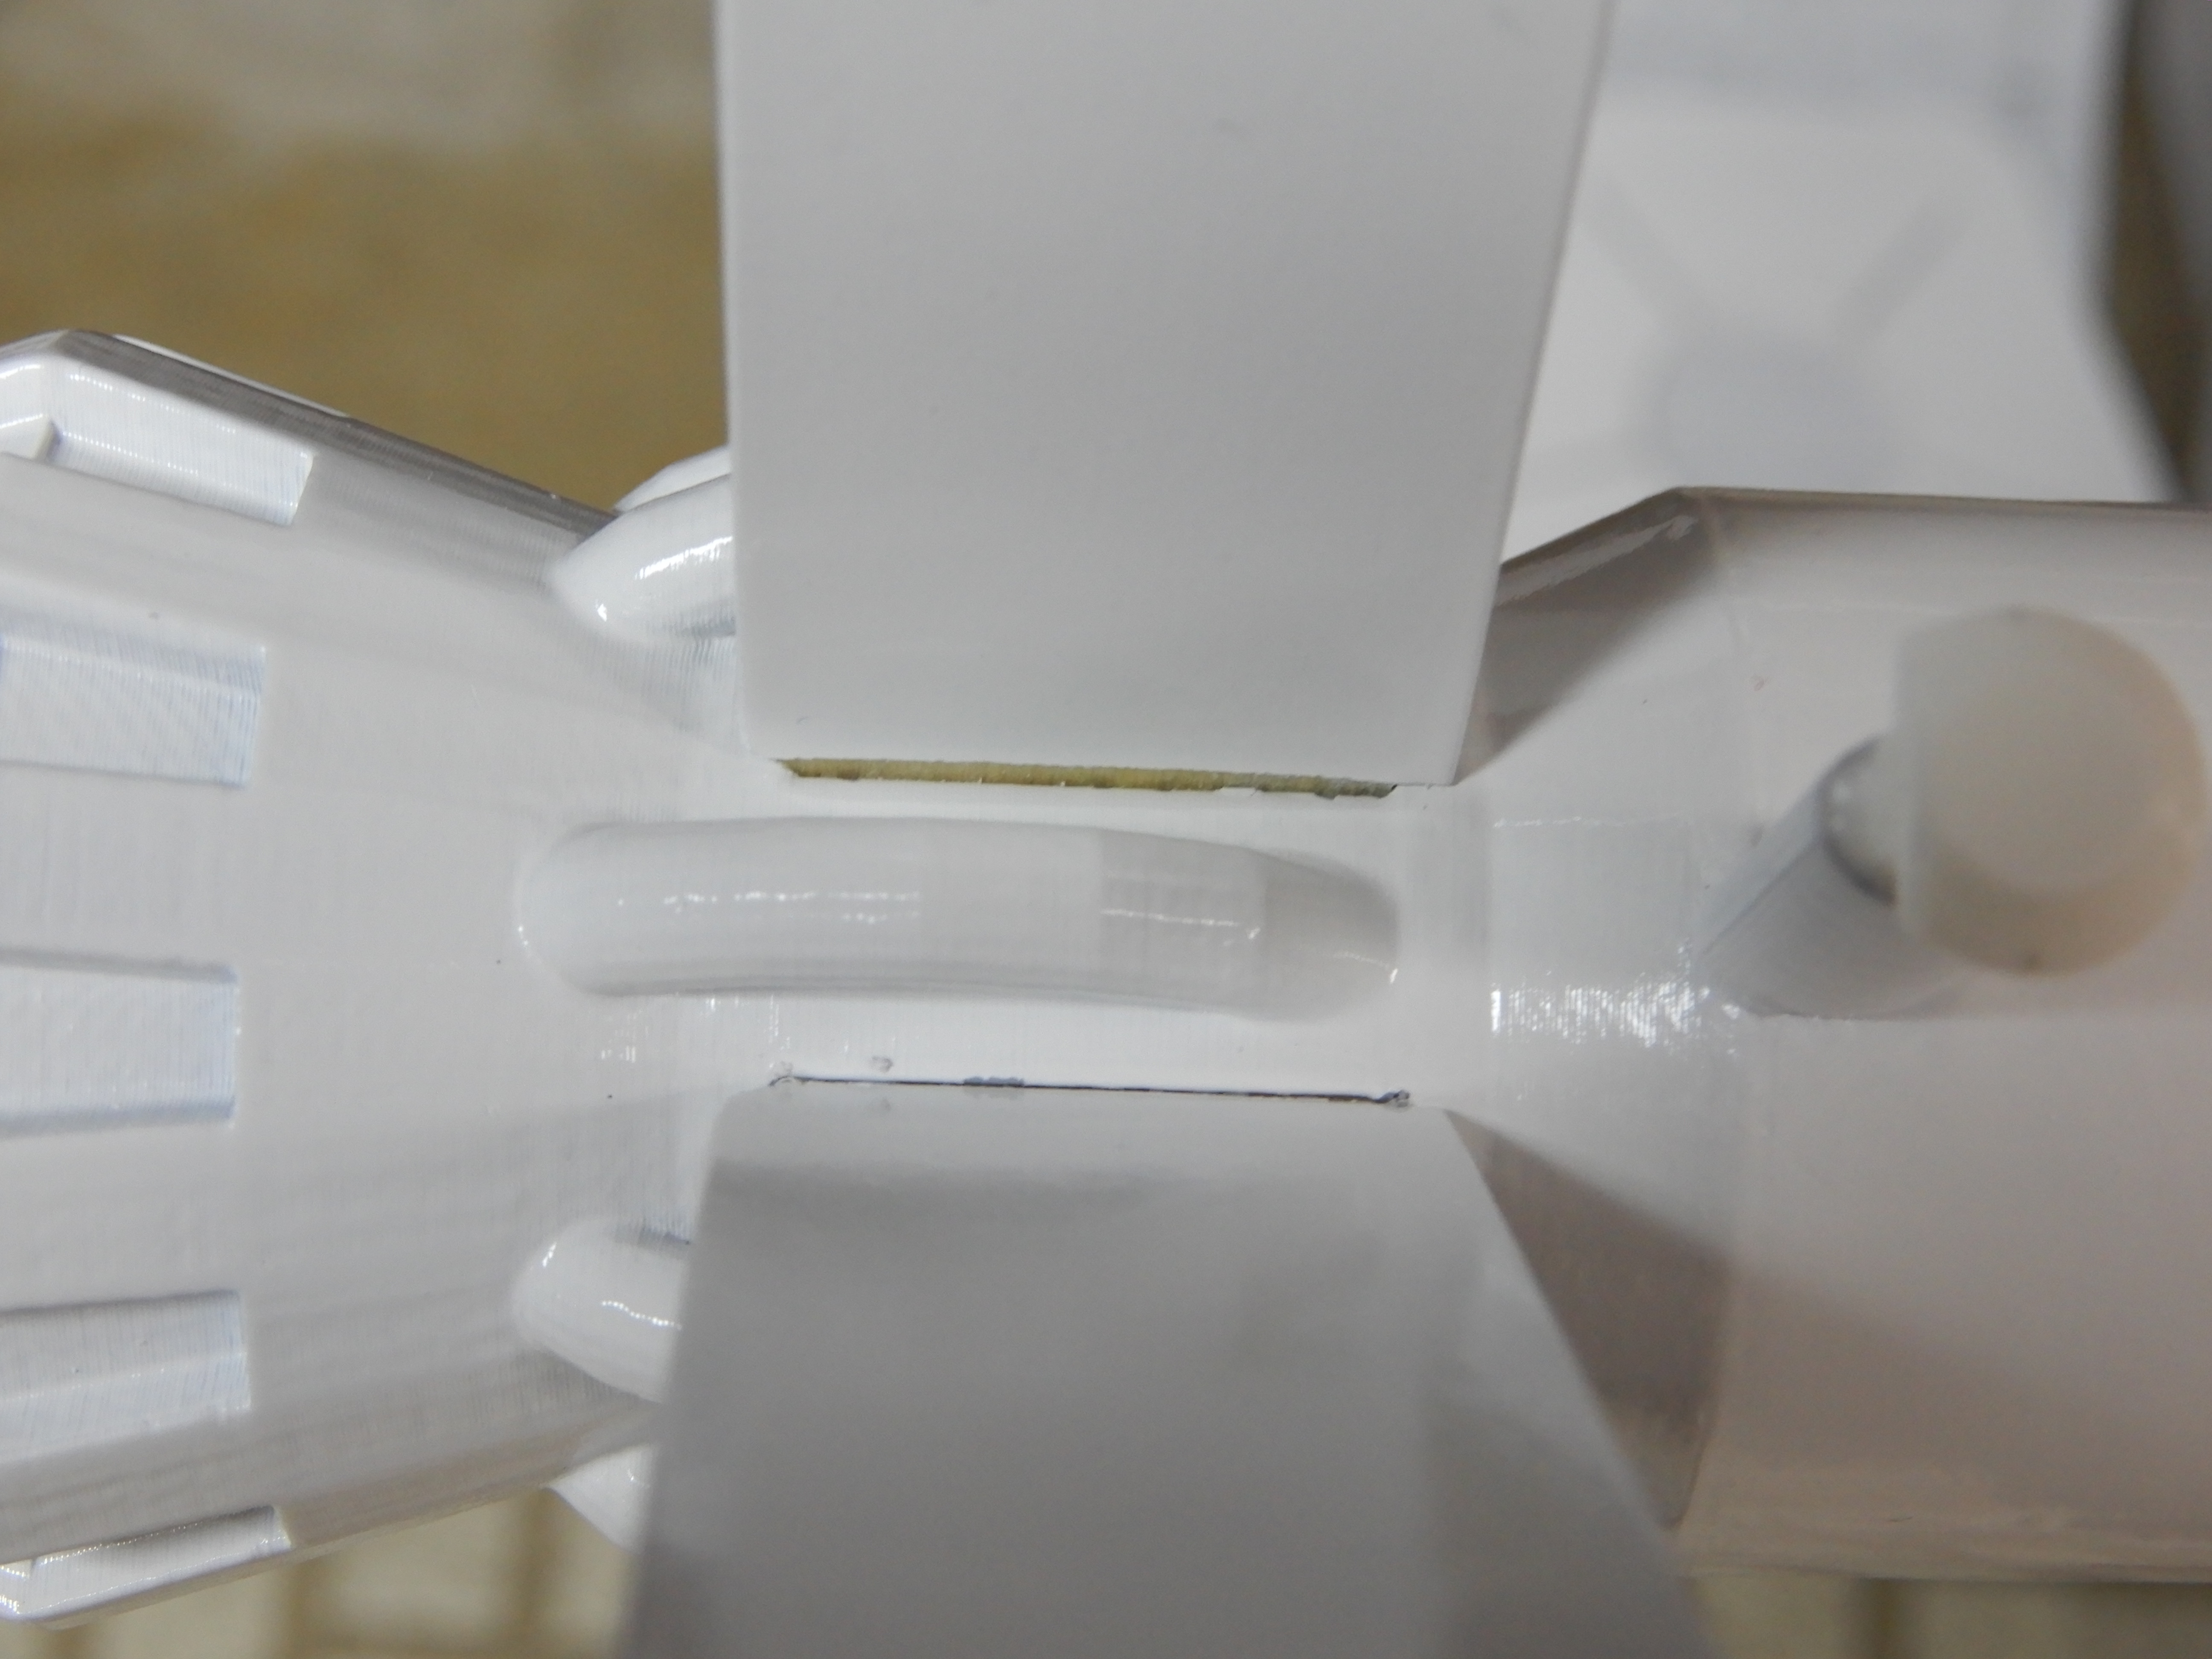
Taking the 4" BT-60 tube section, draw one line from one end to the other. Make a slot 1/16" wide x 1/4" long right on the line, to fit into the area under the pedestal on the rear engine assembly (for attaching the launch lug/rail "button" later on). Test fit it on the rear engine assembly, but don't glue it yet.

Mbw0wvw.jpg


8P1T7mi.jpg


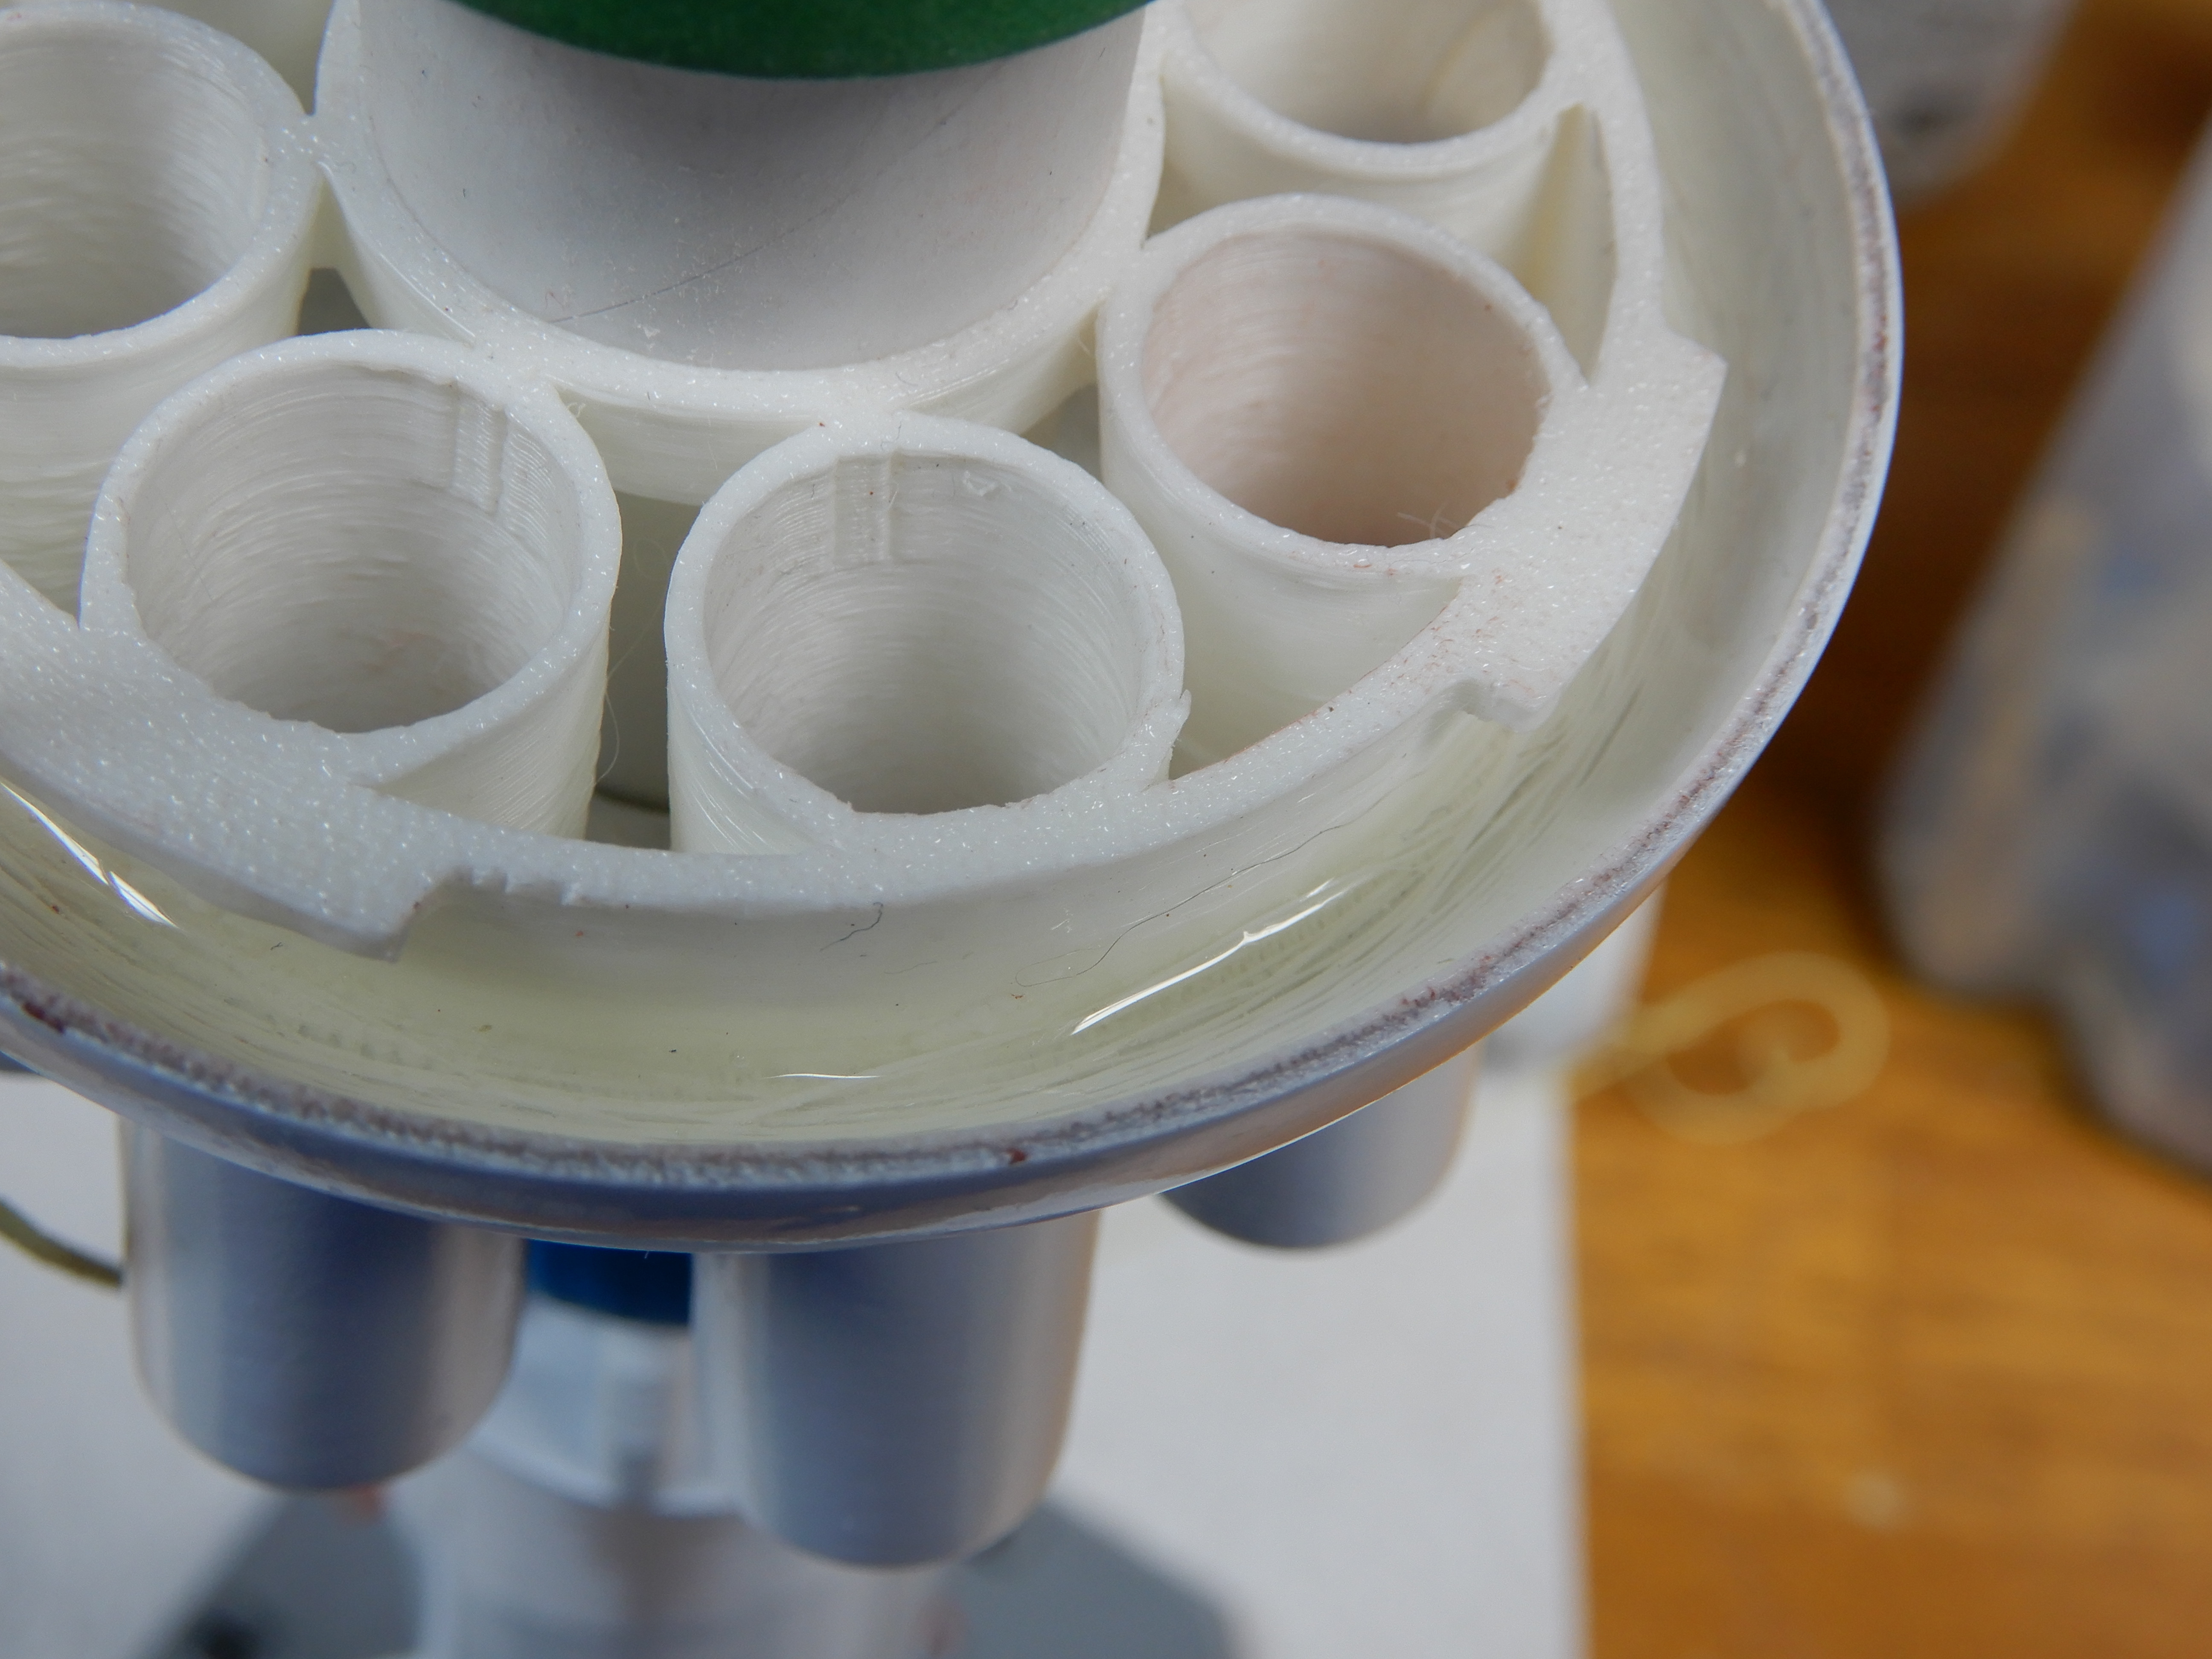
Slide an green ring (BT-55 to 50) onto the front of the BT-50 motor tube. Stop about an inch from the end of the tube, but don't glue it. Slide the rear half of the cluster assembly onto the tube, and press back until it meets the front of the engine assembly. Turn to lock a little bit. Unlock it, and carefully remove the rear half of the cluster assembly. You are using the rear half of the cluster assembly to position the green ring so it touches the inside of the part when epoxied into place.

Note where the green ring is, and mark both the front and rear edges with a pencil line. Slide off the BT-60 tube, exposing more of the motor tube. Move the green ring 1/4" FORWARD of the front line on the motor tube. Apply a bead of wood glue around the tube between the two lines, and slide the green ring down to fit between the two lines. IMMEDIATELY put the rear half of the cluster assembly back on to confirm that the ring isn't too far forward. If it is, gently press the cluster assembly backwards until it stops. Let dry. Add a bead of wood glue to the REAR end of the green ring. Leave the front edge of the green ring clean so you can epoxy it in the next step.

Put some epoxy on inside the rear 1/4" of the BT-60 tube section, and press onto the front shoulder of the engine assembly. You will be putting epoxy on the front 1/4" of the tube as well in the next step, so it may be easier to do it now. Also put some epoxy on the front edge of the green ring, so it will glue to the inside of the rear half of the cluster assembly.

GOTCHA: DO NOT put epoxy directly on the 3d printed part near the hole for the motor tube; it will get onto the motor tube and make a mess, making it harder to attach the shock cord mount in a later step. You want the motor tube to remain clean... I messed this up and had epoxy all over the outside of the motor tube, requiring me to quickly put on the shock cord mount when I wasn't quite ready. Wood glue isn't going to stick well to tube with a coating of epoxy on it, despite using alcohol to remove the epoxy, so beware. :(

Carefully slide the rear half of the cluster assembly onto the motor tube, and go all the way back until it stops. Turn the lock a little to ensure the part is secured. Stand the assembly upside down (front end of the motor tube is down) so the epoxy can drip onto the 3d printed cluster assembly. You could put some expoxy where the cluster assembly joins the motor tube if you want. If you do, be careful to not get any glue away from the joint on the tube (keep the tube clean so you have room to work and attach the shock cord mount later on).

NSHL1tW.jpg


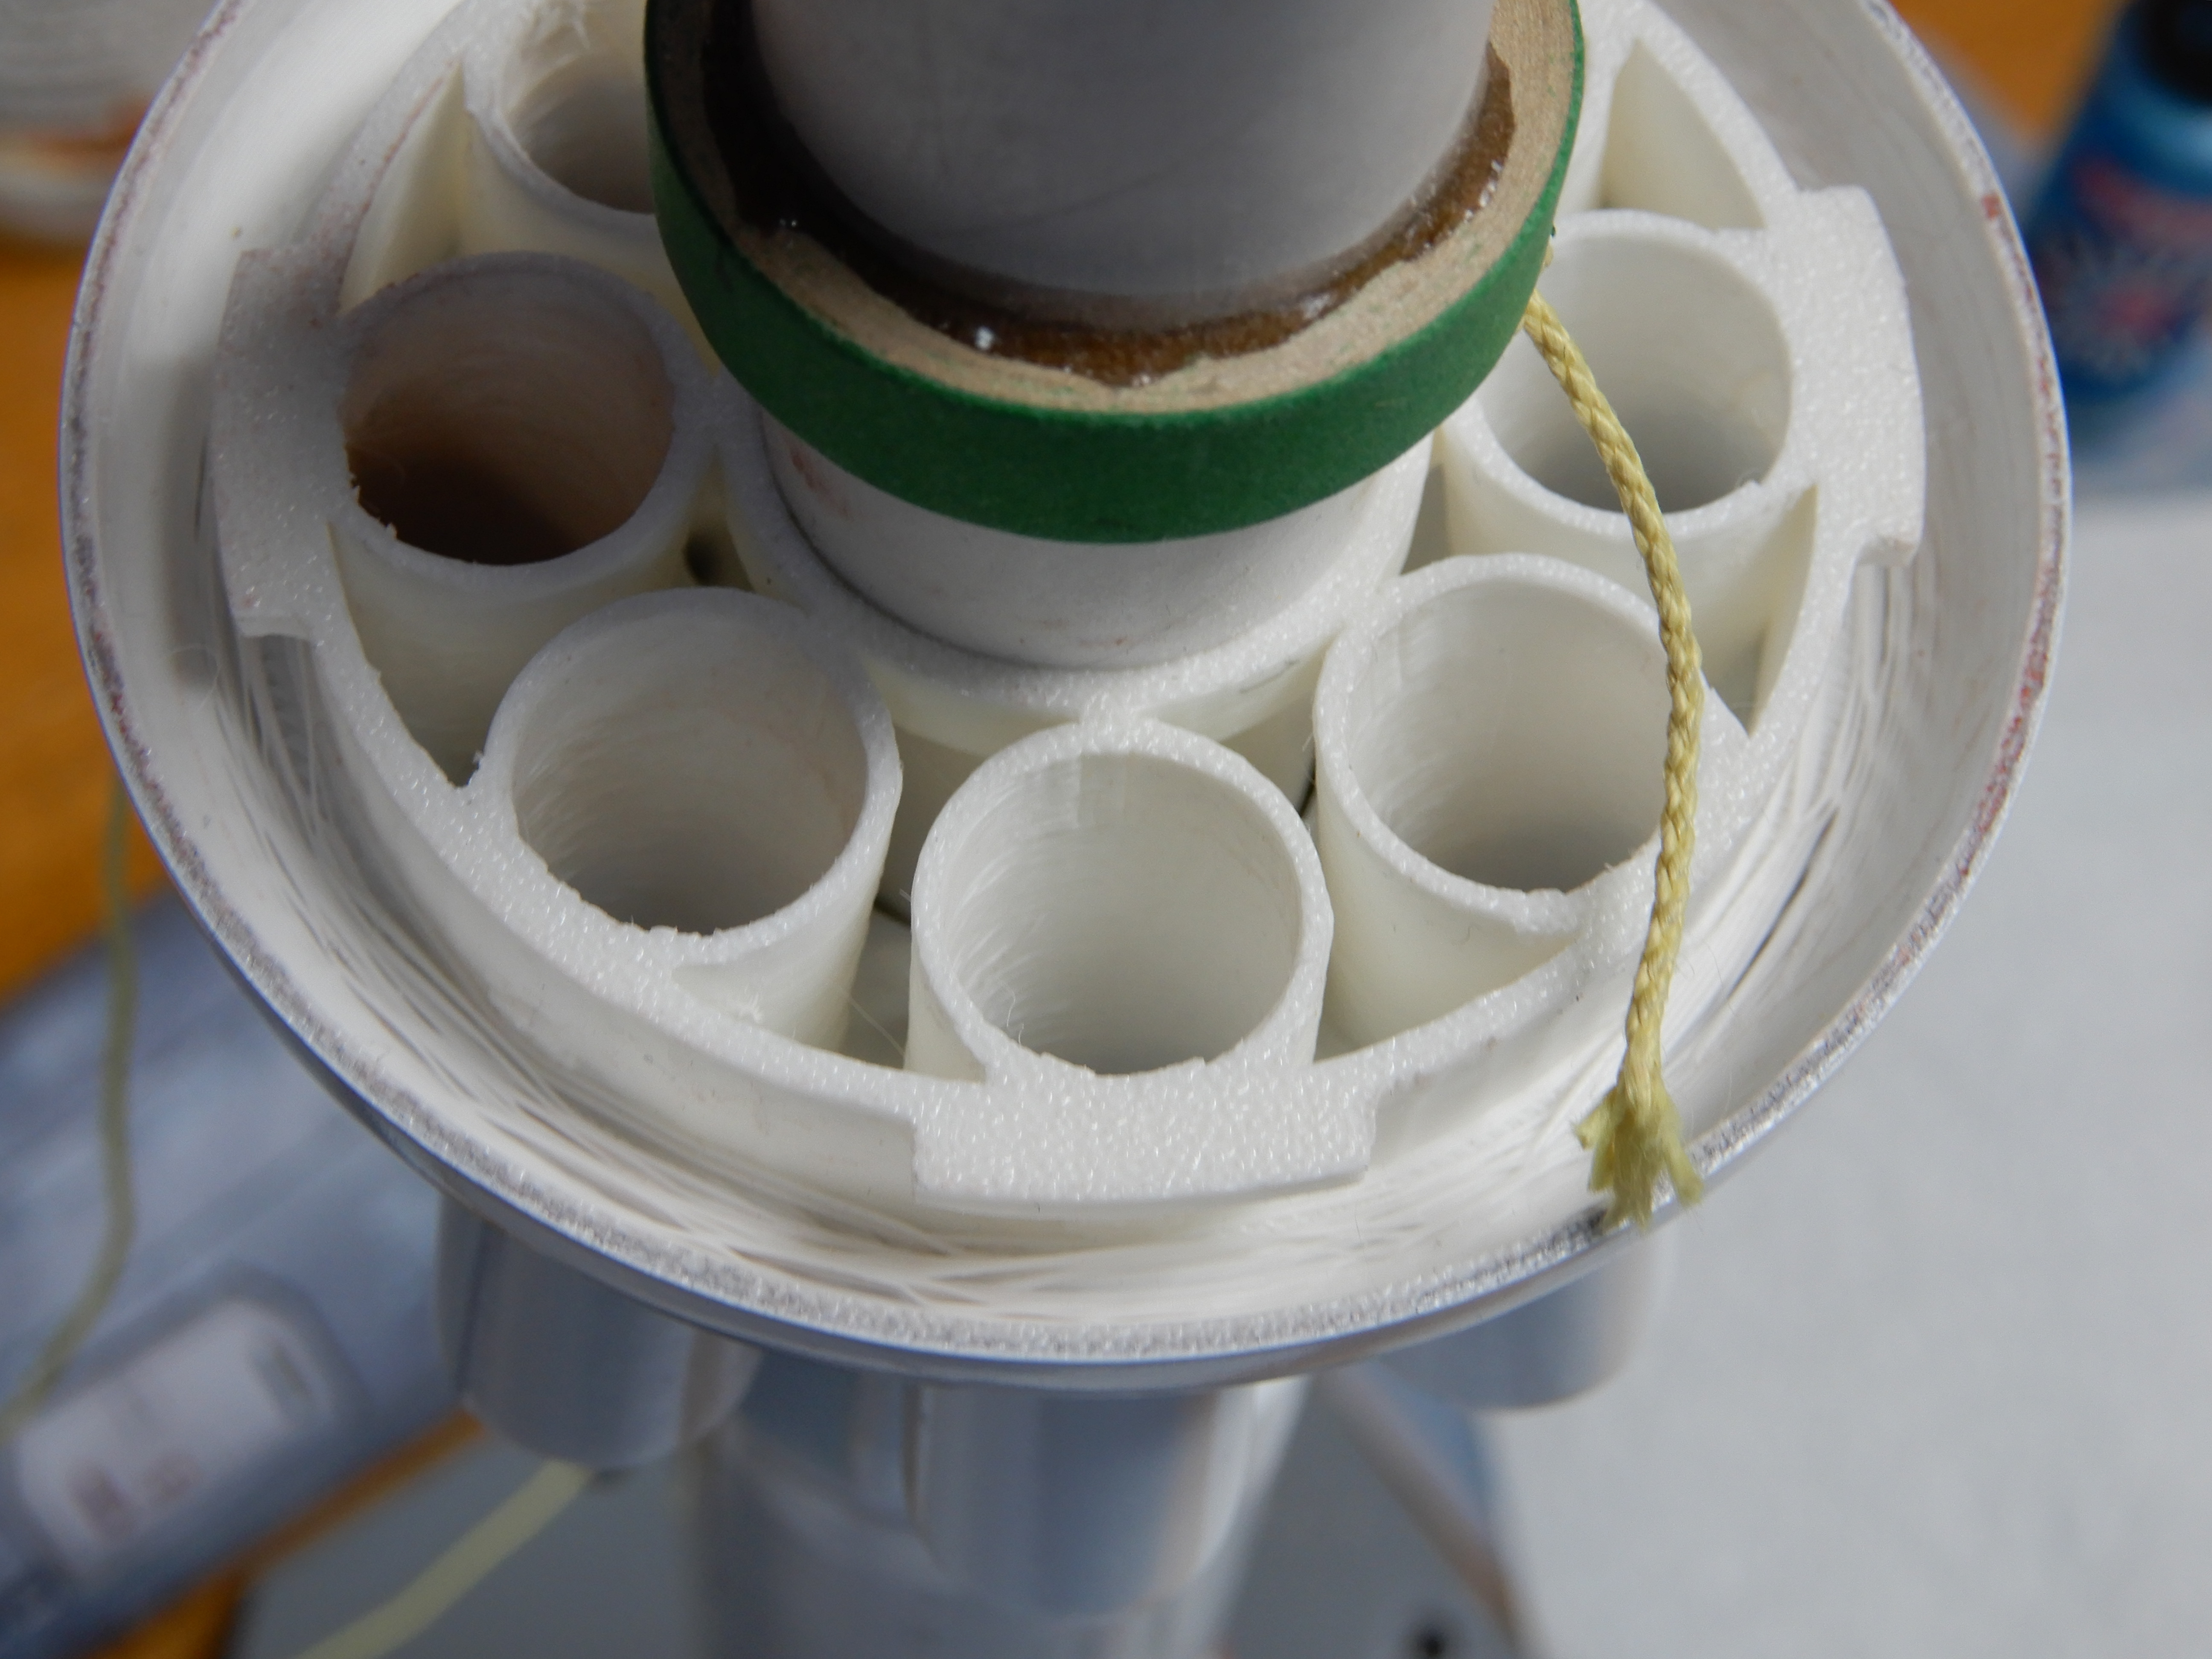
Attaching the shock cord mount:
I decided to use 14' of #200 kevlar. Take the third green ring (BT-55 to 50), and put an notch on the inside of the ring wide enough to allow the kevlar cord to pass through. Slide ring onto the motor tube, with the front edge about an inch from the front end of the motor tube. The distance isn't critical, so long as you can take the front half of the cluster assembly and slide it all the way down and lock it. Glue the ring in place, making sure that no glue gets into the notch. I used a piece of plastic tubing to fill the hole. You should use wood glue to attach the ring, but as I had messed up in the previous step, getting epoxy all over the outside of the motor tube, I decided that the wood glue probably wouldn't stick and therefore used epoxy to attach the ring.

capU8Y4.jpg


UIgbc62.jpg


Thats all for now, will post more soon.
 
Last edited:
Onwards to the nosecone assembly...

Take the BT-20 tube and make marks, starting from the rear at:
2 7/16" from the rear
4 5/8"
6 7/8"
9 1/8"

Take the 4 rings that fit on the BT-20 tube, from smallest in the front to the largest in the rear. Slide the rings onto the tube, with the rings in front of the marks you made. Make marks all around the tube front and back for each ring. See picture:

9kZeVyk.jpg


Temporarily put the final large ring that has the BT-55 shoulder on it onto the rear end of the tube. Don't glue it yet. Using a straight edge (12" metal ruler, launch rail side, etc), lay it up against the side of the rings, and move the center 3 rings back and forth until their outer edges are as parallel to the edge and touching it as possible.

PLm7IVu.jpg


When satisfied, mark their final positions, erasing the original marks if needed. Put some tape on the tube ahead and behind the rings to temporarily hold them in position.

Templates:
I used #110 white cardstock. I wouldn't recommend going any thinner. Print out the .PDF file from Radical Rocketry that has both section 1 and 2 combined, print at actual size. Next, using a ruler and knife, cut out the straight sides, then use a scissors to cut out the curved areas. GOTCHA: Cut on the line that is inside the colored area edge, not the edge of the colored area on the outside of the image. If you don't, the template will be too big. See picture:

2sjREap.png


Also take an appropriately colored marker and color the edges of the cut template. If you don't, you will see white edges in the finished nosecone. I used dark grey, which wasn't a close match, but it was all I had.

Take a dowel, piece of PVC pipe, etc, holding the template in your hand, run the tubing back and forth to put a curve in the template lengthwise.

Put some glue on the outside of the tab area, and bend the template around to form a tube. Use your dowel/PVC, etc, inside the template tube against the back of the joint to help ensure it dries firmly attached. I used Beacon Fabri-Fix from Hobby Lobby, but their TAC stuff is similar. Hold for a few minutes to ensure that the glue dries nice and straight.

Once dry, take the BT-20 tube with rings in place and hold the finished template against it, checking to see that the length is okay versus where the rings are. You want the rear end to be flush with the back of the rear ring. It is okay if the front of the template extends a little (1/ 16" or so) beyond the end of the front ring, as you will be putting the BT-20 nosecone there. Adjust the final position of the rings, and glue them into place - use something quick drying, not the 15-30 min epoxy, as the rings can shift while drying (this happened during the construction of the rear half of the nosecone and it caused all kinds of problems).

xSFpPNg.jpg


Remove the ring/shoulder that fits the BT-55 tube. Now you have a decision to make as to how to attach the shockcord/kevlar, whatever, to the nosecone base. Note that the bottom of the nosecone where you would ordinarily screw in an screw-eye is pretty thin. Originally, I epoxied in place an 1" disk of wood on the back end of the shoulder, planning to drill a hole and screw into the wood and bottom of the nosecone. That might have worked, but the wood was tough, and in the process the wood was torqued too much and the epoxy gave way, and the disk/screw-eye came off. Next I tried just putting the screw-eye into the bottom of the nosecone without the wood, which is how I discovered how thin it is. It just isn't thick enough to accept enough threads in the material and I just knew it would come out very easily. I ended up epoxying the disk and screw-eye again, screwing the eye in until the end of its threads. Hopefully it'll hold.

3UKJFSq.jpg


eyJLBbk.jpg


Once you have the attachment to the bottom of the nosecone finished, put a little glue on the sides of the BT-20 hole in the front of the rear ring/BT-55 shoulder and slide the BT-20 tube in place. Let dry. Next, check the fit of the template one last time, adjusting it as needed. Put some glue on at a minimum, the front and rear rings to hold the template on. I would suggest some glue on all the rings, but its up to you. Slide the template cone onto the tube with rings, ensuring that the rear of the template cone is flush with the rear of the rear ring, and not interfering with inserting the front nosecone half into the rear half's BT-55.

Next up: the rear half of the nosecone assembly.
 
Last edited:
Great documentation -- thank you so much for posting your build!
You're welcome. I originally did a writeup for my own benefit, "pre-building" it before gluing everything together, but I had a hunch it'd be helpful for anyone else who bought the kit. Hence this build thread. :)
 
On to the rear half of the nosecone assembly. I ran into a problem wherein the original tube length was a bit short, not sure how that happened. Hence my recommendation to make the BT-55 tube a bit longer just in case. The concept to build the rear half is similar to the front: place rings, glue on templates, etc. But its more complicated than the front.

Firstly, assemble templates 3, 4, and 5 using the same procedure as you used with the front half template. Make sure you use a marker to darken the edges all the way around. One glitch I had happen was when trying to print the .pdf image of templates 3 and 4; my printer chopped the edges of template 4 off, which was ugly. I ended up using Inkscape to paste the image of templates 3 and 4, but moved it around on the work area so that template 4 was completely on the page, then printed it. So I ended up printing on 3 sheets of cardstock, not 2. No big deal.

I also suggest using the marker to darken the center of the rings where the templates meet, so that if you don't have perfect alignment all the way around (which is very likely to happen), you don't have white ring showing. Much easier to darken before attaching the templates, rather than afterwards and getting too much ink where you don't want it.

Ring placement is similar to the front. I didn't measure the distance from the end of the tube this time. What I did was to firstly attach the open ring to the back of template 5's tube (reinforcement ring), and let dry. Put the rings on the BT-55 tube, smallest in the front, largest in the rear. Don't glue any yet. Next, place the templates in size order from front to back next to the tube+ rings and eyeball where the rings should go. Make sure that templates 3 and 4 have one ring at the front and rear, with one in the middle. Template 5 has one at the front and one in the middle, with the open rear+reinforcement extending beyond the rear end of the tube. You should also use the metal ruler/launch rail side method to try and line up the rings a little more evenly.

xg1ZrgR.jpg


Temporarily tape the rings in place, and test fit templates 3, 4, and 5 onto the rings. Put some tape on the shoulder of the front half of the cluster assembly where the BT-55 tube attaches to get a snug fit (not glueing it makes transport easier). DON'T glue anything yet. Place the BT-55 tube onto the shoulder that sticks out of the front of the front half of the cluster assembly. Slide template 5 with the reinforcement ring to the back until it stops against the dome at the front of the cluster assembly. Ensure that the ring in the front of template 5 is half way covered by the template, and half exposed to support the rear of template 4. See picture:

e06wha1.jpg


Move the rest of the rings back and forth as needed, marking their positions. I secured the rings with 30-minute epoxy and one of the rings shifted less than 1/16", but it made getting template 4 in position very difficult. After much sanding of the 3 rings that template 4 rested on, and not being able to get template 4 far to mate up with the rearmost template 5, I ended up putting template 3 in place (but not glued yet), printing out another copy of template 4, and rolling it around the rings, gluing it as I went. Not ideal, but it worked... See picture.

oQb0oSO.jpg


You could do your templates that way if you want, but I found that it was impossible to support the inside tab with something and it bowed under finger pressure while I was holding the template together while the glue dried. I did it the way I did because I had to, but I would recommend gluing up the templates separately and sliding them on, making sure the rings don't move in the first place.

So, assuming you want to assemble it the easier way, do this:
Glue the rearmost 2 rings for template 5 first, with a quick drying glue (NOT 15-30 minute epoxy). Slide on template 5, making sure that it butts up against the dome on the cluster assembly and that you leave enough space on the front ring to give room for template 4 to rest on. Test fit template 4 now, quickly before the glue dries to confirm that it butts up against template 5 well. If so, great, if not, adjust the 2 rear rings quickly before the glue dries. Once you are satisfied with the fit between template 4 and 5, glue on template 5. Move forward, gluing the ring in the middle and front of template 4, then check fit again. If correct, glue on template 4, repeat for the template 3 in the front. You want to ensure that the front of template 3 in the front doesn't extend beyond the front edge of the front-most ring. Also if there is any excess BT-55 tube extending beyond the front edge of the front ring, remove it now. You want the front of the assemby to be flush so as to mate cleanly with the front half of the nosecone assembly.

DF6VdYB.jpg
 
Last edited:
Picture of the front end of the rear half of the nosecone. For some reason the forum won't let me edit the last post (time limit on edits?).

AAGtudu.jpg


Now the fins... there are 8 flimsy fins which are likely going to break at some point. This is where you decide if you want to permanently glue them in place onto the motor tube, or leave them loose and replaceable. I used thin CA glue to stiffen up the fin tabs, which roughened them up a bit. They needed sanding afterwards.

I masked the fin tabs with some Tamiya yellow tape, which worked fine. BUT I would suggest not doing the masking the way I did it. I masked up to the top of the fin tab, but after spray painting the rocket and installing the fins, I noticed a gap on most of the fins which is kind of unsightly. I'm going to use some white paint I have lying around here to fix it, but I suspect it'll still be noticeable.

Pics of fin tab masking, and what not to do:

22aszWm.jpg


Mask a little more downwards so less of the tab is unpainted, maybe 1/16" or so. If you don't, this is what you'll see...

VOHeWoq.jpg


The ABS material is kind of rough - I didn't do the suggested acetone/ABS slurry as I wasn't confident I would be able to do it neatly enough. Naturally, after priming more defects became obvious. I then used some Bondo Body glaze putty to smooth everything up and sanded as close to the surface as I dared.

skJEqAh.jpg


After much sanding and painting, this is the rear assembly (Tamiya Pure White):

ce3T1Kq.jpg


I will be hand painting in some areas, and am working on decals.

Rocket without decals:

Uo4BVxN.jpg


Now the fins again. I tried the friction fit to keep the fins in the slots without glue, with the idea that they would flex upon a hard landing and not break, instead popping out. BUT what I have been finding is that a friction fit, even with some tape on the fin tab, is inadequate. During boost, said friction fit will probably hold, but upon apogee and pointing downwards, some of those fins may pop off. Certainly it was happening when I was turning the rocket upside down to fiddle with said fin fit. I picked up some rubber cement, and am hoping that it will hold the fins enough that they won't fall off, but will be flexible enough that they'll pop off upon a hard landing. I'll report back on that.

Reporting back... rubber cement doesn't hold the fin enough to help much. I'm also testing some of the Fabri-Fix (not sure how tightly it'll hold, but probably too much). I thought of some silicone sealer, but that maybe too much (plus a hassle to remove the broken fin stub).

About decals: the provided fins are narrower than the width of the radiator fin graphic you can get at Radical Rocketry. I was able to modify them in Inkscape, but my printer absolutely refuses to print them at the specified size, instead printing .050" short, and about .015" narrower than I want. I made the original image slightly larger, and this helped somewhat, but the sizes are still a bit wonky. Finally, I gave up and the size I have is close enough. I'm working on making up some additional decals for the rear half, and will post again when the rocket is done.

Parachute: Rocksim says that an 20" chute should be okay for my rocket (11.5fps descent speed), and since I happened to have one lying around here (Top Flite thin-mil chute, was supposed to be an 22" but closer to 20" instead :( ) I went with that.

Lastly, I attached the entire nosecone assembly to the shoulder on the front half of the cluster assembly with some blue tape. I may end up gluing it on instead. One suggestion I have for Radical rocketry is to make that shoulder maybe .25" longer to give more surface area to glue to.
 
Last edited:
Picture of the front end of the rear half of the nosecone. For some reason the forum won't let me edit the last post (time limit on edits?).

AAGtudu.jpg


Now the fins... there are 8 flimsy fins which are likely going to break at some point. This is where you decide if you want to permanently glue them in place onto the motor tube, or leave them loose and replaceable. I used thin CA glue to stiffen up the fin tabs, which roughened them up a bit. They needed sanding afterwards.

I masked the fin tabs with some Tamiya yellow tape, which worked fine. BUT I would suggest not doing the masking the way I did it. I masked up to the top of the fin tab, but after spray painting the rocket and installing the fins, I noticed a gap on most of the fins which is kind of unsightly. I'm going to use some white paint I have lying around here to fix it, but I suspect it'll still be noticeable.

Pics of fin tab masking, and what not to do:

22aszWm.jpg


Mask a little more downwards so less of the tab is unpainted, maybe 1/16" or so. If you don't, this is what you'll see...

VOHeWoq.jpg


The ABS material is kind of rough - I didn't do the suggested acetone/ABS slurry as I wasn't confident I would be able to do it neatly enough. Naturally, after priming more defects became obvious. I then used some Bondo Body glaze putty to smooth everything up and sanded as close to the surface as I dared.

skJEqAh.jpg


After much sanding and painting, this is the rear assembly (Tamiya Pure White):

ce3T1Kq.jpg


I will be hand painting in some areas, and am working on decals.

Rocket without decals:

Uo4BVxN.jpg


Now the fins again. I tried the friction fit to keep the fins in the slots without glue, with the idea that they would flex upon a hard landing and not break, instead popping out. BUT what I have been finding is that a friction fit, even with some tape on the fin tab, is inadequate. During boost, said friction fit will probably hold, but upon apogee and pointing downwards, some of those fins may pop off. Certainly it was happening when I was turning the rocket upside down to fiddle with said fin fit. I picked up some rubber cement, and am hoping that it will hold the fins enough that they won't fall off, but will be flexible enough that they'll pop off upon a hard landing. I'll report back on that.

About decals: the provided fins are narrower than the width of the radiator fin graphic you can get at Radical Rocketry. I was able to modify them in Inkscape, but my printer absolutely refuses to print them at the specified size, instead printing .050" short, and about .015" narrower than I want. I made the original image slightly larger, and this helped somewhat, but the sizes are still a bit wonky. Finally, I gave up and the size I have is close enough. I'm working on making up some additional decals for the rear half, and will post again when the rocket is done.

Parachute: Rocksim says that an 20" chute should be okay for my rocket (11.5fps descent speed), and since I happened to have one lying around here (Top Flite thin-mil chute, was supposed to be an 22" but closer to 20" instead :( ) I went with that.

Lastly, I attached the entire nosecone assembly to the shoulder on the front half of the cluster assembly with some blue tape. I may end up gluing it on instead. One suggestion I have for Radical rocketry is to make that shoulder maybe .25" longer to give more surface area to glue to.

Your build is looking great. Thanks for feedback as well.

Was the issue with the radiator graphics with the new version? Sorry the fit is not right - I can get the graphics fixed. Below is the new version that I thought were scaled correctly (that PDF was posted later since I originally just posted an image).
1681392655859.png
 
It was the new version. The width of the fins after sanding to try and remove that nasty "bump" on the side was about .990" or a bit less. I wanted there to be some white paint showing around the edges of the fin decal; running it right up against the edge seemed a recipe for issues. I set the width on the decal to .940", but the printer isn't printing exactly that size (driver issues that I can't figure out is the most likely culprit).

Its okay, it works well enough.
 
What about just a little CA to glue the fins in, maybe just along the root? That should allow them to pop free.

That could work if I go easy on the CA glue, and if the fit up against the motor tube is tight enough (can't see that area now that the rear ring is in place). Its a last resort idea, but thanks for suggesting it. :)
 
I did encounter an issue. In the instructions, it is mentioned to use some ABS slurry to strengthen the ABS parts. Because I was not sure I wanted to do that, I skipped it.

Today, while handling the rocket, I noticed a crack in the side of the cluster assembly. Since the rocket is now painted, I didn't want to go ahead now and use some ABS slurry, and so decided to smear some 30-minute epoxy around the interior of the lower half of the cluster assembly. I recommend this to anyone building this kit as cheap insurance against cracking.

Crack:
O7PMLyt.jpg


Inside the cluster assembly before putting in epoxy:
BiIUR4n.jpg


Epoxy in place:

hDxCNRj.jpg
 
I finally finished up the rocket. I forgot to mention the "rail buttons" on the rocket, that attach to the rear of the cluster assembly and the pedestal at the back of the BT-60 tube. I used some ABS slurry to attach them because I figured it would be stronger than superglue gel or epoxy. They aren't easily coming off, thats for sure.

I designed decals, printed them out, and put them on. For the 8 fins, I used the radiators that one can download at Radical Rocketry's website, but downsized them a little so there would be white all around the edges. I think the rest of the decals turned out alright for this non-professional graphics noob. :p

Total weight turned out to 10.1 oz. Stability looks good at 2.93 with an E12-4. Launch altitude on an E12-4 is estimated at 564' high.

Rocket:

gVnwAsm.jpg


cyLVPAD.jpg


yJREylK.jpg


sNEAFng.jpg


Bo3f4nU.jpg
 
Wow -- awesome finishing... Came out really great. Love the other decals you designed for the model. Very cool!

Are you going to fly it? If so I look forward to the flight!
 
I forgot to mention a few things.

1) The fins needed a LOT of file and fit testing to ensure that they were as close to an 90 degree angle to the body tube when installed. They had to be fitted to a particular fin slot.

2) I used Superglue gel to hold the fins on, instead of something sturdier, which might not let the fins break free instead of just breaking. I put a generous amount on the bottom rear of the fin tab (not the whole tab), then slid it into place. Double check that the fin is close to 90 degrees vs the body tube before you glue it in.

3) If you plan to use composite engines that have a thrust ring on the back, you won't be able to use the rear screw-on retainer cap, as there isn't room for the thrust ring diameter-wise. I did try to modify the retainer cap, but that was a failure. You will want to use some tape to friction-fit the composite motor. I plan to mainly use E12-4 engines, so the retainer cap works fine.

4) I decided to not glue the nosecone assembly to the front of the cluster assembly. The rear half of the rocket is kind of fragile with those fins sticking out everywhere, so I'm going to transport it in a large box, wrapped with some bubble wrap to help protect the fins. It will be necessary to take the nosecone assembly off and cushion it separately. This will probably require my not installing wadding, etc, at home, so I can replace the nosecone assembly while pulling the kevlar cord so as to ensure it doesn't get pinched against the shoulder of the cluster assembly.
 
I finally got to fly the Tau Zero. Transportation to the launch site was tricky. I left the entire nosecone assembly off the rocket, and stood it up in a large cardboard box, surrounded by bubble wrap. Worked, but it took a lot of space in my smaller car. I didn't glue on the rear half of the nosecone assembly, to make it easier to break the rocket down for transport. I used a tape friction fit. I had thought about gluing the rear half of the nosecone assembly onto the shoulder of the cluster assembly, and instead use the twist lock feature to break it down and reassemble it, but given the fragility of the assembly and having to epoxy it during construction, I didn't mess with it.

I used an E12-4, which gave a nice straight boost up. Upon ejection, the entire nosecone assembly separated from the cluster assembly, instead of just the front half of the nosecone. Fortunately the tube stayed pressurized long enough to eject the parachute, and the rocket came to a decent landing. But.... the small nosecone at the front had come off. Seems tape friction fit was inadequate to keep it on.

As to those fins... I had previously attached them with just friction fit (tape), no go, not enough. Decided to use a dab of superglue gel on the bottom of each fin to hold it, but my hope was that it would be fragile enough to allow the fins to fold upwards instead of breaking off. When the rocket was being prepped for flight, one of the fins came off, and I glued it back on. Upon recovery, 3 fins folded upwards as expected, but a fourth was missing. It had come off at apogee, and drifted down, and it took a couple minutes to find it. Whew. This design is definitely going to require re-attaching fins after every flight, I suspect.

I'm not sure if I want to keep reglueing the fins after every flight, or just epoxy them in, risking damage and then it'll be difficult to replace the broken fins. Also not sure that making the fins out of a thicker material would help or not. I expect that due to the hassle of repairing the fins constantly, the rocket will be only flown occasionally.

Now for that small nosecone that went missing... we spent 20 mins after the session had closed down, and finally found it. Lesson is that it needs to be epoxied on, lest it depart unexpectedly.
Glad you had a good flight and found all the parts.

I glued the front most nosecone tip in because I found that I could nest the two sections of nosecone inside each other mostly (smaller section fits mostly inside the BT-55 tube in the lower nosecone section and this protects the long nosecone tip).

Glad the fins stayed in on boost and bent up as intended on landing. I wonder if a more flexible glue will work better for holding fins in against ejection shock? Maybe something like rubber cement?
 
I tried rubber cement early on, and wasn't at all confident it would hold during boost.
 
It's a shame you had so many issues with the recovery since the rocket looks so incredible - must've been some sight boosting off! Any video?

Tbh I had no real interest in getting this rocket until I saw your finished build.

My brain is already thinking of ways to have it land with no (or minimal) damage.

How does this recover... one or two chutes?

The fin assembly should have a separate bigger chute if possible.
 
Great flight. Also glad that the tabs/notches worked well to hold the fins into the model during flight. Just need to work out the correct friction that they stay on during ejection but still bend if it lands hard.

Alternatively, it may be worth it to bring it down nose first - run Kevlar line out to the motor retainer cap and bring it down on the rounded nosecone base (or even on the middle of the nosecone section. This would require permanently gluing the fins in place.
 
Last edited:
Back
Top