Balls 22 Projects

The Rocketry Forum

Help Support The Rocketry Forum:

This site may earn a commission from merchant affiliate links, including eBay, Amazon, and others.
Nah, I'm sure Eric could do something far cooler with then than I could ( I was really asking what HE was (or is :dark:) going to do with them(are you allowed to do internal parenthesis?)) ... plus, I can't afford to fly a 6" 2 stager, and don't have the patience to make a nosecone. a good one that is :p.

Eric? Just give him the tubes......i'll help with the rest......:point:
 
A few bowls?? I only had one bowl! That and some St. Germain :)

I will say the projects are coming along nicely and they look every bit as good in person as they do in the pictures.

Ok; only one bowl, though I did serve up more than one. St. Germain: the sweet nectar of the Gods of the Alps....one of my favorite things on earth!

-Eric-
 
Nice pictures! Maybe I missed it, but what laminating resin are you using?

James,

For this round of lamination, I’m using Aeropoxy PR2032/PH3660.

Right, wrong, or indifferent, I’ve used Carbon Slipper as a test bed for various epoxies. At some point, that fin can has used West 105/206, Proline 4100, Aeropoxy PR2032/PH3660, Cotronics 4461, and Cotronics 4525 epoxies.

The leading edges will be capped with 0.6oz glass wet out with Cotronics 4461. I may add a very thin layer of Dow Corning 3-6077 ablative underneath the leading edge glass as well.

-Eric-
 
Don't do it Eric.....:surprised: He'll only use them too build something EVIL......Like probably a......
1. Two Stagger.:D
2. Something that resembles a Two Stagger..:D
3. Something that IS a Two Stagger...:D
4. A short rocket and, a really long rocket that can "Transform" into a Two Stagger.....:D

On second thought, just give him the tubes.....
Just like with Manny when he was soooooo.....much younger.

What would you have him doing? Playing with rockets or playing with himse.......Nevermind.

Still checking in Dawg....Lookin GOOD!:D

Psssst.....was at Lambeau yesterday.....got some real "Cheese Fritters" and, a Reuben at Curly's YUM YUM!

View attachment 143393

Anne said....."Stay away from me if you want to be a Pulse Wave Detonation Engine for the rest of the day.....":mad:
NOT ME......:rolleyes:

Gus,

Now you're in trouble; within a few miles (feet?) of me and didn't stop by:no:. Let's see, Friday was work, and then the fair in the evening with all those blinking lights which you probably drove past on the way to/from the Holy Land (Lambeau). Ironically I thought of you on Friday while at the Fair....perusing a vendor selling shades I spied a whole row of round lensed Lennon-esque glasses in a wide array of colors; I though I could pick up a pair and "be like Gus!"

You coulda/shoulda/whydidn'tya stopped by:
A) for a Mountain Dew or tew
B) to check out my rocket dungeon
C) pickup the former Pyro Pumpkin III booster to shove in an oversized duck's cavity
D) to chew on an unending mound of squeeky cheese

Ah well, next time please do stop! Thanks for following along!!!

-Eric-
 
Nah, I'm sure Eric could do something far cooler with then than I could ( I was really asking what HE was (or is :dark:) going to do with them(are you allowed to do internal parenthesis?)) ... plus, I can't afford to fly a 6" 2 stager, and don't have the patience to make a nosecone. a good one that is :p.

Yo Ben,

I have too many rockets/projects already; don't need any more! So, about those shipping tubes...I'll be saving one for sure to store rails in: the tower for Balls uses (6) 1.5" 1515 rails; plus we have several other rails for the local club. If I have an extra tube, it's all yours if you want it. It is roughly 5.75" diameter, about 8.5' long, and actually has potential for a rocket airframe. It is not the uber thick wall carpet tube style; rather a nicely wrapped decent quality Yazoo Mills style tube with roughly .083" wall. It truly could work as a rocket's airframe.

Of course, it is an odd size tube. One could probably build up a 5.54" nosecone to fit. Or custom make one; a conical nose is pretty easy to custom make; roll up one of those 2' x 3' poster boards and glass it for the cone; then glue and glass it to a coupler tube...done. Couplers would be pretty easy; you could either use 5.54" OD airframe and build up with a few wraps of paper/file folder/poster board, or just cut a section of airframe, slice out a small section until the OD of the coupler fits the ID of the airframe properly, and glass the inside of the coupler.

Been there, done that, it can certainly be done if so desired. Are there easier ways to make a comparable rocket: YES. But if you want it, and if I end up with one extra tube, it's yours!

-Eric-
 
Gus,

Now you're in trouble; within a few miles (feet?) of me and didn't stop by:no:. Let's see, Friday was work, and then the fair in the evening with all those blinking lights which you probably drove past on the way to/from the Holy Land (Lambeau). Ironically I thought of you on Friday while at the Fair....perusing a vendor selling shades I spied a whole row of round lensed Lennon-esque glasses in a wide array of colors; I though I could pick up a pair and "be like Gus!"

You coulda/shoulda/whydidn'tya stopped by:
A) for a Mountain Dew or tew
B) to check out my rocket dungeon
C) pickup the former Pyro Pumpkin III booster to shove in an oversized duck's cavity
D) to chew on an unending mound of squeeky cheese

Ah well, next time please do stop! Thanks for following along!!!

-Eric-

You have apparently never spent a large amount of time stuffed in a compact car with a RED HEADED woman who is eager too get back home, like TOMMORROW!
Sorry we did not make it.....
I WILL be going north again next year!:cool:

Must stock up on Cheese Curds.....

Thank you oh fellow Sith Lord Eric for offering young "Darth Ben" a spare tube.....I have plans for this young one....:y:

Now that young "Darth *still could use some training* Manny" is lost somewhere on the planet known as AIWA......:rofl:
 
Last edited:
Another day, another digital deposit.

The fin can lamination was debagged. Need's a haircut and a bit of cosmetic cleanup:
003_zps3a0d1ea7.jpg


Another angle; guarded by a rooster:
005_zps120d3504.jpg


Last night, I wrapped the upper lower;) airframe in 5.7oz carbon because it wasn't the right color:wink:. First it was given a bubble bath, then roughed up a bit to remove the sheen and garner better mechanical bonding abilities. Then skewered.
001_zps3da5428c.jpg


Two continuous wraps were applied to the stock G-12 tubing:
006_zps3a000d7c.jpg


More epoxy than necessary was applied to the OD of the wraps after I was done rapping:
007_zpsa54286e6.jpg


The excess epoxy was used to fill the weave of the cloth when compressed under smooth and shiny plastic stuff (poly-something-or-another):
008_zpsc8bac814.jpg


I was having so much fun with epoxy and carbon that I couldn't stop there. I noticed the transition shroud was that wrong color as well:wink:, so I fixed that problem:
002_zps7bdba5f6.jpg


Two wraps for the shroud:
009_zps5f3bc4e8.jpg


The shroud was also wrapped in the poly film for a (hopefully) smooth exterior finish.

A note on the shroud: the lower portion will be chopped off prior to implementing in the build. This piece started life as a PR 4" 4:1 conical fabric woven fiberglass cone; the only portion that will be used is a 3-1/4" section between the top of the former cone's shoulder and where the taper reaches 3.125" OD. This shroud is merely an aero transition; no structural value added with this component.

Out to the warm garage for a bit of vac-action. The shroud was sucked:
011_zpsd8a92e59.jpg


As was the section of airframe:
010_zpscd461ac1.jpg


...and then it was bedtime!

-Eric-
 
Great work Eric. I see where some of the green tubes went.
Good luck on your trip. Take care of your Dad.

Thanks Gary!

Indeed, one of the green Sub-lime tubes will go along for the ride.

Both Balls projects will be recovered exclusively using Top Flight products of course; only the best here!

-Eric-
 
Holy Balls, it's September! Time for another quick update; telling the story with more photos and few words.

This past week the bulk of work needed to make the two stager ready was completed with a slight sigh of relief. I do need to complete a bit of work on the transition and upper booster airframe however.

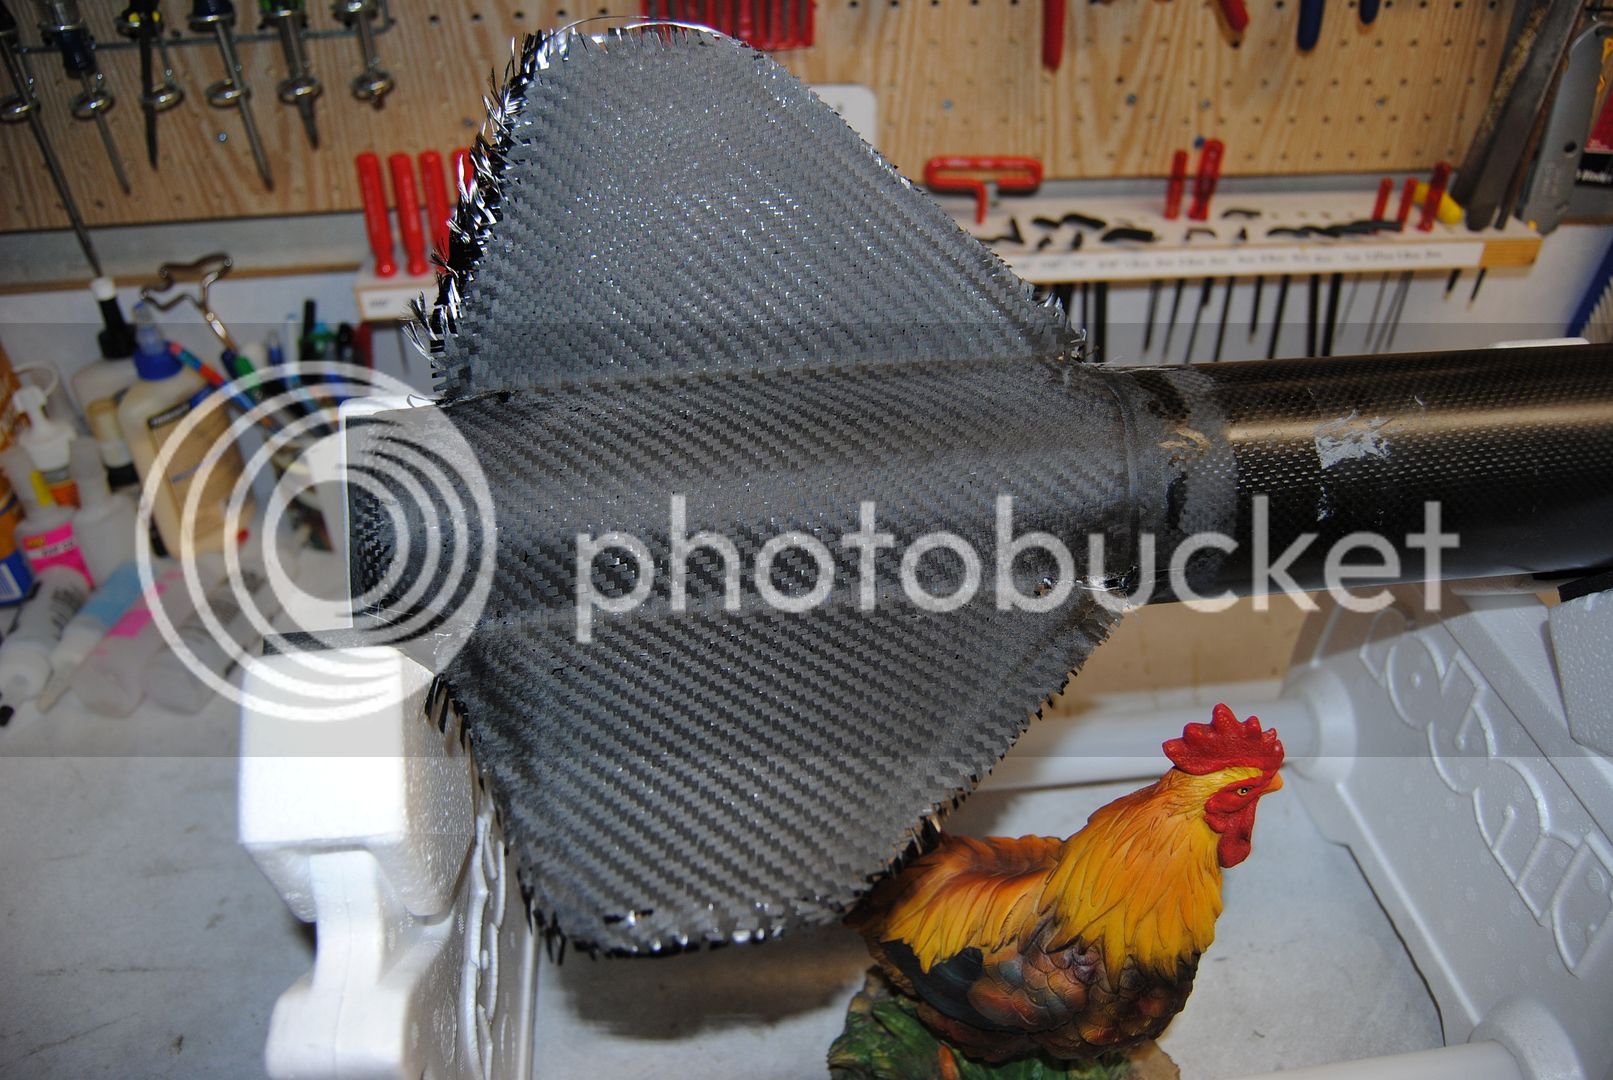
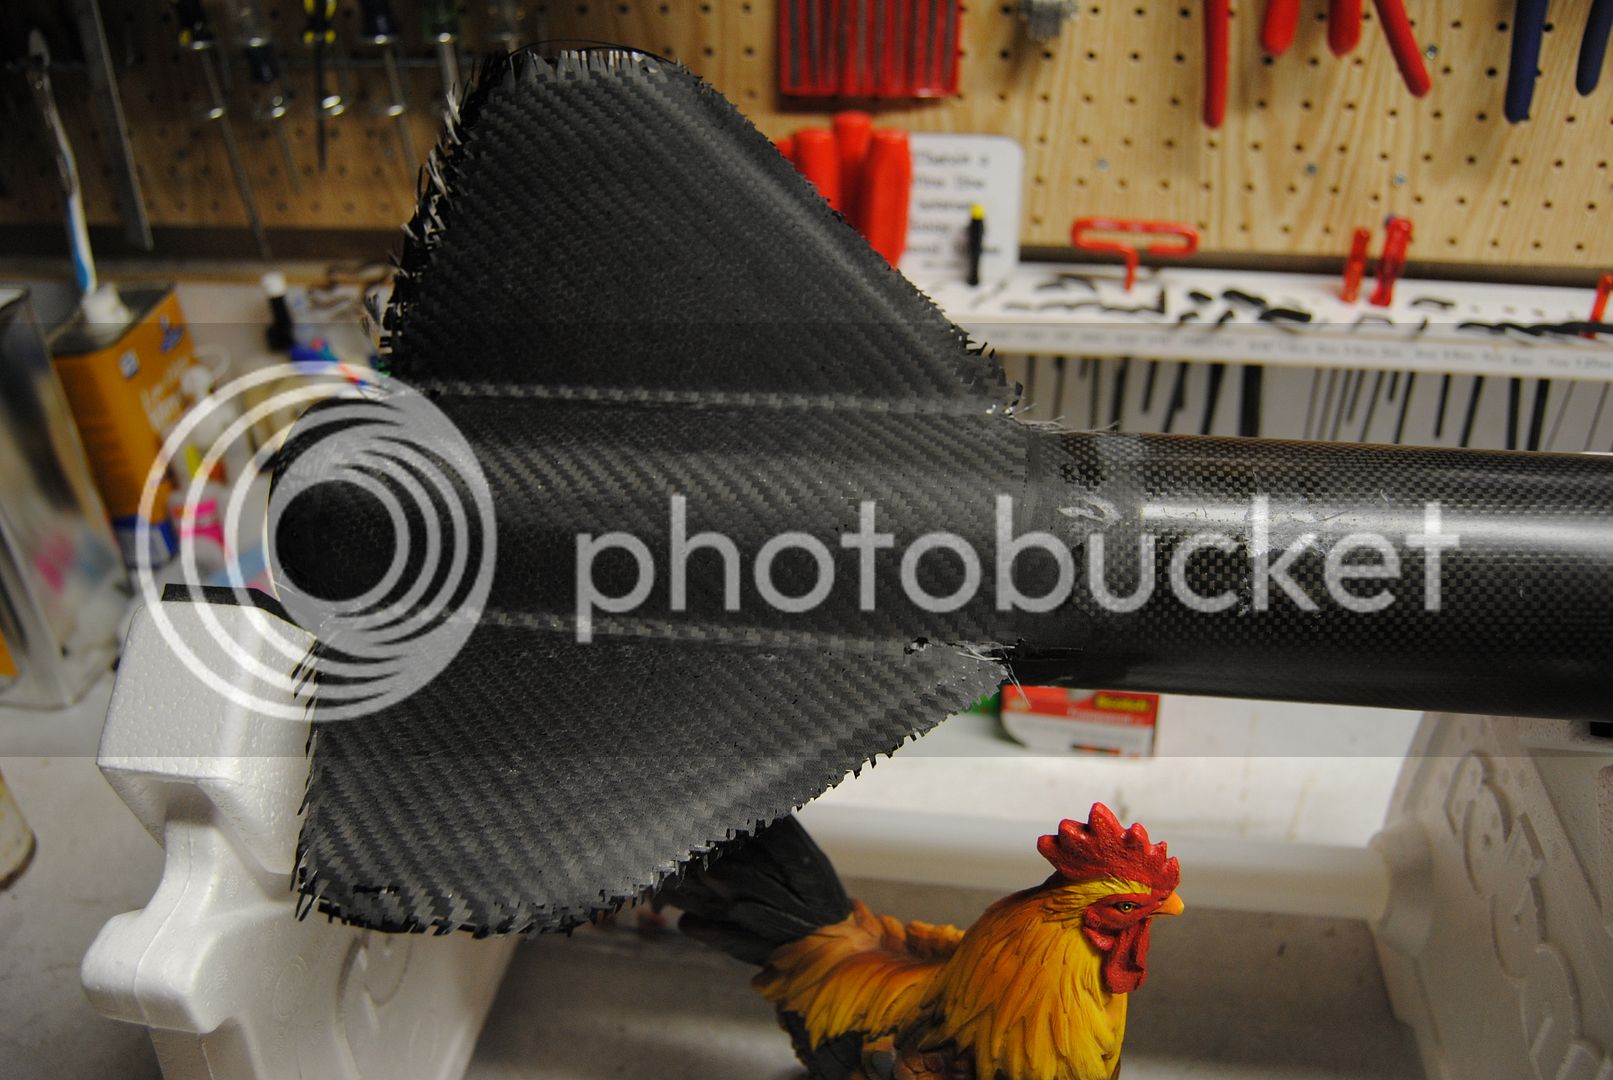
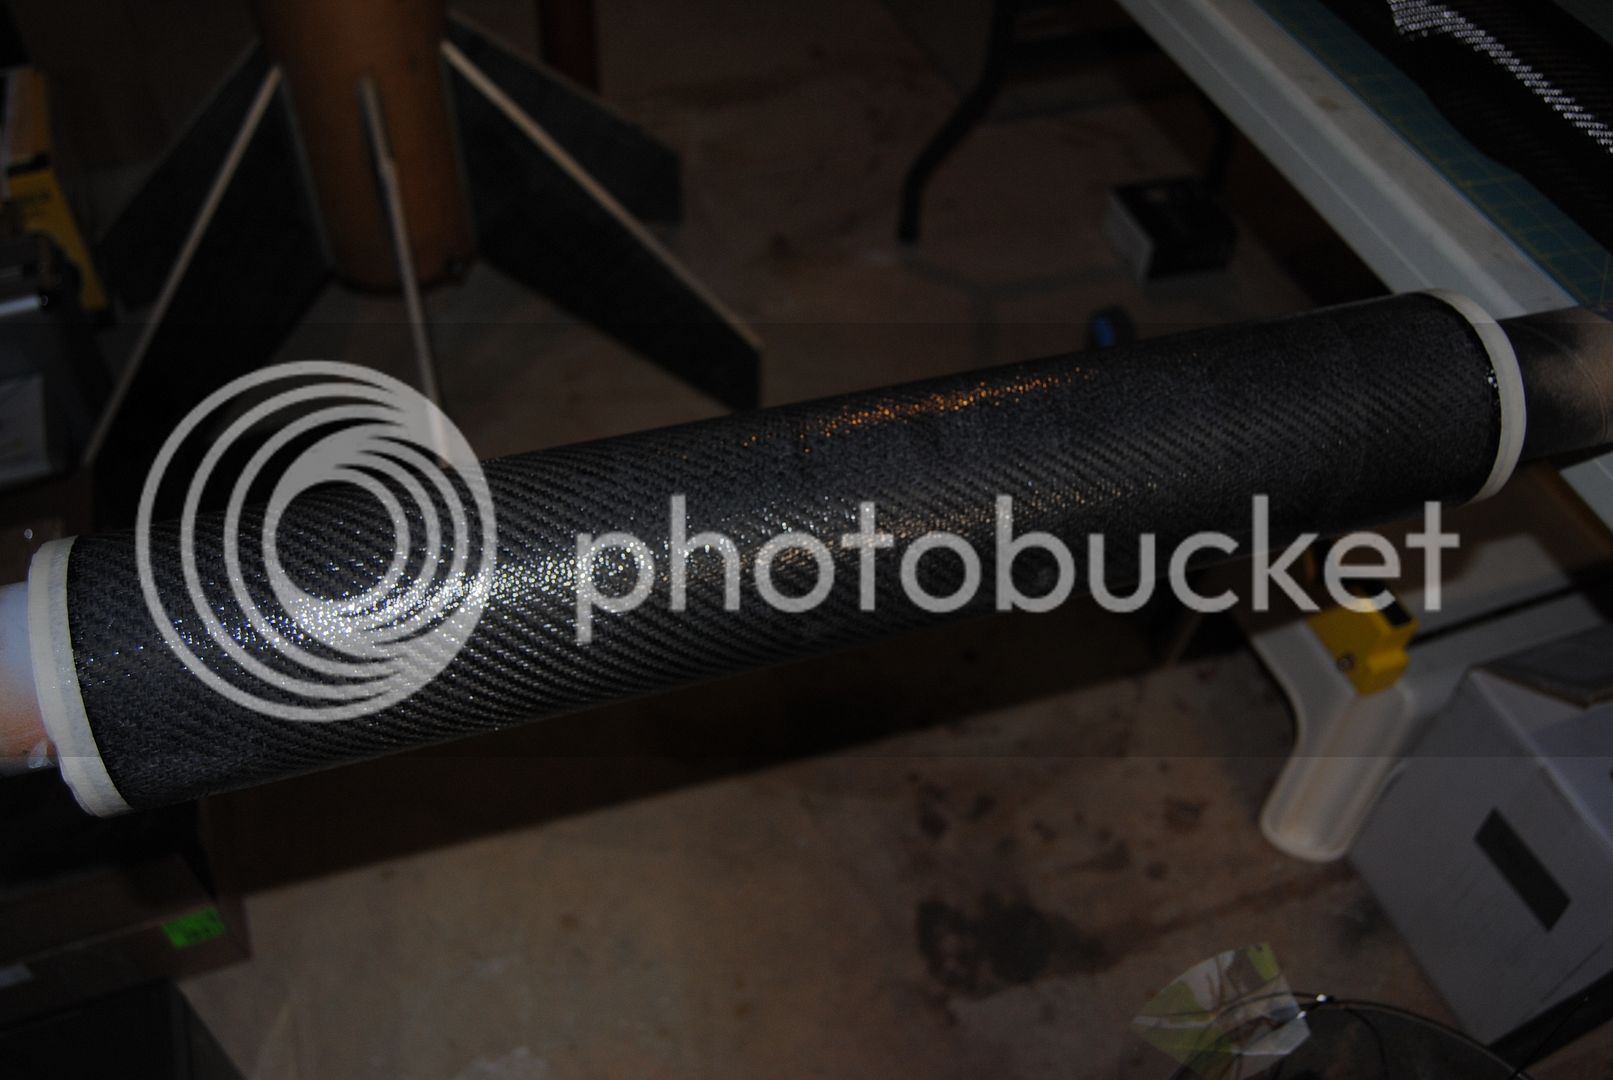
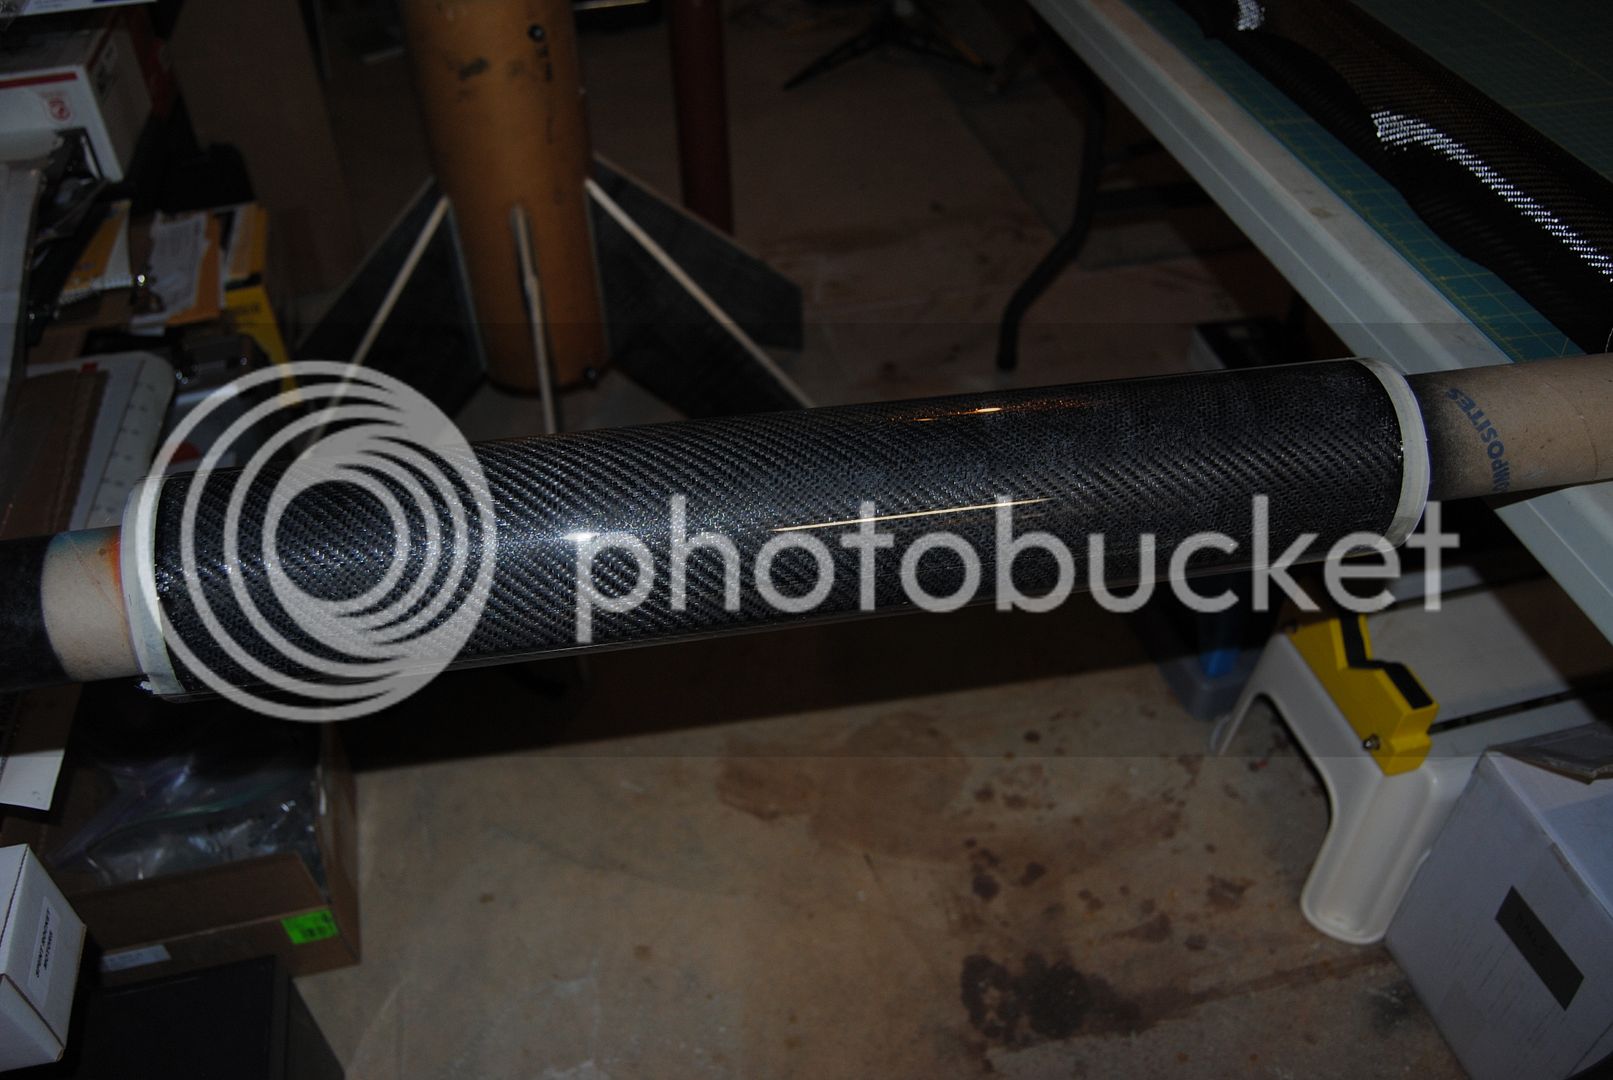
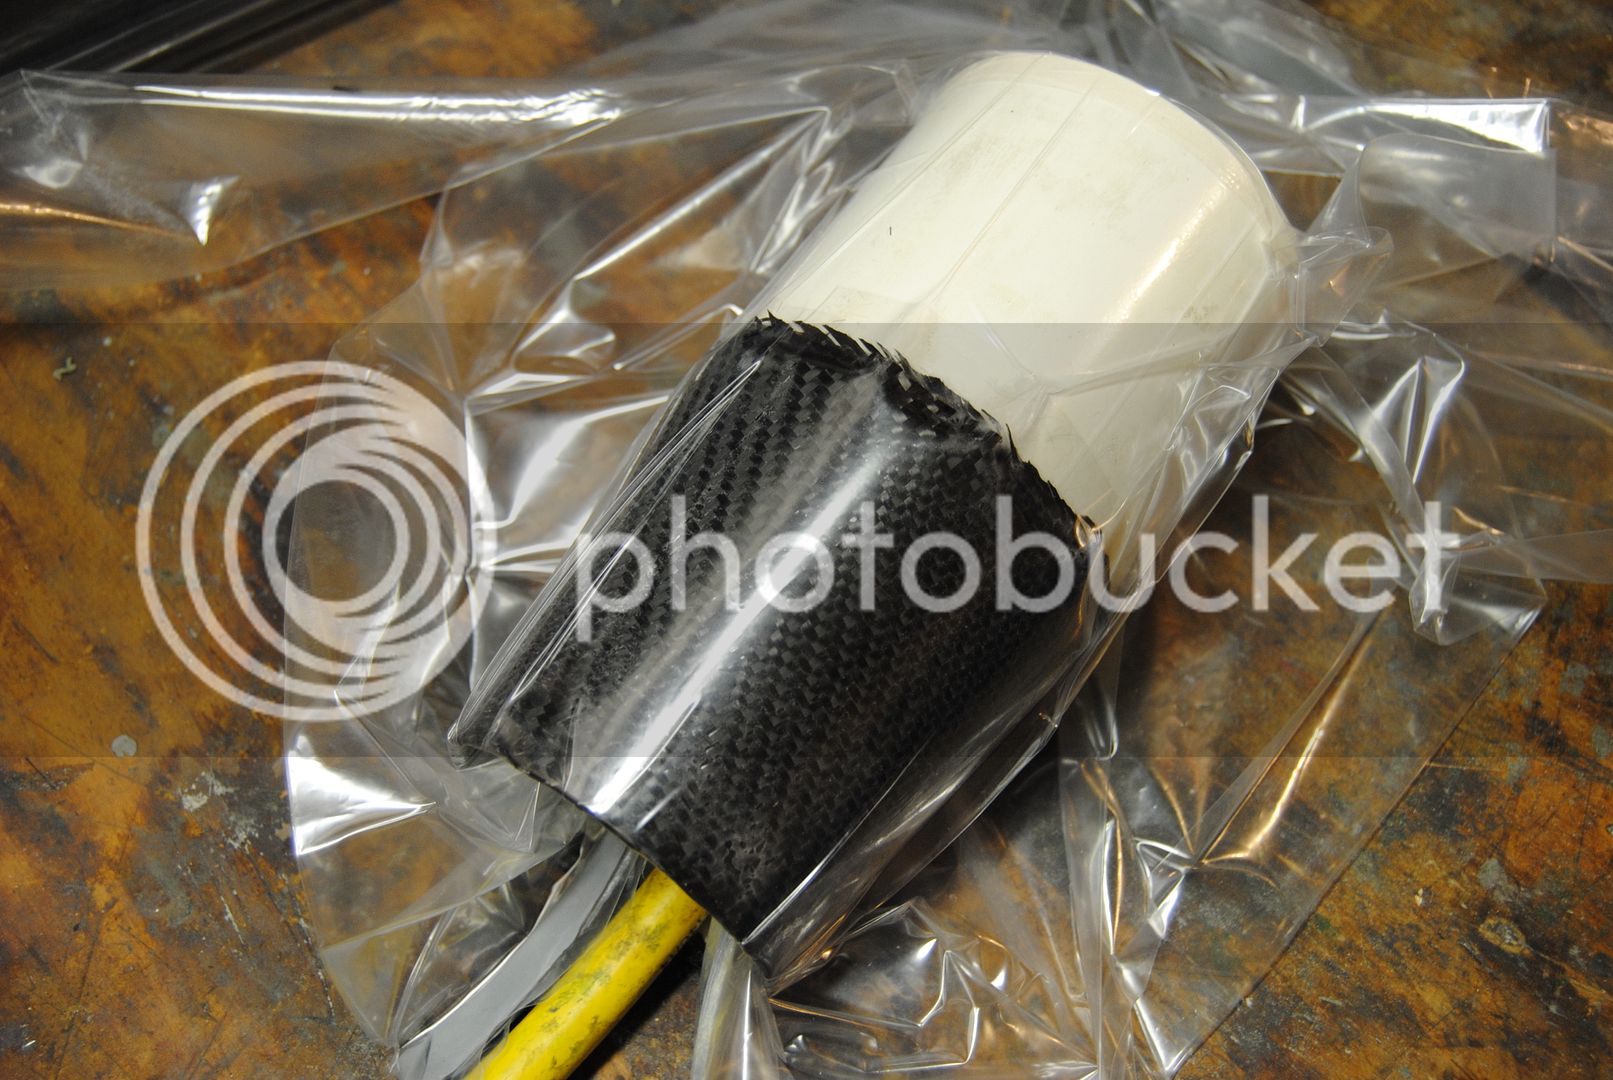
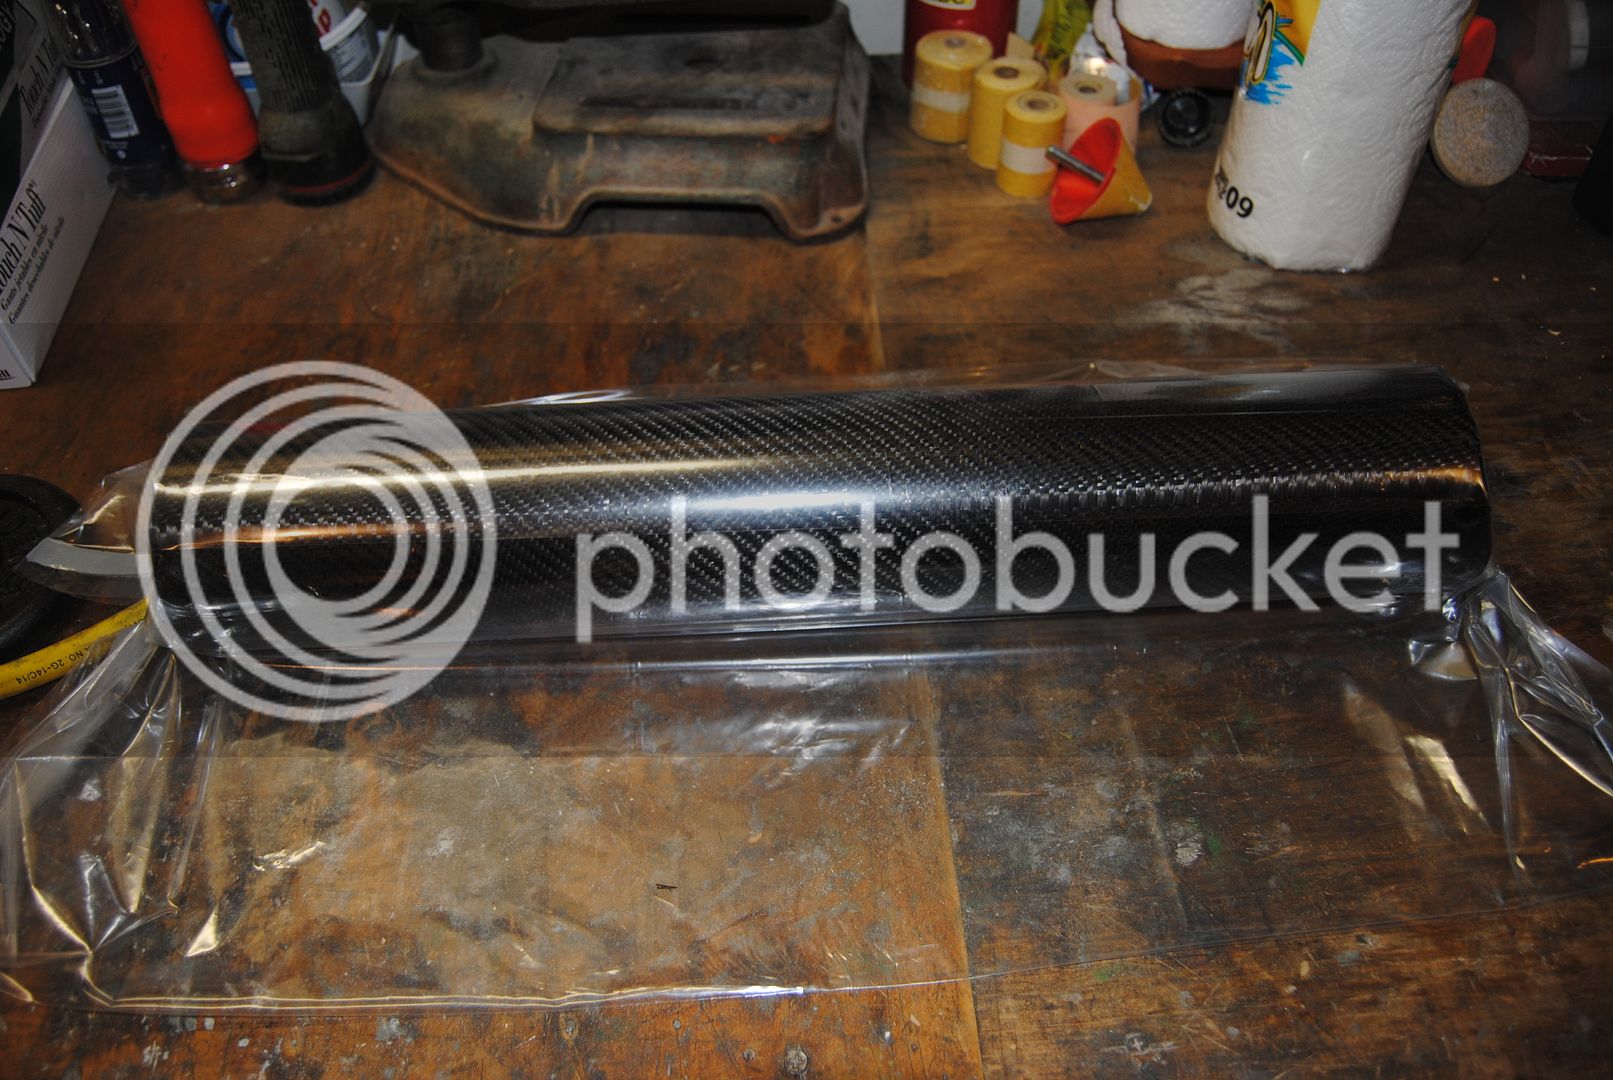
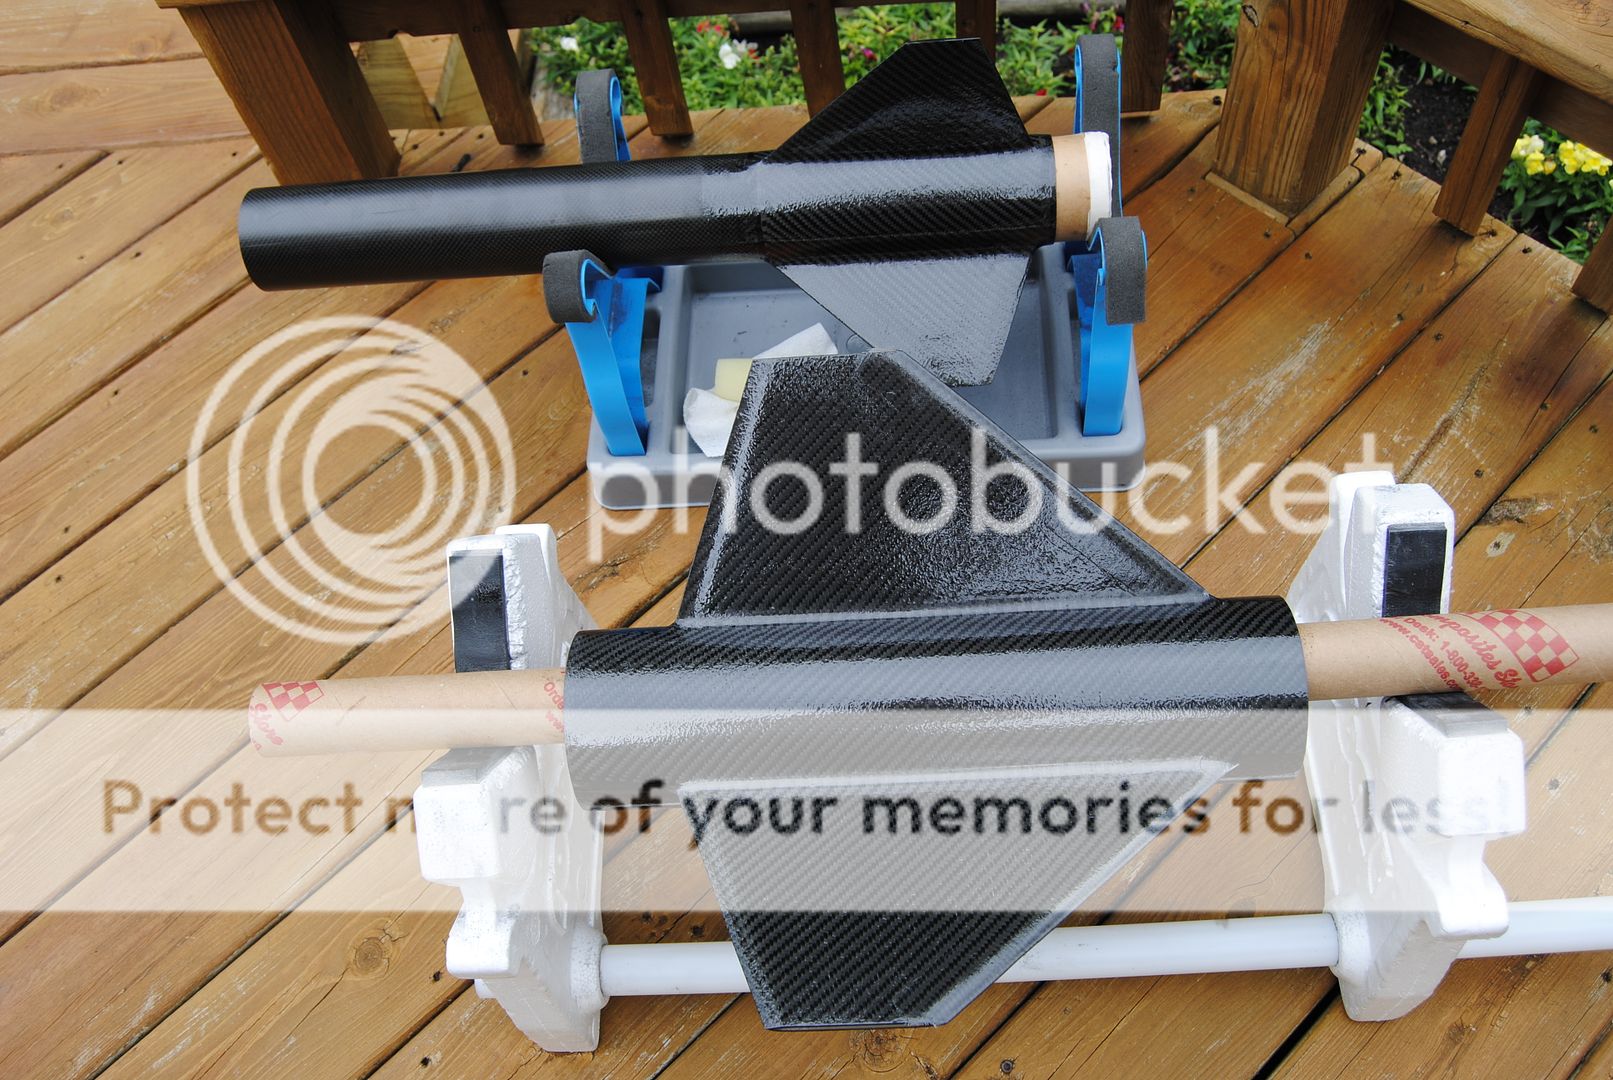
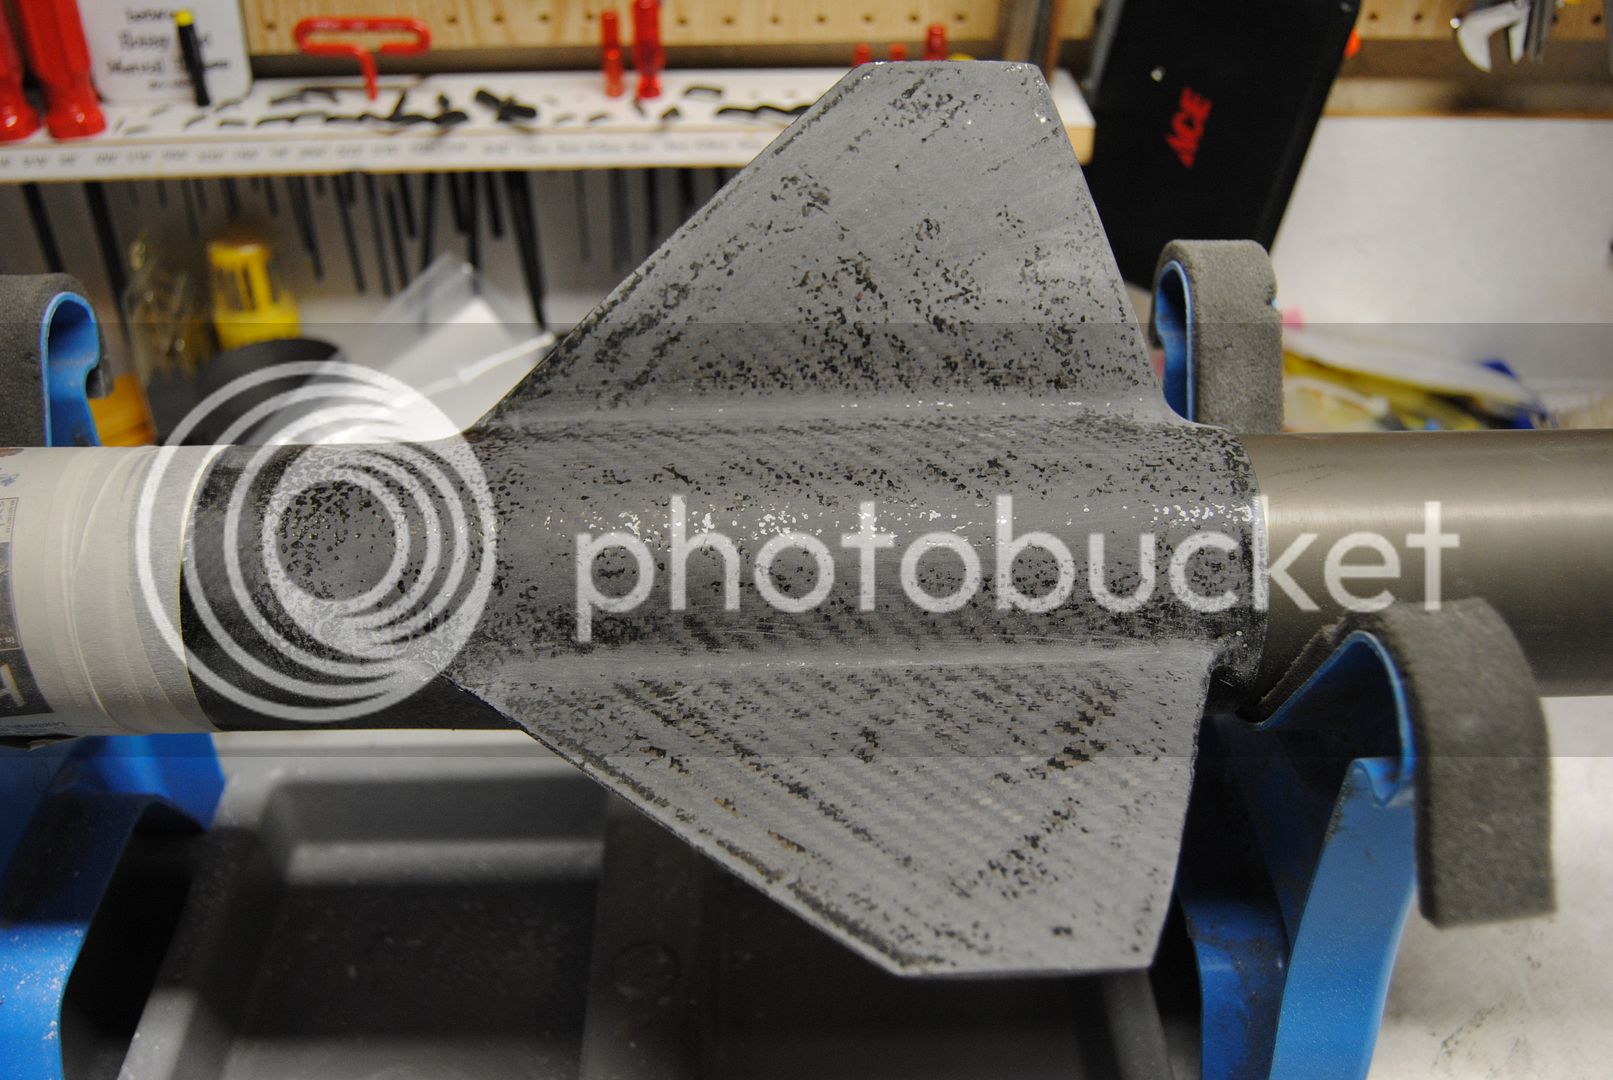
After the excess carbon was trimmed, the fins received a very light exterior sanding. The leading edges of both sustainer and booster were covered in multiple layers of 0.6oz plain weave E-glass laminated with 4461 epoxy: an important step in my opinion. Not overly pretty, but it looked like this:

031_zpsa9664f96.jpg


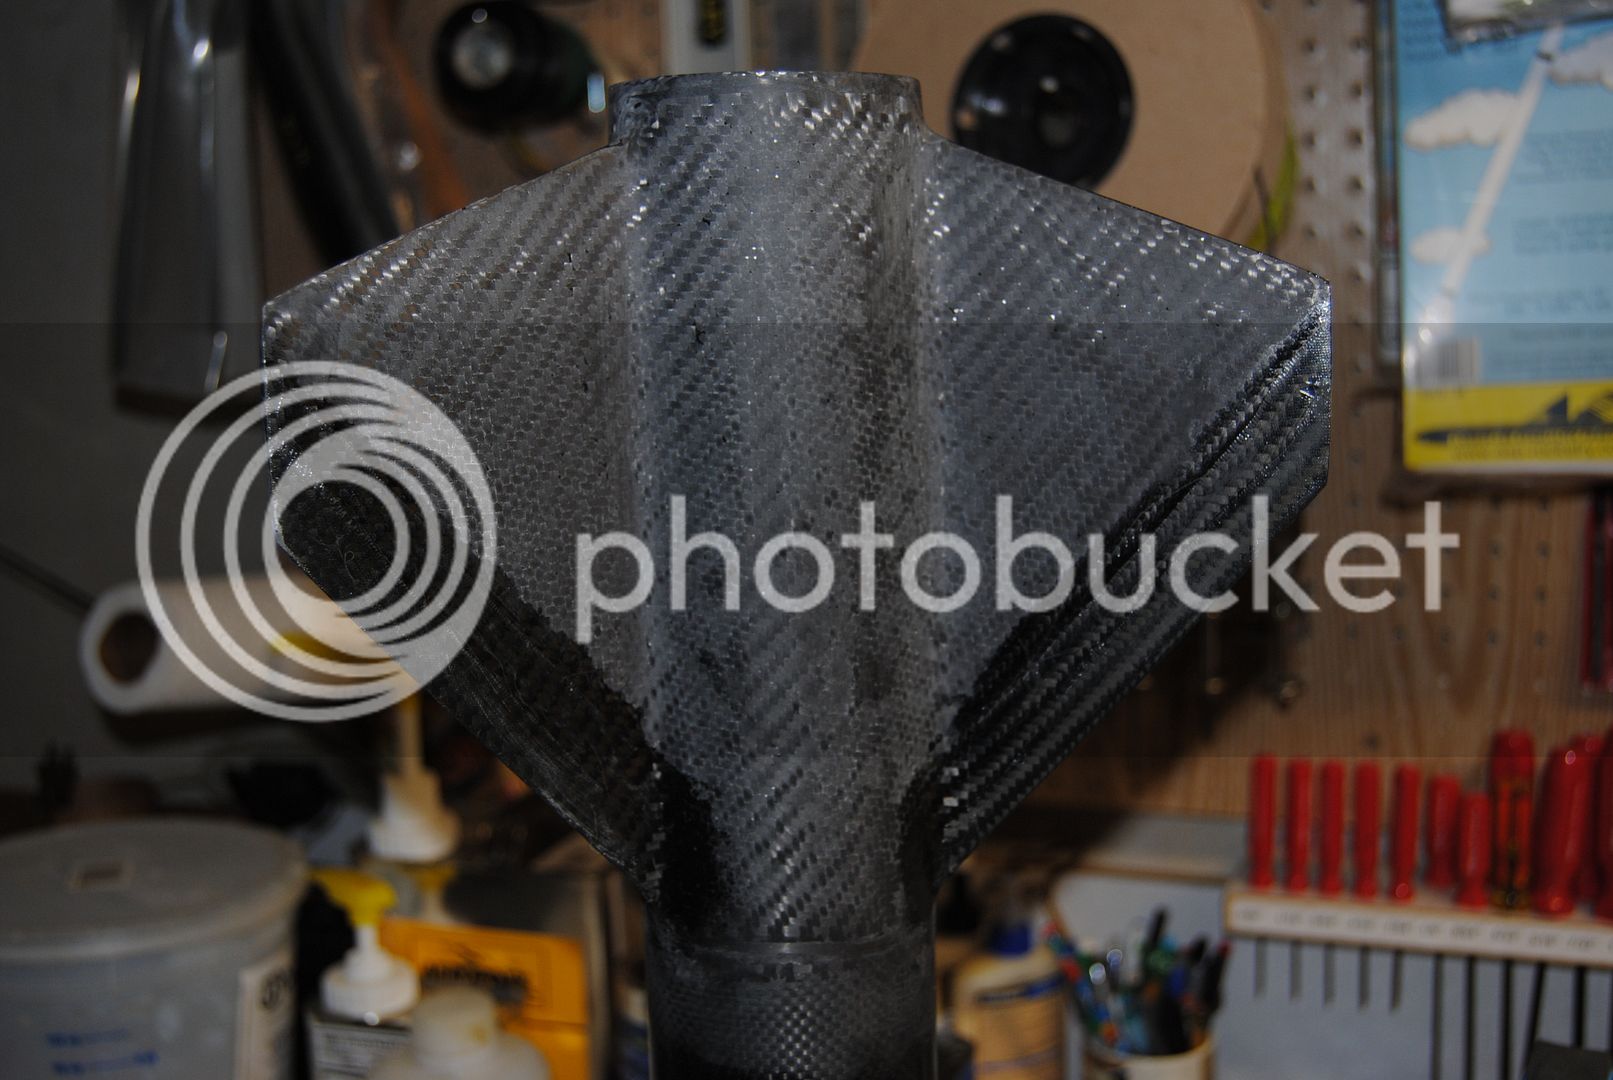
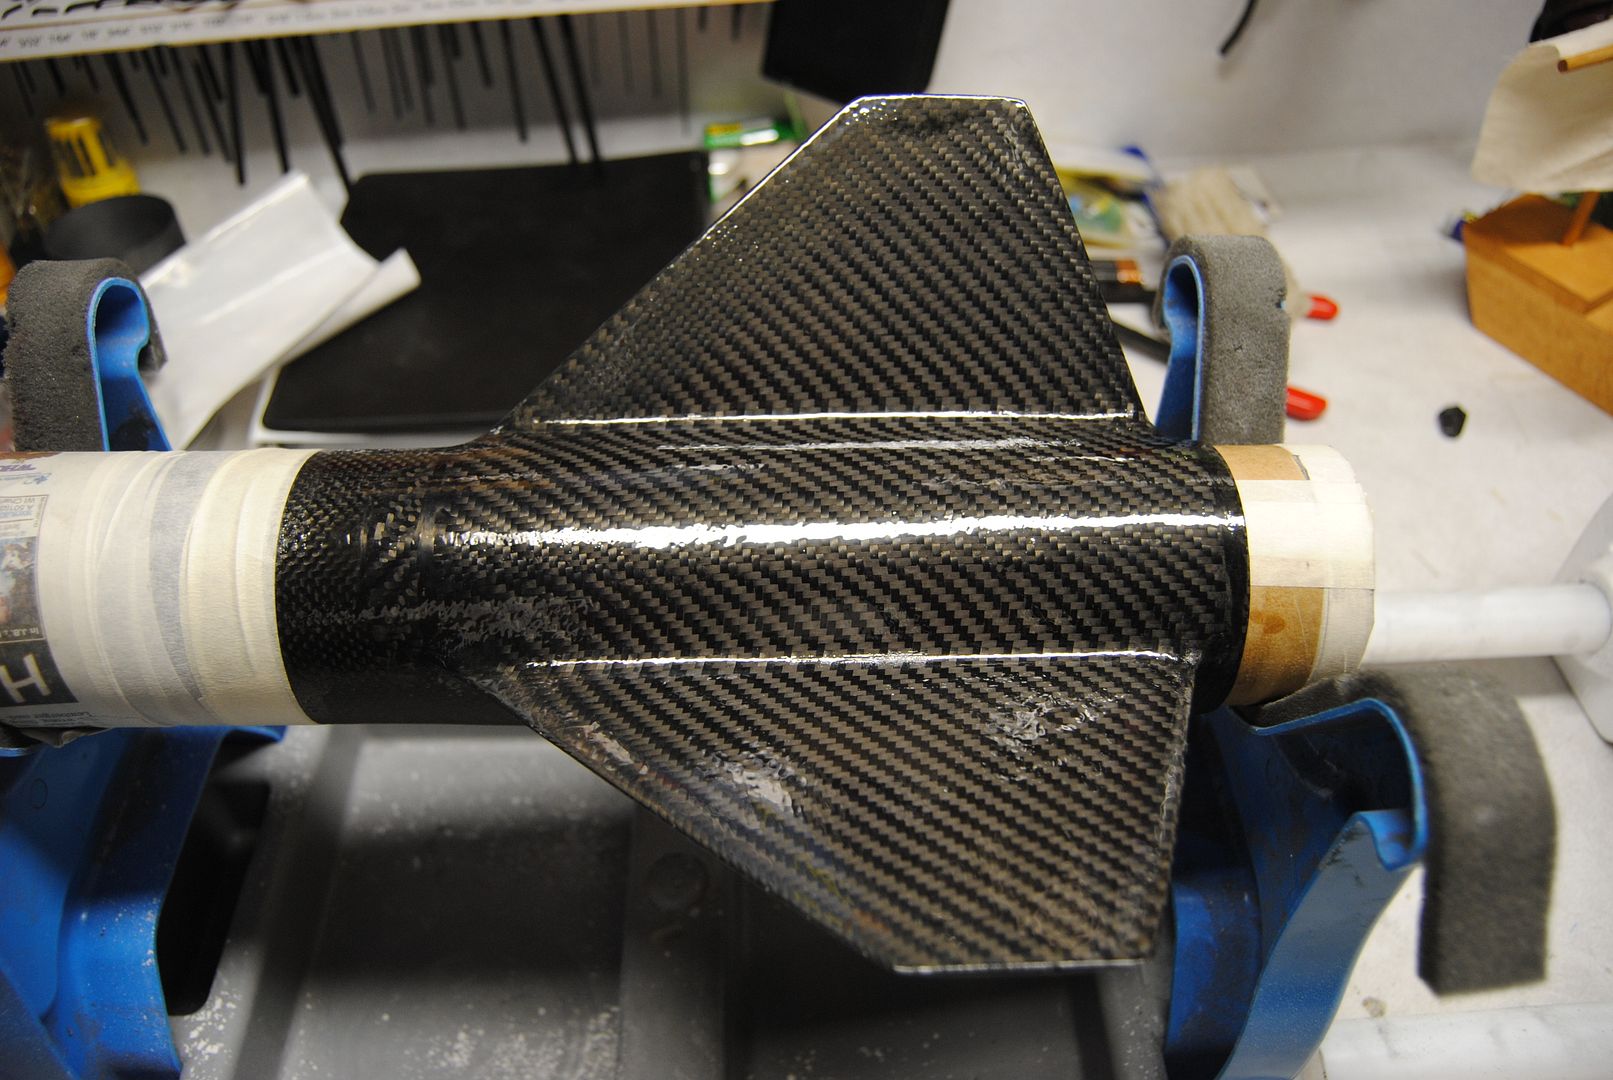
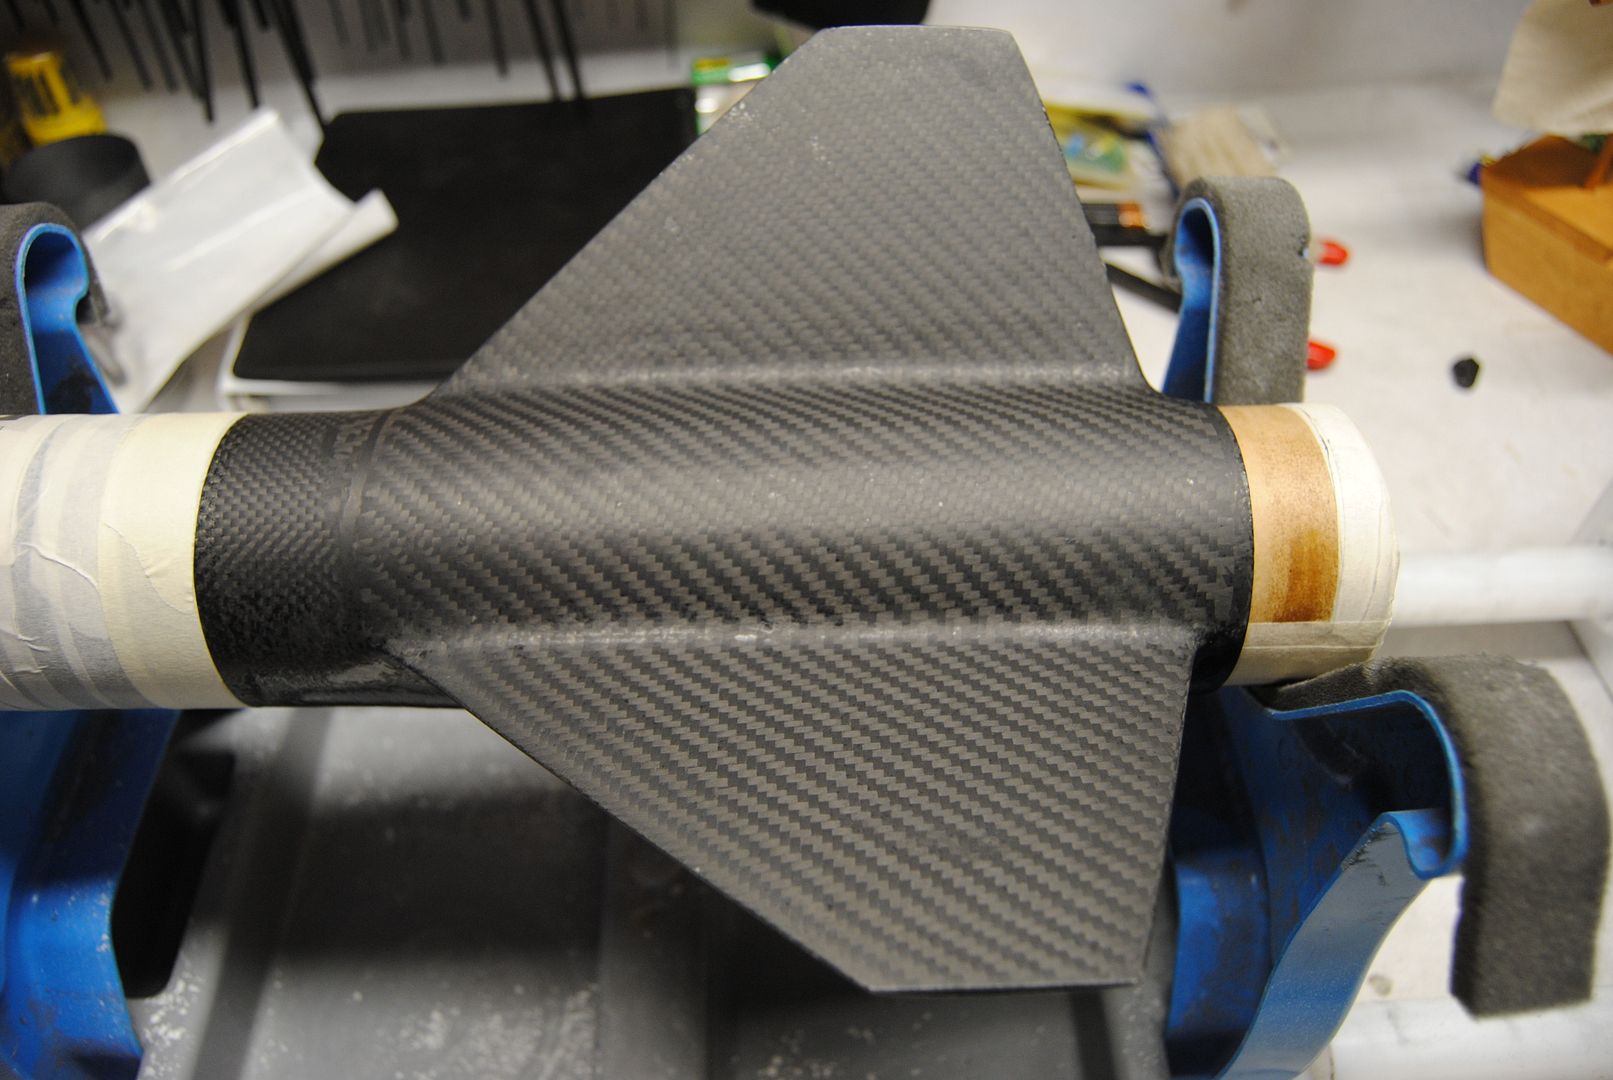
With the fin cans now functionally complete, it's time to work on the aesthetics and smooth things out a bit. The first coat of filler epoxy was lightly applied to both fin cans.

032_zps97489530.jpg


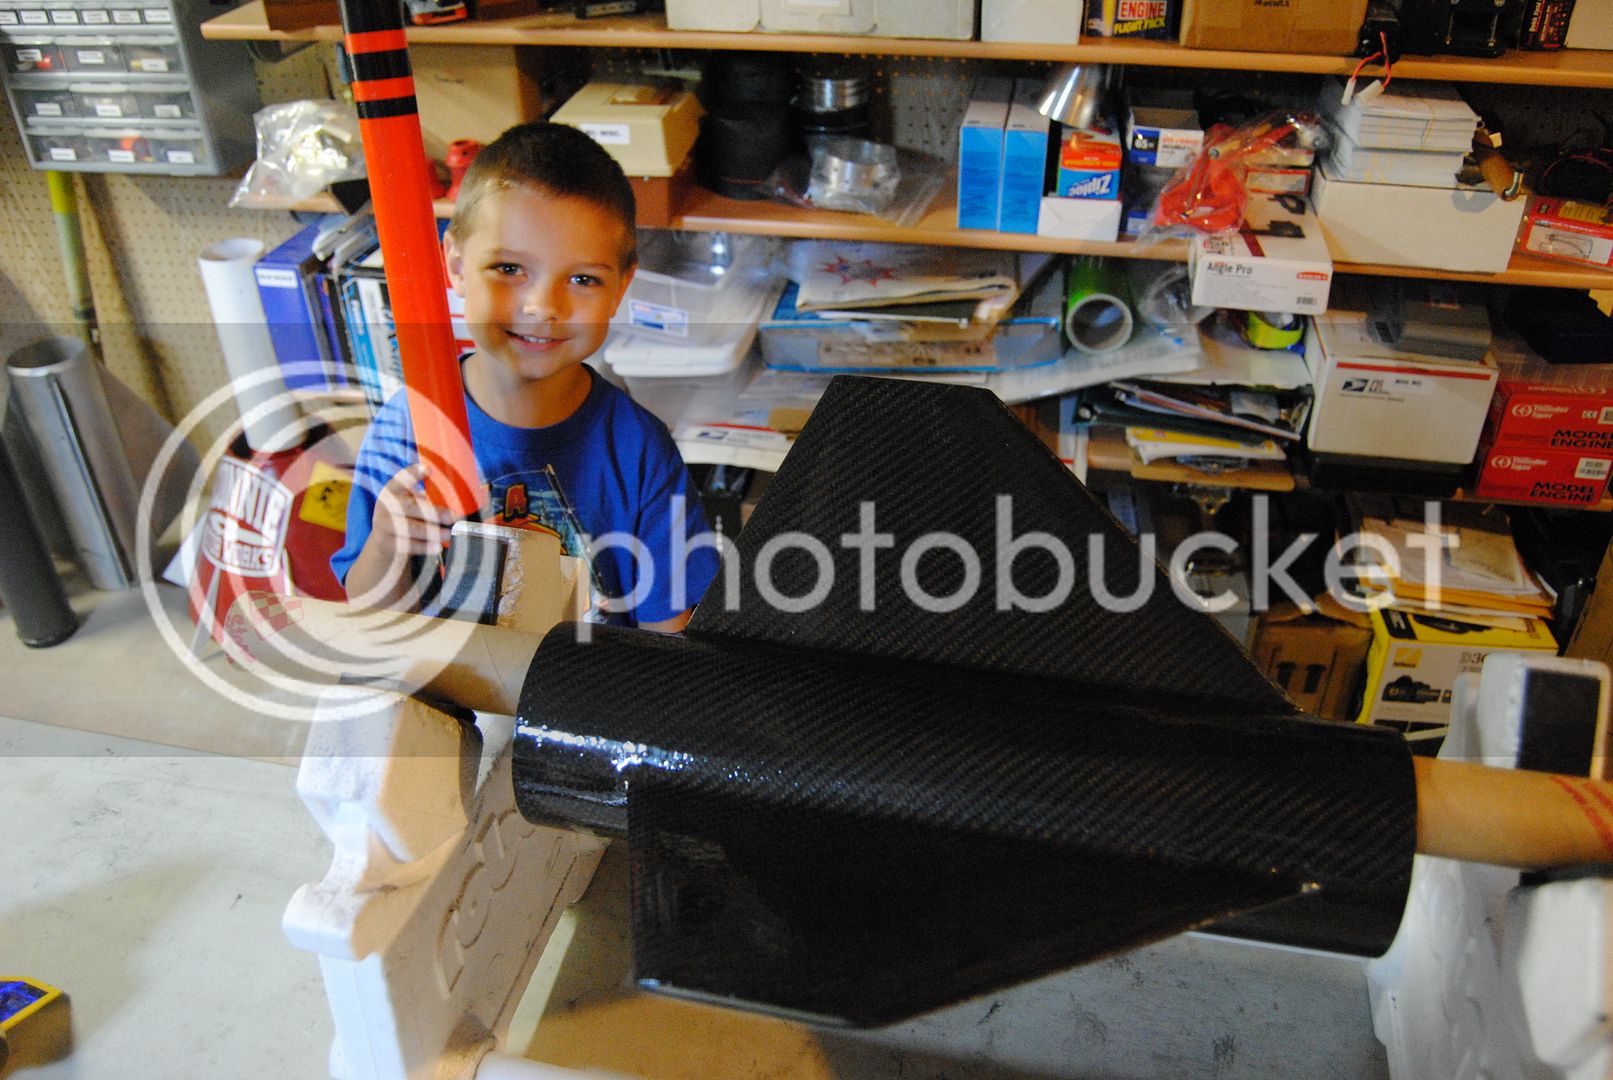
Brandon was proud and wanted to be in a photo with "his" Hi-Flier XL:

036_zpse1f8ab86.jpg


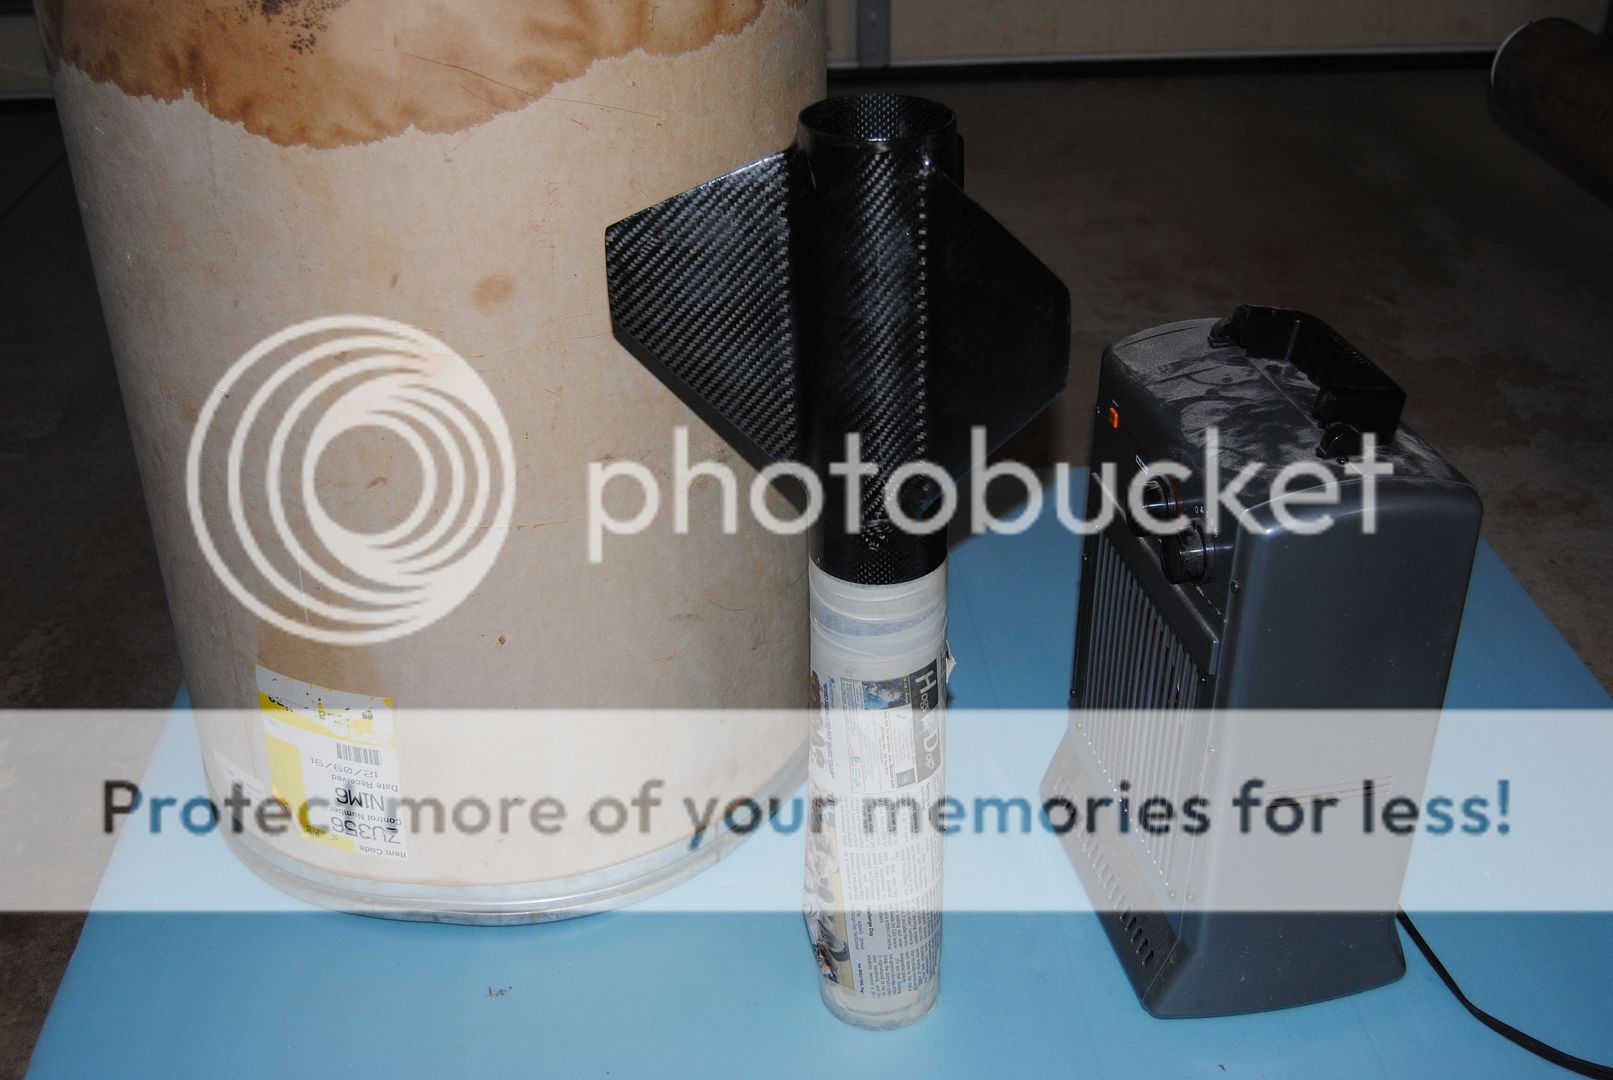
Both components were placed outside to cure in the warm sun; wait, where did the sun go?
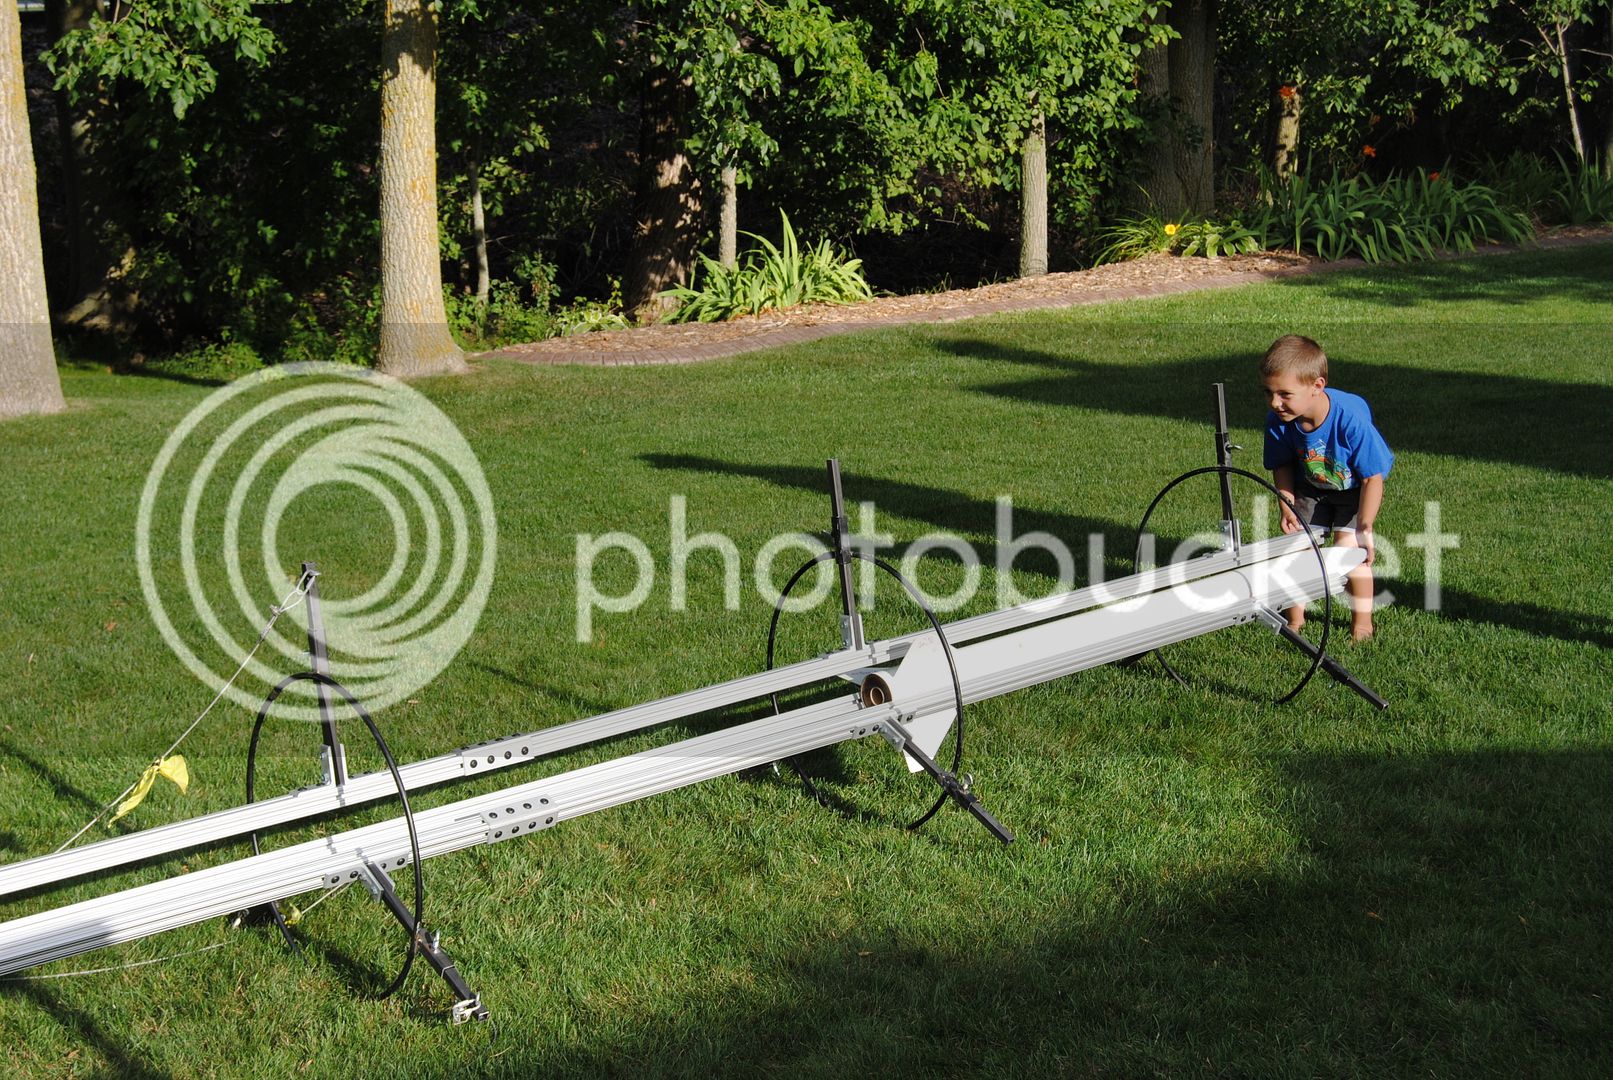
039_zpsbca87fae.jpg


Tower Power

Yesterday afternoon came along and it was time to test assemble the tower. This dry run was a key step to insuring that assembly on the playa (hopefully) goes smoothly. The 16' tower was assembled in the horizontal plane much the same as we've done in the past with this tower's shorter brother. After adjusting the spacing for a 4.5" rocket, Brandon loaded the test rocket into the tower:

045_zps2fb2474a.jpg


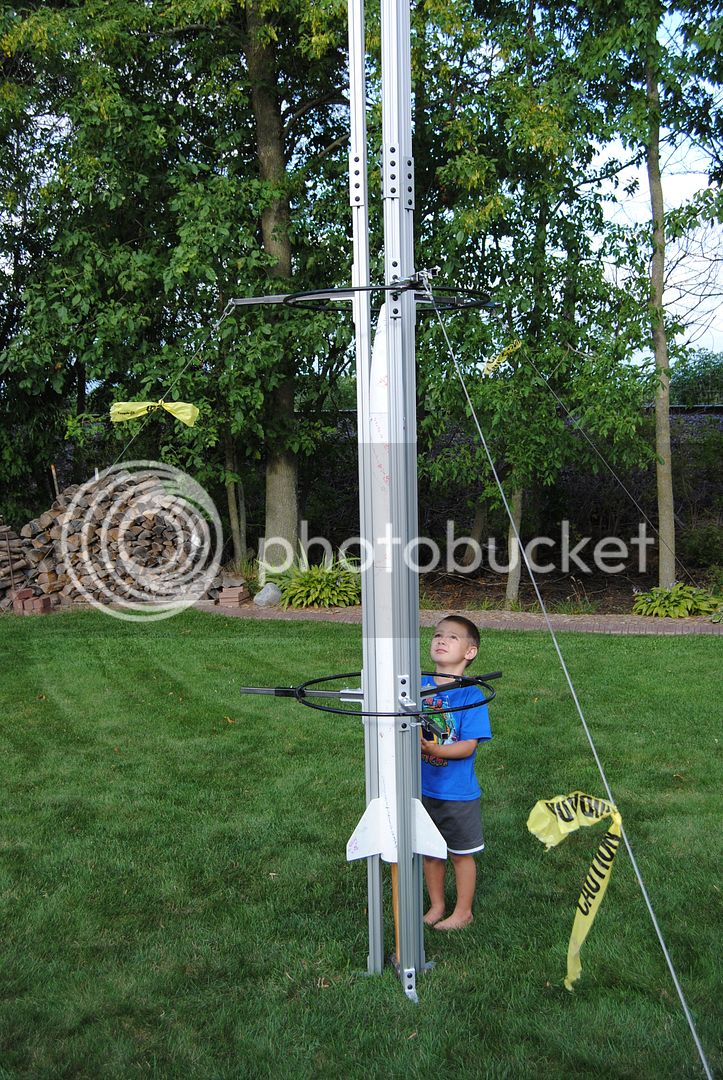
Tom (Dad) and I went to raise the assembly to vertical and discovered that we really needed a third person to keep the base in place. A quick call and Kevin was over to guard the foundation. With two of us lifting and one keeping the base in place, the rise to vertical was easy. Nevertheless, this is why we do a dry run in advance.

Now vertical, a trio of guy wires hold things in place. The neighbors ventured onto their back patio and asked only that we give a loud audible countdown before launching from the back yard. The Pad Manager looks things over:

049_zpsaa093fb3.jpg


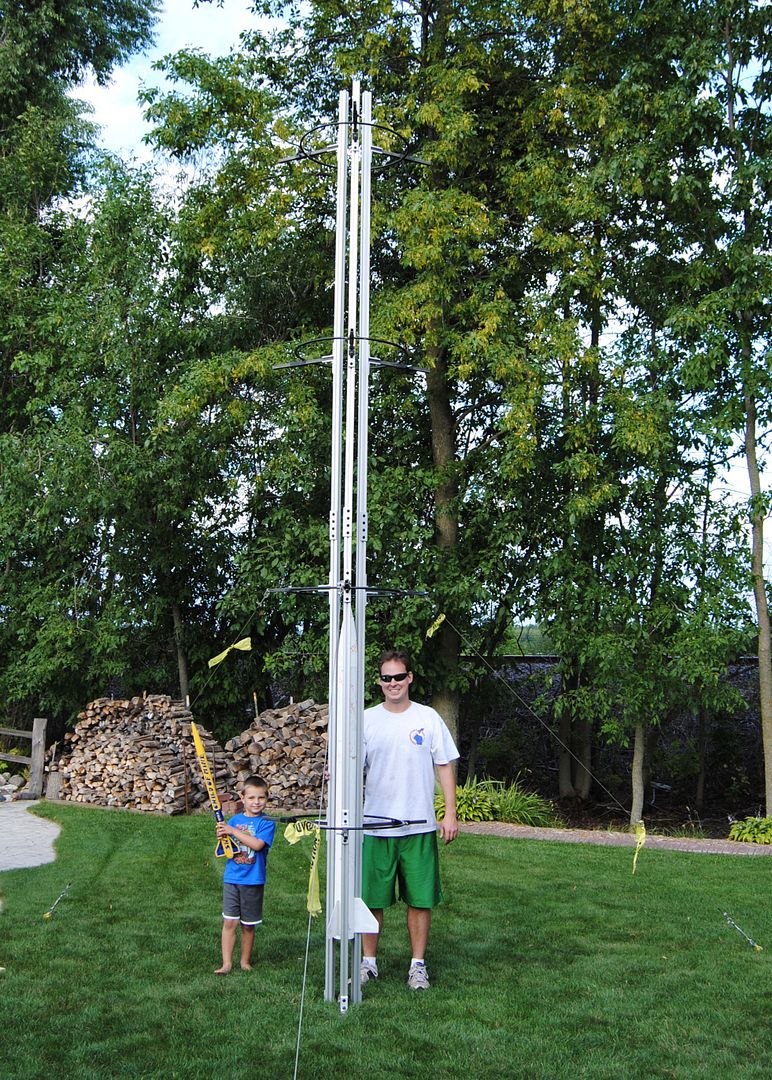
For scale, a 6' ugly guy with green shorts was added to the photo field:

052_zpsd1b0a3bc.jpg


I'll be adding a second set of guy wires to the top set of hoops, a plywood base to the bottom, and a trio of adjustable standoffs to the base for the flight ops. Overall, assembly and the rise to vertical went very well. A huge THANK YOU! to Tom and Kevin for helping assemble this pig on Labor Day!

Valuable lessons learned and noted from this assembly excersize; resulting in a Launch Tower Checklist for implementation at Black Rock.

-Eric-
 
Now vertical, a trio of guy wires hold things in place. The neighbors ventured onto their back patio and asked only that we give a loud audible countdown before launching from the back yard.

-Eric-

Beautiful tower, Eric. So how'd the test launch go? (Certainly you wouldn't have gone to all the trouble of putting one in the barrel without pulling the trigger?)
 
Beautiful tower, Eric. So how'd the test launch go? (Certainly you wouldn't have gone to all the trouble of putting one in the barrel without pulling the trigger?)

Hi Sather!

Thanks; the test flight went well, though we had to keep it low and slow to comply with all local, state, and federal regulations. That's MTW in the background just beyond the trees; though it's a fairly low traffic airport, the tower didn't clear me for takeoff this time around.;)

We have a 5000' runway (in my backyard) for convenience if you ever want to fly up:cool:.
 
Only a few days remaining to get these birds ready before heading west. Many many hours have been poured into these things recently; I don't dare to try to capture the entirety of it all. Instead, here is a collection of photos taken over the last few days. Apologies for the brevity of it all; but we'd all rather look at pretty pictures than read my rambles, anyway, right?

20 Year Itch

I've always appreciated machinists; they do great work. By golly; I'm not a machinist, but I did sleep at a Holiday Inn last night. Or not. I did however drill, tap, countersink, and clean up many holes on the Itch project. Though it took several hours beyond what I had imagined, that work is done. No glorious photos yet; but I promise they'll be good when I post them. In the meantime, here's an exciting photo of some aluminum drillings and the tailcone installed.:eyeroll:

007_zpsb63e29d1.jpg


The fin can had to go back to the machine shop; the ID was not opened up sufficiently after welding, and thus was simply too tight for a proper fit. After re-machining the ID, I had to straighten the leading edges of the fins near the roots a bit (presumably bent due to removing the stuck can).

Lesson learned: Clearly communicate your expectations; make sure the person doing the work truly understands the desired result!

Anyway, though the welds at the root are fairly clean welds, they are not aerodynamically smooth. Proline 4500 fillets were added after taping off the "no glue zones".

011_zps366dfc3d.jpg


020_zpsa2650bce.jpg


The fillets were then scuffed lightly and coated with high temp silvery stuff:

041_zpsdc3a01e5.jpg


Glamour shots may have to wait until she's on the playa, but its getting there.
 
Let's look at more cans.

Carbon Slipper has gone through several repetitions of adding and subtracting epoxy. Here's one round.

Sanded a bit:
001_zps8970e517.jpg


More epoxy added:
003_zps4ca91f51.jpg


Cured to a matte finish; getting pretty close to smooth now:
002_zpsffb43df7.jpg


"Cured": had a curing box on the "to do" list, but it didn't get "to done". Therefore, I improvised. Please note, this arrangement is not what I would consider to be overly safe, so I monitored temps, and kept it outside when operating. Electric space heater and rocket in an inverted 55 gallon barrel. Almost embarrassed to post, but hey it worked.

009_zpsfbaeb3ef.jpg


Motor assembly, transition work, and booster updates to come tomorrow.

-Eric-
 
How did you get the "wet" look on the CF?
Let's look at more cans.

Carbon Slipper has gone through several repetitions of adding and subtracting epoxy. Here's one round.

Sanded a bit:
001_zps8970e517.jpg


More epoxy added:
003_zps4ca91f51.jpg


Cured to a matte finish; getting pretty close to smooth now:
002_zpsffb43df7.jpg


"Cured": had a curing box on the "to do" list, but it didn't get "to done". Therefore, I improvised. Please note, this arrangement is not what I would consider to be overly safe, so I monitored temps, and kept it outside when operating. Electric space heater and rocket in an inverted 55 gallon barrel. Almost embarrassed to post, but hey it worked.

009_zpsfbaeb3ef.jpg


Motor assembly, transition work, and booster updates to come tomorrow.

-Eric-
 
Eric, Looking good!! In that time crunch myself at the moment. See you on the Playa next week:y:

Dennis
 
How did you get the "wet" look on the CF?

Hi Matt,

Thanks for the question! The epoxy, whether wet or dry gives that wet look in most cases when using it as a clear coat over the lamination. For example, here's the core tube of the transition piece. A thin layer of unfilled epoxy is applied to the (peel ply) textured surface before sliding centering rings in place; note the difference in shine. The only difference is the addition of the thin layer of epoxy:

026_zps9826acea.jpg


By the same token, many epoxies will cure with a haze to them (can't remember the term right now....too little sleep!) depending on their composition and curing environment. As an example, the Cotronics 4461 I was using as a clear build up on Carbon Slipper above, dried to that matte finish when curing with an elevated temperature.

I've used West Systems, Proline, and Aeropoxy for clears; my favorite for adding clear layers is clearly West.

Note that wet looking doesn't necessary indicate smooth! For example, here's the booster with the layers of epoxy added, but not yet sanded. Shiny and wet looking, yet not smooth:

013_zps290d2209.jpg


015_zps47818057.jpg


Hope that helps. Thanks for taking the time to post here!:D

-Eric-
 
Eric, Looking good!! In that time crunch myself at the moment. See you on the Playa next week:y:

Dennis

Hey Dennis,

I've been watching the "Who's Coming" list and didn't see your name on their until this week; I was beginning to worry:eyepop:. Glad to hear you'll be there; can't wait to see you (and your project(s)on the playa! 6" motor???????

-Eric-
 
Also, where di you get that clear ply you used to lay up the CF?
Hi Matt,

Thanks for the question! The epoxy, whether wet or dry gives that wet look in most cases when using it as a clear coat over the lamination. For example, here's the core tube of the transition piece. A thin layer of unfilled epoxy is applied to the (peel ply) textured surface before sliding centering rings in place; note the difference in shine. The only difference is the addition of the thin layer of epoxy:

026_zps9826acea.jpg


By the same token, many epoxies will cure with a haze to them (can't remember the term right now....too little sleep!) depending on their composition and curing environment. As an example, the Cotronics 4461 I was using as a clear build up on Carbon Slipper above, dried to that matte finish when curing with an elevated temperature.

I've used West Systems, Proline, and Aeropoxy for clears; my favorite for adding clear layers is clearly West.

Note that wet looking doesn't necessary indicate smooth! For example, here's the booster with the layers of epoxy added, but not yet sanded. Shiny and wet looking, yet not smooth:

013_zps290d2209.jpg


015_zps47818057.jpg


Hope that helps. Thanks for taking the time to post here!:D

-Eric-
 
I'm not sure how I missed this thread until now! Those are some beautiful rockets you've made!!! Wish I could see them fly in person... Make sure to post a full launch report!:)
 
Hamster Dance reveal

Both of these projects are complete; turning out fairly well.

There are a few fun little competitions at the HD launch. One for highest recorded flight, one for lightest rocket, one for heaviest rocket (while staying under the 5 lb limit). I have two projects each shooting for one of the prizes.

The individual that reaches the highest recorded altitude is crowned Alpha Hamster at the launch. I happen to like Estes Alphas (see link for minor obsession: https://www.oldrocketforum.com/showpost.php?p=128154&postcount=33), and saw this launch as an opportunity to add another Alpha to the fleet. I present the Alpha Hamster!
247_zps44a08153.jpg


She's resting a fin on her 19mm F36 motive power!

On the opposite end of the spectrum is ISPy. I've talked about this one before, so won't go into much detail. I'll simply re-state that it's a true minimum diameter 38mm K400 powered machine. The airframe is the motor case, and one can see the glow of the burn through the transparent G-12 casing/airframe (see earlier posts). I gave the bird a quick fade paint job, while leaving the motor section unpainted to see the motor internals. I don't have an outstanding photo of it yet, but Brandon sure likes it! Since the motor section is single use, he already has plans to add it to his fleet after Balls (hoping it comes home alive!:shock:).

010_zps7f96adcb.jpg


-Eric-
 
I'd bet he didn't...

Correct; I failed to mention that another rule for Hamster Dance is that all motors must be single use research motors. Indeed this motor is unique....

-it's a 38mm K motor
-composite cased linerless design (yes it's been static tested, see earlier posts)
-its pretty darn slow burning for a somewhat high Length:diameter ratio

I wouldn't do a motor like this every day, but it makes sense given the parameters and goals of the HD launch!

....by the way, the last time I weighed this critter it was 3.5lbs. Should be around 3.75lbs on the pad!

-Eric-
 
I'm not sure how I missed this thread until now! Those are some beautiful rockets you've made!!! Wish I could see them fly in person... Make sure to post a full launch report!:)

Thank you sir!!! I shall do my best to cover the events to the best of my abilities! Getting excited now; just wish I had a few more days to prep.

-Eric-
 
I'm looking forward to a report as well, a nice loooooong one! Always as entertaining as they are informative!
 
I'm looking forward to a report as well, a nice loooooong one! Always as entertaining as they are informative!

Thanks Chad; undoubtedly this will be an adventure:cyclops::wink:. We'll see what kind of unique landing spots I can find out West!

On another note; just had a former Bucyrus welder interview with us up here. Though he recalled your name, he didn't remember your face (or any wrench shaped gashes in employee foreheads:grin::rofl:).

-Eric-
 
The Sconnie motors have been cast and mostly assembled for some time. I won't cover the standard bates grain motors, but will mention Carbon Slipper's (sustainer) motor. This motor fits in the AMW 75-7600 hardware with a custom nozzle. The grain is cast in a XX phenolic tube after roughing up the ID and coating with R45/E744. We test flew the motor in April at Thunderstruck, where it took a 5.5" 9' tall rocket to 15,000'+ after a 12 second burn. It works out to be about a 9475NS M794 "Superballs"; no I can't/won't prove it!

So we want the motor to light....so we install Pyrodex pellets at the head end. Worked well in the test motor; instant ignition! Hoping for a repeat performance at Balls.

017_zpseca9766e.jpg


...and this XX Phenolic is really good stuff, but I'm still paranoid (and I glue all my RX grains anyway), so we add a bit of Nasa surplus ablative silicone between the XX casting tube OD and XX liner ID. Glues the grain in place and adds a bit more protection for that 12 seconds of motor burn and x seconds of heat generation from the smoke grain. Knock on wood, the test motor's liner came out charred but intact; it left the casing alone.

Spread on the open end of the moon:

021_zpsc276b9eb.jpg


Ready to push into the liner (after adding a bit more to the side on the right):

023_zps0fc2bfb4.jpg


Insert forward bulkhead, nozzle & washer and a pair of snap rings and we have a moonburner!

-Eric-
 
Back
Top