You are using an out of date browser. It may not display this or other websites correctly.
You should upgrade or use an alternative browser.
You should upgrade or use an alternative browser.
TLP Gabriel III/AS Fins And Build Thread
- Thread starter TopRamen
- Start date


Help Support The Rocketry Forum:
This site may earn a commission from merchant affiliate
links, including eBay, Amazon, and others.


- Joined
- Mar 15, 2011
- Messages
- 2,158
- Reaction score
- 12
Noodle Meister You are doing a fine job. I have not built a TLP kit yet, Hope I can do as weel as you and my Favorite Canuck!!
TopRamen
SA-5
- Joined
- Aug 9, 2013
- Messages
- 9,955
- Reaction score
- 112
Thanks Eric.
This is only my second TLP Kit. I look to Sodmeisters Work for inspiration and Techniques.
I just realized that my Pic' and Weight with the G80 Motor is fairly irrelevant, since I will most likely be using the Estes 29mm Black Powder F Motors for this Build (Atleast til' I know how she flies). I need to order some.
ETA: JeromeK99 made me aware that the Estes BP 29mm F may not be up to task, so we'll have to figure that out when it is completed and Weighed. I just re-installed the Trial Version of Rocksim, so as to be able to get some Idea of what will or will not work.
Bummer! Trial Version has expired and won't work. Looks like this one will be old school and spin on a String, then, I'll have to look at the Thrust Curves and whatnot to find good Motors.
Last edited:
JeromeK99
Well-Known Member
- Joined
- Mar 19, 2013
- Messages
- 892
- Reaction score
- 9
It is always tempting to build rockets with a solid base. Strong and sturdy. The reality is, especially on this fin configuration, is that with all this sturdy rear end weight you are going to need a bunch of nose weight to gain sufficient stability. Not really a big deal in and of itself. The problem is that your motor of choice might not be able to safely loft this brick. The Estes 29mm BP F15-4 has a max liftoff weight of 21oz.
Don't get me wrong. I'm not knocking your building skills or techniques. Clean and sturdy built is awesome. I used to build the same way. I have however learned over the years that mid-power rockets don't need it. When you get past "G" impulse, then you need stronger builds. Paper or fiber rings and balsa work fine and keeps the weight down so you can use a larger variety of motors and keep performance characteristics up. Doubling up fiber rings and papering or lightly glassing fins are ways to beef up builds without adding tons of weight.
I hope your final weight comes in low enough. The F15 is a fun motor!
Good luck!
This rocket is on my "to get" list from TLP.
Jerome")
Don't get me wrong. I'm not knocking your building skills or techniques. Clean and sturdy built is awesome. I used to build the same way. I have however learned over the years that mid-power rockets don't need it. When you get past "G" impulse, then you need stronger builds. Paper or fiber rings and balsa work fine and keeps the weight down so you can use a larger variety of motors and keep performance characteristics up. Doubling up fiber rings and papering or lightly glassing fins are ways to beef up builds without adding tons of weight.
I hope your final weight comes in low enough. The F15 is a fun motor!
Good luck!
This rocket is on my "to get" list from TLP.
Jerome
TopRamen
SA-5
- Joined
- Aug 9, 2013
- Messages
- 9,955
- Reaction score
- 112
It is always tempting to build rockets with a solid base. Strong and sturdy. The reality is, especially on this fin configuration, is that with all this sturdy rear end weight you are going to need a bunch of nose weight to gain sufficient stability. Not really a big deal in and of itself. The problem is that your motor of choice might not be able to safely loft this brick. The Estes 29mm BP F15-4 has a max liftoff weight of 21oz.
Don't get me wrong. I'm not knocking your building skills or techniques. Clean and sturdy built is awesome. I used to build the same way. I have however learned over the years that mid-power rockets don't need it. When you get past "G" impulse, then you need stronger builds. Paper or fiber rings and balsa work fine and keeps the weight down so you can use a larger variety of motors and keep performance characteristics up. Doubling up fiber rings and papering or lightly glassing fins are ways to beef up builds without adding tons of weight.
I hope your final weight comes in low enough. The F15 is a fun motor!
Good luck!
This rocket is on my "to get" list from TLP.
Jerome
Thanks for that info Jerome. I had not looked up the Specs for the Black Powder Estes F Motor yet.
Looks like she might have to fly on Composites afterall. Will have to do Sims first.
We'll know when she's done and Weighed I guess.
My TLP Alarm which I bashed the same ways came in at 18oz. without Motor when it was done, but that's a 24mm. Simmed ok on an Aerotech E30.
Last edited:


TopRamen
SA-5
- Joined
- Aug 9, 2013
- Messages
- 9,955
- Reaction score
- 112
They say that Imitation is the sincerest form of Flattery, so Paul should be Flattered that I stole his awesome Idea from his Gabriel III Build.
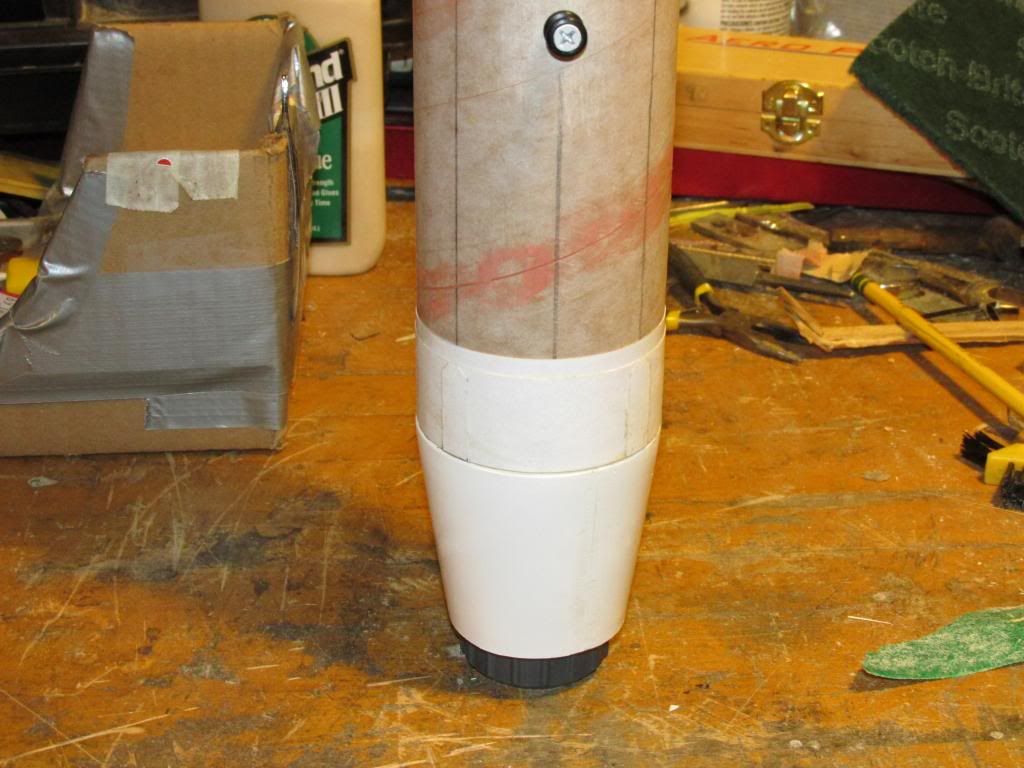
Similar to Pauls Build, my Tail Cone Shoulder was wider than the Base of my Body Tube, so the Cardstock had to come out one way or another.
To honor the amazing Sodmeister, I tried my best to emulate his Idea.
This will mean that I have to modify the Vinyl Wrap/Decal I got from Mark, but we'll make it work.
Now I'll go install my Rail Button Mounting Nuts. Then I can get the MMT/TC Assembly installed.
Similar to Pauls Build, my Tail Cone Shoulder was wider than the Base of my Body Tube, so the Cardstock had to come out one way or another.
To honor the amazing Sodmeister, I tried my best to emulate his Idea.
This will mean that I have to modify the Vinyl Wrap/Decal I got from Mark, but we'll make it work.


Now I'll go install my Rail Button Mounting Nuts. Then I can get the MMT/TC Assembly installed.
Last edited:
TopRamen
SA-5
- Joined
- Aug 9, 2013
- Messages
- 9,955
- Reaction score
- 112
Randy should have the mini buttons soon!
JP
I'll be sticking with 1010 Buttons, since I already have plenty of them, and the Rail to match.
TopRamen
SA-5
- Joined
- Aug 9, 2013
- Messages
- 9,955
- Reaction score
- 112
Rail Buttons ready to go. I'll remove the actual "Button" Parts after the Glue on the inside dries, securing the Flanged Nut Insert, then stick the Screws in the Nuts just to be safe so I don't accidentally knock the Nuts out of place. Then when I paint I don't have to worry about masking off the Buttons. I'll just mask off the Screws and the Protruding Nut Tower.

TopRamen
SA-5
- Joined
- Aug 9, 2013
- Messages
- 9,955
- Reaction score
- 112
MMT/Tail Cone Assembly is in. I used Titebond III for this. It sets up slower than TB II, so in situations like this, it is perfect.
I've had bad Experiences with TB II when it comes to sliding things into place, and having it set when I'm like 3/4 of the way in.
I'll leave it standing up, so the excess TB III will settle around the Rings and whatnot to form internal Fillets that nobody will ever see.
I'm glad that this step is finally done, so I can begin working on the Fins, Chute' Shelf and Shock Cord/Chute' Assemblies.
Oh, and right before I did this I sealed up the Cardstock Parts with CA.
I've had bad Experiences with TB II when it comes to sliding things into place, and having it set when I'm like 3/4 of the way in.
I'll leave it standing up, so the excess TB III will settle around the Rings and whatnot to form internal Fillets that nobody will ever see.
I'm glad that this step is finally done, so I can begin working on the Fins, Chute' Shelf and Shock Cord/Chute' Assemblies.

Oh, and right before I did this I sealed up the Cardstock Parts with CA.
Last edited:
TopRamen
SA-5
- Joined
- Aug 9, 2013
- Messages
- 9,955
- Reaction score
- 112
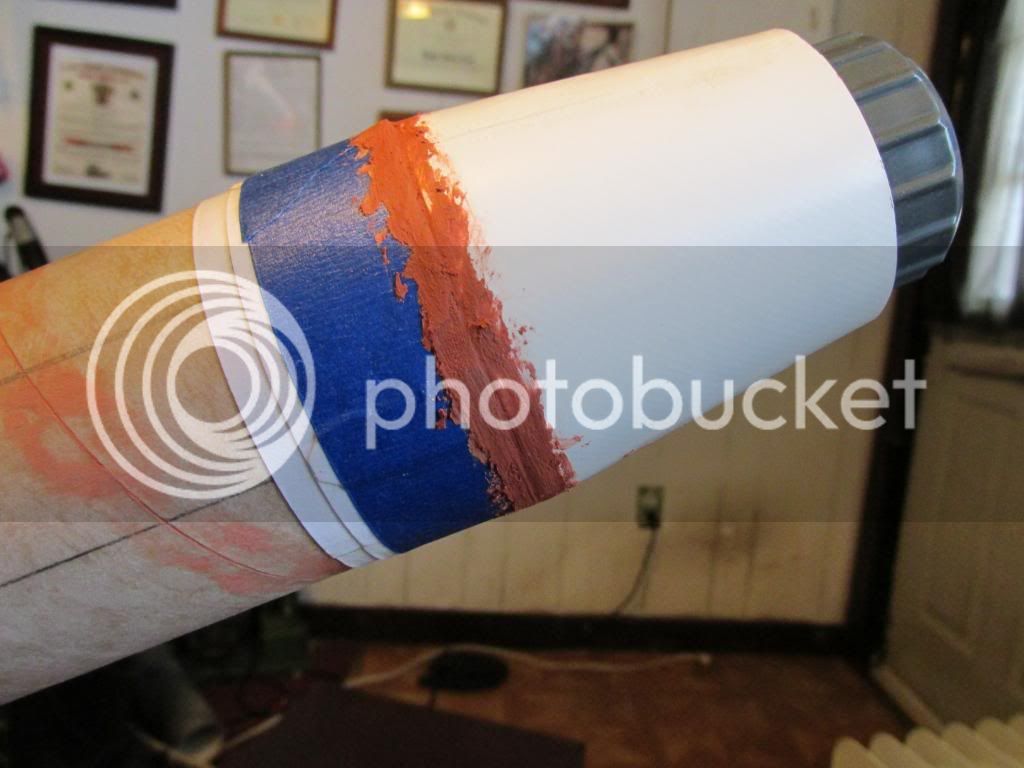
Filling the Gap of the Tail Cone. For my next TLP Mashups, I'll order BT-80 Nose Cones to turn into Tail Cones. The Fiberglass was interesting to work with, but required more "Tweaking" to get right than I would like to have to do.


TopRamen
SA-5
- Joined
- Aug 9, 2013
- Messages
- 9,955
- Reaction score
- 112
Do to the nice results I've gotten with the Mad Cow Fiberglass Tail cone, I take back what I said about it earlier, and infact would not hesitate to use another on a future Build.
I just had to feel my way through it, since I could'nt find anything using Search here on the Forum. I think I've got it licked.
After sanding to blend it with the Body of the Rocket, using a Strip of 120 Grit SP, and a "Shoe Shine" Sanding Method, the Pattern that was visible through the Paint layer on the Tail Cone Dissapeared.
Kudos to Mad Cow for a good Product.:clap:
TopRamen
SA-5
- Joined
- Aug 9, 2013
- Messages
- 9,955
- Reaction score
- 112
That Tail Cone did turn out nice!
The nose cones cut down for a tail cone will probably be lighter.
I've thought about doing that as well.
JP
Thanks.
I don't know about the Weight thing, as this Tail Cone was extremely light and thin. I'll have to order another one and a BT-80 Nose Cone anyhow for whatever the next Build is going to be, so I'll make a Point of Weighing each for Comparison Purposes. I'm a Tail Cone-a-phile, so these things matter to me too, and I will gladly share my Findings.
For now, one thing I can do, is endorse and recommend the Mad Cow Product. On my TLP ALARM that I bashed the heck out of, I took a cut out of a LOC 4" Nose Cone to make into the Tail Cone.
Now I have this 4" Nose Cone that is missing the final 6-7". I have been thinking of making a Static Model out of it, using a clear Dome and just trying to make it look like an IR Seeker or TV Head. Just for a cool Display Model to mount on the Wall.
TopRamen
SA-5
- Joined
- Aug 9, 2013
- Messages
- 9,955
- Reaction score
- 112
I got the 24mm tubing today.
Thank you a bunch!!!
It is much heavier, I like that.
JP
Glad you like it. I enjoy working with it. Adds a little more of a Quality feel to a Build.
TopRamen
SA-5
- Joined
- Aug 9, 2013
- Messages
- 9,955
- Reaction score
- 112
The Trial Version of Rocksim can't be installed twice.
This Bird will have to spin on a String, and I'll have to look at Thrust Curves and use my best Judgement to choose Motors.
That's fine, as I used to Scratch Build all the time when I was younger, up to a Rocket that flew G-80, and never had any problems. Sims are great, but not always necessary.
If it goes "Cruise Missile", no one will be there to see it but me anyhow, so it's not a Safety Issue.
I'll obviously make a Video of it's first Flight, so if it goes wrong you'll all get to see it and then you can rub my Nose in it. :wink:
TopRamen
SA-5
- Joined
- Aug 9, 2013
- Messages
- 9,955
- Reaction score
- 112
I've come up with a Third way of doing the Front Set of Fins. Will post more after I order some more Wood to make them. I think I've come up with a great Idea.
I'm in the Process of shaping the Solid Balsa ones, and it is slow going, as sanding the perfect Angles by Hand is tricky.
I'm in the Process of shaping the Solid Balsa ones, and it is slow going, as sanding the perfect Angles by Hand is tricky.
hcmbanjo
Well-Known Member
- Joined
- Jan 18, 2009
- Messages
- 2,460
- Reaction score
- 423
I could not have hoped for better results. It came out perfect.
After I sanded it, I sealed it with CA on a Q-Tip.

That looks great! Ya' gotta love clean work.
Similar threads
- Replies
- 3
- Views
- 397
- Replies
- 64
- Views
- 2K
- Replies
- 15
- Views
- 1K