New From WILDMAN ROCKETRY The SHAPE SHIFTER

The Rocketry Forum

Help Support The Rocketry Forum:

This site may earn a commission from merchant affiliate links, including eBay, Amazon, and others.

GaryT

Well-Known Member
Joined
Jan 19, 2009
Messages
2,122
Reaction score
168
Location
Guilford CT
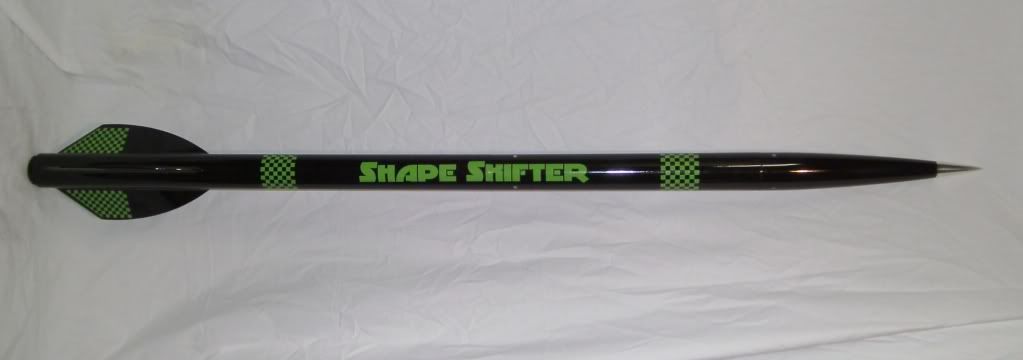
The Shape shifter is a rocket I designed for Wildman Rocketry, The kit is an all G12 Dual deploy rocket with a 38mm MM and filament wound nose cone.

NOTE: The kit below is mine, The ones that will be sold DO NOT come with the Aluminum NC tip.

*** Kits will be available mid January from Wildman Rocketry***

The Vinyl is avalible through Stickershock.

Here's all the info:

ROCKSIM FILE
View attachment Gary T Shape Shifter 2.2-.rkt

SPECS:
1. Over 58 Inches Tall
2. Built Weight Just Over 4 Lbs
3. CNC Precision Cut Parts
4. CNC Precision Slotted Body tube
5. Flies on everything from an H to a J
6. Perfect for Level 1 and Level 2


Parts List:

A. Filament wound Fiber glass Nosecone 12.75" with coupler and 1/8" Bulk plate (Note Coupler must be glued in)
B. G12 2.27" upper body Tube 16” Length
C. G12 2.27" Aft body Tube 30” Length
D. G10 Fiberglass 1/8” Centering Rings (2)
F. G12 38mm MM 13" Length
G. G12 Coupler 7" Length with 1" Switch Band
H. 1/8" Coupler Bulk plates, (2) Inner and (2) Outer
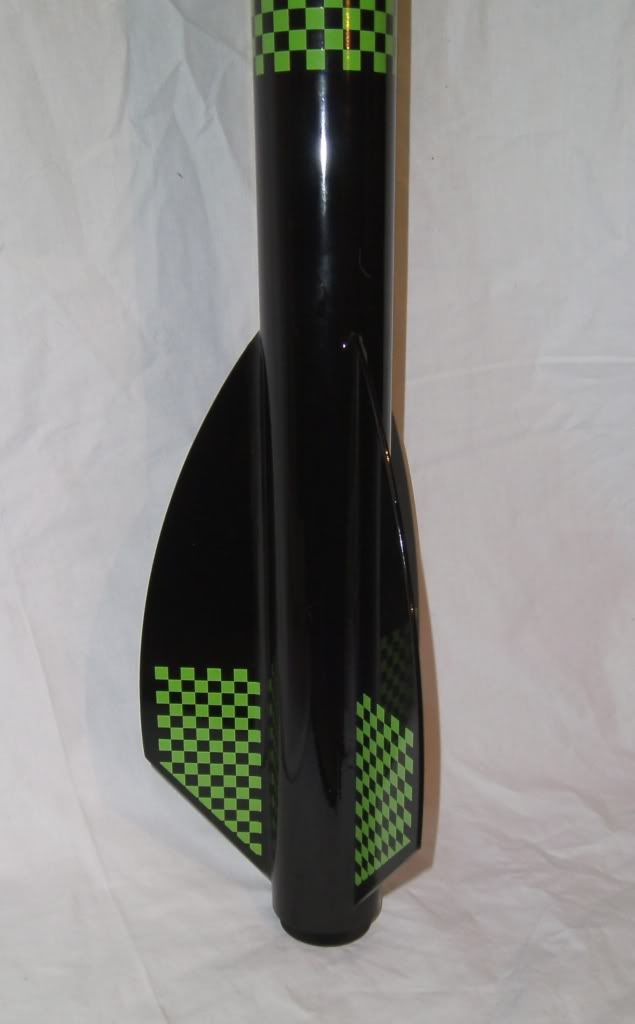
I. (3) TTW G10 Fins 3/32"

SANY0026.jpg

008-1.jpg

SANY0018.jpg

003-3.jpg

0012.jpg

005-4.jpg


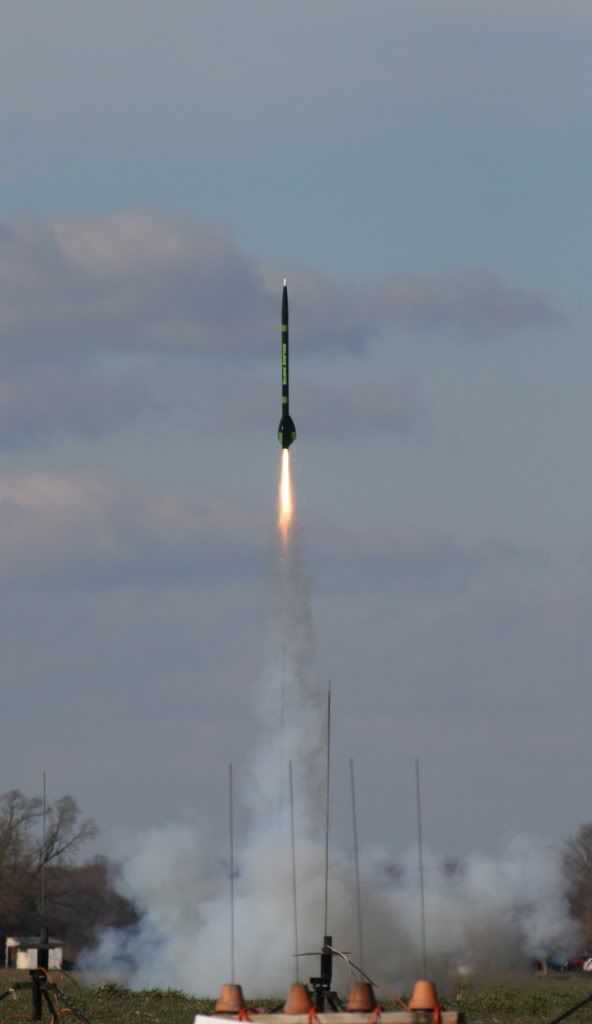
CTI I242WH, Alt 4090'
MDRA2012_0421.jpg
 
Last edited:
how do you always end up with these Gary? :tongue: (disregard, should have...you know...read)

That thing looks wicked, and as usual, looks professionally built :wink:


Braden
 
Last edited:
That's a sexy rocket for sure. Is the aluminum nose available as an upgrade?

G:
Glad you like it, As for the Aluminum tip you'd have to work that out with Tim, If I had to guess though I'd say its not an option for this 1st run of kits anyway.
 
Please make a 5 inch model with a 4-inch hole.

:marshmallow::marshmallow::marshmallow:
 
One sexy looking rocket. I knew this one would at least make the top 5. Mine made the top 11 but got no further...
 
Great job there Gary. My favorite design of the bunch.

I got one sitting here I need to finish for the website.
Going with Red paint & White vinyl.

As you mentioned the kits have spiral wound VK's but NO metal tip, black high temp epoxy instead. Metal ones aren't even being made any more due to high cost & time constraints.

I didn't even get one!

By the way, any difficulty getting the checkerboards on?
I usually use water and soap & wondered if the all stayed together when trying to position them.
 
That is too bad. I think it would add to the loom of the rocket. I guess you could paint it metallic.
 
Thanks Jim:

For the checker board I only had one solid sheet of the green, I had to cut out each block separately and apply each one by hand.


The previous statement was a load of BS! LOLOLO Naaaa it went down just like the name, no problems at all.
 
Great job there Gary. My favorite design of the bunch.

By the way, any difficulty getting the checkerboards on?
I usually use water and soap & wondered if the all stayed together when trying to position them.


Here s the secret to getting a wrap on straight.

Align it up BEFORE you do anything..

Draw a line down the back of your rocket. (launch lug line maybe??) take the decal JUST LIKE YOU GOT IT.. REMOVE NOTHING tale the left (or right ( edge of the decal to that line you drew..

Now wrap the decal onto the rocket... does it line up perfect? no? make some adjustments until it does..

once it is exactly where you want it, fold the decal back using the tape like a hinge. now peel the backing off of the decal. spray your application spray (warm water and just enough soap to make some suds.. a drop or two for a windez bottle is all you need) onto the DECAL (sticky side)

Now slowly wrap the decal onto the rocket. use a squeege (even a credit card etc will do) to squeeze out as much application spray as you can AS YOU ROLL IT ON.

once you get to the last inch or so. go back and squeegee some more. until you have as much water out as you can. SPRAY THE BACK OF THE DECAL WITH SOME SPRAY TOO. This will loosen the backing a little and soften it up.

now let it sit in the sun (warmth) for a few mins. go back and squeege again now start where your tape hinge was.. and start peeling the backing off. I go an inch or so at a time and tear it. that way you dont have too much to work with. once you get the first inch torn off roll the last little part of the decal down you did not stick down the first time (you may need to spray the sticky side again LIGHTLY)

continue working the application tape off a little at a time. once you get it all off you are done.. now go fly the thing.. :cheers:


EDIT: one thing to remember if you start peeling the application tape off and the checks come up. squeege them back down and apply some more heat. a hair dryer works REALLY well for this!!


mark
 
Hey Gary,, on first sight I wasn't crazy about the fins,,, BUT,,,,, the way you put the decal on it makes it look 100% different,, I like it!!!!! Look forward to seeing it in a couple of weeks. Lets all hope the weather holds out.

Tom
 
Hey Gary,, on first sight I wasn't crazy about the fins,,, BUT,,,,, the way you put the decal on it makes it look 100% different,, I like it!!!!! Look forward to seeing it in a couple of weeks. Lets all hope the weather holds out.

Tom

Thanks T, Fingers crossed for GOOD weather!
 
What would be cool is to paint the rocket as an arrow, paint the fins like fletching, add broad head canards to NC.

Ok I need "help"

Tom
 
Here s the secret to getting a wrap on straight.

Align it up BEFORE you do anything..

Draw a line down the back of your rocket. (launch lug line maybe??) take the decal JUST LIKE YOU GOT IT.. REMOVE NOTHING tale the left (or right ( edge of the decal to that line you drew..

Now wrap the decal onto the rocket... does it line up perfect? no? make some adjustments until it does..

once it is exactly where you want it, fold the decal back using the tape like a hinge. now peel the backing off of the decal. spray your application spray (warm water and just enough soap to make some suds.. a drop or two for a windez bottle is all you need) onto the DECAL (sticky side)

Now slowly wrap the decal onto the rocket. use a squeege (even a credit card etc will do) to squeeze out as much application spray as you can AS YOU ROLL IT ON.

once you get to the last inch or so. go back and squeegee some more. until you have as much water out as you can. SPRAY THE BACK OF THE DECAL WITH SOME SPRAY TOO. This will loosen the backing a little and soften it up.

now let it sit in the sun (warmth) for a few mins. go back and squeege again now start where your tape hinge was.. and start peeling the backing off. I go an inch or so at a time and tear it. that way you dont have too much to work with. once you get the first inch torn off roll the last little part of the decal down you did not stick down the first time (you may need to spray the sticky side again LIGHTLY)

continue working the application tape off a little at a time. once you get it all off you are done.. now go fly the thing.. :cheers:


EDIT: one thing to remember if you start peeling the application tape off and the checks come up. squeege them back down and apply some more heat. a hair dryer works REALLY well for this!!


mark


Mark,
Maybe this needs it's own thread, but regarding the wraps: Do they only go around the body tube? Is there a second wrap for fin area, or are the fins painted and then details put on? I have questions and need answers, darn it! :dark:

Eventually I'll be getting a 4" Vindicator from the black Saturday sale, and thought a wrap could be interesting. Help me out here.

By the way, had a great time at dinner with you and Mike and others at dinner a MWP 9. Are we gonna do dinner at MWP 10?
Adrian

Adrian,

What I really need is to make a video and post it.. I have just been to lazy or busy... not sure which.

the wraps are for the body tube. it comes with two of them.

The fin decals are exactly what you see in garys pic. you paint the fin (in this case black) and apply the Green decal. it comes with 6 of them!
Check them out here
https://stickershock23.com/Wildman_Shape_Shifter.html

I hope that helps out.

MWP was AWESOME we had a wonderful time, it was great meeting new rocket people and flying with them.
Of COURSE We will be doing it again next year.. see you there!
 
Thanks Tim, Weather permitting I'll be flying it at the MDRA Jan launch, Probably on the CTI I242WH or I303BS.
 
I love those machined rail buttons.Going to need some of those for sure.

Those are the best pictures of them that I`ve seen.I like the hardware, tres cool !


Paul T
 
Back
Top