I'm building one of the new Estes Vesta Intruder kits. Neat idea.
Here are some observations from building it:
1) Assemble and prime/paint the motor assembly separately - there are a lot of nooks and crannies and getting them adequately covered without getting too much paint all over the fin area looked to be difficult. Glue it in at the last.
2) The centering rings are very loosely fitting, and will need epoxy to glue them in, I think. Estes dropped the ball on this. I tried the centering rings in both the provided white tubing and standard Estes brown tubing, same very loose fit.
3) The body tube is that white tubing, not the usual brown tubing. I dislike it, but there it is.
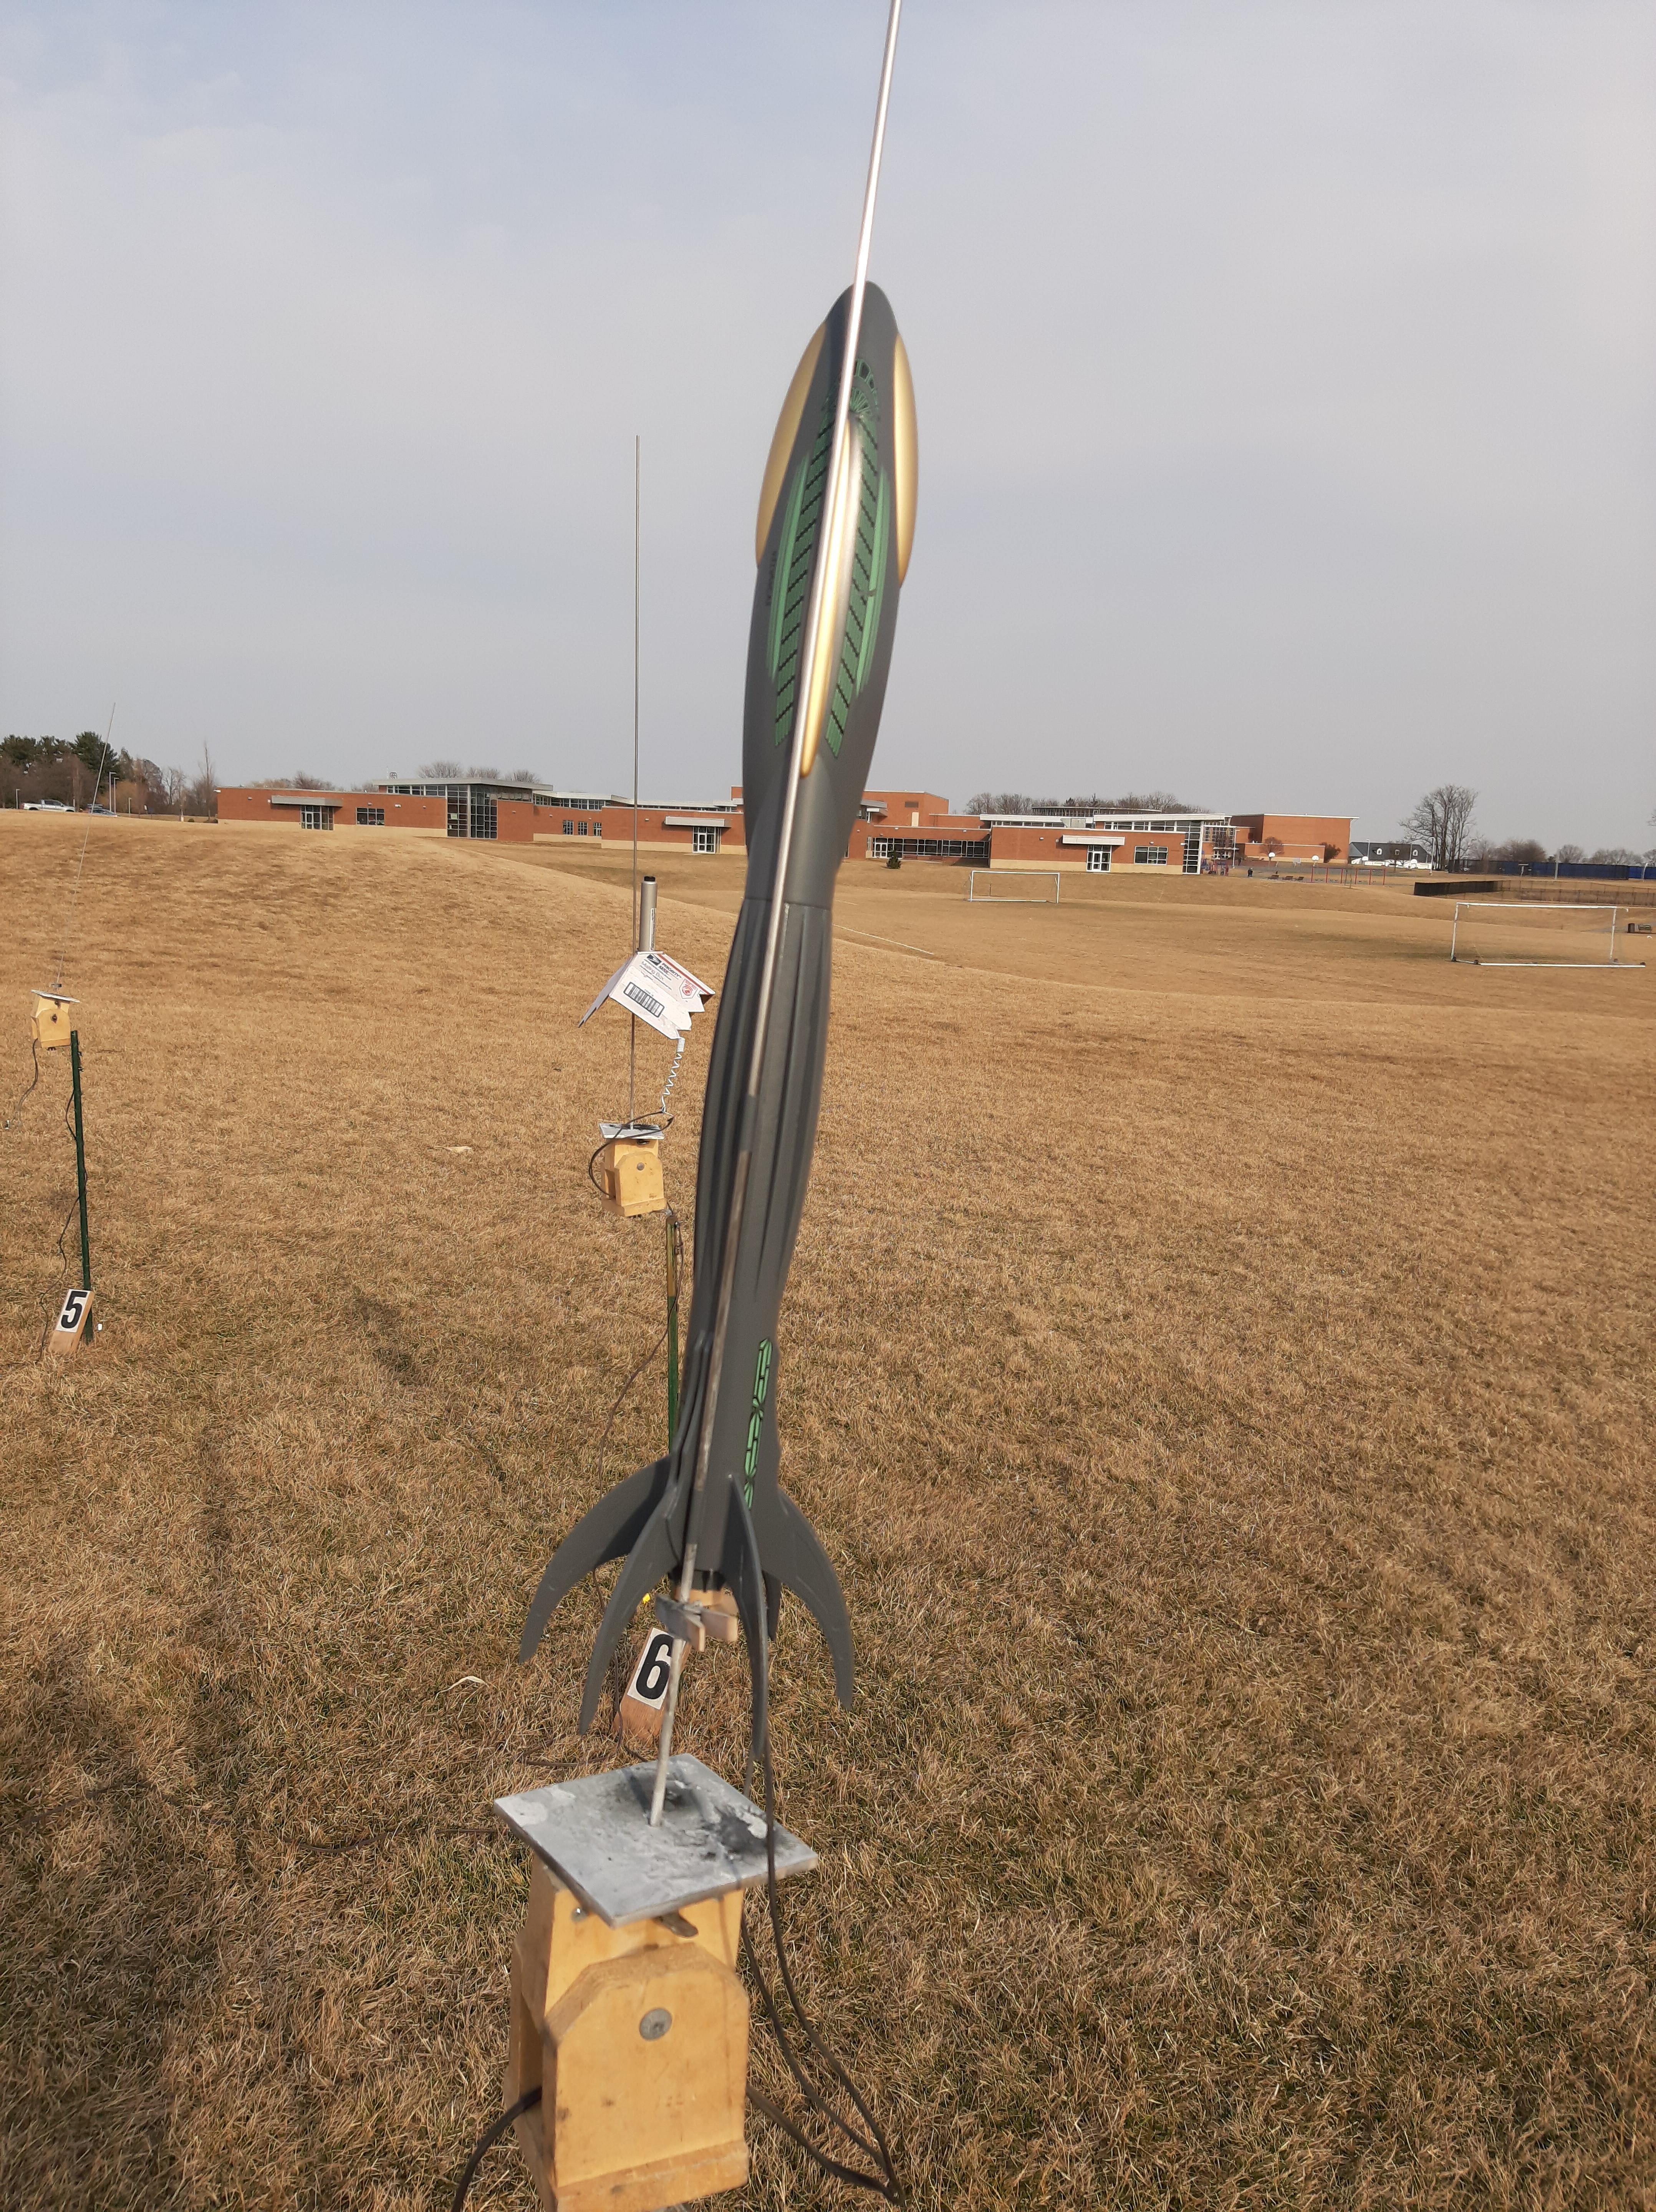
4) Watch the launch lugs/standoffs. I messed up the placement on them (not a lot of room to work with), had to remove them and sand down the base of the standoff a bit to level it out. Once I got it glued in place, and tested the fit with a 3/16" launch rod, there was very little clearance between the rod and the nosecone. Speaking of which, you will need to orient the nosecone correctly so the launch rod doesn't smack into the side of it (the nosecone is elliptically shaped in cross-section). Consider making your own standoffs, a little wider to get the launch lug further away from the body.
5) Priming/painting the launch lugs/standoffs when they are installed is a pain. I expect to have to brush paint portions of it since the paint is having a hard time getting in there without pooling/trashing the main basecoat elsewhere.
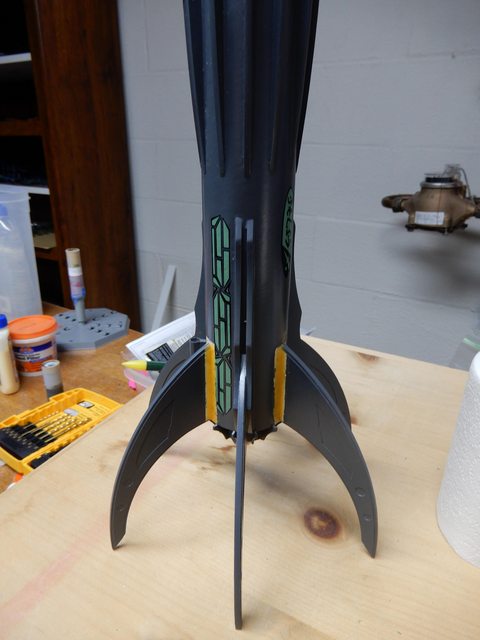
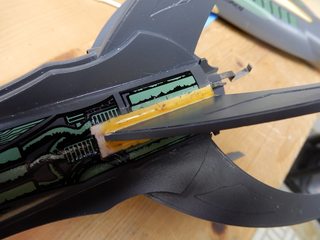
6) I have had a hard time getting primer/paint in between the fin pieces at the base, so I'll probably brush paint those areas so they don't look ugly.
7) I'm concerned about the provided 15" parachute. The model is supposed to be 4.4oz estimated. The fins may be fragile (we'll see how they fare in actual recoveries), so I would think using an 18" parachute would be better. After all, the Estes Interceptor, which is about 4oz uses an 18" parachute. I put in an 18" w/4" spill hole thin-mil parachute from TopFlite in mine and hopefully it will give a gentle descent without drifting too far away.
8) The strakes looked to be challenging to keep straight, but that wasn't really a problem after all. I used the put a small drop of superglue gel on each endof the fin root, and one in the middle, and put Elmers Carpenter glue in the rest of the root. Align carefully, and press into place; the superglue gel grabs pretty quickly. Using additional lines to show where the sides of the fin base go is a really good idea here.
I'll post pictures of mine once its done - I just primed it and am waiting for the primer to fully dry and a nice calm day to paint it.
Here are some observations from building it:
1) Assemble and prime/paint the motor assembly separately - there are a lot of nooks and crannies and getting them adequately covered without getting too much paint all over the fin area looked to be difficult. Glue it in at the last.
2) The centering rings are very loosely fitting, and will need epoxy to glue them in, I think. Estes dropped the ball on this. I tried the centering rings in both the provided white tubing and standard Estes brown tubing, same very loose fit.
3) The body tube is that white tubing, not the usual brown tubing. I dislike it, but there it is.
4) Watch the launch lugs/standoffs. I messed up the placement on them (not a lot of room to work with), had to remove them and sand down the base of the standoff a bit to level it out. Once I got it glued in place, and tested the fit with a 3/16" launch rod, there was very little clearance between the rod and the nosecone. Speaking of which, you will need to orient the nosecone correctly so the launch rod doesn't smack into the side of it (the nosecone is elliptically shaped in cross-section). Consider making your own standoffs, a little wider to get the launch lug further away from the body.
5) Priming/painting the launch lugs/standoffs when they are installed is a pain. I expect to have to brush paint portions of it since the paint is having a hard time getting in there without pooling/trashing the main basecoat elsewhere.
6) I have had a hard time getting primer/paint in between the fin pieces at the base, so I'll probably brush paint those areas so they don't look ugly.
7) I'm concerned about the provided 15" parachute. The model is supposed to be 4.4oz estimated. The fins may be fragile (we'll see how they fare in actual recoveries), so I would think using an 18" parachute would be better. After all, the Estes Interceptor, which is about 4oz uses an 18" parachute. I put in an 18" w/4" spill hole thin-mil parachute from TopFlite in mine and hopefully it will give a gentle descent without drifting too far away.
8) The strakes looked to be challenging to keep straight, but that wasn't really a problem after all. I used the put a small drop of superglue gel on each endof the fin root, and one in the middle, and put Elmers Carpenter glue in the rest of the root. Align carefully, and press into place; the superglue gel grabs pretty quickly. Using additional lines to show where the sides of the fin base go is a really good idea here.
I'll post pictures of mine once its done - I just primed it and am waiting for the primer to fully dry and a nice calm day to paint it.


")