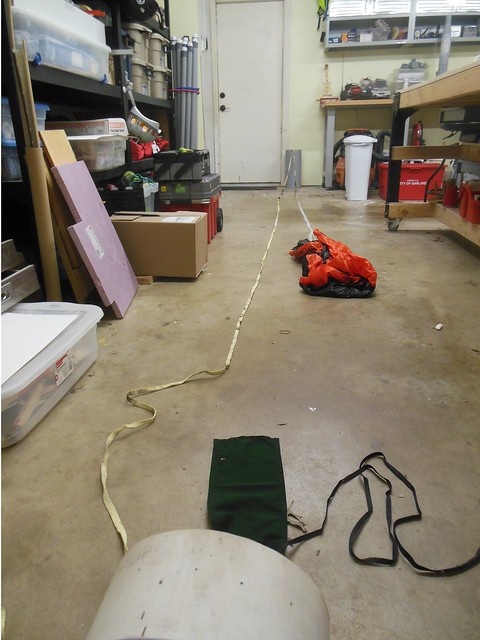
Working out the recovery turned out to be more difficult than I anticipated, and I wasn't expecting easy to begin with. First up I set everything up similar to "Option A" above. Basically a standard recovery train with a deployment bag in the mix. Problem was the main cord had to be loooonnnnngggggg to ensure that the deployment bag couldn't hang in the NC if the shock cord reached full extension, even if all the shroud lines were pulled out. Also, there had to then be enough cord that the NC and BT wouldn't be able to beat each other to death on the way to the ground. All in all, this was a 42' cord...that was a lot of 1/2" kevlar which worked out to a lot of volume to pack in a not very big space. Adding some rubber bands for cord management helped, but only got me so far. Also, this configuration necessitated most of the cord be pack below the parachute, and not in the NC where there is a little extra room. Hard to explain this, but trust me, I packed this many different ways, and the only way that didn't bind any was with as much cord as possible aft. The drogue bay was far more straight forward having sufficient room for the entire mess.
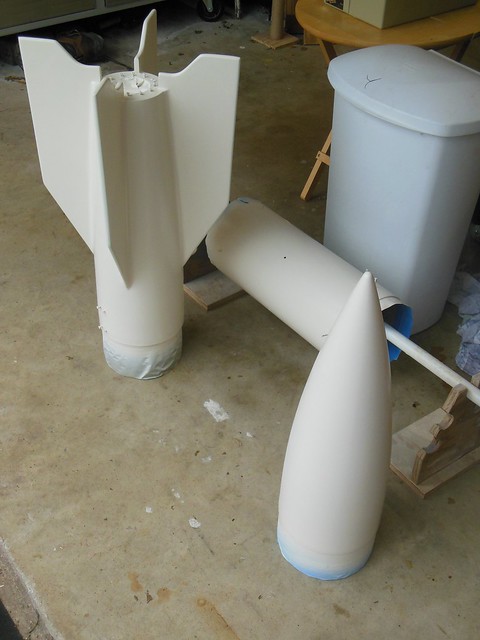
Here is the entire first iteration laid out.

One problem, initially I couldn't come close to getting the nose cone on. It required about 30 minutes of fiddling, twisting, repacking, cursing, etc. to get the NC straining against the shear pins in place...not good. I decided to see how things had shifted as I shimmied everything on, and when I opened it up it was a tangled mess, so much so, that I would not feel comfortable relying on it all to come out cleanly. Variability of packing this way was going to be a problem, so another approach was needed.
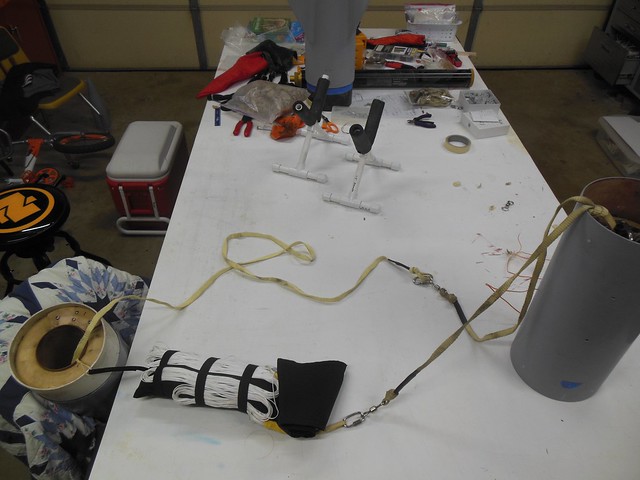
I cut up the looonnnggggg cord to make a Y-harness and shorter (22' I believe) cord. The Y-harness attaches to the bulkhead (I added a piece of nomex to cover the charges and ensure I don't blast that expensive chute too). In this setup the NC will hang as it did in "Option B", so there may be a little cosmetic damage at the lip of the BT, but it beats going splat in a field under drogue. Also, I took care that all attachement points in this train would hang off the BT, i.e. only kevlar would be pulled taught against the BT, no swivels or links. I'm also taking the suggestion to have the NC pull off the deployment bag...why not, that is going to be a lot of momentum, so that bag is coming off.
The deployment bag attaching to the NC, solved another problem as well. Specifically how to ensure that the deployment bag doesn't bind sideways if the lines are pulled taught. Getting the pilot chute in the wind first would have required loading the deployment bag with the opening toward the NC tip. This means the lines would want to pull out in that direction too, which is away from the direction of deployment in this case. [Sorry, this is really hard to put into words, but look at the original recovery train picture for an idea of what I'm getting at] However, with the bag attached to the NC I could pack everything "backwards" with the opening in the bag pointed aft, so the lines could be pulled out in that direction. As these lines are pulled out the deployment bag bundle becomes smaller, and more easily to pull out. In fact the bag with just the chute (no lines in the elastic straps) will fall out of the NC if held up. This setup also allows me to pack much of the long shock cord forward of the deployment bag saving me space where I needed it most.
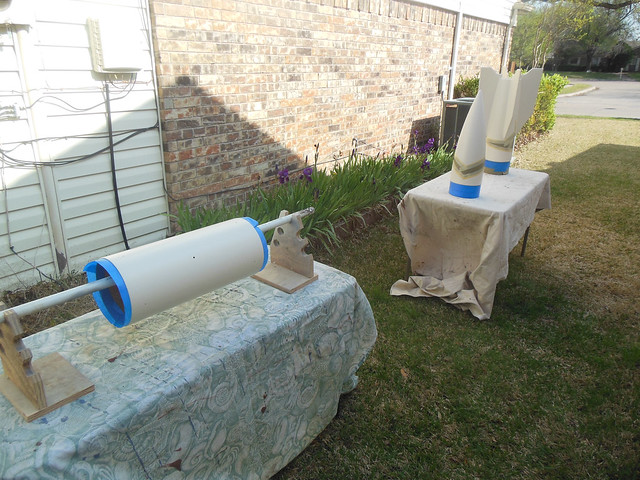
Pictures will do a better job than my explanation:


Once I made it so the bag flap dropped away easily, and wasn't tucked along the inside of the bay everything deployed with only a slight pull. I went to a nearby playground and tested it by holding the the NC and dropping the shock cord with a couple quick links attached and everything came right out, so it worked with way less separation force than a deployment charge is going to impart.
Lastly, a pic of the relatively spacious drogue section, and everything pinned up for ground testing. I'll post some ground testing video in the next day or so, but it was an adventure. To summarize, the aft section went with the calculated amount, but the forward section took about 3 fold the calculated amount for a frisky separation. That would likely be due to the 9 lbs NC and (4) #4 shear pins.


") . But if not I'll be flying a lot too.
. But if not I'll be flying a lot too.