Ultimate Level 3

The Rocketry Forum

Help Support The Rocketry Forum:

This site may earn a commission from merchant affiliate links, including eBay, Amazon, and others.

Cory

Well-Known Member
Joined
Aug 28, 2013
Messages
440
Reaction score
151
Location
Shamrock Texas
Recently received approval from two TAPs and started working on my L3 project. I have made some good early progress over the last couple of weekends and figured it was time to get a build thread going to document the journey. HERE is a link to the Flikr album that will be updated as I go along and will contain the same pictures as here plus many more. This is an Ultimate Wildman kit and the cert attempt will be with an Aerotech M2500 (98/10240). The current goal is to fly on or before Kloudburst in April at the rocket pasture.


[url=https://flic.kr/p/2aXndfU]

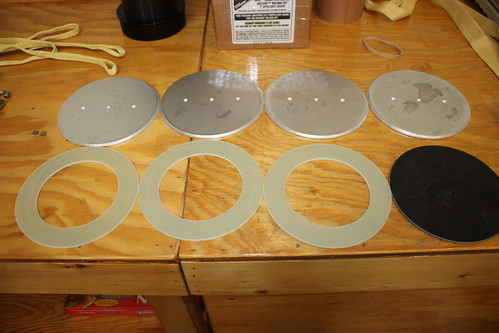
[url=https://flic.kr/p/2aXndum]

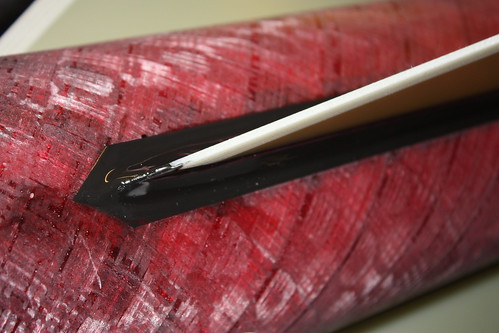
All recovery harnesses and components were purchased from Ted over at ONEBADHAWK and was a pleasure as always to deal with. I will give more detail later, but safe to say these custom harnesses are the best gear I have yet put into a rocket.

[url=https://flic.kr/p/2aXncZy]


[url=https://flic.kr/p/2cC1ESA]


Started the fun off with the obligatory parts bath.

[url=https://flic.kr/p/2aXneTU]


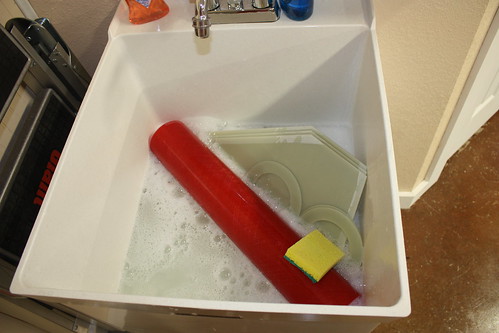
Decided the MMT was as good a place as any to start and so mixed up the first batch of ROCKETPOXY for this build. This was my first time using the flange type Aeropack, but especially with a motor case on hand, the installation was not difficult. After the AP was in place and the Y-Harness attached to the forward CR via two U-bolts- the MMT was ROCKETPOXIED in place.

[url=https://flic.kr/p/2cC1Efy]


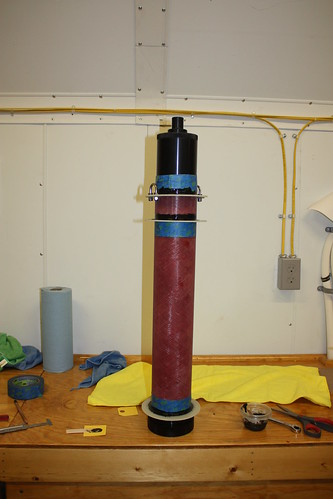
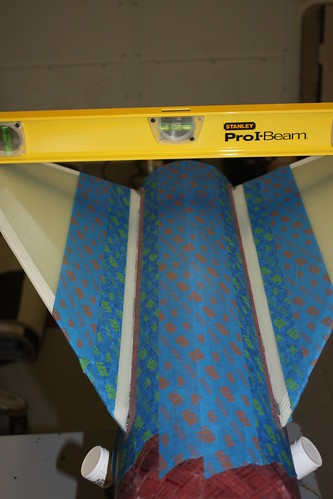
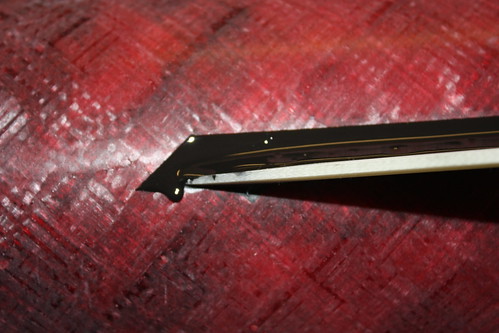
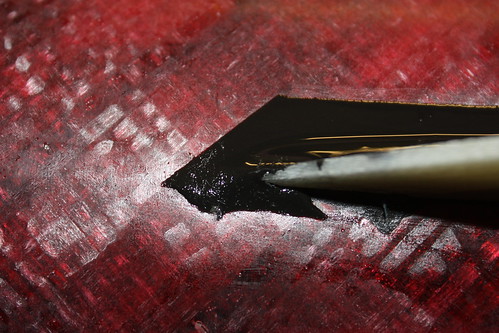
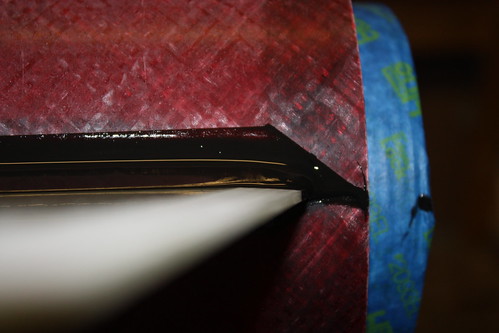
After prepping the fin root with 100 grit, I notched it with a hacksaw. Not really sure if this is necessary or better, but trying to follow the advice I have seen given multiple times hear and heard in person – DO WHAT HAS WORKED IN THE PAST ON CERT ATTEMPTS, NOT THE TIME TO TRY SOMETHING NEW!- I have had great success with fin roots prepped this way.

[url=https://flic.kr/p/2dDDb8m]


[url=https://flic.kr/p/2dDDae7]


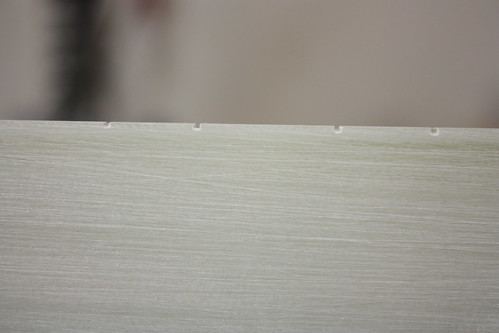
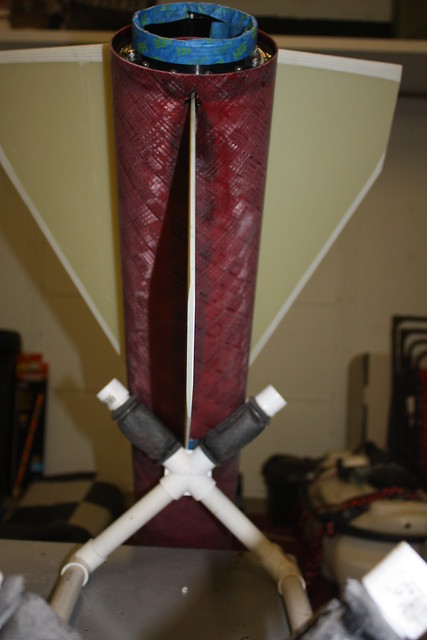
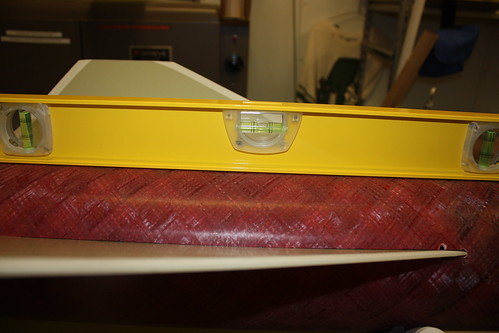
Using the good ole’ double butter method-coupled with trusty Estes fin alignment jig and the first fin is attached! I had previously used the Dremel to notch the fin root to allow injection of the internal fillets.

[url=https://flic.kr/p/2ckt8SZ]


[url=https://flic.kr/p/2dDDbFW]


[url=https://flic.kr/p/2aXyUFm]


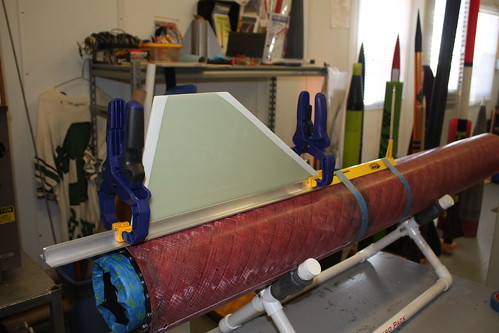
[url=https://flic.kr/p/2aXyVnG]


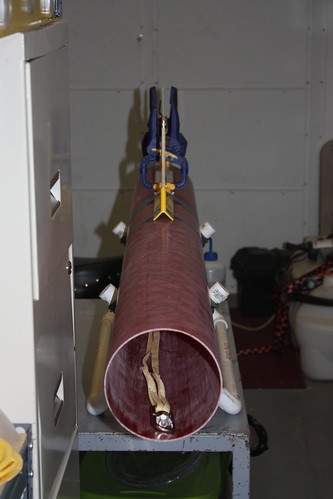
I have no idea why all the text after the first picture is linked to Flikr - Sorry.
[/url][/url][/url][/url][/url][/url][/url][/url][/url][/url][/url][/url]
 
Very cool..thanks for sharing the build and pics with us !

Kenny
 
Congrats on your fine start and progress Cory and thank you for taking the time to share your build and techniques.
 
Great work Cory. Looks like everything is 1st class!
Good luck on your L-3 attempt....pasture is THE perfect place for the flight.
 
Thanks everyone, hope you enjoy the thread.

Had a few minutes this morning before taking off to the inlaws for some Christmas festivities and wanted to get the second fin ROCKETPOXIED in place.

 
I was really frustrated with the words being linked in the first post yesterday and obviously didn't proof read it. Just re-read the post and had to laugh at here being spelled hear and a couple other random mistakes I didn't realize I couldn't go back and edit after a certain length if time.
 
Cory looks like your doing a great job. What size kevlar are you using? I myself like the tight weave kevlar cord like what Wildman sells.

Goog luck
 
Not sure what size Kevlar off the top of my head. It is what you get when you email ONEBADHAWK and request a custom harness set and answer the questions about what your flying. I'll make sure to list the specs when I get to that point in the build.

Just cut the aluminum angle yesterday, usually just use the Estes jig and rubber bands, but needed something a little beefier for this build. I am happy with the technique...Probably not perfect but with a little patience and eyeballing back and forth the final product is flightworthy.
 
No doubt the harnesses are great. Just an aside...Estes Crossfire is my favorite LPR kit- I've built and lost at least 5, probably more.
 
The recovery harnesses are 7/16" Tubular Kevlar...

Finished attaching the 3rd fin yesterday afternoon and decided to type up this update while I wait for the first internal fillet to set up hard enough to pull the tape off the injection sites.

I had really been debating whether or not this project should get a tip to tip layup. In a timely stroke of luck phyzzld started a thread https://www.rocketryforum.com/threads/when-is-a-tip-to-tip-layup-required.149957/#post-1843586 that directly addresses the question. Decided to go for beefy fillets only, and feel good about the decision. Planning on using a 1" piece of PVC for the fillet pulling tool. This is my first time on a fin set this size and wonder if the 1" tool is about the correct size???

Going to inject the internal on fin #2 tomorrow morning before work and at the rate the build is going this project may be read to fly, without paint at least, by the end of January.
 
Just finished injecting the second fins internal fillets and snapped a few pictures

Checked the 4 injection holes from last night, and had one hole needing some filling, the other three were already filled nicely and will need minimal sanding before the final external fillets.

I inject from the top and though it is difficult to see in the picture, it is possible to see the black pigmented ROCKETPOXY running down the internal fillet. I wait until a small amount runs out of the front hole before covering it with tape. After epoxy has made it down both sides and the four injection holes are covered with tape, I put the fin down and level. In an hour or so when the epoxy is 99% finished running I will pull the tape and leave the fin down. This usually works wells to fill all the holes though timing is everything. I am using about 60 grams of mixed ROCKETPOXY which is enough to fill the syringe about 2.5-3 times. This is definitely more than necessary but is enough to ensure a good amount of epoxy is there to form the internal fillet.


[url=https://flic.kr/p/Q3uhoM]

Actually took the following picture before loading the syringe with epoxy. [url=https://flic.kr/p/2dJaEMG]

If you look closely you can see the epoxy running down the inner AF forming the internal fillet.[url=https://flic.kr/p/2dJaJB5]

Again if you look closely you can see the epoxy just beginning to seep out of the second hole. The first hole has already been covered and as soon as this picture was snapped I covered the hole and leveled the fin can. [url=https://flic.kr/p/2b37Zyj]
[url=https://flic.kr/p/Q3ugWK]
[/url][/url][/url][/url][/url]
 
Good build! Nice and straight forward

I'll confess whenever you type ROCKETPOXY I feel like you're shouting it out lol
 
I'm surprised you can get the rocketpoxy to run enough for internal fillets, or even be thin enough to force through a syringe. Mine seems thicker that that.
 
I'm surprised you can get the rocketpoxy to run enough for internal fillets, or even be thin enough to force through a syringe. Mine seems thicker that that.

ROCKETPOXY can be thinned with Rubbing Alcohol . . . The Apogee website talks about it here : https://www.apogeerockets.com/Rocket-Kits/Skill-Level-4-Model-Rocket-Kits/Flying-Machine

HOWEVER, a TRF thread recommends using Denatured Alcohol : https://www.rocketryforum.com/threads/internal-fillet-help.132892/

Tim Van Milligan shows the Rubbing Alcohol process in this video . . . Starting about 4 minutes into the video.

Dave F.

 
Last edited:
Interesting, didn't realize thinning was an option. I usually use Proline 4500 for injections, but decided to use Rocketpoxy this time around. Definitely not the easiest to push through the syringe, but it is doable without any thinning. I take the plunger out and load the syringe with the same popsicle stick used to stir it up. No time for messing around from mix to inject and it takes about 15 minutes for the epoxy to make its way down, but at ~70º-72ºF room temperature Rocketpoxy is inject-able.
 
Sounds like thinning epoxy at all is a bad idea. From that article:

"Thinning epoxy with solvent causes enough loss of strength that we (and most other reputable epoxy formulators) cannot recommend using it as a structural adhesive."

The attached PDF file is interesting . . . I like the suggestion of warming the surfaces to be bonded, rather than the epoxy itself. Also, the suggested heat was considerably lower than I had expected.

Dave F.
 

Attachments

  • Thinning WEST SYSTEM Epoxy.pdf
    304.3 KB · Views: 29
This is my first Wildman kit and need to take a line to comment. GREAT KIT! Everything in this kit is top notch with excellent fit and finish. Centering rings were super tight to start needing just a bit of sanding for perfect fit – EXACTLY THE WAY IT SHOULD BE! Enjoying this build and I have no doubt I will be adding many more Wildman kits to the fleet.

I have had the impression from the start that thinning epoxy can/does compromise final strength and so have always avoided it. Thankfully, multiple epoxy options exist with widely varying viscosities.

Started external fin fillets today and wanted to post some pictures of the process and progress.

First off, I Sharpied the end of an approximately 6” long x 1” diameter section of PVC to create the marks for taping off the fillets and taped off the first two fillet halves. Used Acetone to prep the area followed by a good helping of 60 grit sanding. Pulled the tape, cleaned again with acetone, snapped a few pictures, then did the final taping. Next, I mixed up about 75 grams of ROCKETPOXY (not yelling-just like the caps version better). After the initial mix in a small cup, I put it all on a plate for about 45 minutes to allow the epoxy to achieve a low flow state and allow most of the bubbles to form, rise, and pop. The epoxy had been curing for right at an hour by the time I spread and smoothed it into the joint. Using a clean/unmarked piece of 1” PVC soaked in Isopropanol the fillets were formed and immediately the tape was pulled. Finally, once the epoxy had stopped running I completely cleaned up the ends where it had run past the originally taped and sanded areas.


[url=https://flic.kr/p/2b77nch]


[url=https://flic.kr/p/2cLHStm]


[url=https://flic.kr/p/2cLHSQd]


[url=https://flic.kr/p/2b77mKL]


[url=https://flic.kr/p/2dSGnM8]


[url=https://flic.kr/p/2ctYqEk]


[url=https://flic.kr/p/2ctYr7c]


[url=https://flic.kr/p/2ctYrzB]


NOTE: I usually like to put the description of the step directly above the corresponding picture, but for some unknown reason any text put in after the first picture is hyperlinked to my Flikr page where the photos originate. Until I figure out how to make this stop I am going to put the text first followed by pictures.
[/url][/url][/url][/url][/url][/url][/url][/url]
 
Just finished the second set of external fillets, which completes round 2 out of 3 and totally completes one fin. I noticed a few bumps in the first set and so waited a little longer before lying in todays and almost waited too long. Went with closer to 100 grams of mixed ROCKETPOXY and 1-hour wait to allow bubbles to form, rise, and pop. For all that, the final product looks about the same as the first and I would rather a little runnier epoxy, so the final set will be applied at 45 minutes mix to application.

Weighed all the parts minus parachutes and propellant and looking right at 40 pounds for the total weight. This information in hand I went to Fruity Chutes and ordered a 30” Standard Elliptical for a drogue and 96” Standard Iris Ultra for a main. The 96” Iris is rated for 50lbs@20fps. Used the online calculators on the Fruity Chutes website to decide on the 30” drogue. The calculators estimate this drogue to bring in 45lbs. @~75 fps. Considered using the 24”, which brings in 45lbs closer to 100fps, but settled on the 30” preferring the slower drogue rate and so softer main deployment.

[url=https://flic.kr/p/Q8DMMZ] [url=https://flic.kr/p/Q8DMYv] [url=https://flic.kr/p/2cv9KQZ] [url=https://flic.kr/p/2dPgZjj] https://flic.kr/p/2dPgZjj [/url][/url][/url][/url]
 
Good fillets

What I don't understand is how in the world you could wait 45-1hr before laying fillets!? My batches (half the size, also in a wide flat container) were near impossible to work with after not much more than 25 minutes rest. Eventually I settled on 14 minute wait, pour, pull, wait half hour, lift tape

Dozen ways to skin a rocket lol!
 
The UW is a really tough bird. I can't count the number of times mine has flown, but it's always been on a Cert3 drogue and Cert3 XL. Mains at 600.
 
Rockerpoxy setting up is very temperature dependent. If you are working in higher ambient temps than Cory, it would account for the difference.

I used it when visiting in Chicago when it was 65 took almost an hour, but down here in Savannah only 30 minutes.

Anyhow great looking fillet work Cory!
 
Back
Top