


kjmccarx
Well-Known Member
- Joined
- Jul 1, 2013
- Messages
- 62
- Reaction score
- 0
I upgraded my launch pad to an 80/20 rail earlier this summer... It's only seen one launch because most of my rockets are still equipped with 3/16 launch lugs, so I thought I would start to upgrade some of my older rockets to rail buttons. I knew that getting a rail button between the centering rings would be the hardest part since there was no way to get a nut in there. This is the first time I did this - I wanted to share for other people who are in a similar situation as me. In this post I use rail 3 piece Derlin rail buttons from www.rail-buttons.com - you can use any other rail buttons you please, but you will have to modify this for your specific needs.
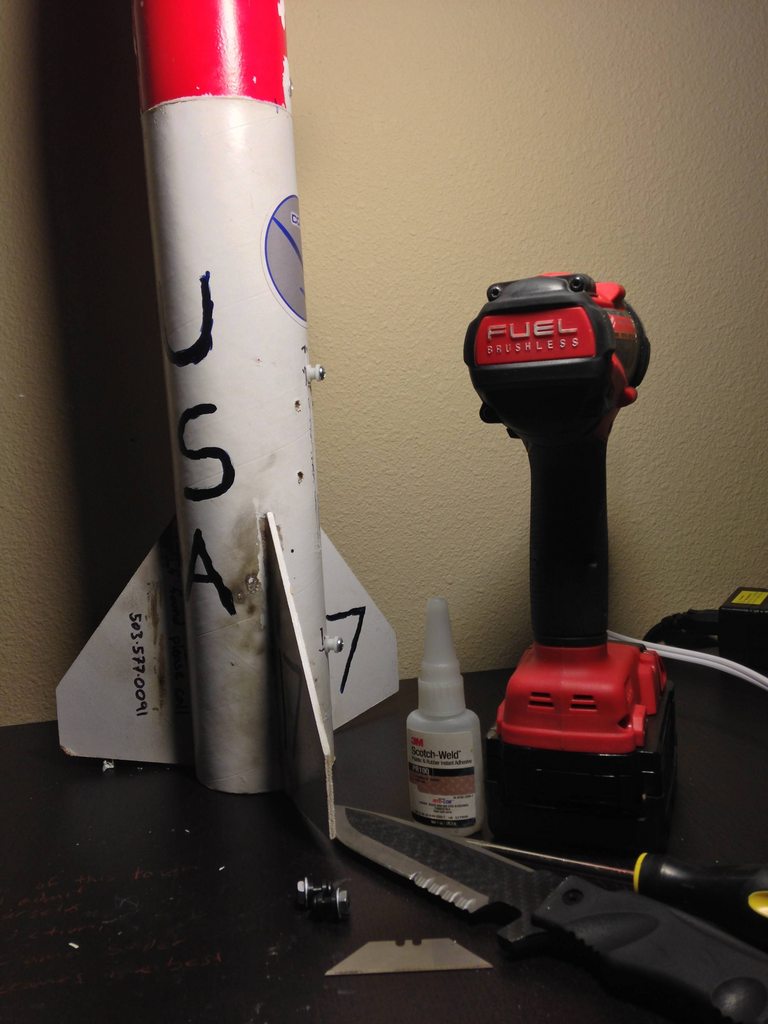
All of the things I needed for the retorfit were:
I started by cutting off the old launch lug with my knife, and then cleaned up the remaining super glue with a utility blade.


I then tried (and failed) at marking down the center for a nice place to drill the holes for the rail-button screws. I used a 5/32 drill bit because it was a little smaller then the the size of the bolt; this way the bolts could be screwed into the body tube, not just passed through. Ideally I would have used a piece of L-bracket to get a nice straight line but I didn't have that so I had to improvise which resulted in a very messy mark... But I was able to find the places to drill.

The top button was easy. All I had to do was drill, and then attach the washer and nut.


For the bottom rail button (which was in between the two centering rings) I drilled the hole, and then applied a generous amount of super glue in and around it. Once I had the super glue in the hole I threaded the screw into the tube as tight as it would go before it stripped the hole that I was taping. I would have preferred to use JB-Weld for this step, but I am in the process of moving, and I could not find my JB-Weld - besides, the 3M Epoxy is pretty tough.


In the end the rocket turned out well. For those of you who are doing this on nice shiny rockets I would recommend sanding and painting over the old launch lug location, but since this rocket is not exactly a prize stallion, I don't think it's something I am going to worry about.


I will post and update on how well these rail buttons hold up (especially the bottom one), after I launch this again... For those of you wondering why there are four holes in the side of the rocket already it's because this is a night launch rocket with a 35w HID setup and I use those holes to secure the battery and ballast during launches.
Good-luck to all who try this out. I hope this post helps you.
All of the things I needed for the retorfit were:
- Knife
- Utility Blade
- JB Weld (or Super Glue)
- PH2 Screwdriver
- Drill
- 5/32 Drill Bit
- #8 Washer
- #8-32 Nut
- Rail Buttons
I started by cutting off the old launch lug with my knife, and then cleaned up the remaining super glue with a utility blade.
I then tried (and failed) at marking down the center for a nice place to drill the holes for the rail-button screws. I used a 5/32 drill bit because it was a little smaller then the the size of the bolt; this way the bolts could be screwed into the body tube, not just passed through. Ideally I would have used a piece of L-bracket to get a nice straight line but I didn't have that so I had to improvise which resulted in a very messy mark... But I was able to find the places to drill.
The top button was easy. All I had to do was drill, and then attach the washer and nut.
For the bottom rail button (which was in between the two centering rings) I drilled the hole, and then applied a generous amount of super glue in and around it. Once I had the super glue in the hole I threaded the screw into the tube as tight as it would go before it stripped the hole that I was taping. I would have preferred to use JB-Weld for this step, but I am in the process of moving, and I could not find my JB-Weld - besides, the 3M Epoxy is pretty tough.
In the end the rocket turned out well. For those of you who are doing this on nice shiny rockets I would recommend sanding and painting over the old launch lug location, but since this rocket is not exactly a prize stallion, I don't think it's something I am going to worry about.

I will post and update on how well these rail buttons hold up (especially the bottom one), after I launch this again... For those of you wondering why there are four holes in the side of the rocket already it's because this is a night launch rocket with a 35w HID setup and I use those holes to secure the battery and ballast during launches.
Good-luck to all who try this out. I hope this post helps you.
Last edited: