Asteroid Hunter Build Thread

The Rocketry Forum

Help Support The Rocketry Forum:

This site may earn a commission from merchant affiliate links, including eBay, Amazon, and others.

n3tjm

Papa Elf
Joined
Jan 21, 2009
Messages
8,489
Reaction score
2,023
Location
Penns Creek, PA
Parts.jpg

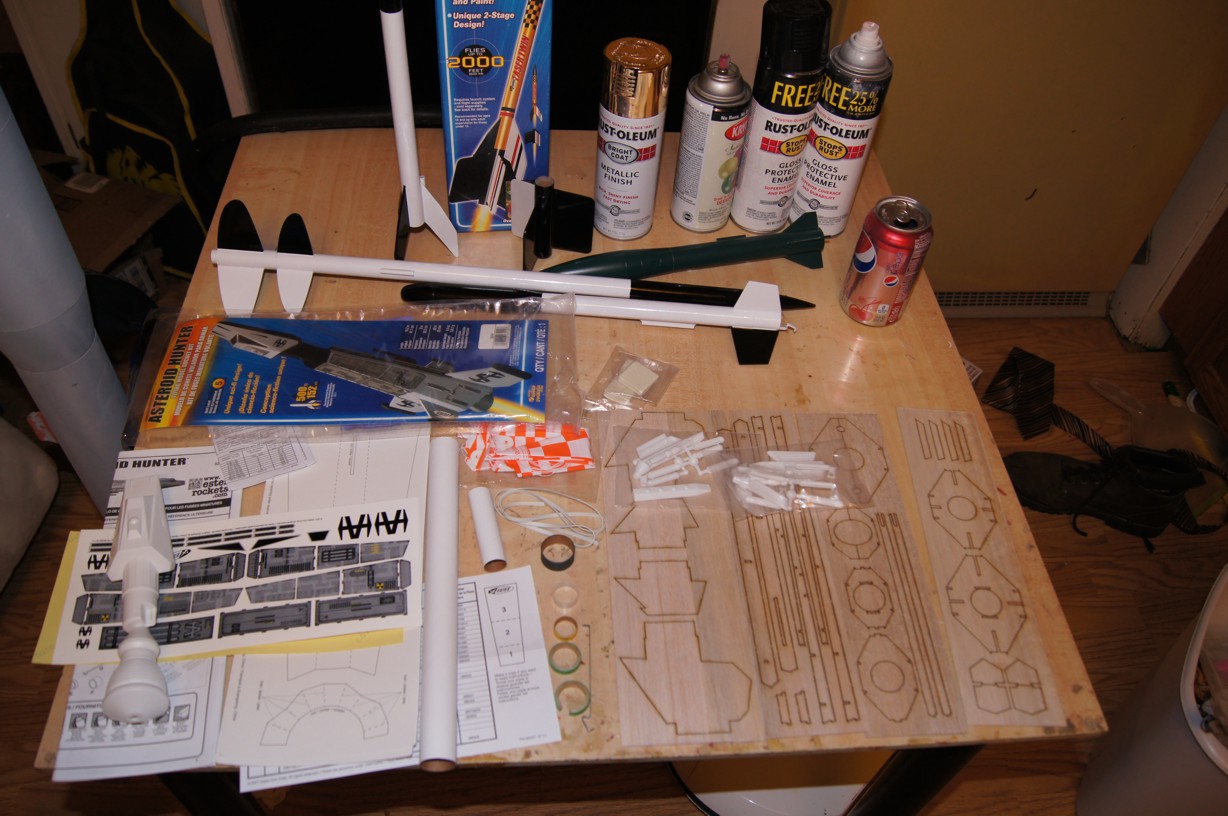
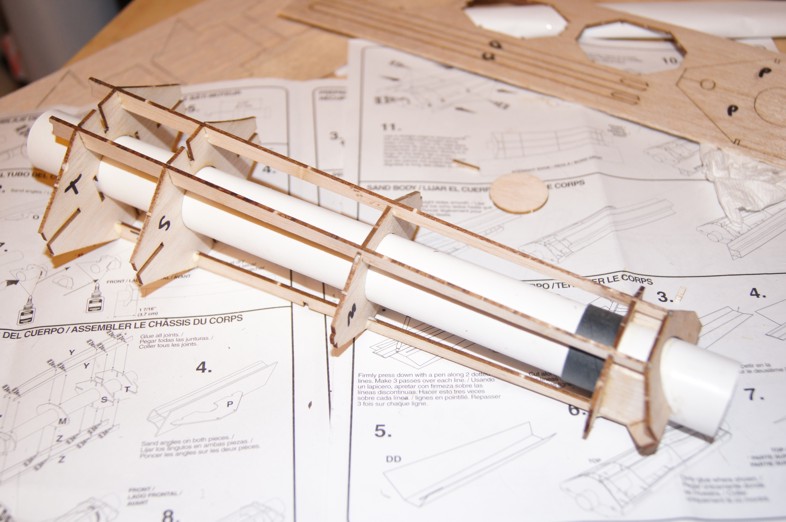
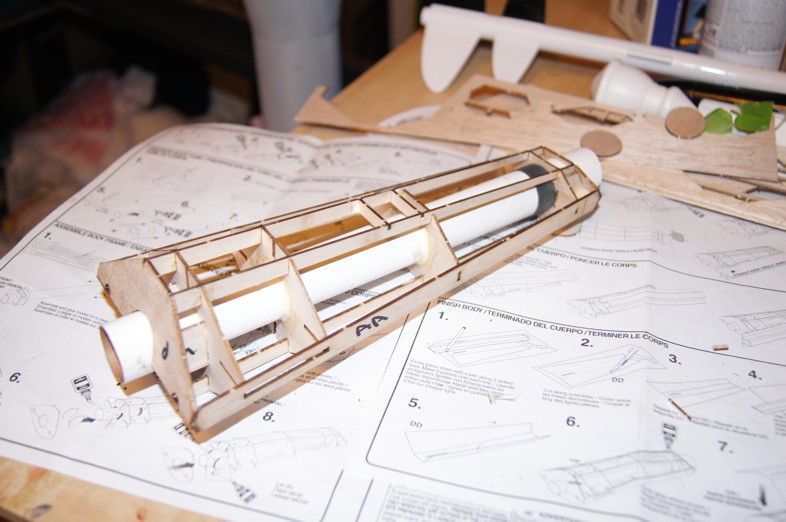
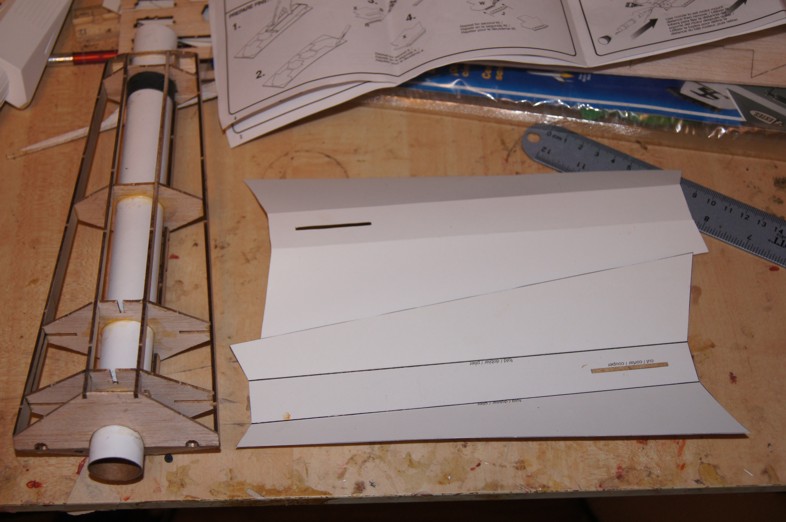
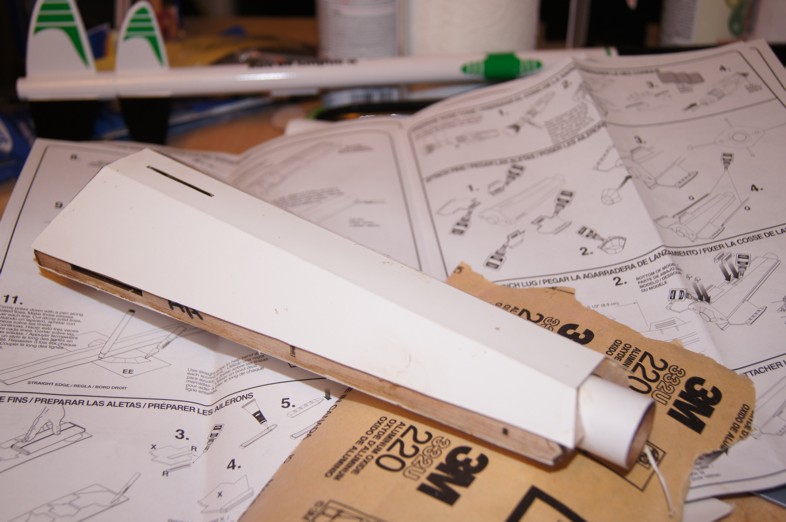
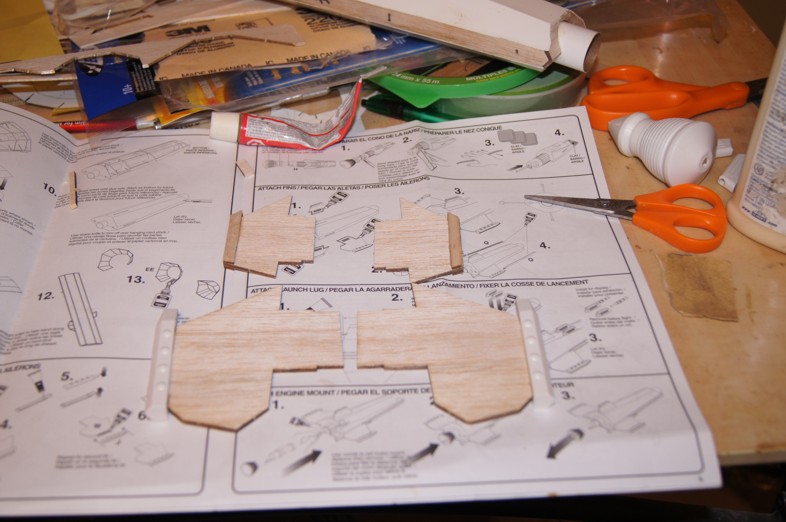
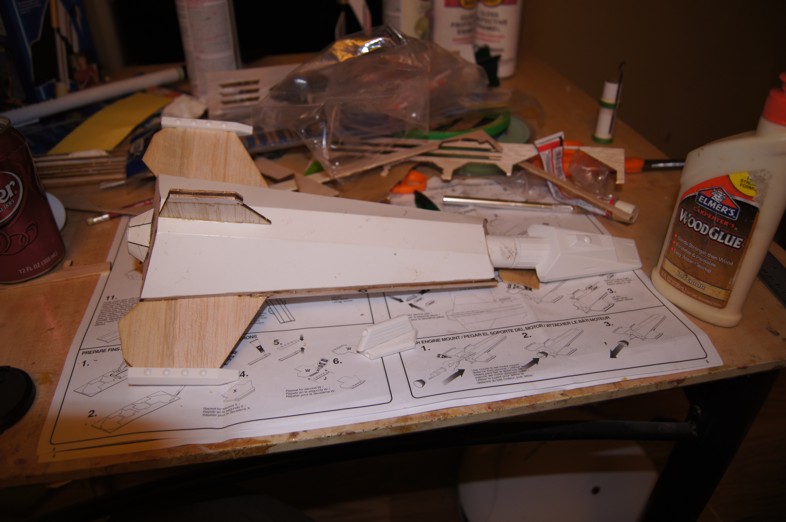
Lots and Lots of Parts. Balsa wood is the type you would hate to cut out by hand since it was a mixture of hard and soft wood. Thankfully everything is laser cut. Rockets in the background, paint, and soda not included.
 
Motor_Mount.jpg

First step is assembling the motor mount. The mount does not use standard measurements so it is important to follow the directions. There was one mistake in the instructions, and one thing I did different. The mistake was it showed the thrust ring is glued flushed to the front end of the motor tube. You want to push the thrust against the motor hook which is further down the tube. The thing I did different was secure the motor hook before attaching the aft centering ring.
 
Front_Bulkhead.jpg

Next up is to build the frame. Its important to experiment and test fit parts with this kit. I find the order of operation in the instructions not optimal for construction. First example of this, the instructions wants you to glue the two front bulheads together and use the loose support pieces as a guide. However, this is awkward. Instead I dry fitted the supports into the next bulkhead and used it as a stand and guide. Once the glue is dried, the bulkhead assembly is glued to the core tube.
Front_Bulkhead_glued.jpg
 
I see GOLD!
Are you at the paint stage already????????
MAN, you be a fast buider...;)

That sure is a lot of parts is pieces. :y:
Anywhoo- Ill be watching.
 
top_and_bottom_ribs.jpg

Next up is building the frame itself. This is done by sliding the bulkhead pieces on the tube and attaching the top and bottom spares. DRY FIT FIRST! You will notice that the instructions shoe the to edge of the spars are flush with the edges of each bulkhead. This is not the case with middle bulkhead. However, the ribs fit so I assume that the ribs are right and the illustration is wrong. Another thing notice by dry fitting is the front end of the spars have to go in first. Once everything is dry fitted, one by one, I removed a spar a glued it in place. Note the Bulkeads are not glued to the tubes yet.
 
finished_ribs.jpg

I deviated from the instructions a little to finish the frame. I punched out the side pieces and dryed fitted them on the tabs. I wanted the extra support to keep everything aligned while I glued the bulkheads to the center tube. Once that was done, I glued the side pieces on, finishing off by attaching the rear bulkhead pieces.

The parts picture has a clue for what the gold paint was for :p
 
Since I plan to get this kit very soon, I'll be watching this build thread with great interest.:wink:

BTW, what color(s) of paint are required for this kit besides silver obviously???
 
skins.jpg

Next up is the skins. You use a ball point pen to crease the folds. I used scissors to cut out the skins, and a hobby knife to cut out the window for the fins. Dry fitting I noticed the fit was dead on.

First_Skin_Attached.jpg

The Top Skin is glued on first. It is important to note where you want to put the glue. I smeared glue on each spar and only on the aft and forward bulkheads. (The middle bulkheads are slightly curved allowing a gap between them in the skins. This allows the equalization of pressure. Very smart design). Once the glue is dried, the overhang is trimmed off.

Second_Skin_Attached.jpg

The bottom side is done exactly the same way, noting that the bottom side has the launch lug supports, which you want to apply glue to.
 
Fins.jpg

Next up is assembling the fins. The vertical fins pods are made by gluing two smaller balsa pieces to the sides of the fin tip. The "wings" have two plastic pods assembled from two pieces. Toxic Plastic Cement is used to glue the pieces together. Then I put a generous amount of wood glue in the pods and installed them on the wings. I decided to assemble the launch lugs at this time since I had the glue out.

Assembled.jpg

While the glue was drying, i prepped the nosecone. Three squares of clay are used to keep this rocket stable. I assembled the tail cone earlier, so that was ready to install on the end of the core tube. Each fin was dry fitted and glue into place. Finally the "trim" was glued in place.
 
I really,really will be watching NOW.
I got a box today in the mail. Much to my surprise.
I opened the box and what do my eyes behold, an Asteroid Hunter!!!!!!!!!!!!!!
Seems someone :wink: (THANKS!) has wished me a Happy Birthday!
TOO COOL!
Made my day!!!!!!!!!!!!!!!!!!!!!!!!!!!!!!!!!!!!!!!!!!!!!!!!!!!!!!!!!!!!!!!!!!!!!!!!!!!!!!!!!!!!!
 
Guns_Nozzles.jpg

The instructions seem to suggest using wood glue to glue on the plastic launch lugs, but I decided regular plastic cement would be a better choice. That seems to work well. There are some display guns that fit in the launch lugs for display purposes only. The motor mount is finally glued into the core tube. The main nozzle is used as a guide to how far to glue the mount in the tube. Then i test fitted the smaller nozzles. I decided not to glue the nozzles, and the plastic body details until after the rocket is painted.

Primer.jpg

Fillets were added first to the front bulkhead joints, then the aft bulkheads joints, and finally all the other joints and seams. Once all that was dry, light sanding was done, and the first coat of primer was applied.
 
I really,really will be watching NOW.
I got a box today in the mail. Much to my surprise.
I opened the box and what do my eyes behold, an Asteroid Hunter!!!!!!!!!!!!!!
Seems someone :wink: (THANKS!) has wished me a Happy Birthday!
TOO COOL!
Made my day!!!!!!!!!!!!!!!!!!!!!!!!!!!!!!!!!!!!!!!!!!!!!!!!!!!!!!!!!!!!!!!!!!!!!!!!!!!!!!!!!!!!!

Happy Birthday :)

My birthday is coming up soon :p. Already planning on what I am going to launch on that day :p
 
If only Dragon_rider10 was still active. I might need to put a bug in his ear about this one.
 
Nice build.

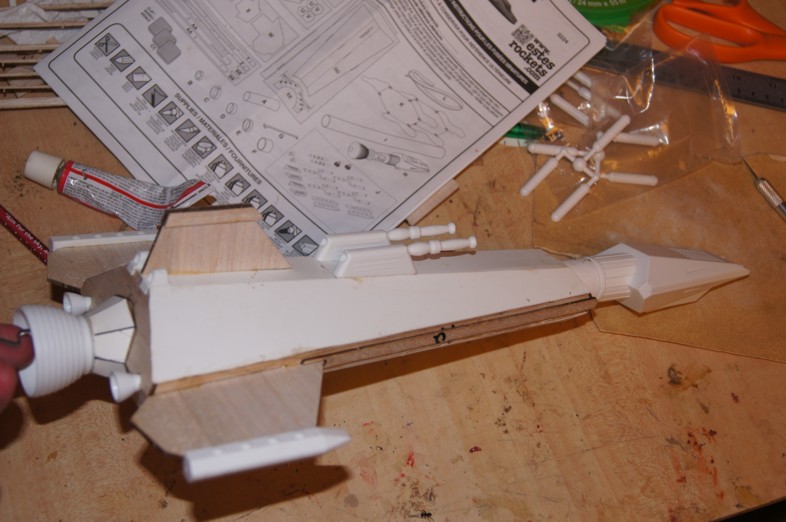
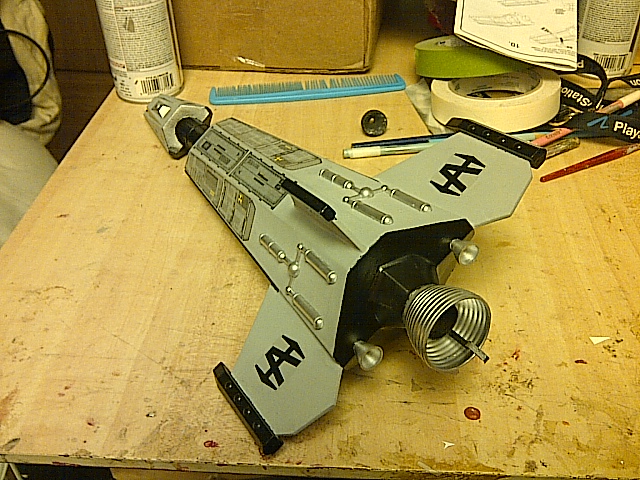
Anyone else thinking this kit screams UPSCALE

Well, back in '95 I did make sort of an upscale of this. Imagine like a 3 or 4x upscale, made with foamboard, with wings, but sans the detailed nose, and that's about what I made.

Flew on an I motor, but with that drag, did not go very high, and the glide was less than desirable (a bit of Dutch Roll, which is understandable).

I'm sure a 'rocket only' version of this made with Readiboard would suffice for a cheap/dirty upscale and only require like a G64 or such. A good 'build weenie' could even likely make a reasonable upscaled detailed nose.
 
Just a quick update. Got what I hope is the last bondo touchup needed and soon will apply what I hope is the last coat of primer. I am going use the primer as one of the paint colors so the only thing I need to do is paint the darker gray and silver. Painting can be done in one day. Hoping to get this done by my birthday (the 4th), will launch it with a C6-3, and a D13 and D24 if they come in time and the weather is good. I also ordered some 18" parachutes. I am going replace the dual 12" recovery with a single 18" chute.
 
Painted_and_Detailed.jpg


I didn't get it done in time for the 4th, but the good news is it is almost done now :)
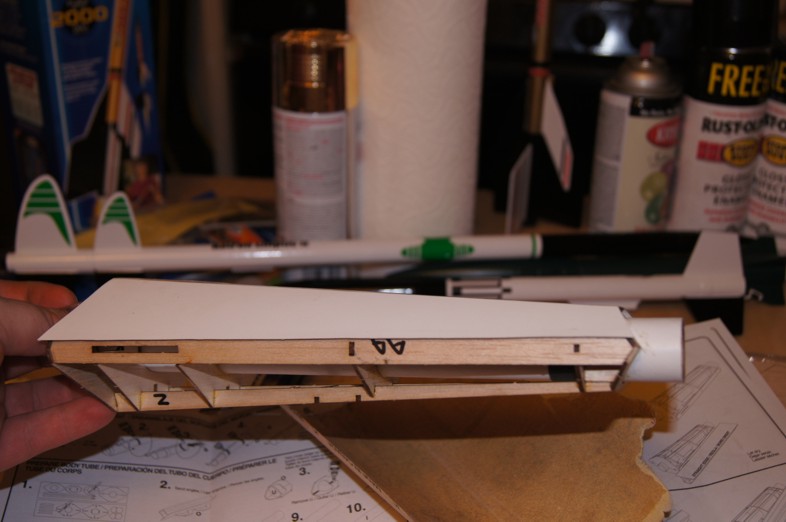
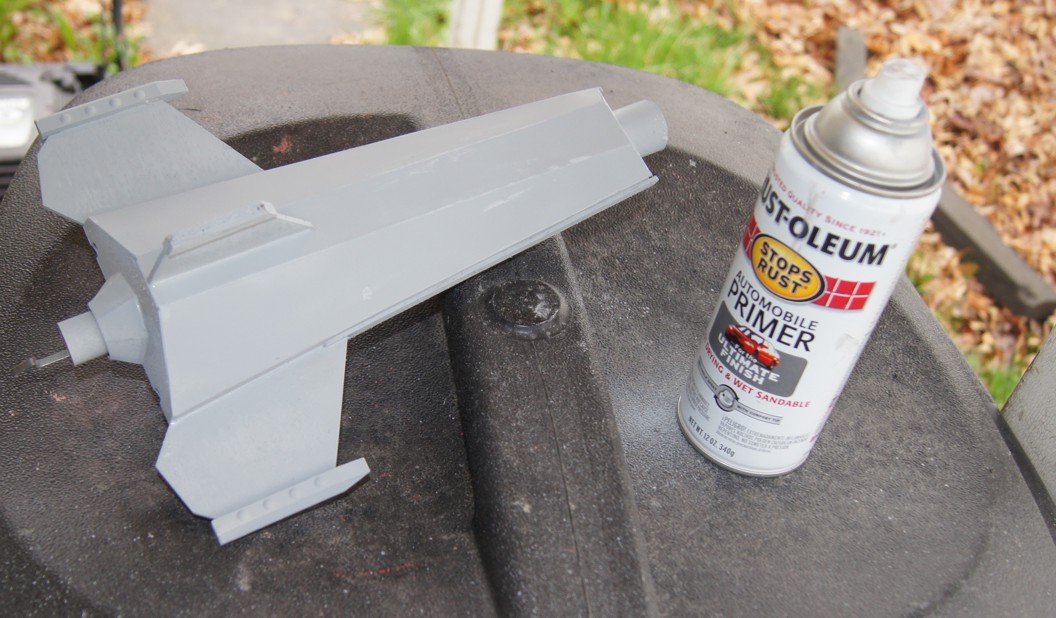
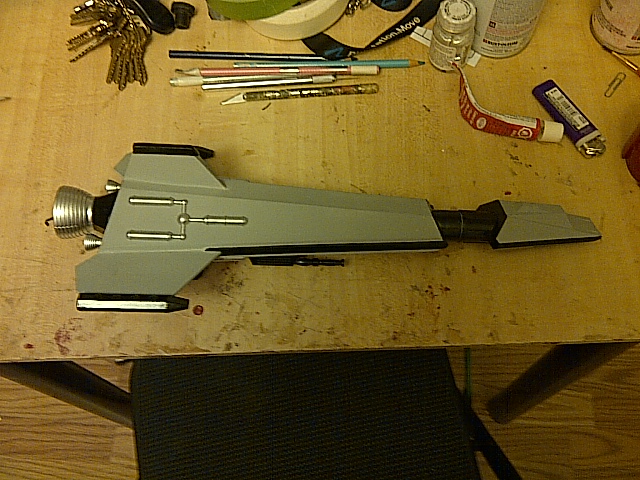
. For the light gray I just used the primer. There was some minor touch ups needed to the last coat of primer, but those were fixed by hand.
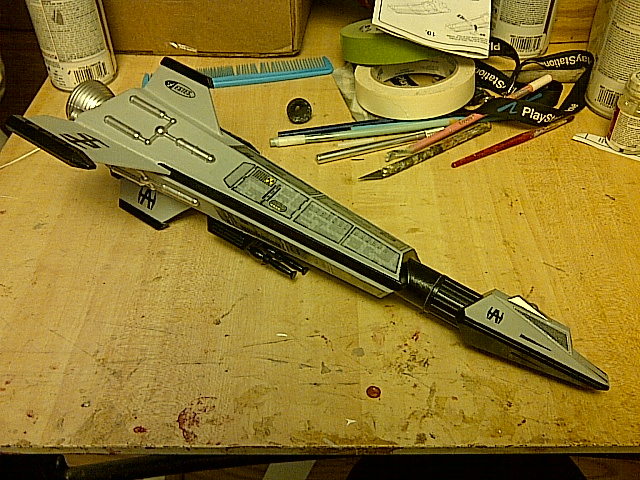
I decided to use black instead of dark gray since the cover art looks more black than gray to me. The detachable guns and the launch lugs were painted black to. The nozzles and tanks were painted with aluminum paint (Looks close enough to silver). Once everything was dry, I used plastic cement to glue on all the details. Now only thing left to do is apply the decals and assemble the recovery system. I ordered some 18" p-chutes and will use one of those instead of the dual 12" chutes.
 
Last edited:
Looks great, cant wait to build mine. Did you fill/seal the balsa or just spray primer and sand until smooth?
 
I use Rust Oleum light gray automotive primer. Only takes a few coats to get all the grain filled, and the stuff is very easy to sand. Make sure its the Light Gray, they also sell it in other colors, but does not work as well. Once I discovered this stuff many moons ago, I been using it exclusively.
 
Finished_1.jpg

After painting some details on the nosecone, it was time to apply the decals. Most of the decals matched the cover art. The cover shows the thin long decals that go on the outer edge panels are silver. They are not. They are a dark color that can not be seen because I painted the panels black. Also, there is no white backing with the Estes logos.

Finished_2.jpg
 
Back
Top