38mm LOC Onyx Build

The Rocketry Forum

Help Support The Rocketry Forum:

This site may earn a commission from merchant affiliate links, including eBay, Amazon, and others.

Nathan

Joined
Apr 19, 2012
Messages
2,230
Reaction score
755
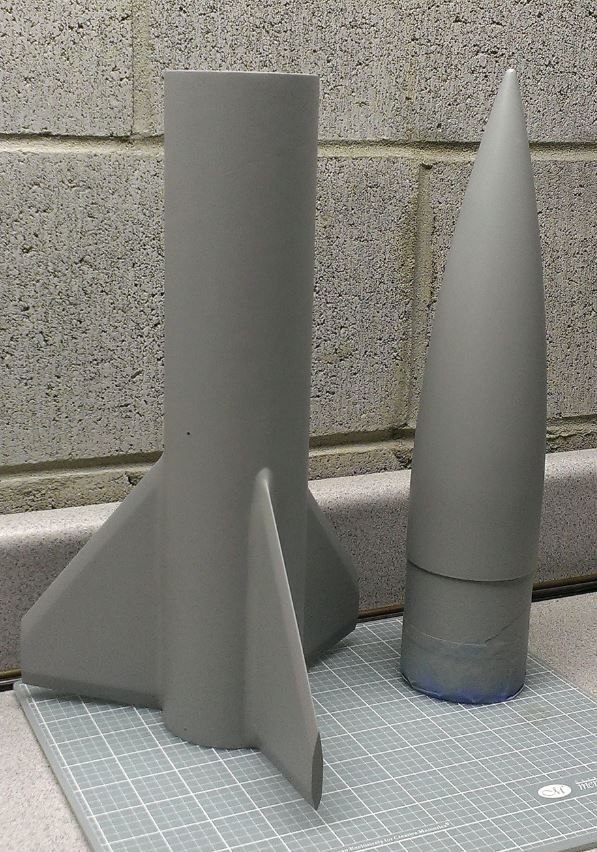
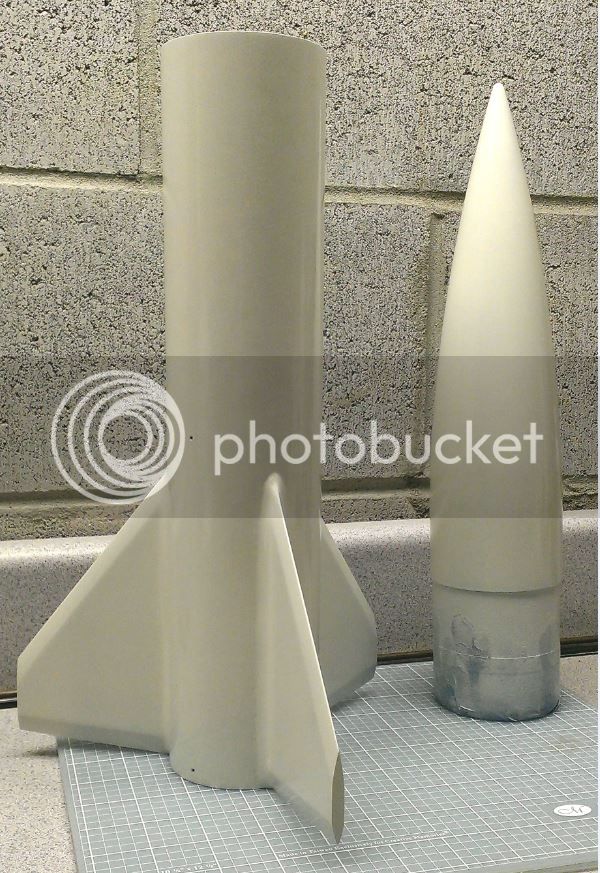
I started building a modified LOC Onyx about a week ago. It will have a 38mm motor mount, 1/4" TTW fins, and 8 oz nose weight. The only parts that I am using from the kit are the airframe tube and the nose cone. Here are some pics of what I've done so far.

I put two dowels through the tip of the nose cone to anchor the nose weight. This pic is after sanding down the dowels and smoothing it out with Bondo.
onyxbuild1.jpg


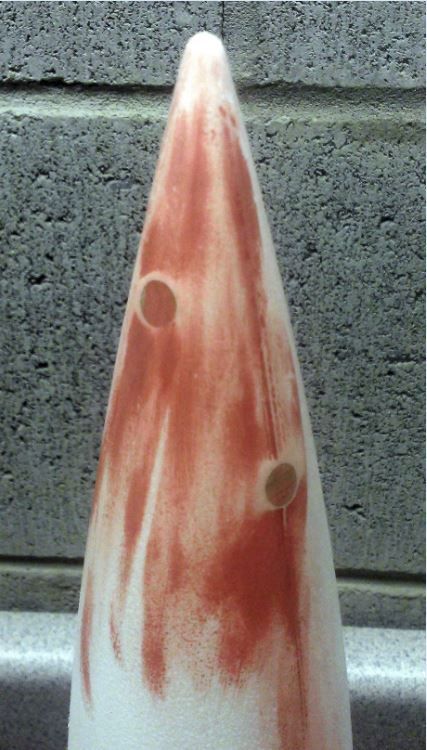
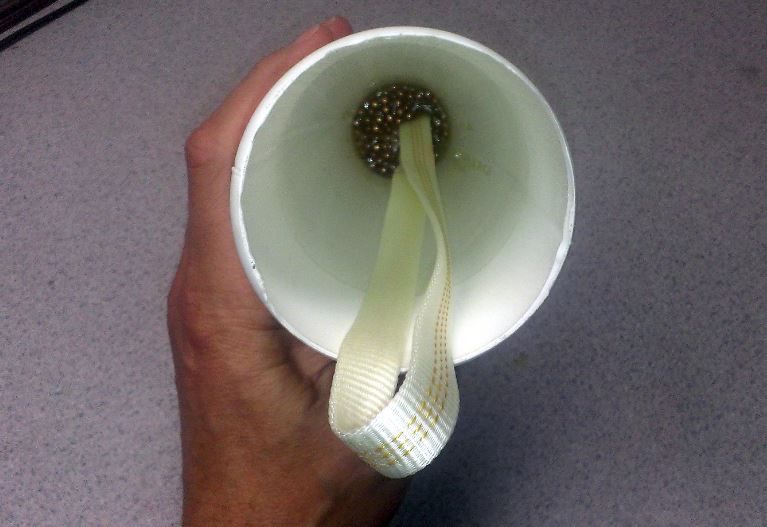
I cut the bottom off of the nose cone so that I could pour in the BBs and epoxy and also because with the big motor mount I need that extra space for the recovery system. I tied a loop of nylon strap around one of the dowels before pouring in the epoxy and BBs.
onyxbuild2.jpg


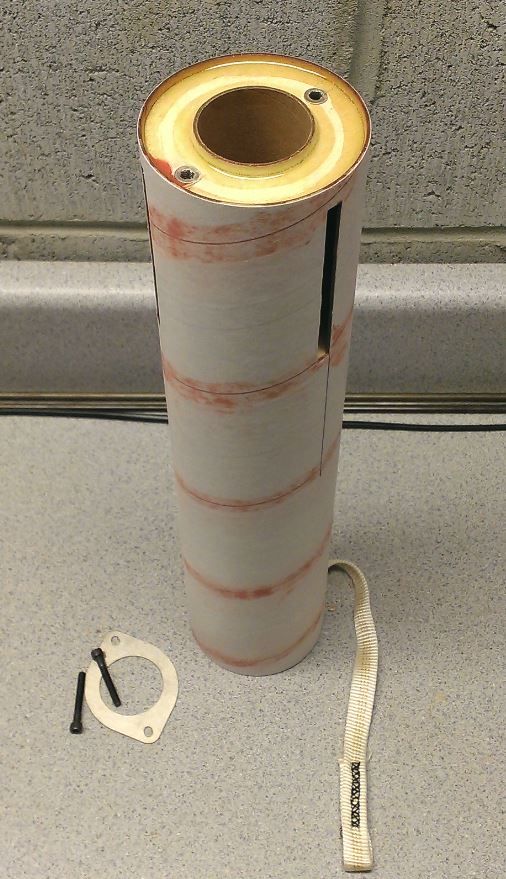
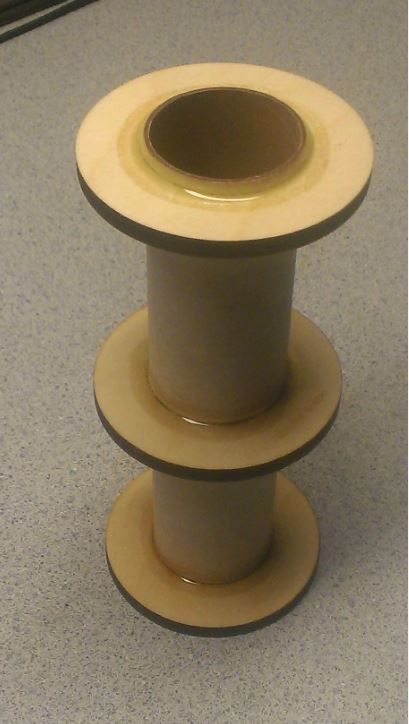
Here is the 38mm motor mount with 3 centering rings. The motor mount is the same height as a 2 grain CTI case.
onyxbuild3.jpg


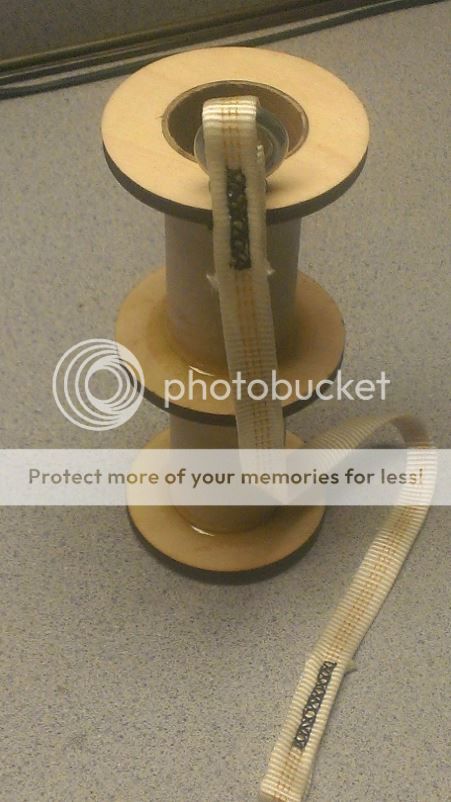
I'm using an eyebolt in the upper CR as a shock cord anchor. But since my hand doesn't fit down the 3" tube I permanently attached a short nylon strap to the eyebolt, which I will cover with a Nomex sheath. My wife did a nice job sewing the loops on the nylon strap.
onyxbuild4.jpg


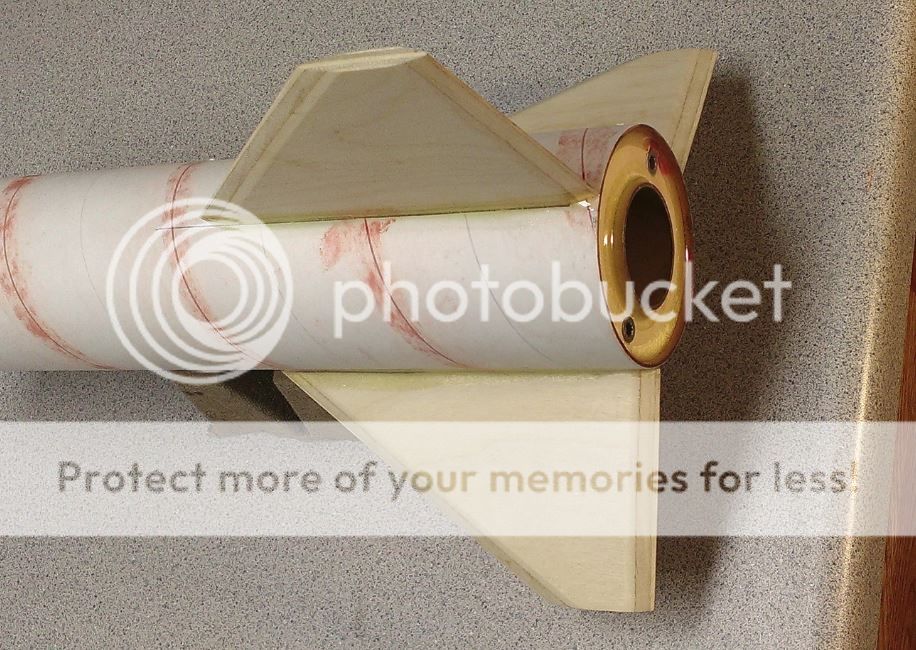
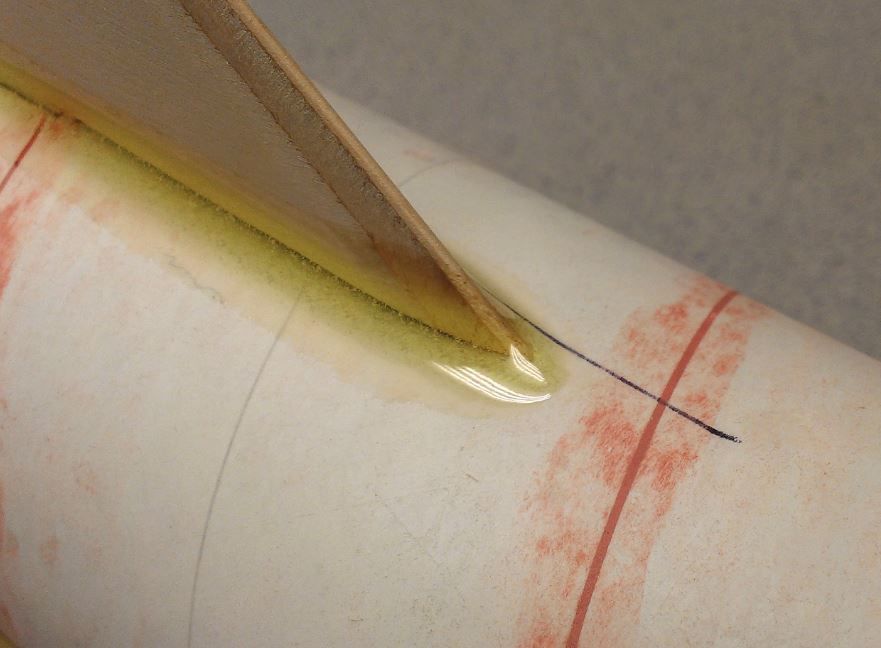
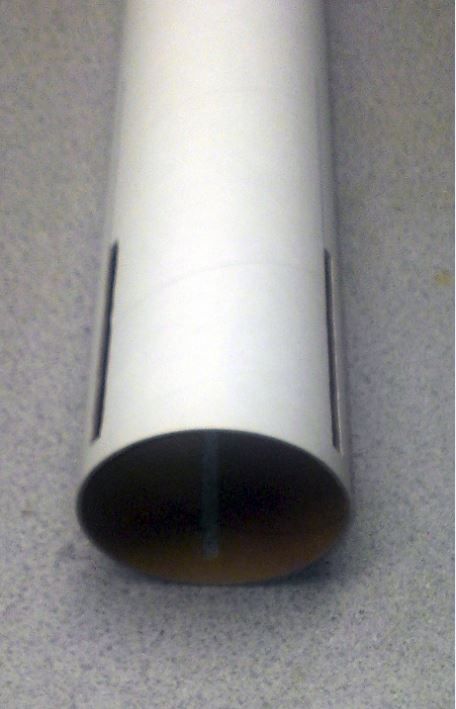
Cut slots for the TTW fins.
onyxbuild5.jpg


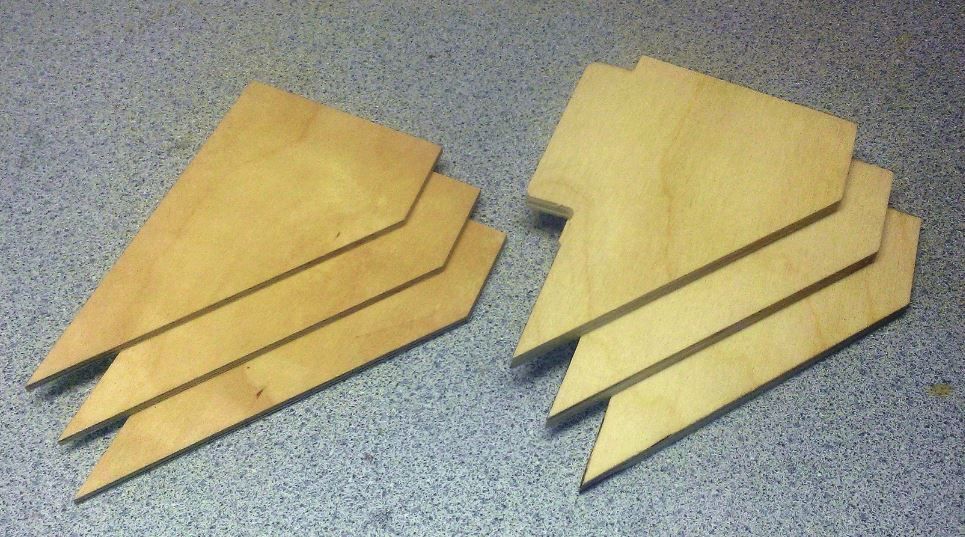
On the left are the 1/8" surface mount fins that came with the kit. On the right are the new 1/4" fins with TTW tabs, which I cut out today. They are the same shape as the original fins.
onyxbuild6.jpg


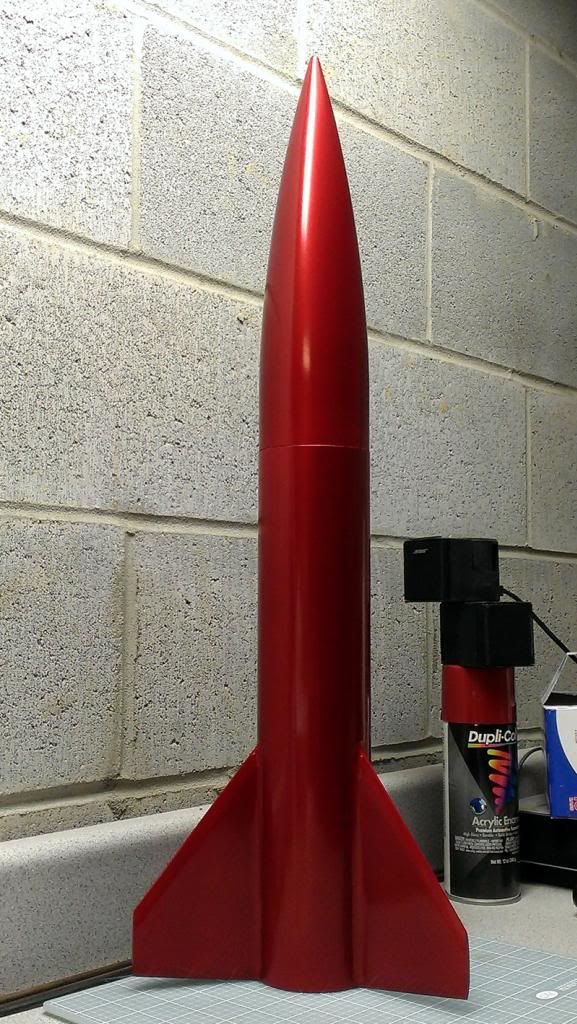
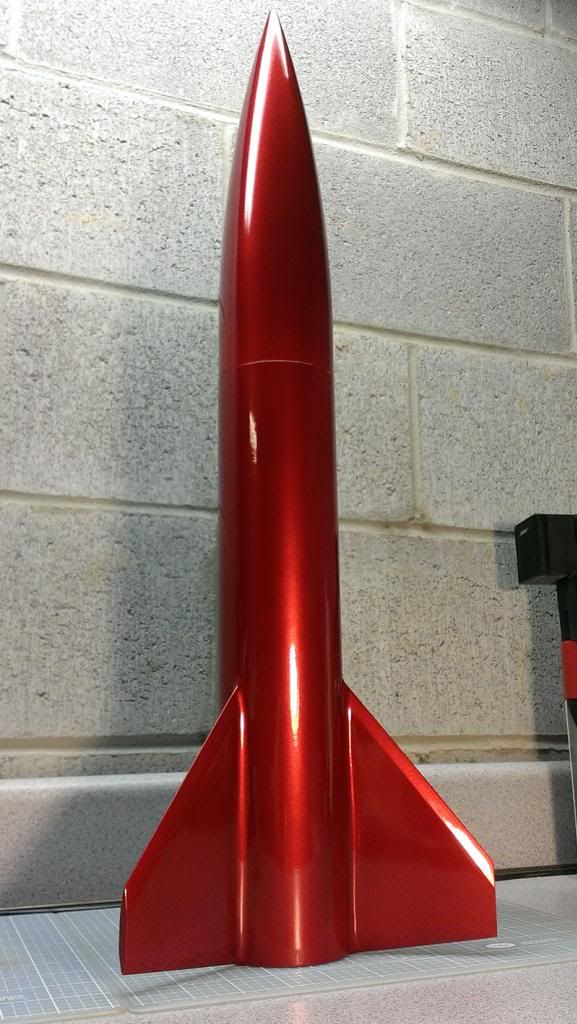
That's all I've completed so far. I'll update this thread as the build progresses.
 
Last edited:
I'll be watching.Looking good so far.This should really scoot.
 
Looks like a really good build.

The only thing I would suggest is since you made a permanent attachment for the shock cord, that a loop of Kevlar epoxied to the MMT might have been just as efficient and much lighter then the steel eyebolt with the nuts and washers. Just thinking of over all weight and it might have allowed a little less nose cone weight.

This looks like a great build. I rebuilt my 4" BD Thug with a 38mm MMT. Love those short stubbys with big motors!
 
...The only thing I would suggest is since you made a permanent attachment for the shock cord, that a loop of Kevlar epoxied to the MMT might have been just as efficient and much lighter then the steel eyebolt with the nuts and washers. Just thinking of over all weight and it might have allowed a little less nose cone weight...

Yeah you're right that would have been better but I'm not going to change it now. Actually that eyebolt is positioned only about 2" aft of the CG so getting rid of it would have a small affect on the amount of nose weight required. I used enough nose weight to get 1 cal of stability. With 8 oz of nose weight stability is 1.01 cal with a H400 motor according to OpenRocket.

This has been done before, I got the idea here: https://archive.rocketreviews.com/reviews/all/mod_loc_onyx.shtml
 
Nathan,

Are you really considering an H400 in this?
Make sure Im there!
 
Nathan,

Are you really considering an H400 in this?
Make sure Im there!

This will be finished in time for the February launch, first flight will be with a 1 grain motor like maybe a G115. After that I'll fly on 2 grain motors if we ever get calm days at Higgs farm. It sims at 3400 ft and 40 g's on a H400. I also may try a combo parachute/streamer recovery system; 24" chute with a 10 foot mylar streamer for visibility.


1 word,
J1000.
:)

That would be cool but I'm only NAR level 1. Just for fun I checked anyway and a Loki J1000 is 1" shorter than the Onyx. It would fit!
 
Bummer, you should have tried to put an altimeter bay in there.


Also, I would like to point out:
You are a Level 1.
The Loki J1K requires a L2.

Tell me a Loki J1000 in an Onyx would not be one heck of a cert flight.

Just saying...
:)
 
Have you considered this? https://www.apogeerockets.com/downloads/Newsletter154.pdf and part 2. This is definitely applicable to the Onyx. You can probably reduce your nose weight considerably.

Interesting. I've read lots of the Apogee newsletters but I hadn't seen that one. I figured that base drag might make the Onyx more stable than stability calculated by OpenRocket. I came across the issue of base drag before with my Minie-Magg, which according to OpenRocket would have negative stability without adding nose weight because OpenRocket doesn't take base drag into account.

In any case, at this point my Onyx has 8 oz of BBs and epoxy in the nose that aren't coming out.
 
Over the past two days I filled tube spirals with Bondo, installed the threaded inserts for the motor retainer, and installed the motor mount.

onyxbuild8.jpg
 
Fillets complete. I've seen some complex and difficult looking fillet processes in some other build threads. All I do is drizzle 15 min epoxy in the joint and then smooth it with my finger tip. I wear a glove and wet my finger with rubbing alcohol which helps make it smooth. Even though it's called 15 min epoxy I've found that you really need to finish working with it within just a few minutes so that it flows and levels evenly before it starts getting tacky. That means getting it right the first time.

onyxbuild10.jpg


onyxbuild11.jpg


Now the fun part starts; finishing!
 
Finally had some time to get back to working on my Onyx. Here it is after 3 coats of filler primer.

onyxbuild12.jpg
 
The finish on this Onyx will be metallic red lacquer with polished enamel clear coat. I was originally going to do a 3 color paint job but I got lazy. I'll do a 3 or 4 color paint job on the 7 foot scratch build I'm doing after this. Anyway the red lacquer needs a white base coat. Here it is after spraying a couple of coats of white lacquer today.

onyxbuild13.jpg
 
Nathan,
I've seen a few of your previous threads on painting/finishing rockets. The Porsche DX3 is stunning! I'm trying to 'up my game' in the rocket painting area and I'm trying to follow many of your processes. I couldn't find this in your previous posts (sorry if I missed it), do you dry or wet sand your primer coats, and with what grit?
 
Primer doesn't need to be wet sanded. I use Duplicolor filler primer and sand it with dry 400 grit. I sand the final primer coat with 600 grit.

I only wet sand coats that I'm going to polish. For wet sanding I always use 2000 grit. For this Onyx I will only be wet sanding and polishing the final enamel clear coat. When the color coat is enamel (like on the Porsche DX3) I wet sand and and polish the final enamel color coat before spraying the clear coat. But lacquer goes on so smooth that it doesn't need to be sanded prior to clear coat. The down side of lacquer is that you always need to use clear coat if you want a high gloss finish because it's not as glossy as enamel.
 
I actually prefer to wet sand. I find it easier to clean up and like keeping the dust down. Is there any reason you can't (or shouldn't) wet sand the primer if the label allows for wet sanding?

Thanks for the clarification on enamel vs lacquer paints. After filler/primer I am going to being applying the color with my airbrush using Createx 'Wicked Colors' which I believe are acrylic. I've been pouring over the Createx website looking for anything about sanding over their Wicked Color. I can't find anything, but my impression after the first rocket I airbrushed is not to sand the color coat. I would then enamel clear coat following the multiple coats with sanding, polishing and finally waxing as you shared on your DX3. Does that sound reasonable? I'm using a couple paper towel tubes as test pieces for this process before I start on my current project, a 2.6" DX3. Thanks again for the guidance!
 
I guess you could wet sand primer but I've never tried it. Definitely a good idea to test your paint process before you use it on your rocket. But you should really use a piece of scrap body tube rather than paper towel tube if you want to see how it's going to turn out.

I've never tried Createx acrylic paint but others on the forum have used it with good results. If you are concerned about sanding the Createx paint then what you described is the best solution. Follow it with several coats of clear enamel and then wet sand and polish the clear enamel. Be sure to wait several days before sanding because enamel takes a long time to cure.
 
Sprayed many coats of metallic red lacquer today. Next step: clear coat

onyxbuild14.jpg
 
Sprayed 3 coats of clear enamel, 10 minutes apart. Next step: wet sanding.

onyxbuild15.jpg
 
You're making that rocket way too pretty, Nathan.

Early on I did that, too. Discovered I didn't want to fly them. Now I make them just "pretty enough" to fly.
 
I fly all my rockets. The more I fly them, the more beat up they get. That just gives me an excuse to build more new ones.
 
Back
Top