You are using an out of date browser. It may not display this or other websites correctly.
You should upgrade or use an alternative browser.
You should upgrade or use an alternative browser.
Playin' With Fire 2.0 - "Flight"
- Thread starter Aksrockets
- Start date


Help Support The Rocketry Forum:
This site may earn a commission from merchant affiliate
links, including eBay, Amazon, and others.
mannyskid
Well-Known Member
- Joined
- Feb 2, 2011
- Messages
- 961
- Reaction score
- 6
How did the motor test go today?
Motor test went well. The forecast for QCRS was looking pretty bad, so I decided to go to the Tripoli Minnesota launch since it's closer and it looked like less chance of poor weather. There was a pretty low ceiling and I didn't care too much about actually flying it so I decided to static test it.
The motor worked, but there was a slight hiccup near the end of the burn. A guy at the launch set up his GoPro near this and got some great video, when I get it I'll make a post in the research section about the test and what I plan to change for Alex's flight.
Aksrockets
Now with 8% more aluminum
- Joined
- Apr 1, 2011
- Messages
- 3,505
- Reaction score
- 14
Huh. I made a post last night and woke up to find that it didn't exist anymore. WTF is up with this forum.
Anyway. Abridged version: I made the nosecone coupler last night. I needed the exact angle of the nosecone, so what better mandrel then the nosecone itself! I cut out pieces to wrap around the NC evenly out of 10oz and 6oz glass.
I wrapped the Nosecone in mylar and started mixing epoxy. See! Its just like rolling a tube. I'll consider making an entire nosecone this way in future builds because of how easy it was to do.
It's also worth noting that I staggered the start/stop point of each layer to prevent any seam from weakening the coupler.
Here it is, peel ply and all. 8 layers of 6oz glass and 2 of 10oz glass. Aeropoxy used throughout.
Pulled it off the next morning and was pretty happy with the result.
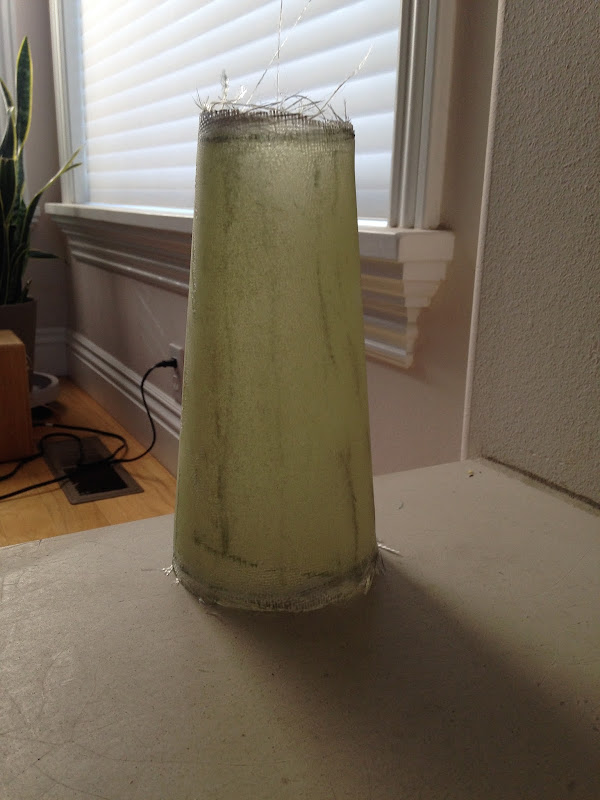
Its a little ugly, but feels solid.
My calipers read .1in thick. It's a little heavy duty for the application, but meh. I was pulling peices of shattered FWFG coupler out of my last rocket and I don't want to relive that experience. Better an inch too thick then a millimeter too thin.
Alex
Anyway. Abridged version: I made the nosecone coupler last night. I needed the exact angle of the nosecone, so what better mandrel then the nosecone itself! I cut out pieces to wrap around the NC evenly out of 10oz and 6oz glass.
I wrapped the Nosecone in mylar and started mixing epoxy. See! Its just like rolling a tube. I'll consider making an entire nosecone this way in future builds because of how easy it was to do.
It's also worth noting that I staggered the start/stop point of each layer to prevent any seam from weakening the coupler.
Here it is, peel ply and all. 8 layers of 6oz glass and 2 of 10oz glass. Aeropoxy used throughout.
Pulled it off the next morning and was pretty happy with the result.
Its a little ugly, but feels solid.
My calipers read .1in thick. It's a little heavy duty for the application, but meh. I was pulling peices of shattered FWFG coupler out of my last rocket and I don't want to relive that experience. Better an inch too thick then a millimeter too thin.
Alex
Aksrockets
Now with 8% more aluminum
- Joined
- Apr 1, 2011
- Messages
- 3,505
- Reaction score
- 14
Pardon my ignorance, but, uh, how does the coupler go into the cone if it was wrapped around the outside of the cone?
Nate
It has the same angle as the inside of the cone. Once the shoulder of the NC is trimmed off it'll fit just fine.
Alex
nute
Well-Known Member
- Joined
- Jun 30, 2013
- Messages
- 2,298
- Reaction score
- 5
It has the same angle as the inside of the cone. Once the shoulder of the NC is trimmed off it'll fit just fine.
Alex
Oh, I get it now. Thanks! So it'll slide in, just not as far up as where it was wrapped, right?
Aksrockets
Now with 8% more aluminum
- Joined
- Apr 1, 2011
- Messages
- 3,505
- Reaction score
- 14
I trimmed the coupler and NC. Pretty happy with how well they fit.


Alex
Alex
Aksrockets
Now with 8% more aluminum
- Joined
- Apr 1, 2011
- Messages
- 3,505
- Reaction score
- 14
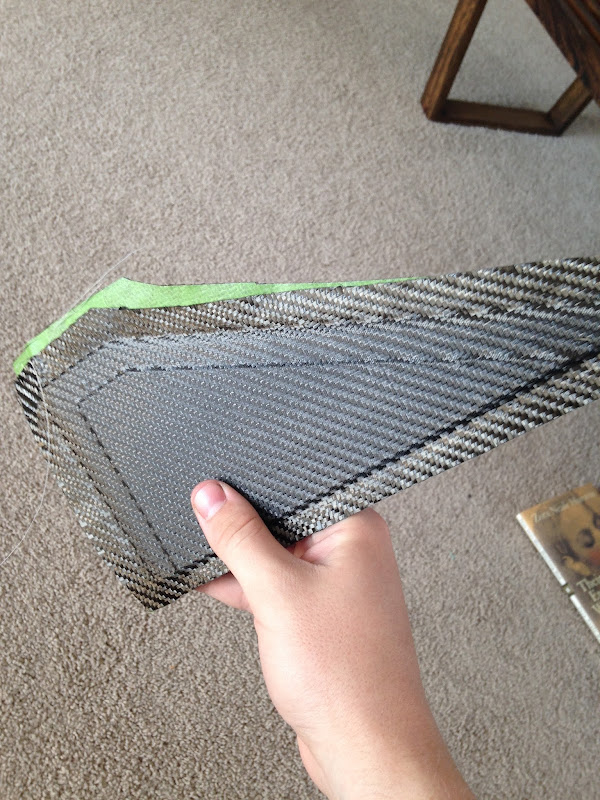
Let's talk fins.
This is what I call a "compound fin". I don't know what the real word for it is, or if "compound fin" really means something else. It's just what I'm calling it.
The idea is, you use smaller fins to create one bigger one, which allows you to get complex fin profiles without the need for expensive machinery or tedious sanding. I've experimented with this in the past with good results, but this is my first time using it in a rocket.
In this case I'm using the 1/16 carbon core and two smaller panels glued to the side to create a steeper bevel then I would dare making using traditional methods.
The smaller pieces are made with .032in unidirectional carbon.
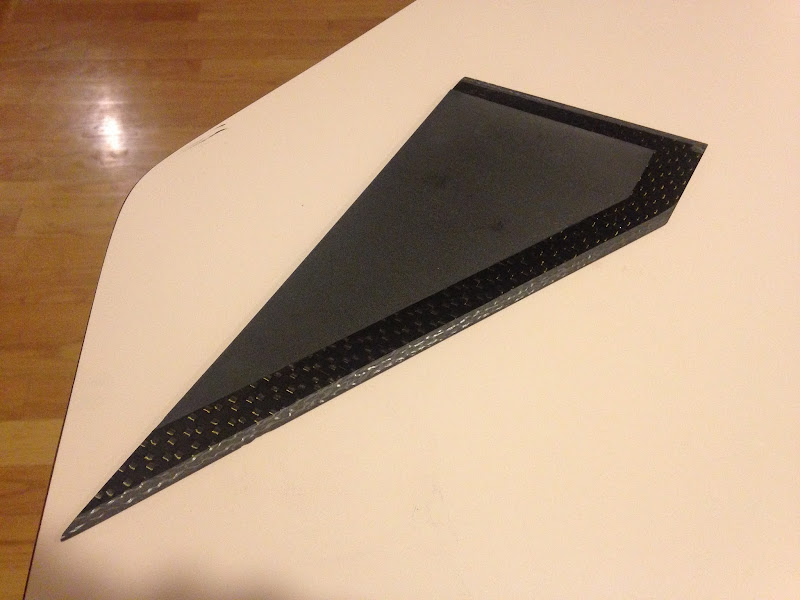
It sucked making 8. They were too thin to cut using a jigsaw so I was forced to use a dremel and cutoff tool.
Next up: I make the jig to align these all perfectly.
Alex
This is what I call a "compound fin". I don't know what the real word for it is, or if "compound fin" really means something else. It's just what I'm calling it.
The idea is, you use smaller fins to create one bigger one, which allows you to get complex fin profiles without the need for expensive machinery or tedious sanding. I've experimented with this in the past with good results, but this is my first time using it in a rocket.
In this case I'm using the 1/16 carbon core and two smaller panels glued to the side to create a steeper bevel then I would dare making using traditional methods.
The smaller pieces are made with .032in unidirectional carbon.
It sucked making 8. They were too thin to cut using a jigsaw so I was forced to use a dremel and cutoff tool.
Next up: I make the jig to align these all perfectly.
Alex
Houdeani01
Well-Known Member
- Joined
- Jun 23, 2015
- Messages
- 63
- Reaction score
- 1
Motor test went well. The forecast for QCRS was looking pretty bad, so I decided to go to the Tripoli Minnesota launch since it's closer and it looked like less chance of poor weather. There was a pretty low ceiling and I didn't care too much about actually flying it so I decided to static test it.
The motor worked, but there was a slight hiccup near the end of the burn. A guy at the launch set up his GoPro near this and got some great video, when I get it I'll make a post in the research section about the test and what I plan to change for Alex's flight.
I was there for that test and it was impressive and after reading this thread I would love to see the motor turned around and in the rocket your building. Great Work!
Okay I'm curious, what is the purpose to the sandwiched fins?
Aksrockets
Now with 8% more aluminum
- Joined
- Apr 1, 2011
- Messages
- 3,505
- Reaction score
- 14
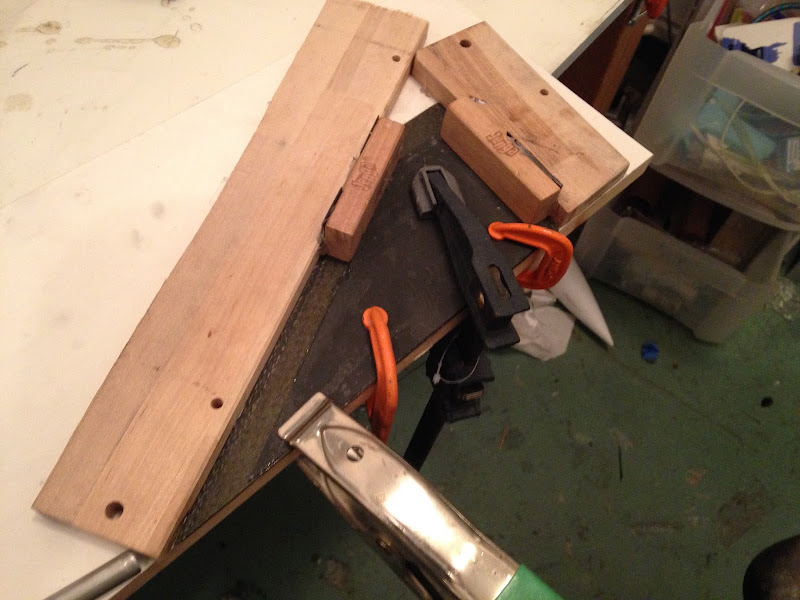
And now for the most ghetto fin panel alignment jig you've seen today. Yes. That's scrap wood, jenga blocks and hot glue.
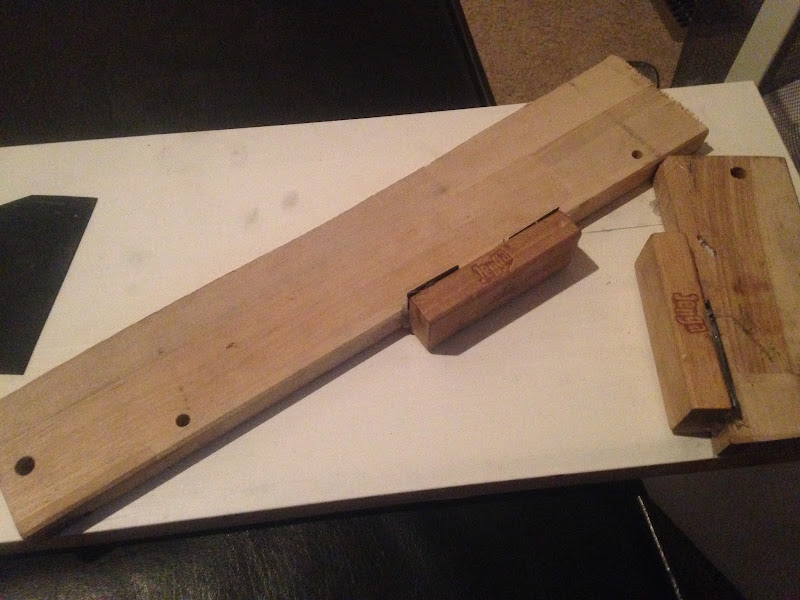
The fin core slips into the two longer pieces. The smaller fin panel rests between the Jenga blocks. Hey, it works and all will end up exactly the same.
Here is the first side done. I used structural Aeropoxy.
Alex
The fin core slips into the two longer pieces. The smaller fin panel rests between the Jenga blocks. Hey, it works and all will end up exactly the same.
Here is the first side done. I used structural Aeropoxy.
Alex
Aksrockets
Now with 8% more aluminum
- Joined
- Apr 1, 2011
- Messages
- 3,505
- Reaction score
- 14
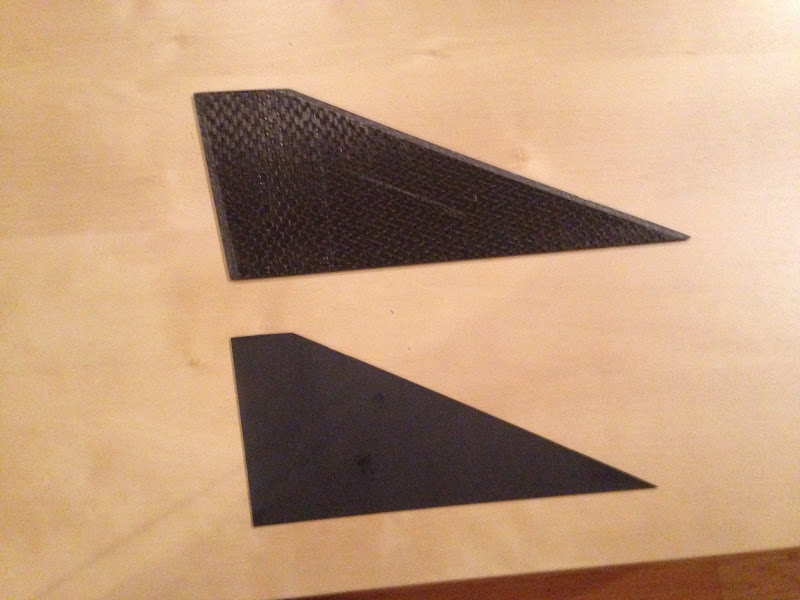
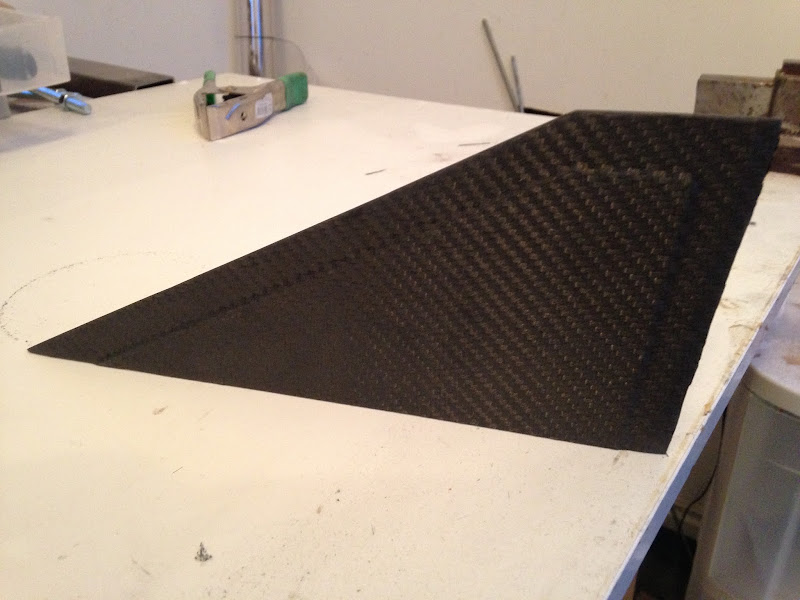
I just finished all 8 sides. Because of the jig they all came out nearly identical. Here's one.
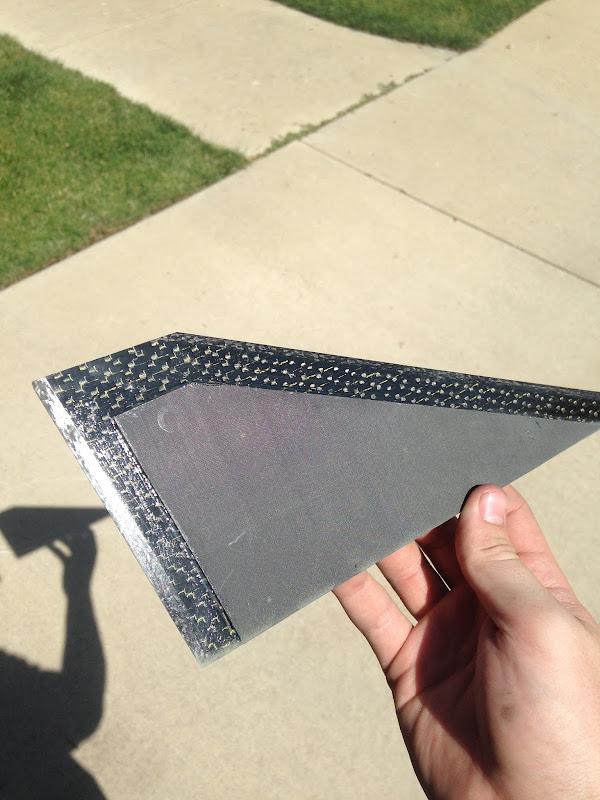
The next step is to laminate 2 layers of CF over each side.
That will probably happen tonight.
Alex
The next step is to laminate 2 layers of CF over each side.
That will probably happen tonight.
Alex
markkoelsch
Well-Known Member
- Joined
- Mar 18, 2009
- Messages
- 4,362
- Reaction score
- 160
Alex, shouldn't you do the bevel before the laminations?
Aksrockets
Now with 8% more aluminum
- Joined
- Apr 1, 2011
- Messages
- 3,505
- Reaction score
- 14
Alex, shouldn't you do the bevel before the laminations?
Not quite sure what you're asking here. The filler between the core of the fin and the panel? I was thinking about that and I decided against it at this stage in the building. My reason is I want to avoid the large section of material that does nothing more then add shape to the fin. I'll be doing everything with that step there. The step will get less and less defined with the layers of T2T. The step will be filled completely when I apply the ablative. This way the ablative doubles as my filler instead of sitting inside the laminate, basically doing nothing.
I hope that clarifies things, I know I'm not the best at explaining.
The "core" was beveled on the last page of the thread.
Alex
Aksrockets
Now with 8% more aluminum
- Joined
- Apr 1, 2011
- Messages
- 3,505
- Reaction score
- 14
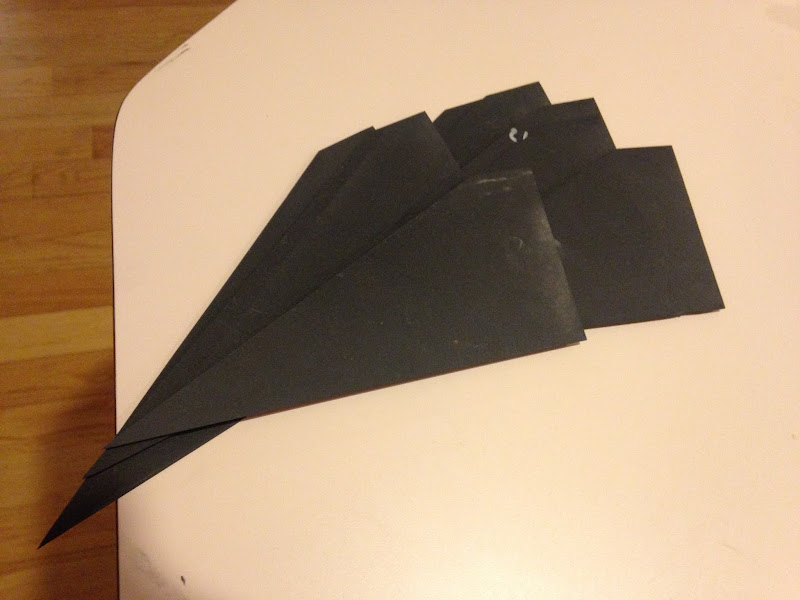
Real productive day today. I finished gluing the fin panels to the cores and added a layer of carbon fiber over the completed cores.
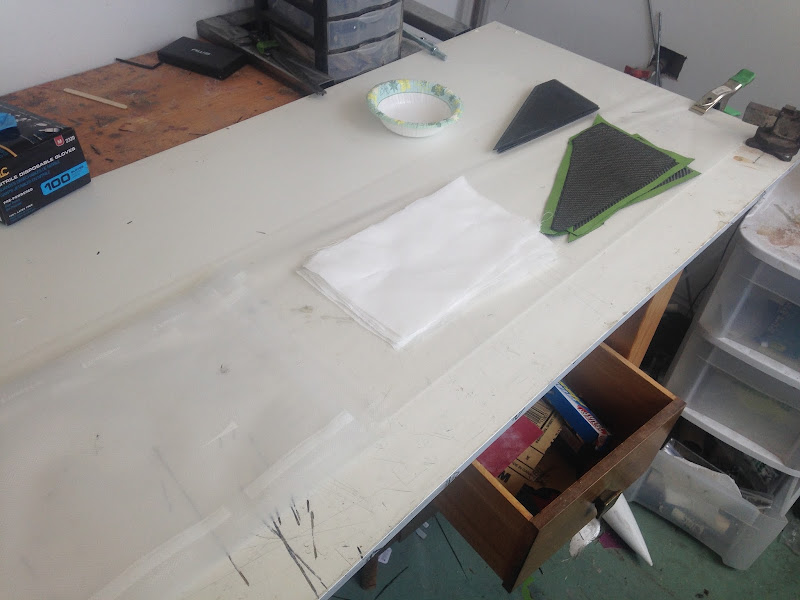
All ready to go.
I use a foodsaver for vacuum bagging the small stuff. For small 2D (or simple 3D) parts like fins it really can't get much easier. No vacuum fittings, no noisy vacuums, no leaks. It takes maybe 60 seconds for me to get a part in the bag and sealed.

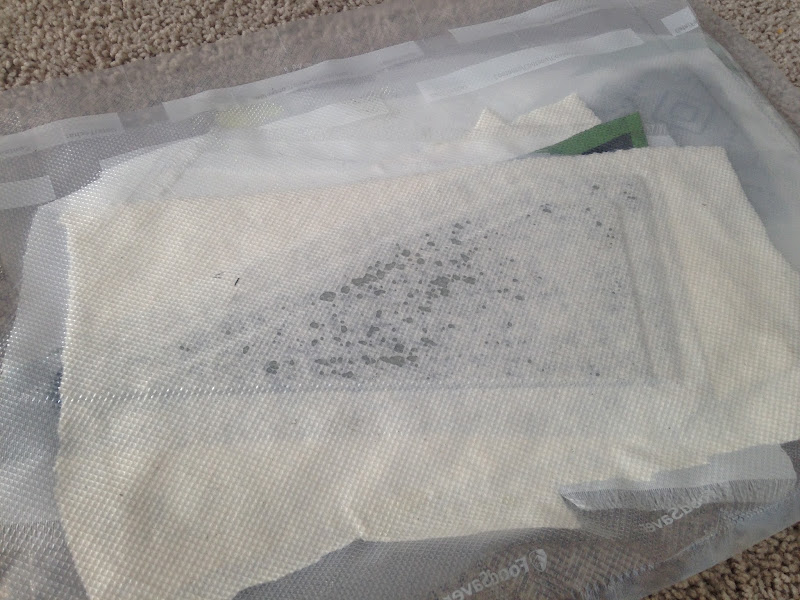
Pulled them out of the bag. I'm pretty happy with how they turned out. The carbon pulled down tight into those corners and around the bevel.
Trimmed using a dremel and the belt sander.
Attachment starts early tomorrow morning.
Alex
All ready to go.
I use a foodsaver for vacuum bagging the small stuff. For small 2D (or simple 3D) parts like fins it really can't get much easier. No vacuum fittings, no noisy vacuums, no leaks. It takes maybe 60 seconds for me to get a part in the bag and sealed.
Pulled them out of the bag. I'm pretty happy with how they turned out. The carbon pulled down tight into those corners and around the bevel.
Trimmed using a dremel and the belt sander.
Attachment starts early tomorrow morning.
Alex
markkoelsch
Well-Known Member
- Joined
- Mar 18, 2009
- Messages
- 4,362
- Reaction score
- 160
Alex, what I am saying is that you have the main core fun, and then attach the smaller fin panel. There is no bevel between them- only an abrupt 90 degree surface. Stinks for aerodynamics, and a very short 90 degree bend for your carbon laminate.
What I would have done is to attach your smaller fin panels as you did. Mix up epoxy and some amendment, and created a bevel between the fin edge and the panel. Once set, sand smooth and then put the fabric over that. This creates. Good bevel, and optimizes the strength of the fabric laminate.
What I would have done is to attach your smaller fin panels as you did. Mix up epoxy and some amendment, and created a bevel between the fin edge and the panel. Once set, sand smooth and then put the fabric over that. This creates. Good bevel, and optimizes the strength of the fabric laminate.
patelldp
Well-Known Member
- Joined
- Jan 23, 2009
- Messages
- 5,647
- Reaction score
- 101
Alex, what I am saying is that you have the main core fun, and then attach the smaller fin panel. There is no bevel between them- only an abrupt 90 degree surface. Stinks for aerodynamics, and a very short 90 degree bend for your carbon laminate.
What I would have done is to attach your smaller fin panels as you did. Mix up epoxy and some amendment, and created a bevel between the fin edge and the panel. Once set, sand smooth and then put the fabric over that. This creates. Good bevel, and optimizes the strength of the fabric laminate.
What he said.
Aksrockets
Now with 8% more aluminum
- Joined
- Apr 1, 2011
- Messages
- 3,505
- Reaction score
- 14
It's about time I update this. The fincan is in final stages of construction. I just need to epoxy seal and do ablative coats. It was filleted with 3/4in JB weld. 3 layers of T2T. My vacuum system wasn't working so well so I couldnt use any compression. I just took extra steps to make sure the carbon conformed well and it came out perfectly.
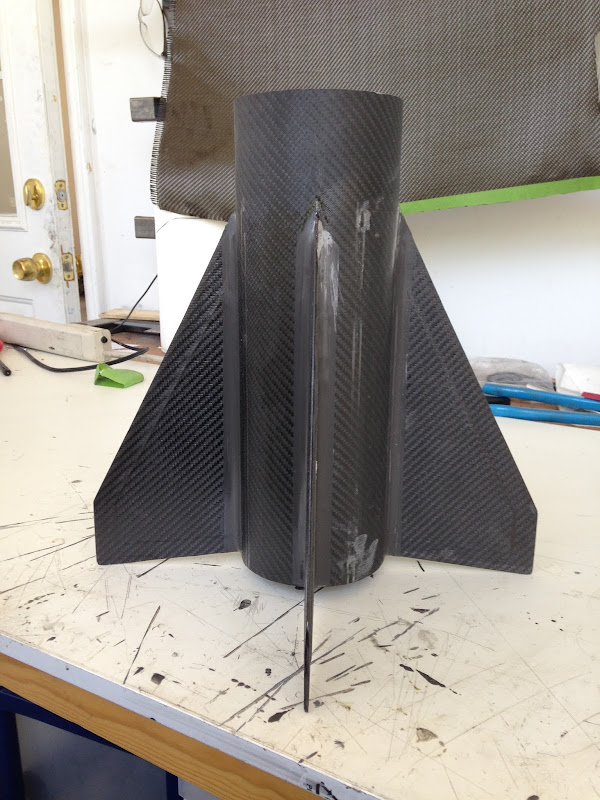
Here it is, pre-T2T.
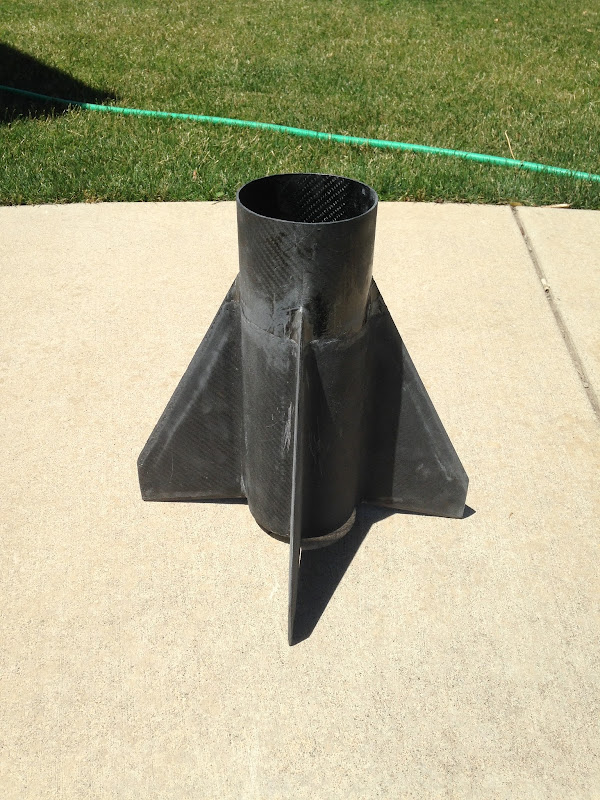
T2T completed. It's a little dusty because I've been touching it up with sandpaper and a file.
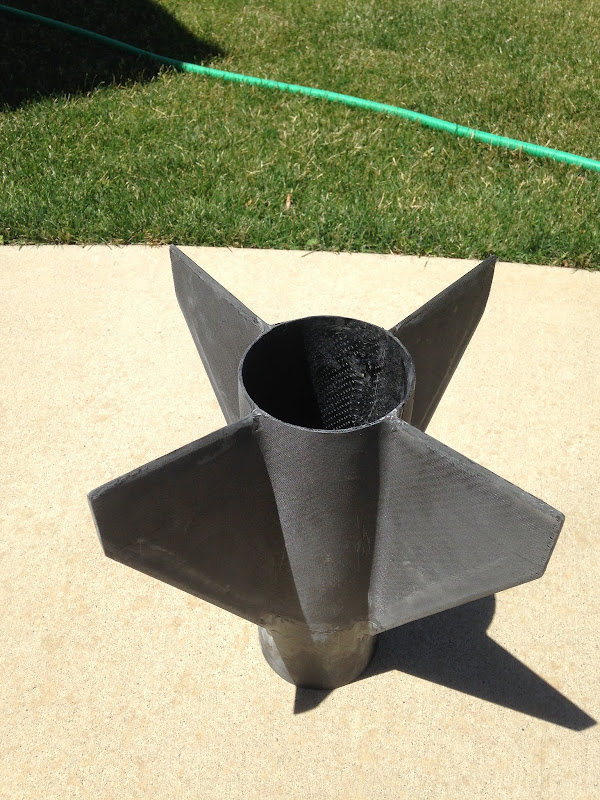
Onto ablatives!
Alex
Here it is, pre-T2T.
T2T completed. It's a little dusty because I've been touching it up with sandpaper and a file.
Onto ablatives!
Alex
Aksrockets
Now with 8% more aluminum
- Joined
- Apr 1, 2011
- Messages
- 3,505
- Reaction score
- 14
I did a little work on the AV bay today. Although this is a 4in rocket, space is still limited. I wasn't able to fit my RRC3 in, so I'll have to use my RRC2+. No big deal, I've still got a stratologger in there.
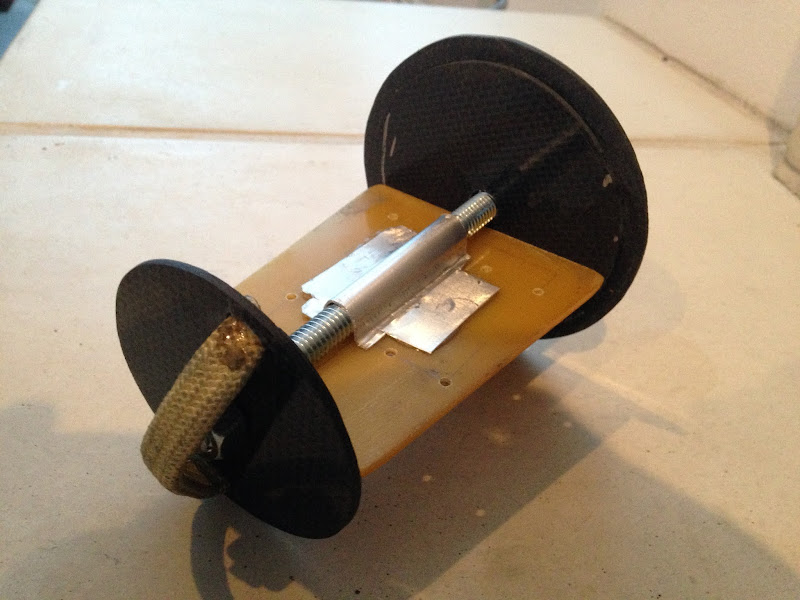
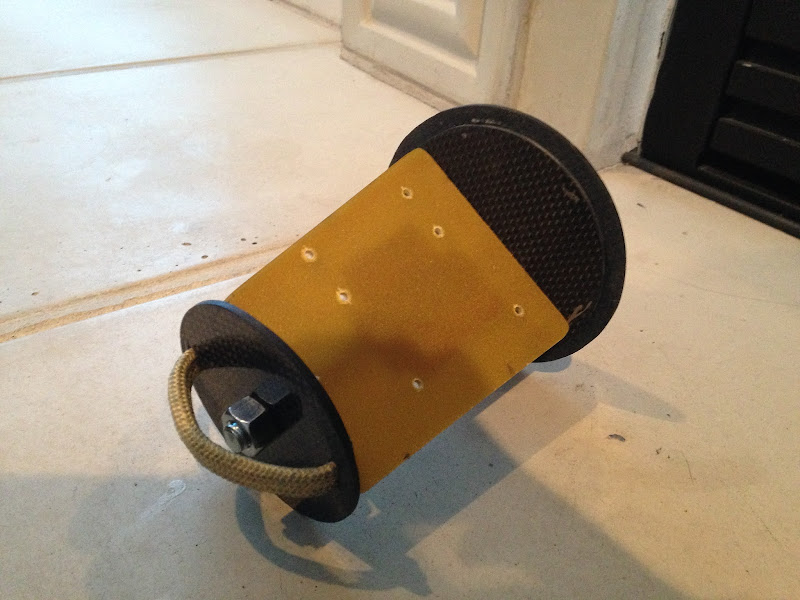
Alex
Alex
Aksrockets
Now with 8% more aluminum
- Joined
- Apr 1, 2011
- Messages
- 3,505
- Reaction score
- 14
Manny also got his GoPro footage of the static test.

The flame:length ratio is going to be pretty incredible.
[video=youtube;Zn3DkzoX9Fc]https://www.youtube.com/watch?v=Zn3DkzoX9Fc[/video]
Only 2 weeks until this motor faces the other direction.
Alex
The flame:length ratio is going to be pretty incredible.
[video=youtube;Zn3DkzoX9Fc]https://www.youtube.com/watch?v=Zn3DkzoX9Fc[/video]
Only 2 weeks until this motor faces the other direction.
Alex
grouch
Well-Known Member
That fin can is sexy. I like what you have done with it. I am curious to see how the ablative will go on.
That was a nice static burn of the proposed motor...
Solarover12
Well-Known Member
- Joined
- Dec 18, 2014
- Messages
- 283
- Reaction score
- 1
Haha! That's awesome, you can see the motor slowly push its way deeper into the ground. Impressive.
Man, I hope you have enough room for everything in the nosecone, it's going to be tight. Can't wait to see this fly..
Man, I hope you have enough room for everything in the nosecone, it's going to be tight. Can't wait to see this fly..
Houdeani01
Well-Known Member
- Joined
- Jun 23, 2015
- Messages
- 63
- Reaction score
- 1
Manny also got his GoPro footage of the static test.
The flame:length ratio is going to be pretty incredible.
[video=youtube;Zn3DkzoX9Fc]https://www.youtube.com/watch?v=Zn3DkzoX9Fc[/video]
Only 2 weeks until this motor faces the other direction.
Alex
Where is the launch taking place? Northbranch?
mannyskid
Well-Known Member
- Joined
- Feb 2, 2011
- Messages
- 961
- Reaction score
- 6
Where is the launch taking place? Northbranch?
The motor test was at North Branch, the flight will be taking place at the Black Rock Playa in a week and a half.
Aksrockets
Now with 8% more aluminum
- Joined
- Apr 1, 2011
- Messages
- 3,505
- Reaction score
- 14
Time for an update. I've been fairly busy between work and working my @$$ off trying to finish this stupid thing, so I didn't well document the final stages of the build.
My ablative was an epoxy - phenolic microbaloons mix. Ultimately, the ablative coating went poorly. The thing with these "spread on" ablatives is that you need a gap to fill for them to be truly effective. Neither my nosecone or fincan were designed with this in mine, so I just spread it on like a filler. As you can see from the photos, it didn't turn out as even as I'd hoped. If you're imagining a lot of sanding, you're correct.
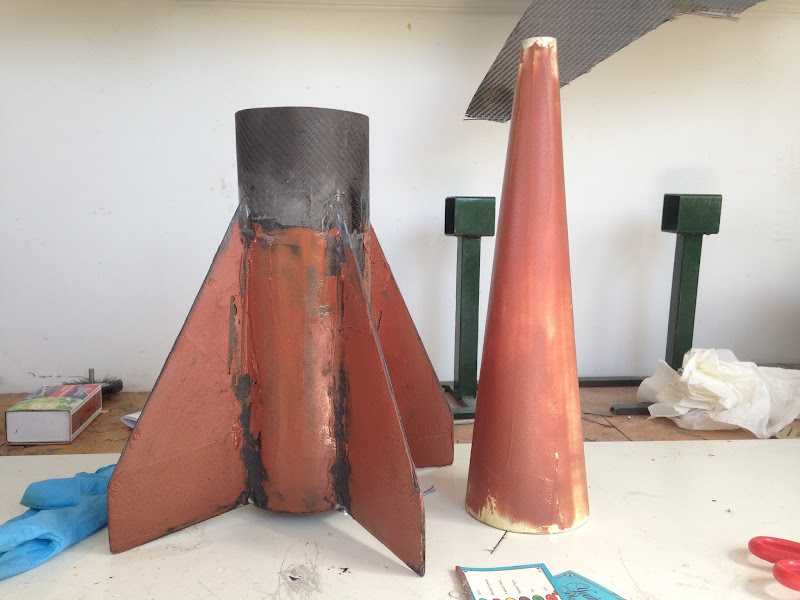
It's probably too thin to be effective, but that's fine. I'm right in the grey area between where I do or don't need ablative. If anything it was a good learning experience. I know now if I'm going to use an ablative to plan ahead a little better.
Sanding took a long time. My little "quote" besides my avatar has never been so true.
I hit it with 3 coats of high temp paint this morning.

Still not great, but whatever. If I had more time I'd really polish it up. The launch is this weekend and I just need to finish this.
T-4 days until launch!
Alex
My ablative was an epoxy - phenolic microbaloons mix. Ultimately, the ablative coating went poorly. The thing with these "spread on" ablatives is that you need a gap to fill for them to be truly effective. Neither my nosecone or fincan were designed with this in mine, so I just spread it on like a filler. As you can see from the photos, it didn't turn out as even as I'd hoped. If you're imagining a lot of sanding, you're correct.
It's probably too thin to be effective, but that's fine. I'm right in the grey area between where I do or don't need ablative. If anything it was a good learning experience. I know now if I'm going to use an ablative to plan ahead a little better.
Sanding took a long time. My little "quote" besides my avatar has never been so true.
I hit it with 3 coats of high temp paint this morning.
Still not great, but whatever. If I had more time I'd really polish it up. The launch is this weekend and I just need to finish this.
T-4 days until launch!
Alex
Aksrockets
Now with 8% more aluminum
- Joined
- Apr 1, 2011
- Messages
- 3,505
- Reaction score
- 14
Best of luck on the flight. Going to miss you at hellfire again
I'll miss you and the rest of the Hellfire bunch too. Good luck with that L3 man! That BB turned out wicked!
Alex
Similar threads
- Replies
- 163
- Views
- 37K
- Replies
- 17
- Views
- 4K
- Replies
- 135
- Views
- 25K
- Replies
- 49
- Views
- 10K