My Estes Stingray Upscale & Downscale Obsession

The Rocketry Forum

Help Support The Rocketry Forum:

This site may earn a commission from merchant affiliate links, including eBay, Amazon, and others.

Kframe

Well-Known Member
Joined
Sep 30, 2022
Messages
86
Reaction score
135
Location
Minnesota, USA
This is going to be a retrospective build thread. I will add to it in chunks so I don't lose what I've written along the way. Also, as this occurred over months I may not have the exact order of each step recounted correctly, but you’ll get the idea.
***
Last summer a friend of mine that works in estate sales pulled an Estes Range Box out of a dumpster at sale he worked and gave it to me.
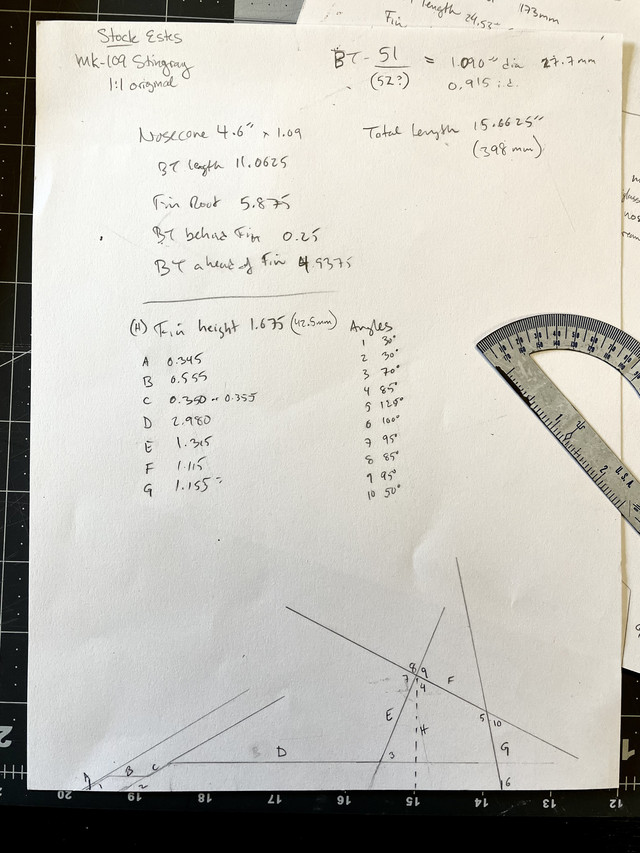
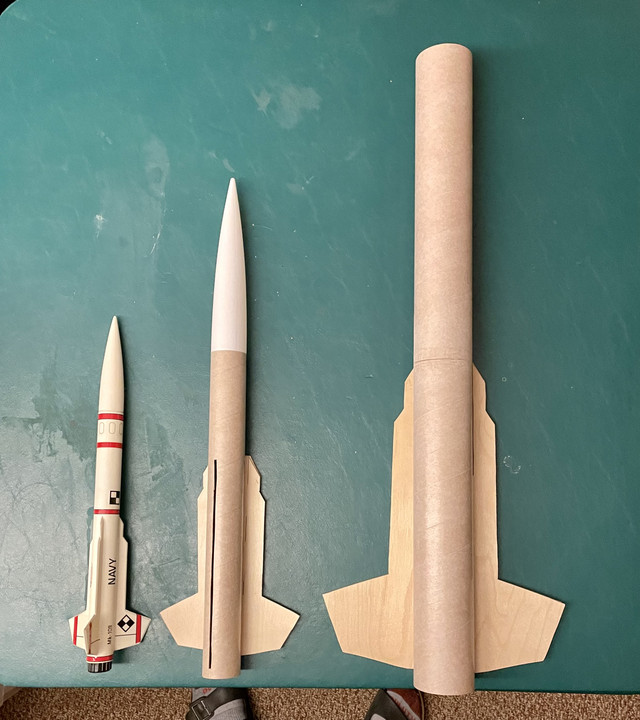
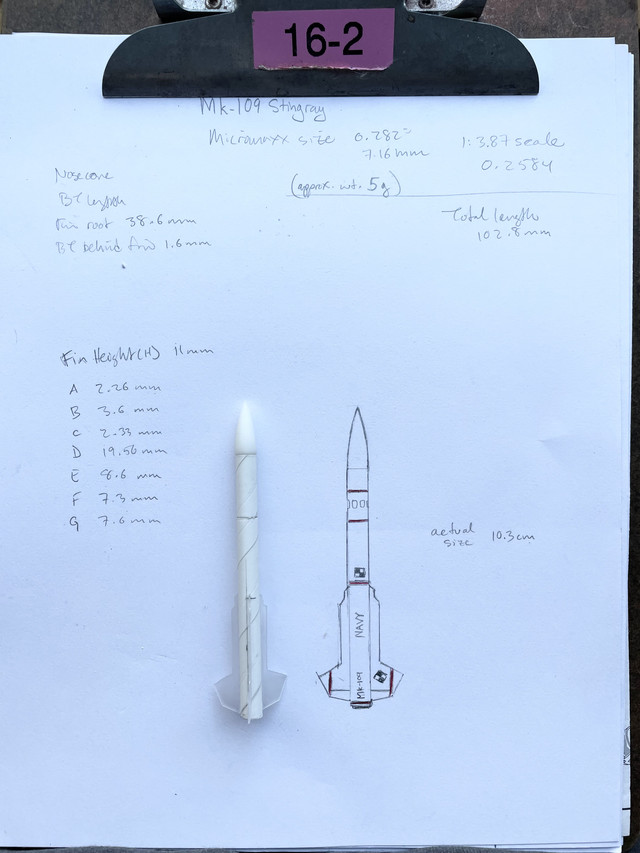
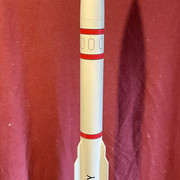
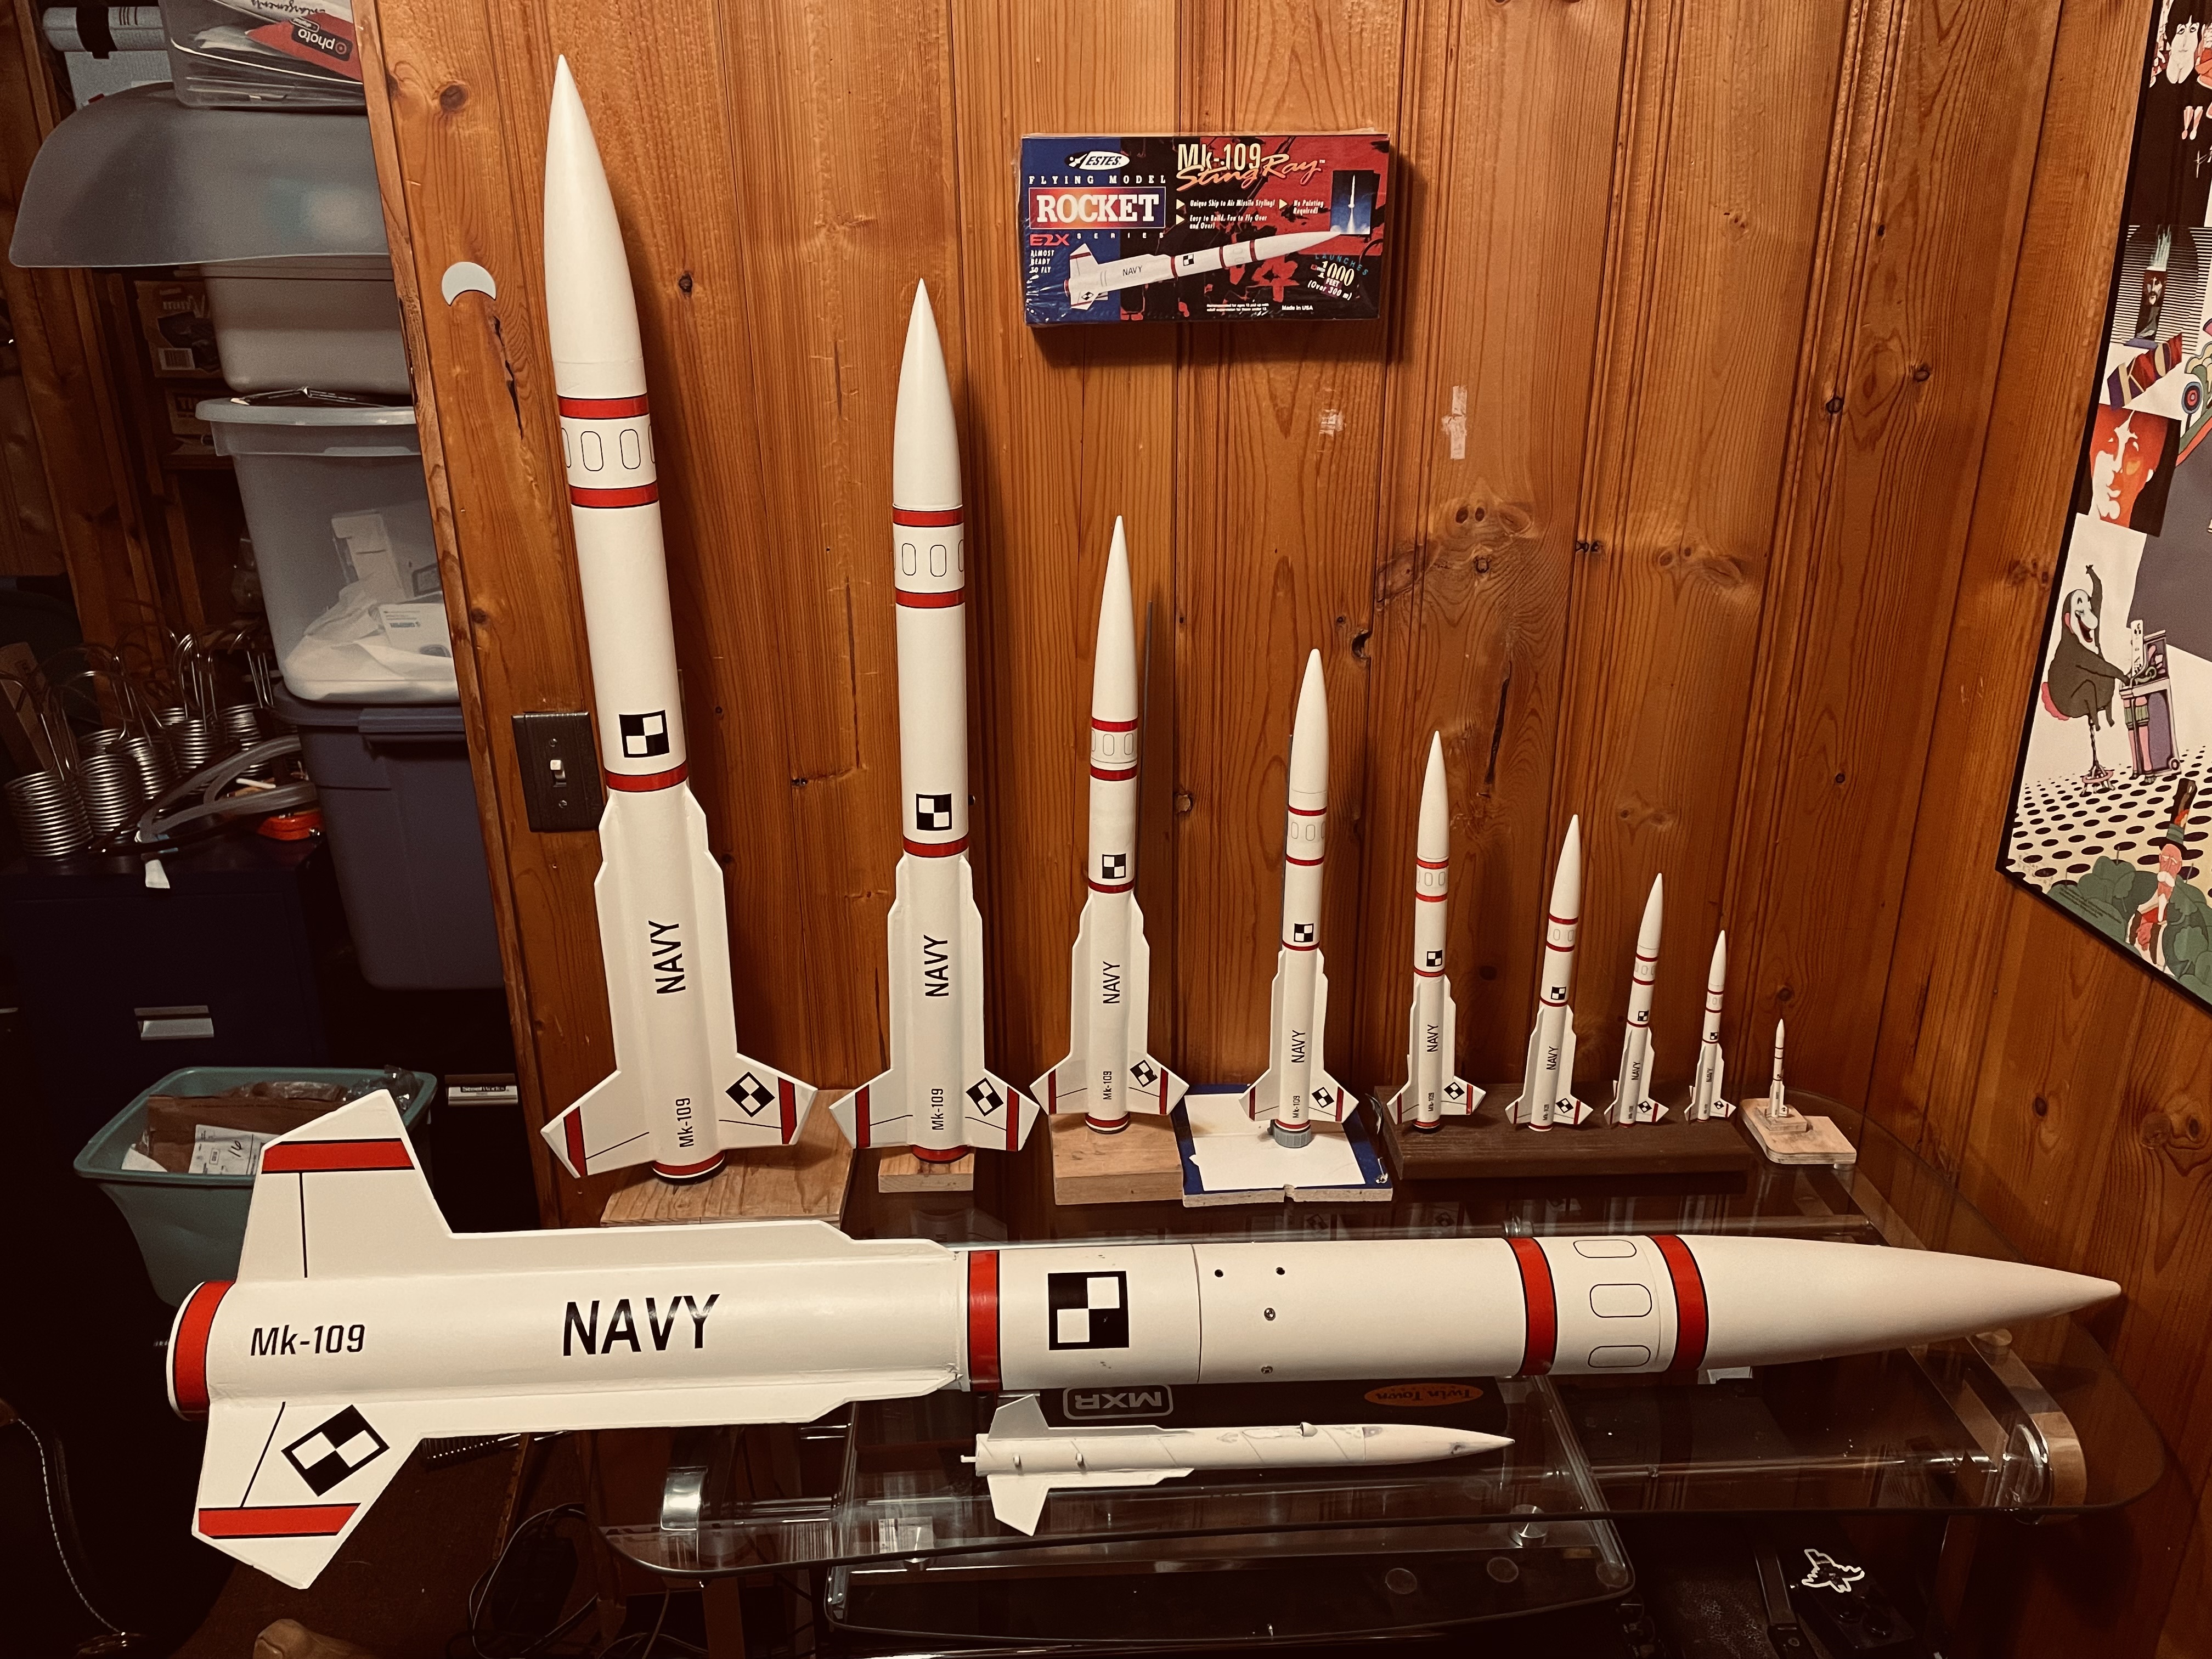
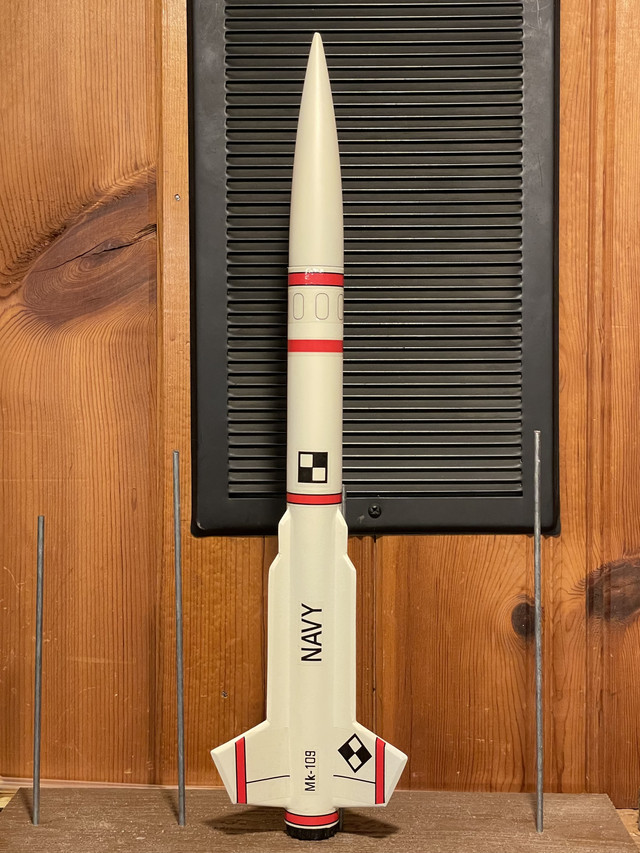
Among other bits and pieces was an assembled but damaged Estes Stingray Mk-109 (#2131) and the instructions and the intact decal (sticker) sheet. Almost immediately I kind of fell in love with the lines of this rocket, still just 3FNC but the fins were long and sleek and just looked awesome to me. The damage was just a plastic fin that had popped off, but before I glued it back on I traced it on paper as I already had thoughts of making a high quality clone of this E2X rocket (the 'wart' on the side for the shock cord just bugged me).

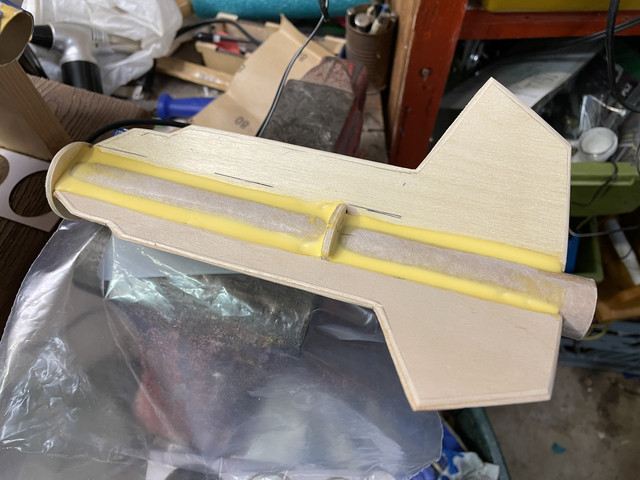
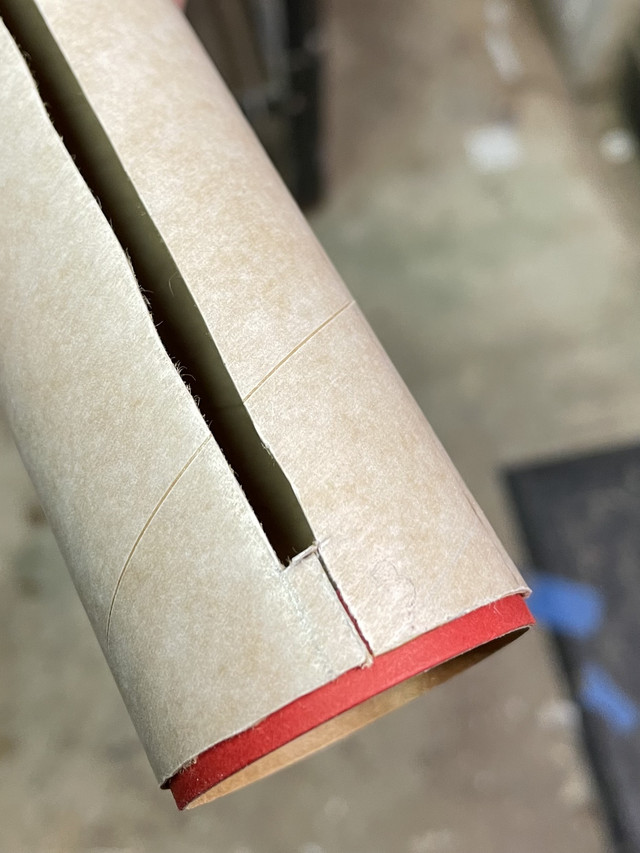
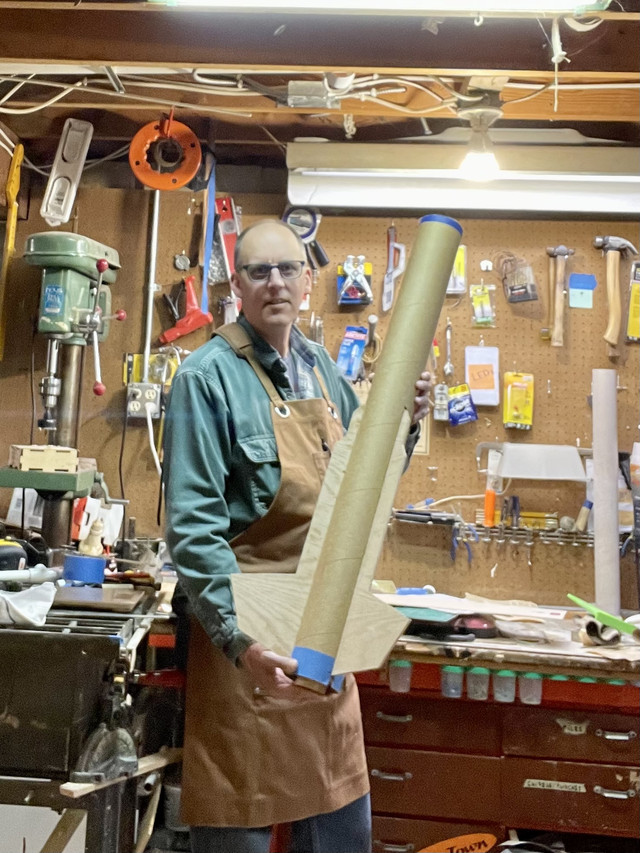
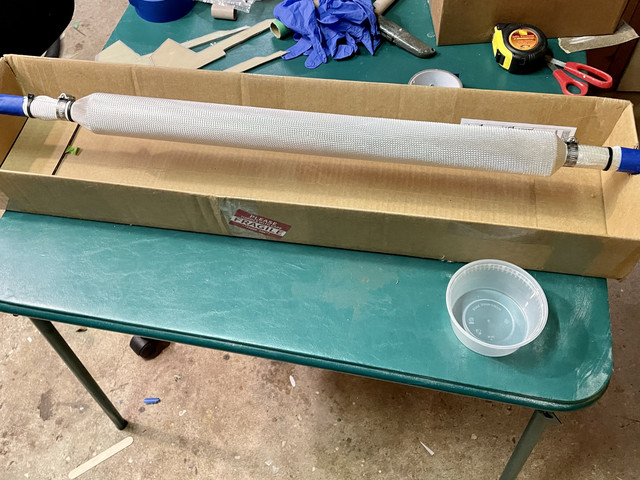
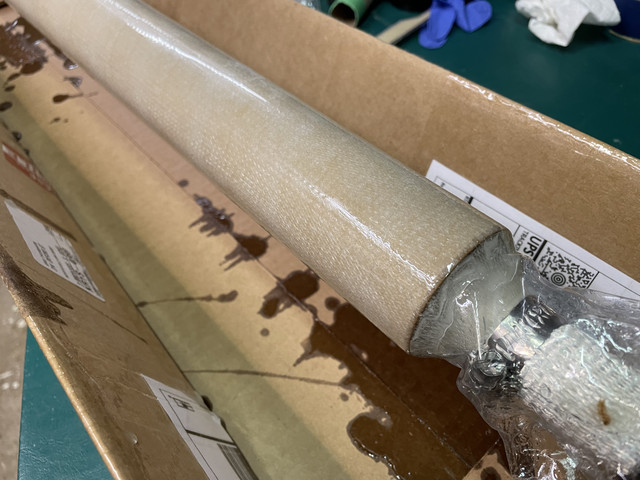
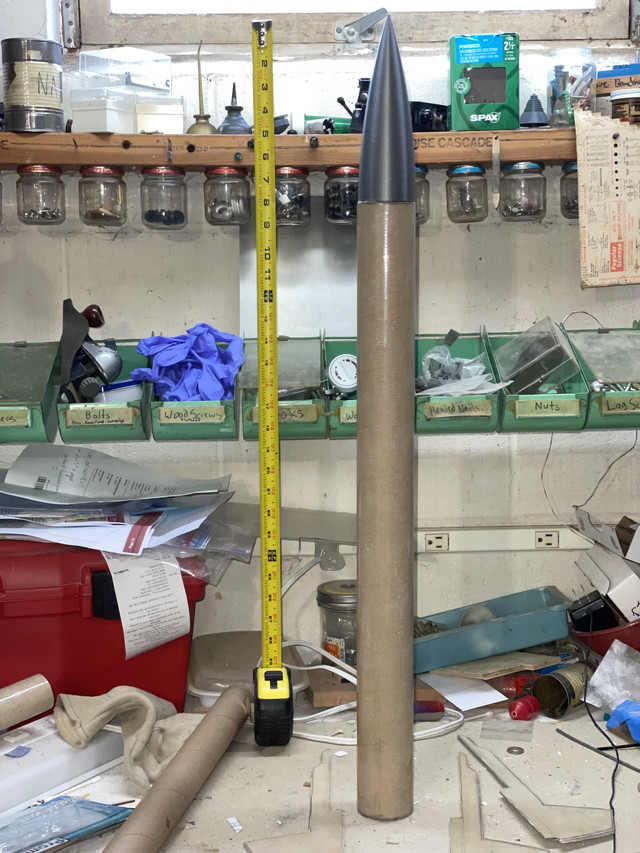
Within about a day I had mostly built the clone. You can also see I filled in the slots for the E2X fins and the lug ‘wart’ hole.


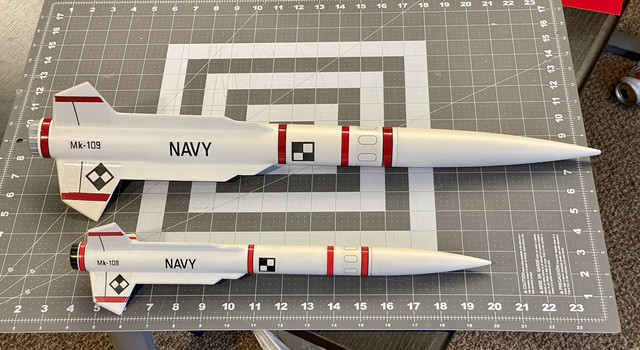
After paint and using the stickers from the dumpster, I had a really great looking version with wood fins and no lug wart.

What I didn't know yet was how far I would take this...
 
Last edited:
I've always liked this rocket, especially because it looks a bit like the potential AMRAAM replacment, Peregrine.

What sizes of this rocket have you built?
 
I am a huge fan of BT-60 sized rockets; there is plenty of space for the recovery system, the liftoffs are usually a little slower than slimmer and lighter rockets and they're also just, bigger. :D

Pretty soon I decided to start working on a BT-60 upscale of the Stingray.
That would require a decent amount of math and geometry, and luckily I'm a nerd and that stuff is fun for me. So I found my forty year old metal protractor, a good ruler and set to determine the attributes of the original.


At about the same time I started getting really interested in HPR and the different building techniques and materials needed for that, so I decided to try making this size with TTW fins. Obviously not necessary at this size and power level but it was good practice.


Here you can see it almost glued, with a rubber band holding things tight as the glue dries on the aft centering ring.


As I was finishing up the BT-60 version, my son dragged home a 4" mailing tube he found and I thought it would be fun to practice making an HPR capable rocket with it and the Stingray design and came up with a mockup in an hour or two.


Well, pretty soon I thought, 'hey I could actually make this a real flying rocket' and things started to snowball...
 
Last edited:
Pretty soon I was ordering recovery gear from Rocketman, and reading as much as I could find about dual deployment and started working on an AV bay while I was working on the rocket.

I'm not going to post a lot of detail about the AV bay build as this thread is about the Stingrays but here is the bay I built for the 4 incher. RRC3 and RRC2 from Missile Works.


I haven't flown that one yet as in Minnesota the high power season is just now getting underway as the fields dry out.
But, soon!!

I should also mention that the builds started to overlap. As I continued to work on the four incher I began work on a BT-80 version as well.
Here is the Estes clone, alongside the in-progress BT-55 and BT-80 ones.

Here is the BT-55 one next to my Estes clone.
I made the black decals on a laserprinter with waterslide paper I ordered, and the red was self-adhesive MonoKote film cut into strips.

This is the completed BT-80 version going up on an F42 at my LPR/MPR club.
It's is my first 29mm motor rocket and the first rocket I flew on a composite and mid-power motor.
 
Last edited:
The four incher was taking longer than I anticipated as I kept needing to order stuff and wait for it to arrive, plus it was wintertime and I wasn't in a hurry.
At some point I'd finished the clone, the BT-60 and the BT-80 and then thought, well, why not make some downscales.
More math and drafting, yay!
Back to the protractor and ruler I went.


Another thing I needed to scale was the placement of the decals and the widths of the red MonoKote film bands, which I wrote down on this page.
 
Last edited:
For the sub-scale models, I first did the BT-50, then BT-20, then BT-5. And to round it out I decided making a MicroMaxx size one would be hilarious and a fun challenge, and I wasn't disappointed.


That is a .22 cal rimfire round next to it. My favorite part of this rocket are the fins, which I cut out of the thin clear plastic that enclosed a pair of Aerotech F42 motors. Yes, that thin. Adhered to the body with CA.
 
Once I had the MMX, the BT 5, 20, 50, clone, 60 and 80 (and the four incher underway) I realized I needed to make BT-55 and BT-70 sizes as well, if I wanted a 'complete' collection.

The BT-55 was a pretty standard LPR style build, again with decals I made and MonoKote.
On the other hand, I decided that the BT-70 would be a great size for a screamin' fast HPR rocket if I put in a 38mm motor mount and made it strong enough. I didn't take as many pics as I wanted to, which I blame on having gloved hands and epoxy all over for much of the build.
On a previous rocket I wrapped it with 6oz fiberglass and resin, which worked but I really didn't like how much sanding I had to do and the wrapped edge kept fraying and was a real pain to deal with - so, I decided to buy Soller composites fiberglass sleeves and heat shrink tubing for the BT-70 Stingray.


I'm really glad I spent the time on doing that, the final product turned out great and may fly on up to a J motor this summer.
 
Along with the custom vinyl decals for the BT-70 from Stickershock23.com I also got a set for the four incher which by now has been completed.
And now, with the exception of other in between sizes I feel like my Mk-109 Stingray series is complete.
I'm pretty happy with how they all turned out, none are perfect but each got better along the way and I have flown all but the BT-70, BT-55 and the four incher - but they will all fly soon.

Enjoy!

Front, the dumpster find that started it all. Behind that, the 4-incher with 38mm mount.
Then, L to R in back, BT's 80, 70, 60, 55, clone, 50, 20, 5 and MicroMaxx.

Oh, yeah, always remember to use eye and ear protection when using power tools, and a mask when you're sanding.
:)

-Kris
 
Great thread!

Makes me want to build BT-20, BT50 and BT-55 versions myself...but need to finish my other projects first.

Is your BT-20 version a rocket that flies off of 18mm or 13mm engines? Also, does your BT-55 fly off of 18mm or 24mm engines?
 
Great thread!

Makes me want to build BT-20, BT50 and BT-55 versions myself...but need to finish my other projects first.

Is your BT-20 version a rocket that flies off of 18mm or 13mm engines? Also, does your BT-55 fly off of 18mm or 24mm engines?
I’ve uploaded the .ork files I made to Rocket Reviews so anyone can use them. Searchable under Stingray, Mk-109 and 2131

www.rocketreviews.com

The 20 has an 18mm motor size, and the 55 I made with a 24mm, but all of that is optional. Just need to watch the CG.

 
Another thing, the paint I used is not white, I decided on using Rustoleum French Cream, matte. In sunlight it looks much more white than it does in the photos taken indoors. You kinda can see what I mean in the picture of the BT-80 at liftoff.
 
At some point I wouldn’t be too surprised if I got the itch to make a 3 and a 6” version of this.
 
Back
Top