Estes Mercury Redstone kit build

The Rocketry Forum

Help Support The Rocketry Forum:

This site may earn a commission from merchant affiliate links, including eBay, Amazon, and others.

Jimmy_B

Active Member
Joined
Dec 24, 2013
Messages
34
Reaction score
0
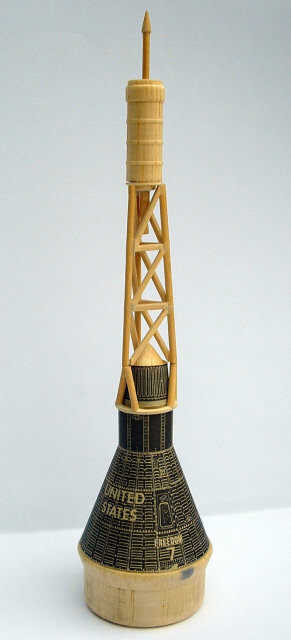
I started this rocket in the mid 70s and lost interest very early in the build. It was the last of many kits I had as a kid. I decided recently that after more than 35 years, it's time to finish it. After working on this for the last few days, I believe I was in over my head when I was 13 or 14 and maybe that's why I gave up on it. I haven't built anything since, although I have launched, lost and destroyed many of the rockets I had with my kids and the wife's grandkids. I still have a few somewhere. I am posting this thread so those with experience can point out where I go wrong, or give me tips and pointers. Maybe even suggestions for better materials than I am using. Let me know if you think it will fly without experiencing a catostrophic event.


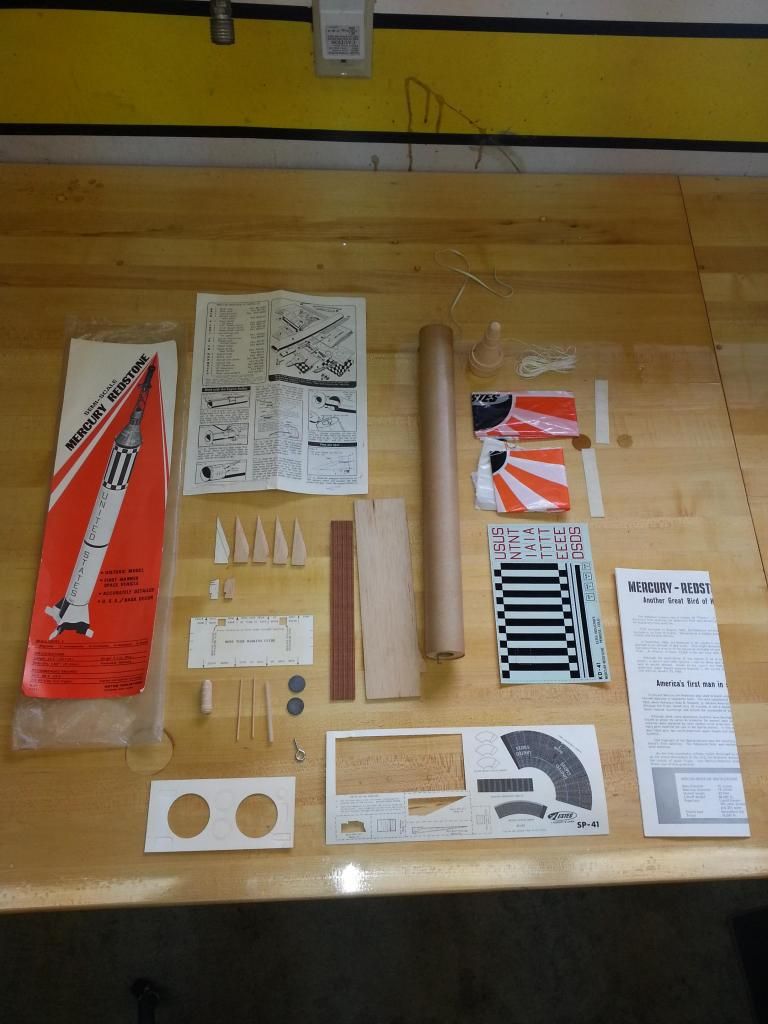
I had already completed and installed the engine mount and shock cord. I had one component of the fins cut. That's where I pick up the build.

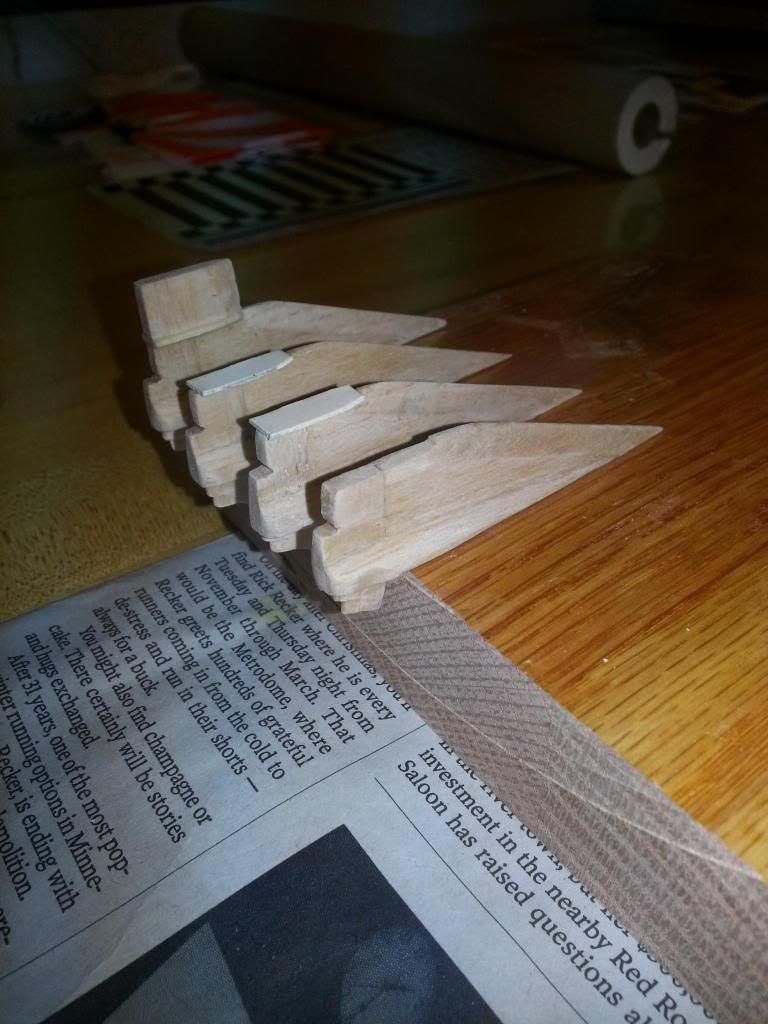
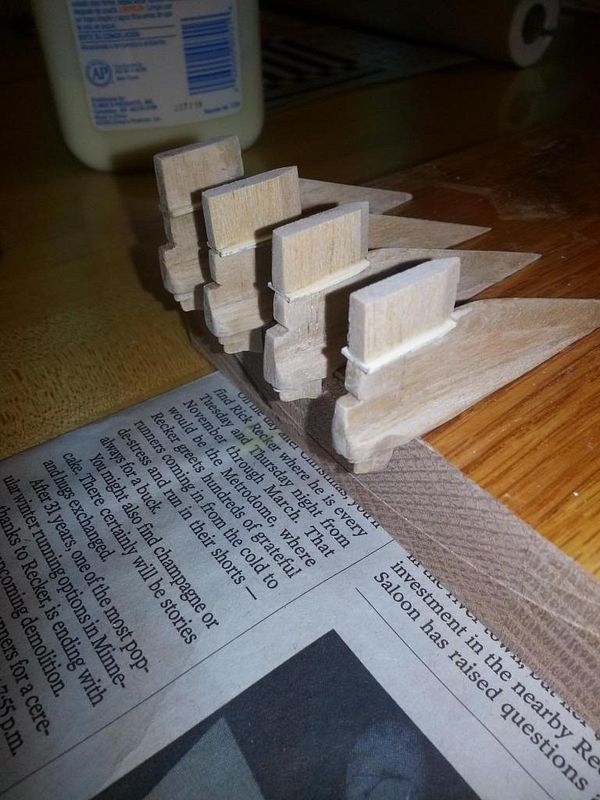
After many hours of cutting and shaping, the fins are coming together. I had a hard time deciphering one of the diagrams for a fin component, and I do tooling, drawings and CAD work for a living. I did figure it out, but no wonder I was so confused as a kid trying to build this. Estes could have done a much better job with diagrams in the instruction sheet. Or maybe that's why this kit is considered a level 5?


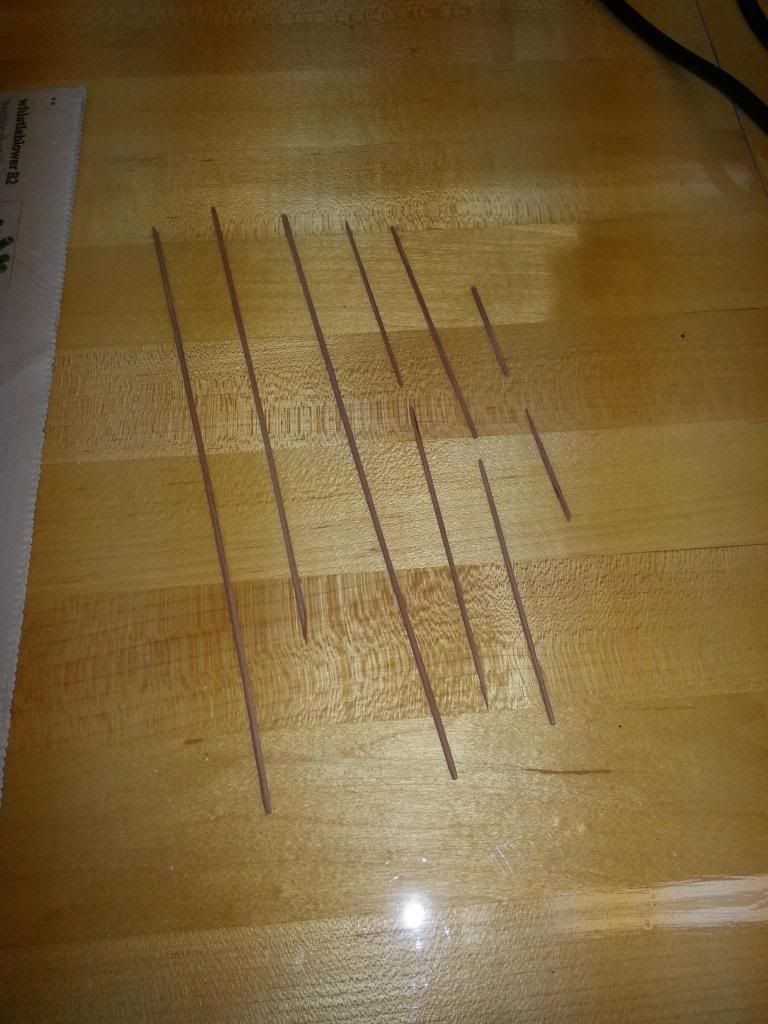
From there it's time to build the upper tower. What a pain this was. Cutting little dowels out of this card stock and then trying to make them round, but I'm getting there.......


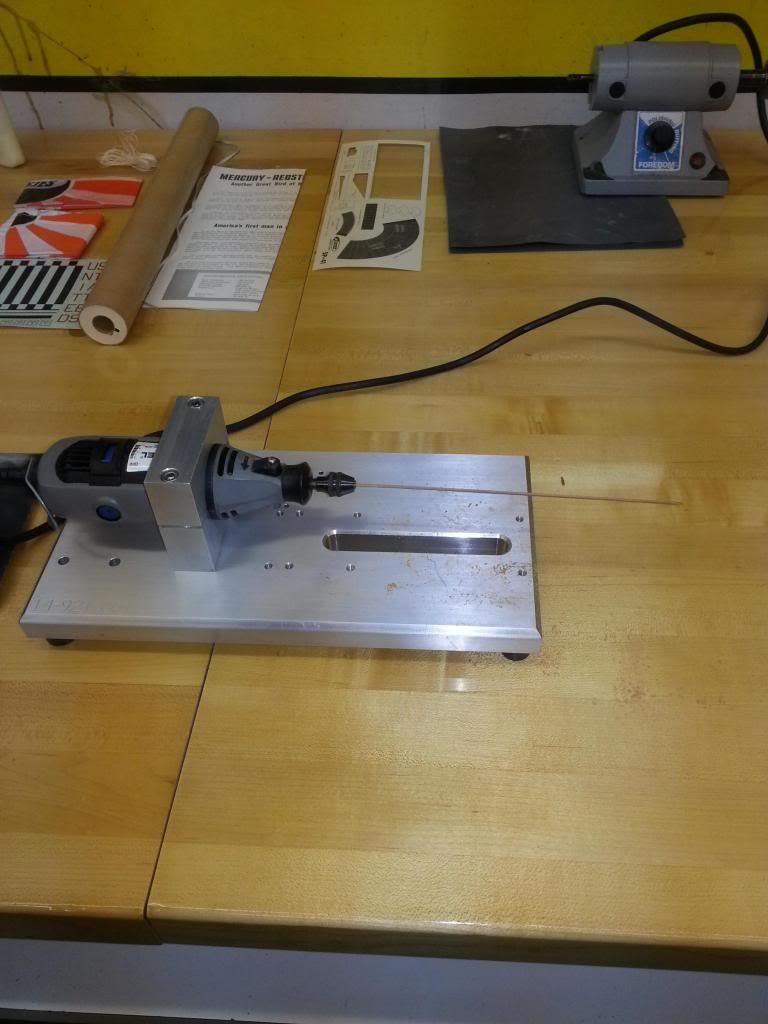
I was fortunate enough to recycle a tool that my work was throwing away. I put a $10 3 jaw chuck on the dremel to hold the semi round dowels so I could spin and sand them.


I broke a couple of them before getting the hang of it. More than enough material to build a tower though.


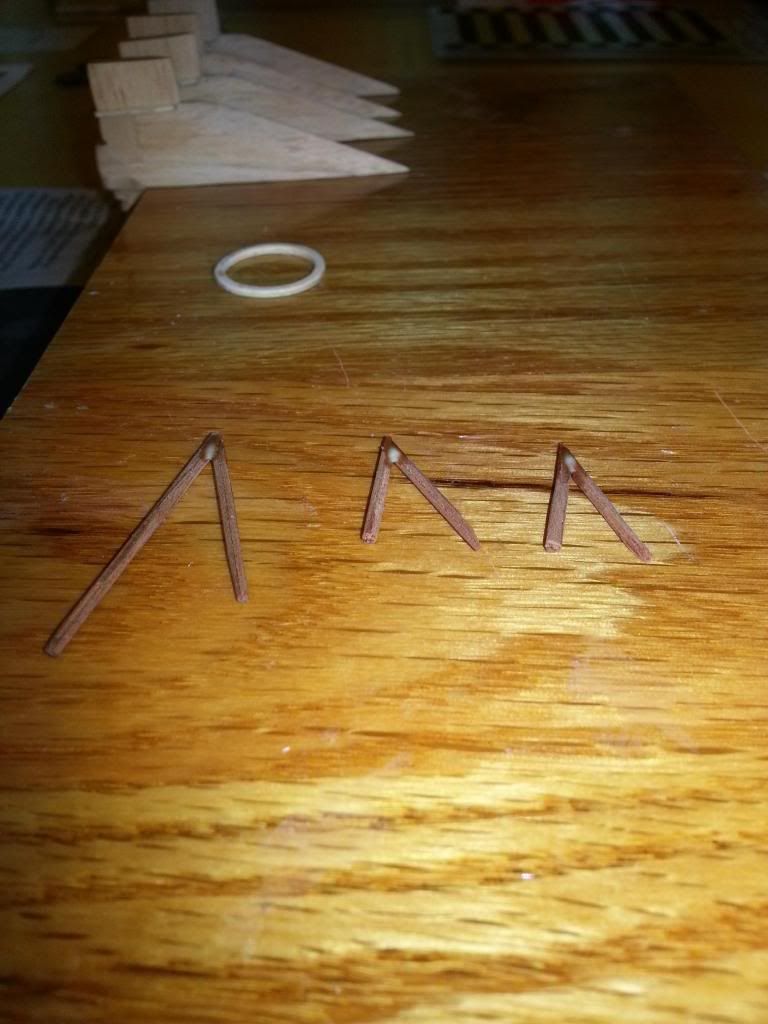
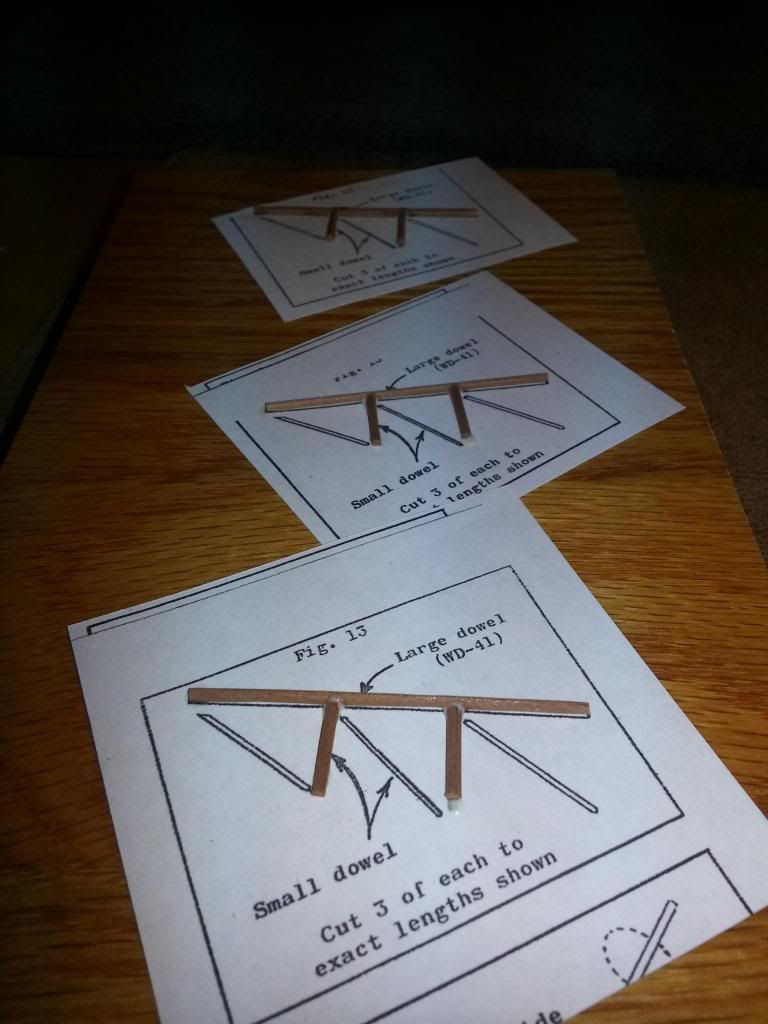
First couple of pieces going together. I glued some of them to the paper template and will cut them off after completion....


Last edited:
I finished shaping the tower base pieces.....


Then glued them to the tower base ring.....


Tower pieces assembled......
 
Jimmy,
looking at the original packaging sure brought back memories for me..I built 2 of these as a kid and the Mercury Redstone remains one of my favorite rockets to this day.....from what I see you are doing a great job with her!!!
 
Oh my....a vintage old school Estes Redstone...beautiful !!

Like Rick said ,it `s a walk down memory lane.

I think you`re doing fine with the kit !

Keep at it ,this will be fun to watch.


Take care

Paul T
 
Good stuff Jimmy.

I started my Redstone sometime in the mid 80's.

This is how far I got:

mercuryredstone_capsule.jpg


Looking forward to seeing yours getting finished :)
 
The Mercury Redstone is my all time favorite. I have the Dr. Zooch version as the Estes one is out of my price range.

Looks great so far. I wonder if the tower will be a fragile as mine is. I've built it several times. The landings can be a bit rough for them!
 
Thanks for the pic Leo. It is very helpful at this point.

My dogs got me up at 5:30 today, so I got an early start. I went to mock up the assembly and started with some plumbers putty and a ring impression to hold the pieces.....


It wasn't working as well as I would have liked. And I now have the pieces all hacked up trying to fit them.......


So I decided to super glue it to a piece of wood. This was helpful enough to tell me I'm not even a little happy with how it fits together......


I think I have enough material left over to start again. I was hoping to keep everything original on this even though I'm tempted to use toothpicks. At this point I will work with what I have. I am going to build it different then the instructions show. I think I will start with the 3 upright struts held in position and install all of the cross bracing from there. This way I will have the proper circular geometry at both ends.
 
I tacked the 3 uprights to the wood with super glue, then glued the white disk on top of those.....


I managed to salvage the horizontal and diagonal struts from the old parts and filled in one side at a time.....


Filled all of the joints with more glue. Now to wait for it to dry and cut off wood base......


The instructions call out coating this sheet with clear enamel to prevent the ink from smudging, so on went a coat of clear.....
 
I've always wanted one of these, but the escape tower is what always scared me off making the attempt. If I ever do build one, I'm going to use your approach and build the uprights first, then fill in the diagonals.
 
I think I have enough material left over to start again. I was hoping to keep everything original on this even though I'm tempted to use toothpicks. At this point I will work with what I have. I am going to build it different then the instructions show. I think I will start with the 3 upright struts held in position and install all of the cross bracing from there. This way I will have the proper circular geometry at both ends.

That's probably the better way to go.
It seems the three sides never line up when the cross braces are glued on before.
 
Your escape tower is built just like how I built mine. Uprights first then infill.
 
You might think about replacing your shock cord. The only remaining rocket from my youth, a Screamer flown in 1972, remains fairly intact, but for a missing fin. The recovery system however looks like the spoils of an archaeology trip to ancient Egypt. The rubber tends to break down over time. I just received a Zooch today. I have been wanting to do one of these for quite some time. I believe it was the Saturn V that did me in as a kid... After hosing the connection of the internal recovery tube from the original design, I wound up with trains. I'm still slowly working thru last year's Saturn, though it's going well. But I guess that's the beauty of being BAR. :wink:
 
You might think about replacing your shock cord. The only remaining rocket from my youth, a Screamer flown in 1972, remains fairly intact, but for a missing fin. The recovery system however looks like the spoils of an archaeology trip to ancient Egypt. The rubber tends to break down over time. I just received a Zooch today. I have been wanting to do one of these for quite some time. I believe it was the Saturn V that did me in as a kid... After hosing the connection of the internal recovery tube from the original design, I wound up with trains. I'm still slowly working thru last year's Saturn, though it's going well. But I guess that's the beauty of being BAR. :wink:

Thanks for the recommendation on the shock cord. It was something I wondered about. What's BAR?


I didn't do much today. A little paint work and glued the fins on.....


That`s looking pretty darn nice Jimmy B !

The tower and fins turned out great........good old fashioned hands on craftsmanship......gotta love it !


Take care


Paul T
 
Bravo jimmy_B. Greate build so far; those fins are beautiful. Somewhere, Gene Street is smiling ! :)
 
Bravo jimmy_B. Greate build so far; those fins are beautiful. Somewhere, Gene Street is smiling ! :)

Now you guys have me spending as much time on the interwebs looking at rockets and googling designers as I am spending actually working on this rocket!

Thanks for the kind words and especially the encouragement everyone. It is motivating me to make this nicer than it would have been otherwise. now I want to figure out what it is exactly that I currently have and what I destroyed and lost along the way.

BAR = Born Again Rocketeer?
 
she is looking good Jimmy!
and yes....BAR= Born again rocketeer...welcome back!!

Now you guys have me spending as much time on the interwebs looking at rockets and googling designers as I am spending actually working on this rocket!

Thanks for the kind words and especially the encouragement everyone. It is motivating me to make this nicer than it would have been otherwise. now I want to figure out what it is exactly that I currently have and what I destroyed and lost along the way.

BAR = Born Again Rocketeer?

That's a great looking rocket and your doing a nice job with the build.You'll have a show piece when it's finished.It's a shame these are OOP and the crazy prices that people want for them on Ebay.Hope these kits come back someday.
 
That's a great looking rocket and your doing a nice job with the build.You'll have a show piece when it's finished.It's a shame these are OOP and the crazy prices that people want for them on Ebay.Hope these kits come back someday.

Yes ,but i wish they would come back with a kit you actually build, and not all that plastic "snap together" construction ,but like this one with wooden fins and a tower you need to actually build......BUT.....for that,there is the Dr.Zooch offering, a very fine kit.

I am surprised however, Estes discontinued their Redstone ,seems to be a popular kit......or not ?


Paul t
 
I put a glue fillet on the bottom of the fins tonight. I also spent some time going around the fin edges as there's a pretty large gap due to the fin being flat on the glued surface. I thought it looked good, but the glue shrank when it dried, so I'll continue this process until it's filled in. You can also see where I wrinkled the bottom ring on the motor mount assembly when I installed it decades ago. I thought about trying to repair it so it looks nice, but I'll leave it there since it tells a story.


Lots of dope around the boss where the body meets the nose cone. The balsa had a few little 'chips' in spots. I think was just original quality from the turning process.


A little smoother now.


Cut the cardboard wraps. Two passes with a new exacto blade seemed to give a clean cut.


Test fit the wrap before the first coat of black.
 
Finally getting to see some real tricks of the trade in this thread. :pop:

David
 
Now you guys have me spending as much time on the interwebs looking at rockets and googling designers as I am spending actually working on this rocket!

Thanks for the kind words and especially the encouragement everyone. It is motivating me to make this nicer than it would have been otherwise. now I want to figure out what it is exactly that I currently have and what I destroyed and lost along the way.

BAR = Born Again Rocketeer?

A build thread like this deserves the recognition. Now I sure wish I would find a cool dremel holder like that in the trash !
 
I never realized that the Estes fins have so much more detail than those of the Dr Zooch Mercury Redstone.
 
gosh its been close to 38 years ago since I built the Estes Mercury Redstone....the biggest difference I can recall is that small little fairing that goes between the fin and those distinctive control surfaces. I also recall that the Estes had a separate chute for the capsule and for the booster. I remember this because I launched this on a windy day and I can still see that capsule going up instead of descending on its chute and soaring away over the local high school....I think the thing is still up there....I wish I could give a better comparison but its been so long. The Zooch Redstone is a great kit...its another that I will want to take another shot at. (it was my second Zooch build and my second kit since coming back to the hobby)

I never realized that the Estes fins have so much more detail than those of the Dr Zooch Mercury Redstone.
 
I got a few things done yesterday. I must have lost the 1/8" dowel that came with the kit for making these parts, or it was originally packaged wrong. I have two 1/12" dowels rather than one of each, and the 1/12" is too small to build the components from. I had to substitute with a modern version of wood dowel, but I don't think wood has really changed much so I should be OK.

Here is my jettison rocket, escape nozzle bases, aerodynamic spike and escape rocket. I did cheat a little on these and did not hand form them. I turned them on a lathe, but they did turn out quite nicely. I drilled a pilot hole in the escape rocket for the aerodynamic spike. I'm a little anal about this stuff and want all the axis's in alignment or it would hurt my eyes every time I looked at it.


The spike mounted in the escape motor.


Cutting out the escape nozzles. After cutting these out I am sorry I didn't scan this sheet into the computer so I had the patterns for future repairs. Oh well.


I used the small 1/12" dowel to roll these over and get them into the cone shape. A little tedious with my big fingers. After gluing them I clamped them with a right angle tweezers and held them in this vise until dry.


Nozzles mated with the bases. I will manipulate the 'roundness' of these before painting and installing.


The jettison rocket mounted to the escape rocket and painted.


I'm still working on the nose cone to make it presentable. It's not as smooth as I would like it to be. :(
 
Finally getting to see some real tricks of the trade in this thread. :pop:

David

Thanks David, but I don't know how tricky anything here really is. I do tooling and process development work in the medical device industry, so this is similar to what I do everyday.


A build thread like this deserves the recognition. Now I sure wish I would find a cool dremel holder like that in the trash !


I am very lucky, the people I work for treat me very well. This was a tool I built 5-6 years ago for a manufacturing process on device I called 'the eye screw'. Unfortunately the work went away and this became obsolete. But it worked out for me!


I never realized that the Estes fins have so much more detail than those of the Dr Zooch Mercury Redstone.

I have gone and looked at those. I want one of those now too!


gosh its been close to 38 years ago since I built the Estes Mercury Redstone....the biggest difference I can recall is that small little fairing that goes between the fin and those distinctive control surfaces. I also recall that the Estes had a separate chute for the capsule and for the booster. I remember this because I launched this on a windy day and I can still see that capsule going up instead of descending on its chute and soaring away over the local high school....I think the thing is still up there....I wish I could give a better comparison but its been so long. The Zooch Redstone is a great kit...its another that I will want to take another shot at. (it was my second Zooch build and my second kit since coming back to the hobby)

You, sir, have a great memory. This does have two chutes. I have had a glider on top of a local elementary school since the late 70s. You get a ride home from the popo when you are caught trying to retrieve them yourselves I found out.
 
Jimmy....I was probably 11 or 12 when I built my first Estes Mercury Redstone....probably summer of 73 or 74 ...but I always loved the look of this rocket...and it was a lot of fun to fly...but I can still see that little capsule way up up there...and chasing it as fast as I could run and slowly realizing that it is not coming down......kinda pulled up....and stared at it as is just kept going up and out of sight.....back then my allowance was like 25 cents a week...so it took some weeks to save up for the replacement...but I did and learned the hard way that there are days you just shouldn't fly...

you are doing a great job with her! It fun to watch you bring this old girl back to life where she belongs!


Thanks David, but I don't know how tricky anything here really is. I do tooling and process development work in the medical device industry, so this is similar to what I do everyday.


I am very lucky, the people I work for treat me very well. This was a tool I built 5-6 years ago for a manufacturing process on device I called 'the eye screw'. Unfortunately the work went away and this became obsolete. But it worked out for me!


I have gone and looked at those. I want one of those now too!


You, sir, have a great memory. This does have two chutes. I have had a glider on top of a local elementary school since the late 70s. You get a ride home from the popo when you are caught trying to retrieve them yourselves I found out.
 
I found I forgot about the thin strip of decorator tape the instructions call for on the jettison rocket. I had to cut down some fine line tape I had for this. 1/64" = .015", a real pain to cut anything this slim. Mine is probably twice that wide. Then I touched up the silver paint.


Two pull away plugs underway.


And two pull away plugs complete. Now to install them. I am slowly running out of parts laying around. :)
 
Some inspiration for your build....getting that knife-edge on the leading edge of the fins was always my downfall...and it still is. Got to be a jig or something to make that easier. And I never realized there was such a huge fillet on the Redstone fins til I went back and looked at the attached shot...

P1010100.jpg

P1010137.jpg

P1010091.jpg

P1010098.jpg
 

Latest posts

Back
Top