41% Downscale Binder Design Velociraptor (NOW With Spock's Ears!!!)

The Rocketry Forum

Help Support The Rocketry Forum:

This site may earn a commission from merchant affiliate links, including eBay, Amazon, and others.
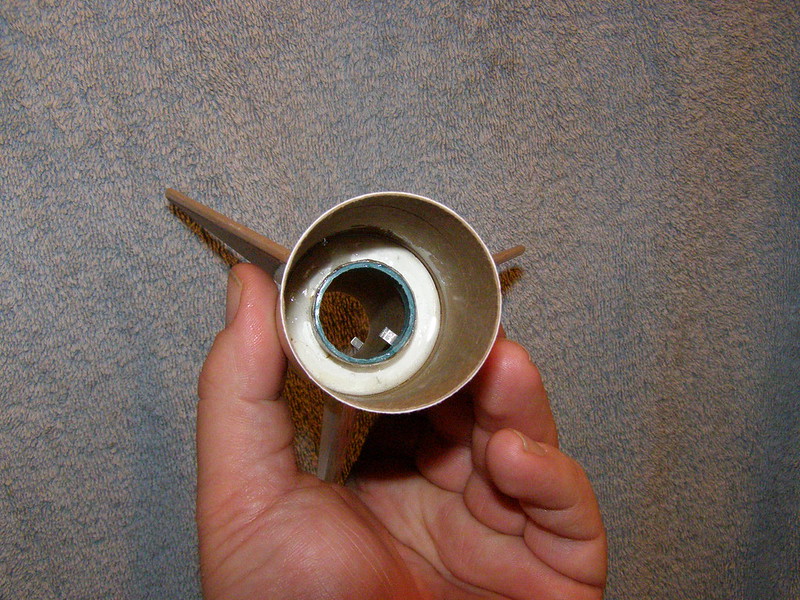
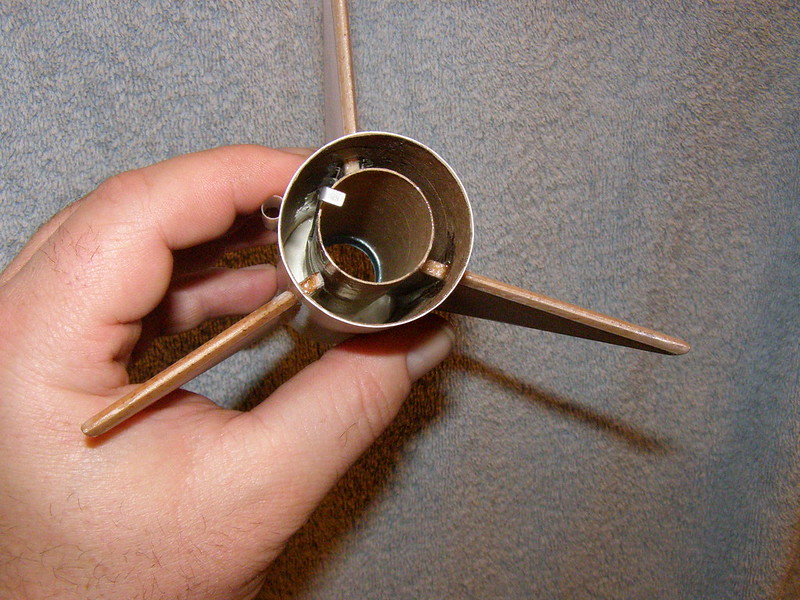
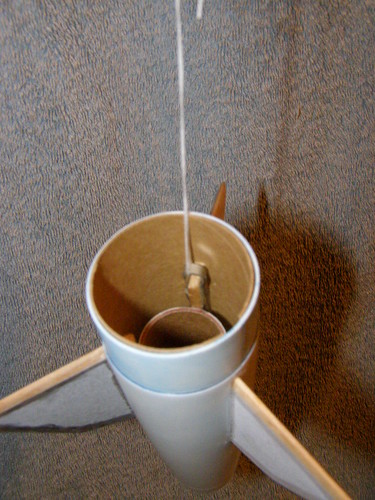
The sustainer's motor mount is based on some pretty standard mounts, except that it lacks a rear centering ring.


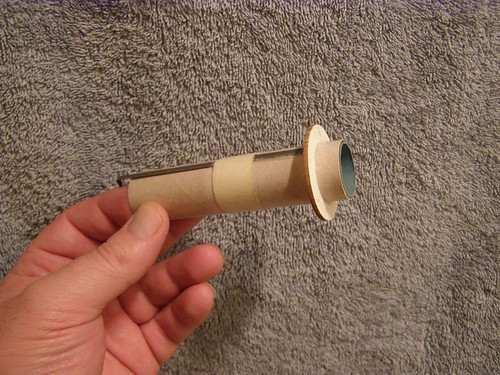
Thanks to Eric, I've got a centering ring that I needed to get the build moving forward. Now, I'm not putting in a rear centering ring because I need to create those "tunnels" for whatever recovery device I finally decide on using for the booster. The fins will mount to the motor mount, and internal fillets will hold the mount securely.

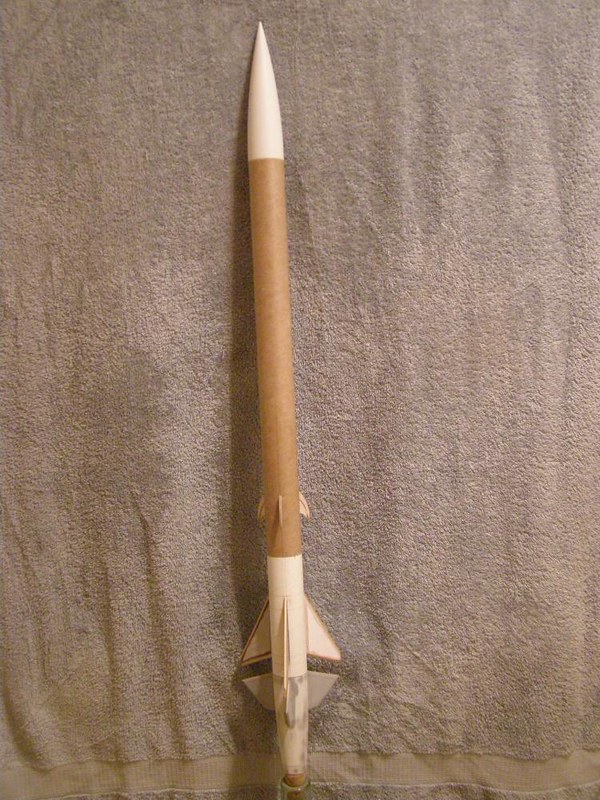
I finally opted not to add a payload section to the build. In my experience handling my zipperless design Yellow Jacket upscale, I keep having the fin can fall to the ground (usually pebbly concrete, or some other hard abrasive, fin-chewing, surface (gravel)). The problem with the Yellow Jacket is that the separation joint is below 1/3 the length of the rocket, my natural grabbing point. The Velociraptor has the large green section and the decal (VELOCIRAPTOR) that I don't want to cut, which puts the separation joint closer to 1/2 the rocket's length. To me, that's a guarantee that the fin can will fall (repeatedly) to the ground and get damaged, and I don't want that to happen to my rocket.


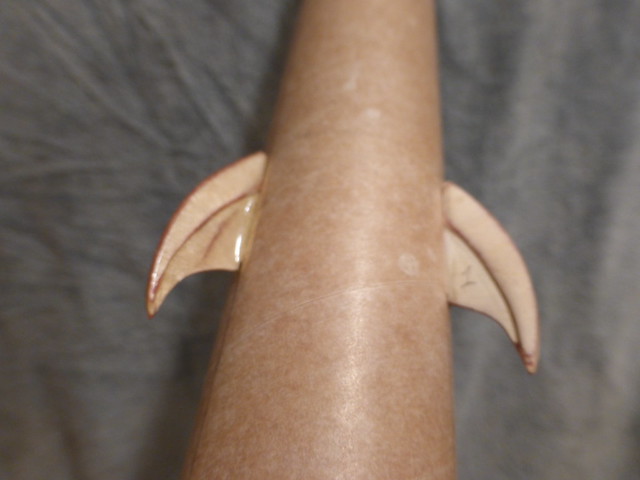
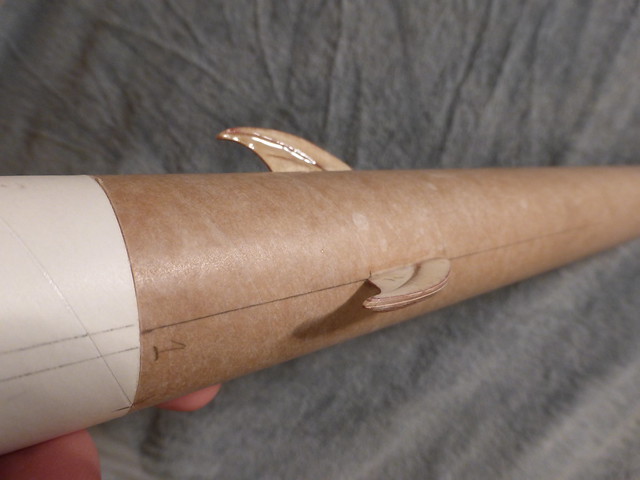
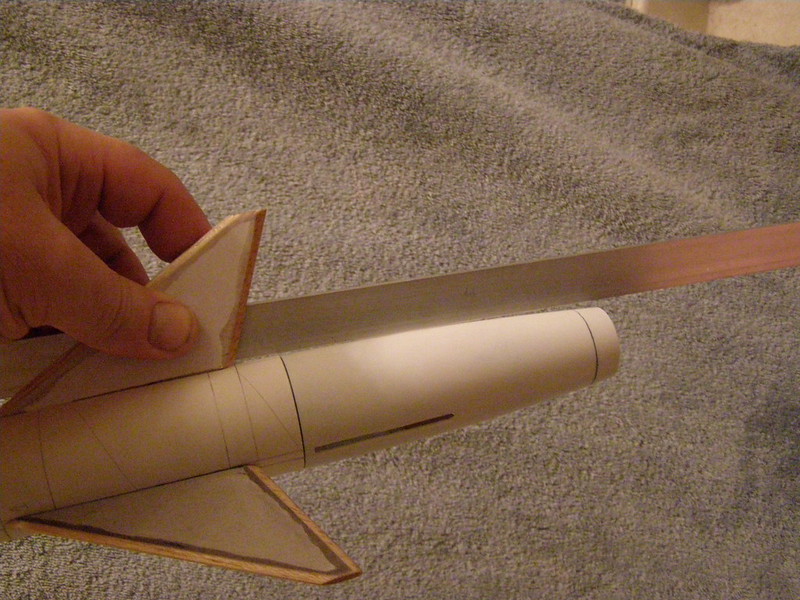
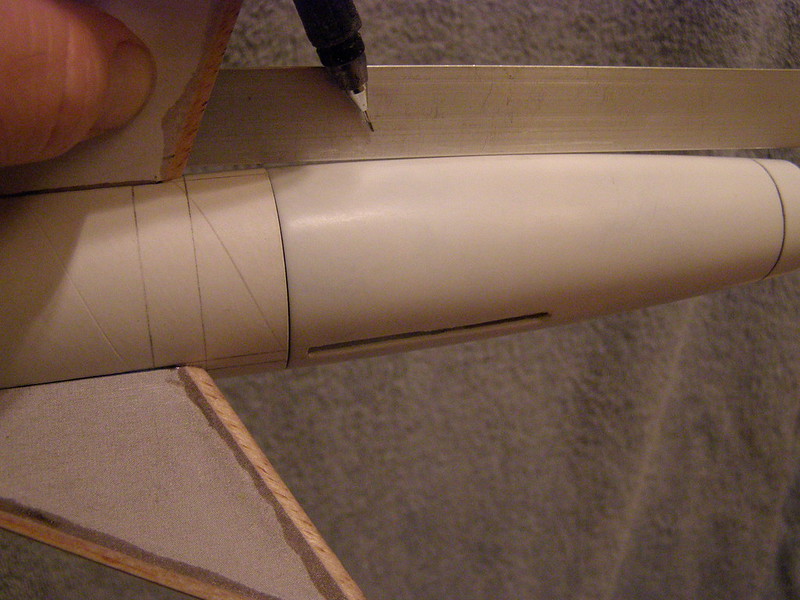
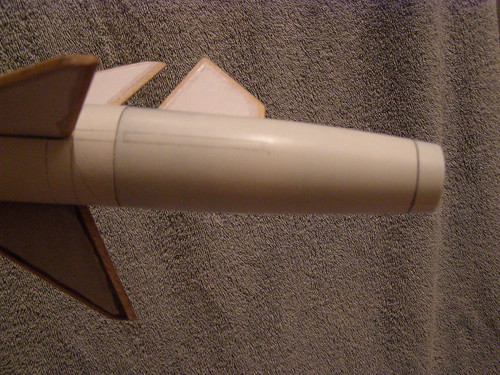
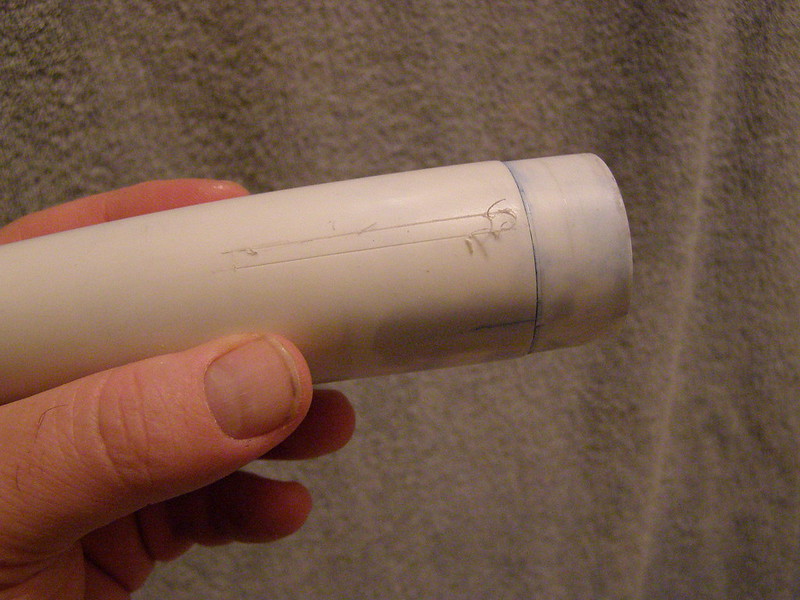
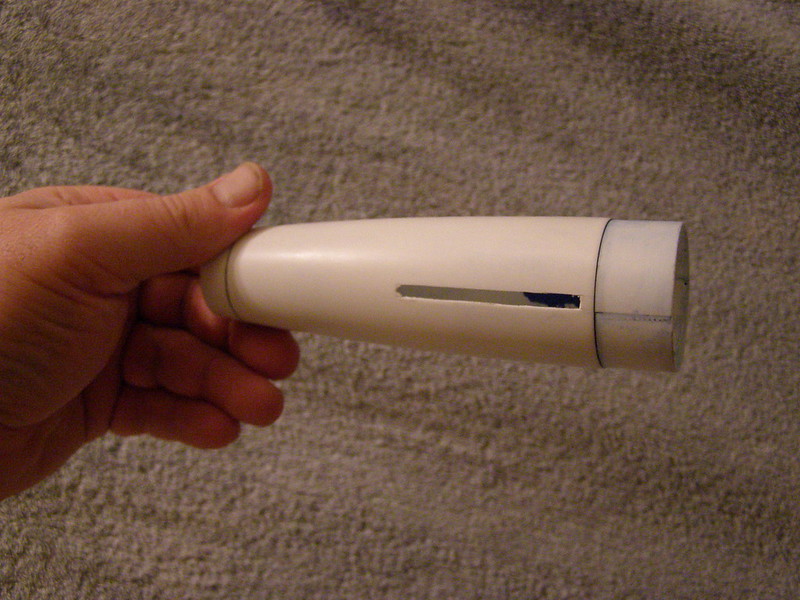
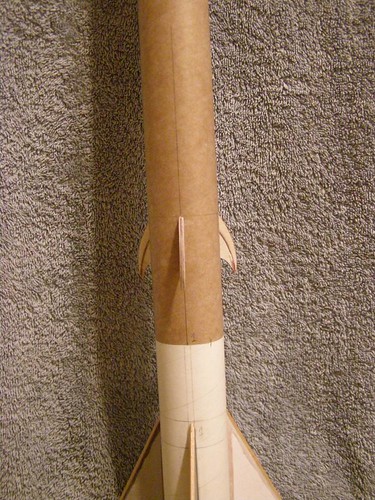
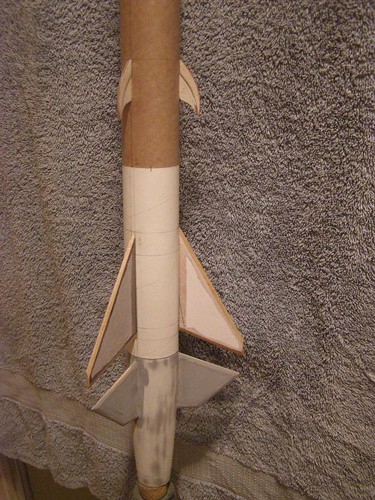
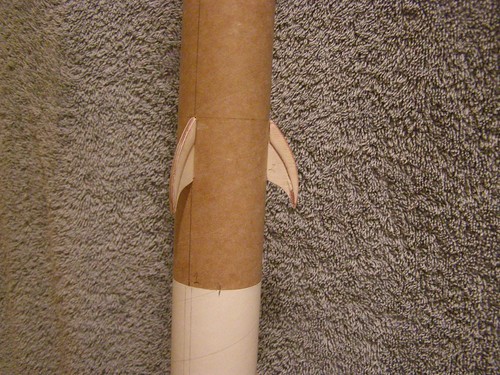
Since the body tube is longer than 18", I decided not cut down two complete body tubes to make up the length needed. So, I've decided to make the shorter section the fin can. I've marked it up, and slotted the tube for a couple of the fins (I could have done all of them, but I wanted to take a WIP photo).


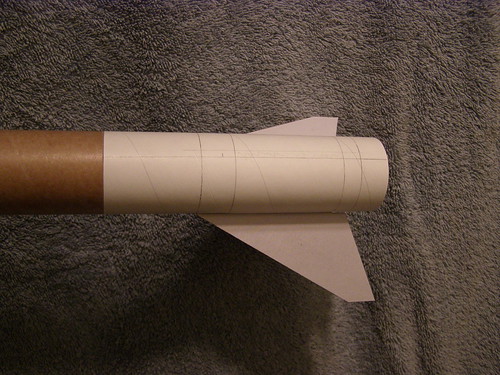
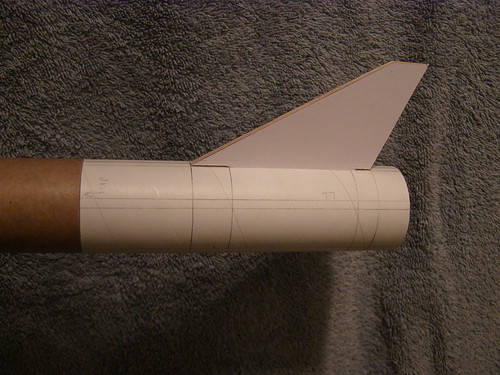
BTW... I like to align my launch lugs with my engine hook (hence the clear markings I make for it). That way the engine hook is out of the way when I connect the clips to the igniter.

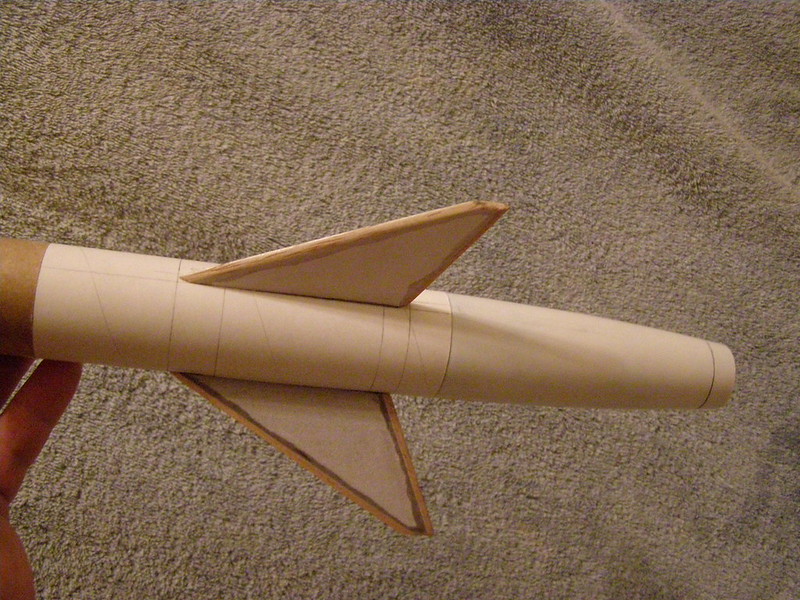
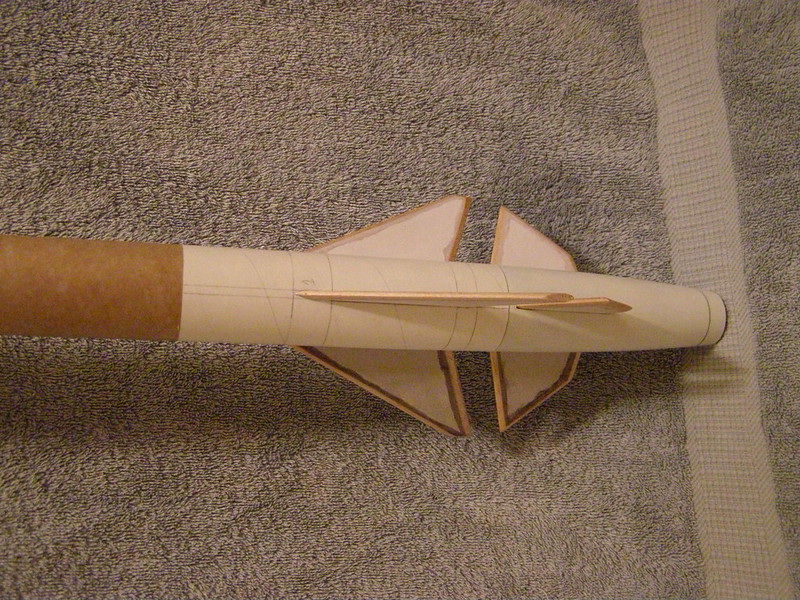
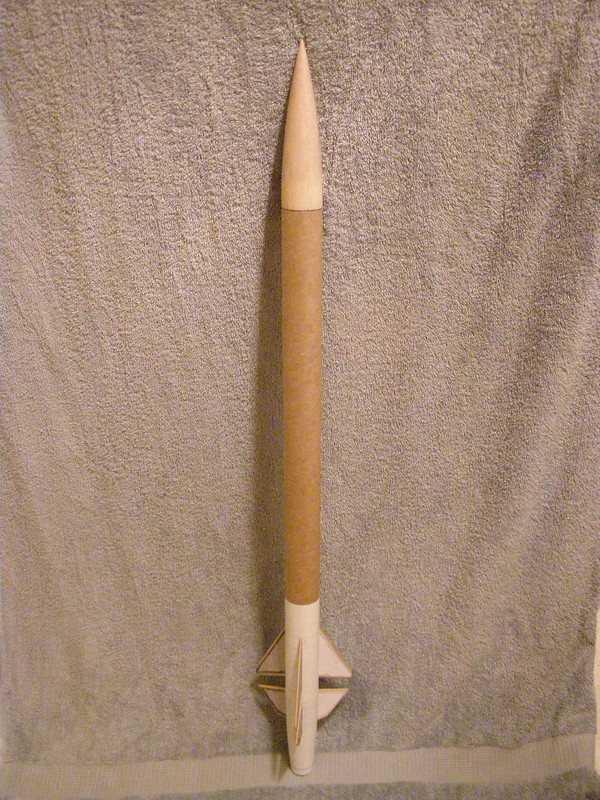
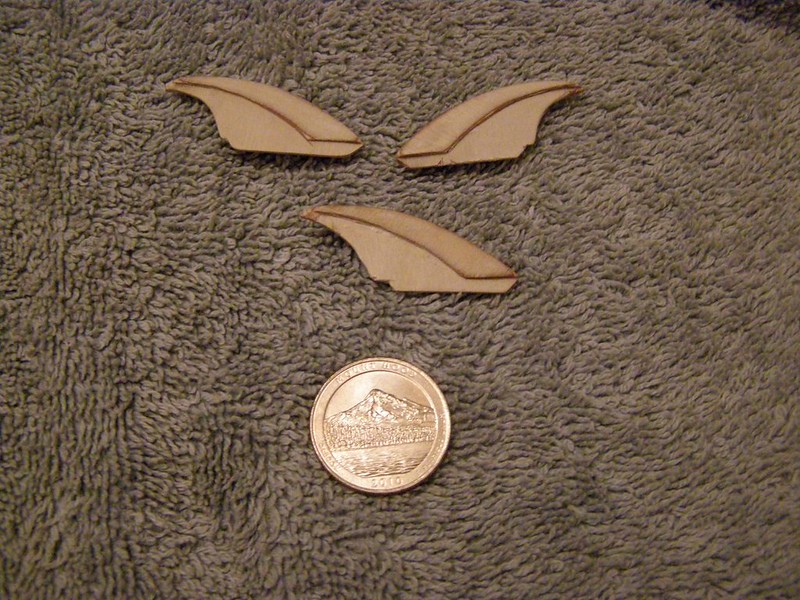
After getting the new fins cut out, the hard parts begin... Making those Talon fins, and all of the boat tail work.

However, I'm working on 2 hours of sleep right now. So, I'll get on it when I'm fresh.

TBC
Jim
.
 
Last edited:
Well, I'm almost caught up with my homework, and school was called off early yesterday (and canceled today) due to snow.

Before going home, I printed fresh copies of the fin patterns (I'd emailed them to myself), and got working on them. I began by papering them with the pattern, then sanding them to shape.

Then, I glued on the "main" fins... CA to tack it in place.


Next I glued in the Sustainer's MM w/BSI's 30 Minute Epoxy. I allowed this to cure overnight.


Today I epoxied the internal fillets


I cut the Booster's fins, then figured out how to slot the plastic nose (tail) cone.


I first used a piece of aluminum angle to ensure that the lines were straight.


Next I used a .05" mechanical pencil to mark the slots.


I discovered that by dragging the back of a #11 blade it was better than trying to cut with the edge of the knife. The first few passes were done with the aluminum angle keeping things straight, then when the slot was established, I continued freehand.


I scribed my slot's long edges, then cut the front free. I notched the back cut to match the beveled edges a little better, rather than leaving the slot the full width.


And here's what I've got so far.


I've now got to wrap my head around how to make the talon fins 1/8" thick. Had I thought about it more, I'd probably been better off using 3/32" thick fins... Maybe next time.

Pointy Side Up!
Jim
 
Last edited:
Nice job. That would be a great idea for kit from binder.


Sent from my iPad using Rocketry Forum
 
Nice job. That would be a great idea for kit from binder.

I asked about this before, and was told that the profit margin wouldn't be enough to make it doable. However, the decal patterns have been made, so you can buy them from Mike.

One idea that came to mind last night was a solution on the talon issue. Oh Landru... You reading this thread? 3D printed Talons would be interesting.

Pointy Side Up!
Jim
 
Just wondering if you solved your booster recovery issue? You know you don't need a streamer to slow it down. You only need something to destabilize it so it doesn't come in stable and ballistic. A Kevlar string with some pieces of Nomex tied to it should do the trick and not be damaged by the sustainer motor's flame.
 
Just wondering if you solved your booster recovery issue? You know you don't need a streamer to slow it down. You only need something to destabilize it so it doesn't come in stable and ballistic. A Kevlar string with some pieces of Nomex tied to it should do the trick and not be damaged by the sustainer motor's flame.

I don't know if I could pack enough Nomex into the tunnels to do the trick. However, the mount for the recovery device (still leaning on streamer) is off center, and hung by a string (temporary modeling piece of shroud line) the booster hangs slightly off of plumb.
 
I gotta say this is one of the coolest build threads I've followed.

Dave
 
I gotta say this is one of the coolest build threads I've followed.

Thanks Dave!

Glad you like it!

Ok... More on the "tunnels"

The sustainer's tunnel is 3.5" long, the booster's is 1.5" long (adjusted for the length of the shoulder). This means that whatever is packed in there must compact to be less than 5" long. If I opt for a drag fin design, and it is firmly attached to the booster by ?"struts"?, it needs to be less than 2.5" long to allow it deploy. If a drag fin/rotor assembly is tethered by a Kevlar cord, then it must be less than 5" (including the "hub").

The inner diameter of the booster is 1.4375", less the outer diameter of the MM (.978") leaves me .4595"/2 = .22975" (less the thickness of the tape and the engine hook in one of them) of space to pack as much streamer, and flame protection in there as I can. Oh I nearly forgot... It's a curved shape too (flat would be too easy.

Crunching the numbers ((.978"*pi-3*.125")/3) I've found that the narrow side of the tunnel is only about .89" wide.

I may need to use two (or all three) of the tunnels to get whatever method I decide on needed to slow down the booster to an acceptable rate. Right now, I'm thinking about a tethered drag fin/rotor design again.

Fun! :eyeroll:

I should mention, in my desire to get the fins glued to the booster, I failed to remember to decide on my mounting method for the Kevlar shockcord. As soon as the glue set, I realized my error. My solution was to take a 13mm motor retaining clip (I have quite a few) and bend it into a "bobby pin" shape. I slipped that over one of the fins (fin 2 by my nomenclature) and then epoxied it in place. Now I have a loop of metal that I can tie a loop or length of Kevlar to (currently, I'm just using a short length of shroud cord).


I also cut the sacrificial liner to allow it to fit over the fins and shield the inner surface of the tail cone from a direct blast of heat during staging. It is simply slid in place, and not glued.

I'm also considering not to glue the booster's thrust ring in place. I'm thinking that if the booster comes down hard, having the motor be able to slide some may reduce some of the shock. A long thrust ring would be held in place by the sustainer's engine clip, and would also serve to shield the recovery device from some of the hot gasses from staging.

TBC
Jim
 
Last edited:
I've come up with a few ideas on the Drag fin/rotor idea. I'm now thinking about using a piece of BT-55 tube coupler (maybe even some tube) to create a "crown" shaped hub that slides up inside the booster's tunnels. At the points, there would be one or two hinges, perhaps made from small pieces of bent paperclip wire, or even better... kevlar cord knotted/glued to hold the pieces together. To restrict the fin/rotors from inverting like an umbrella in high wind, a length of kevlar would be attached to the outside edge, and would restrict the fins from simply flopping into a streamlined shape. Those lines, and the hub would be attached to the shock cord, and would be carefully placed inside the cavity out of the direct blast of the motors. I'm also thinking that some carbon fiber strips could be glued to the long edges of the fins/rotor for reinforcement as I don't know what kind of shock damage could occur upon deployment.

Upon separation, the assembly would simply pull free of the upper stage. When the booster falls away, the fins/rotors would deploy, and it would either auto-rotate, or act like a seriously vented parachute slowing the booster some. I don't know if it brings it to a "safe" speed, and I'm still trying to think up ways of extending them to increase the drag. Perhaps a Chinese Fan-like assembly? Oooh... I'm liking that idea. :w:

A "fan" of fire resistant material, folded accordion style attached to strips of carbon fiber. Each "fan" would be glued to it's neighbor with a strip of say 3/16" or 1/4" balsa to allow it to slide between the fin tabs. The rest would be just like my drag fin idea. When it deploys, it creates a parachute about 9-9.75" in diameter.

Other ideas welcomed.

Thanks!
Jim
 
Last edited:
New idea...

On the talon fins, rather than building them up with 1/16" balsa over a ply core, then sand to a 1/8" thickness, I'm thinking hat I should just go ahead and make them 3/32" thick. Two of the narrow profile shapes (ply) glued over the core shape (also ply). Then use epoxy to give it that nice slick taper. I haven't finalized on making them ttw, or not.

As long as they're 120 degrees apart, and centered on the main fins, things should look good... I think.
 
Due to a surprise illness, I haven't been able to work on this. However, I came up with a new idea for the booster recovery... If the booster was to have a line attached to it (looped (and taped) around the motor)and attached at the top of the booster, then the streamer (drag fin, rotor, Chinese fan, whatever), was attached in such a way as to to keep it horizontal (or tail up), I may have my ballistic issue resolved.

Think of a recovery much like how many scale models with escape towers (Mercury Redstone, Mercury Atlas, Saturn 1B, Saturn V) have the capsule recovered so that the tower is not pointed down on decent to reduce the chance of damaging it.
 
Last edited:
Here is a completely different idea for using a side hatch on the booster. You could put the streamer or a small 6" chute in there. Either way, you could put a top centering ring on the booster to shield the hot gasses. It is modified from the Estes Tau Design of the Month. Pardon my sketch.

TailconeHatch.JPG

Not sure why the pic is being rotated 90 degrees in the post. It looks fine until I upload it.:facepalm:
 
Here is a completely different idea for using a side hatch on the booster. You could put the streamer or a small 6" chute in there. Either way, you could put a top centering ring on the booster to shield the hot gasses. It is modified from the Estes Tau Design of the Month. Pardon my sketch.

View attachment 163216

Not sure why the pic is being rotated 90 degrees in the post. It looks fine until I upload it.:facepalm:

Hi Bill,

Thanks for the sketch. It reminds me of my idea for the Mk82 Snake Eye recovery system. However I don't see how you'd ensure that a streamer/chute wouldn't fall out at the moment of launch. Air Pressure once it got going would do the job, but then you'd have to make sure that whatever secured it would release upon staging. Even w/o additional devices to hold it down, the real big problem I have is it's already glued in (the centering rings have been epoxied to the tail cone).

BTW. When I open the image, then click to enlarge it, it was oriented correctly.
 
I don't see how you'd ensure that a streamer/chute wouldn't fall out at the moment of launch. Air Pressure once it got going would do the job, but then you'd have to make sure that whatever secured it would release upon staging.

At launch the hatch is held in place by the kevlar hinge at the bottom and the tab at the top being inserted into the sustainer tube along with the rest of the coupler. When the rocket stages, the tab will no longer be held in place by the sustainer tube. Air pressure combined with an assist from the laundry being packed tightly into the hatch compartment (imagine the latches being opened on an overstuffed suitcase) should pop the hatch releasing the parachute/streamer.

I have built this assembly for a Tao (mentioned in previous post), but it has not flown due to issues with the sustainer. It has performed well in ground testing (Read here holding the hatch closed and then throwing as high as I can in the air. LOL.

Even w/o additional devices to hold it down, the real big problem I have is it's already glued in (the centering rings have been epoxied to the tail cone).

I thought you might be too far along, but thought I would throw this out there just to look at the problem from a completely different direction. Plus, it looks like you have quite a few people following this thread. Maybe one of them might want to try it. Maybe me :wink:
BTW. When I open the image, then click to enlarge it, it was oriented correctly.

Glad I did not spend too much time trying to fix it then:bang:
 
Ok, this has languished enough for a while... I need to get back on this build now that the weather is awful (it's northern Oregon in spring), and I'm on a rained out spring break.

Tomorrow, I hope to find my desk, my 1/32" thick ply, and get some photocopies to work from. Wish me luck.
 
Like the vast majority of my builds, this has taken a lot longer than I'd hoped for. Velociraptor #2 (downscaled) is beginning to get underway as well.

That said, today I finally managed to make the talons, and get them glued onto the rocket. The fins took about 2 hours to cut and shape. I used 1/32" thick aircraft ply to build up the layers, and I hope to epoxy the blended shape in soon (as in say Monday at the latest).


P6200402.jpg
 

Attachments

  • P6200403.jpg
    P6200403.jpg
    151.8 KB · Views: 150
  • P6200404.jpg
    P6200404.jpg
    175.8 KB · Views: 154
  • P6200405.jpg
    P6200405.jpg
    257 KB · Views: 150
  • P6200406.jpg
    P6200406.jpg
    174.5 KB · Views: 150
Last edited:
The major difference between #1 and #2 will be the fin thickness. #1's fins (except for the talons are 1/8" thick). #2's are going to be 3/32" thick all the way around.
 
FWIW, the inspiration to the shape and carving detail was derived from dinosaur talons and Spock's ears.
 
Cool thread. It's good to see an original designer get on board with a down scale/ up scale build. Love the look of the smaller size and the two stage addition.

Adrian
 
Any update? I've been following silently:):) I hope do build and upscale of this someday if I can get permission:)
 
Any update? I've been following silently:):) I hope do build and upscale of this someday if I can get permission:)

Sorry, nothing at this exact moment... However with the Raptor build going, I pulled out VRaptor 1 and think I'm ready to try and finish the talon work (then it's off to paint). VRaptor 2 has had a few fins cut out, and the rest should follow soon (VRaptor 2 will be getting improvements that I found #1 needed).

Now, If you're asking me for permission to copy this, sure. However, I think that Mike Fisher is the guy to ask.

Sounds good can't wait to see the rocket painted. No just wanted to mention I intended to get permission from him before upscaling any of his designs so no one got angry:)
 
The Talon fins have been getting epoxied (to create the blended look between the different layers). Four out of the six sides are done already. This also serves to create the external fillets for them.

​

I also mounted the half moon baffle I made (after giving it a coat of JB Weld). The baffle was installed 9" back from the top of the body tube.

BTW, the Raptor downscale is now getting its external fillets.
 
Last edited:
Back
Top