Playin' With Fire - Flight Report

The Rocketry Forum

Help Support The Rocketry Forum:

This site may earn a commission from merchant affiliate links, including eBay, Amazon, and others.
My 75mm carbon MD has 3 fins mainly because on the moonburners I intend to fly it on, it barely goes over Mach 2, if even that. I think that 4 fins is only really warranted at ~Mach 3, at least where stability is concerned.

However, Kurt von Delius' Falcon (M motor record rocket) went about Mach 3.2 and it still had 3 fins (and they were TINY!). Then again, Kurt always goes for maximum performance. He was probably at around 0.7 calibers of stability.
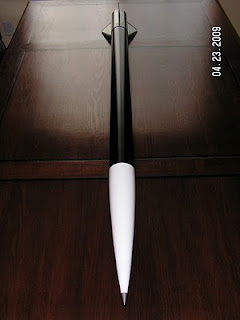
5ob81tP.jpg


As for the altimeters, I'm using a Perfectflite Stratologger for both main and apogee, with a Raven3 as backup/ for data. I have a single airframe break with two line cutters around a burritoed chute. Add in a BigRedBee 70cm GPS AND a BigRedBee 70cm RF tracker, and it is completely full. I wouldn't recommend putting the RRC3 up so close to it's limit, since the baro sensor could get a lot of noise and false detect apogee.

Hope you come out to Aeronaut, we can drag race!
 
I don't think even Mach 3.2 is fast enough to cause worry. Note that this is based upon my totally unscientific experience of having flown exactly one rocket past that (admittedly one with really tiny fins).

Take this advice with a cave full of giant salt crystals.

640px-Cristales_cueva_de_Naica.JPG
 
4 Fins it is!
I want this rocket to be able to take ANYTHING I can throw at it. That means M3 will be about my Max speed, depending on the motor. It may not get there with Manny's motor (It MIGHT with "plan B") but I want it to be able to handle a Mach 3 flight. I might be fine with 3 fins, but 4 will give me a little more cushion both in regards to stability and strength. So what if it's a little more work! I'm not afraid to work for my rockets.
Tuxxi said:
Hope you come out to Aeronaut, we can drag race!
I'll be out there if all goes according to plan! Welcome to the party!
Sweet blog BTW! Real nice work on your 3in MD. Where did you get the tubes from?

RRC3 talk: I've already got my RRC3, and it's not the Extreme version. With the 4 fin version of the rocket I'm only simming 33k or so. That's much more in my comfort zone.

Alex
 
4 Fins it is!
I want this rocket to be able to take ANYTHING I can throw at it. That means M3 will be about my Max speed, depending on the motor. It may not get there with Manny's motor (It MIGHT with "plan B") but I want it to be able to handle a Mach 3 flight. I might be fine with 3 fins, but 4 will give me a little more cushion both in regards to stability and strength. So what if it's a little more work! I'm not afraid to work for my rockets.

I'll be out there if all goes according to plan! Welcome to the party!
Sweet blog BTW! Real nice work on your 3in MD. Where did you get the tubes from?

RRC3 talk: I've already got my RRC3, and it's not the Extreme version. With the 4 fin version of the rocket I'm only simming 33k or so. That's much more in my comfort zone.

Alex

The failure mode for the electrolytic capacitor on the non-Extreme RRC3 is a slow boiloff. The few seconds it spends at the moderate vacuum at 40,000 feet is not gonna break anything. Heck, the Google team used an RDAS with an electrolytic cap up to 104,000 feet.
 
While I have your attention, I finished the main BT!

DSC07831.jpg

No pics of the layup, but It was exactly the same as the previous two. 5 layers of 3k Carbon, wrapped around a mandrel with mylar over it. This tube is 37in long.

I'm actually very pleased with how this turned out. It's most likely the best tube I've ever made. There are NO cosmetic of structural flaws and the entire surface is completely even.

DSC07833.jpg

DSC07832.jpg

I had some left over epoxy from the booster tube so I gave the upper tube a thick coat to fill in pinholes or any other imperfections.

Hopefully this can show how deceptive carbon can be in photos. In the first one, the tube looks slick and glossy.
DSC07834.jpg

In this one: Not so much....
DSC07836.jpg

I stacked all the tubes on top of eachother to give a general idea of the size.

It's not a small rocket. In minimum diameter terms at least.
DSC07838.jpg

Hope you're enjoying the build so far. Sorry about the lack of details and pics! Life gets busy right when you don't want it to be!

Alex
 
Hey Alex, if your booster tube is 37" long, how do you plan on fitting a 75/7600 in it? Isnt the 75/7600 40" long? Are you using the motor as the coupler? it doesn't look like this in your original design.

those tubes look fantastic! great job!
 
Hey Alex, if your booster tube is 37" long, how do you plan on fitting a 75/7600 in it? Isnt the 75/7600 40" long? Are you using the motor as the coupler? it doesn't look like this in your original design.

those tubes look fantastic! great job!
Thank you! That tube + my 16 inch fincan tube gives me something like 53in for the booster section.
Nice job Alex, spray those tubes with clear gloss. It's less of a hassle :D.
Clear gloss doesn't build up like epoxy does. Don't try and use clear gloss as a filler! Just a finish.
Glad to see you coming along! Darn the busy part, I'm in the thick of life I guess.
-Ken
I'm hoping to see you out, burning AP soon! Have fun with the new job.

Alex
 
Clear gloss doesn't build up like epoxy does. Don't try and use clear gloss as a filler! Just a finish.

spray and lightly sand, then spray again until it builds up. Clear gloss works just the same way as primer :wink:. Your choice I am merely giving out an alternative.
 
Minwax makes a high build urethane gloss. Tons easier to work with than epoxy.
 
I finished the 4 fin design on Openrocket. I'm still playing with it and tweaking certain aspects.
The fin design is a little different, but I can't see many drawbacks with it, and I DO think it looks pretty sweet.

Screen Shot 2013-11-01 at 5.25.26 PM.png

Screen Shot 2013-11-01 at 5.20.20 PM.jpg

Feel free to download it and play around. Openrocket says it's stable up through Mach3. I'll have to run the RAS tests later.
View attachment Playin' With Fire with 4 fins .ork

Alex
 
Look what showed up on my porch today!
6in x 24in of 1/8in Dragon Plate!
DSC07843.jpg

I taped the templates onto that and cut them out with my Jigsaw.
DSC07845.jpg

Here they are, all cut out and stack sanded. I didnt take pics of the cutting process. It's the exact same with cutting out any other fin material. Just moving a jigsaw around.
DSC07847.jpg
DSC07846.jpg
The fins are actually quite small. Here is a pic of them next to the 3 fin design.
DSC07848.jpg

Thats all for tonight folks! I have the day off from school tomorrow, so I'll get some more stuff done!

Alex
 
I'll be sure to get me a jigsaw, those cuts look very accurate. Question, are those carbon fins finished with peel ply?
 
I'll be sure to get me a jigsaw, those cuts look very accurate. Question, are those carbon fins finished with peel ply?

Yes. Dragonplate offers material in several finish options, one of which is 'economy' finish, which in addition to being cheaper has no after-pressing surface finish on it. They press the panels down with peel ply and bleeder to allow an escape for excess epoxy, so the default panel finish is peel-ply.
 
I just hand beveled the fins. I've hand beveled 30+ composite fins so I've gotten quite good at getting an even bevel. These ones turned out great.

DSC08006.jpg

In regards to the metal edging: It didn't work out. I got very thin galvanized steel from ace hardware and tried to bend it to match my fin bevel. I used guides and small homemade jigs to try and get a good angle, but it just turned out ugly and there was always something askew. I tried using aluminum with the same result.

Here is the edging that I WONT be using:
DSC08004.jpg

DSC08005.jpg

DSC08009.jpg

For edge sealing, I'll be using the Jim Jarvis method.

Fin Attachment happens today.

Alex
 
Thanks Cap'n!

I tacked the fins on with Aeropoxy structural adhesive. This is my all-time favorite tacking epoxy. The cure time is a little long, but once it's cured those fins aren't EVER coming loose (during construction at least).

It's one cool looking fincan.
DSC08019.jpg

Merry thanksgiving everyone!

Alex
 
Thanks Cap'n!

I tacked the fins on with Aeropoxy structural adhesive. This is my all-time favorite tacking epoxy. The cure time is a little long, but once it's cured those fins aren't EVER coming loose (during construction at least).

It's one cool looking fincan.
View attachment 155347

Merry thanksgiving everyone!

Alex

Happy Thanksgiving Alex, that is one cool looking fincan :cool:
 
Thanks Cap'n!

I tacked the fins on with Aeropoxy structural adhesive. This is my all-time favorite tacking epoxy. The cure time is a little long, but once it's cured those fins aren't EVER coming loose (during construction at least).

It's one cool looking fincan.
View attachment 155347

Merry thanksgiving everyone!

Alex
Love the shades. Aviators?
 
We're not even to the pretty part yet.

I'll just add that this project is leading up to an even cooler one. :grin:

Alex
 
Almost to the pretty part.

I did some cosmetic work on the tube over the past few days.

First up was an Epoxy coat with West Systems. Epoxy coating is about all I use West Systems for anymore. It's really thin and clear, which gives the carbon fiber a nice glossy shine.

DSC08020.jpg

Once coated, the surface is still quite bumpy and uneven. The next step is to sand it down with 120-180 grit sandpaper. The surface should look dull, but even and flat.

DSC08022.jpg

You can see that the picture, the 120 and 180 leave deep scratches in the finish.

To get rid of these, we need to apply another epoxy coat. I like to thin this coat with Acetone until it reaches a water-like consistency. You want to spread this coat very thinly. Just enough to fill the scratches from the sanding, but not enough to run or build up at all.

Here it is after the second coating, this time with Acetone-epoxy.

DSC08024.jpg

This coat needs to be sanded down as well, but with finer grit sandpaper. I'll start with 320 or 220 and work my way up from there. I'll be going up to 1200 grit. Maybe I'll do that today.

Alex
 
Back
Top