Interceptor E Build

The Rocketry Forum

Help Support The Rocketry Forum:

This site may earn a commission from merchant affiliate links, including eBay, Amazon, and others.

Pantherjon

Well-Known Member
Joined
Jan 19, 2009
Messages
7,434
Reaction score
9
Well, I got the urge to build something-or at least START building something, tonight..I walked into the room I call 'Jon's Rocket Store' where the stash of kits are..Hmmm, that opened Interceptor E was calling my name...Pouring out the parts(after a good shake to get them well mixed) I was a little disappointed that an assembled rocket didn't plop out! Sheesh, I gotta do this the old fashioned way and actually BUILD it?:rolleyes: :lol: This is going to be a little bit of a long build as I have my work and a TON of other junk I HAVE to get done by the 29th..So bear with me...

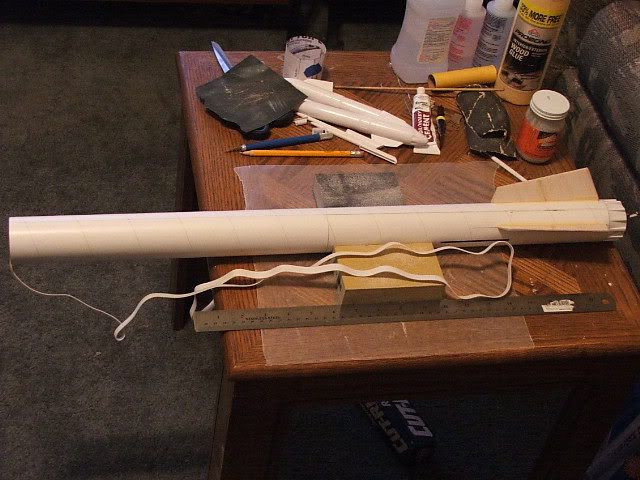
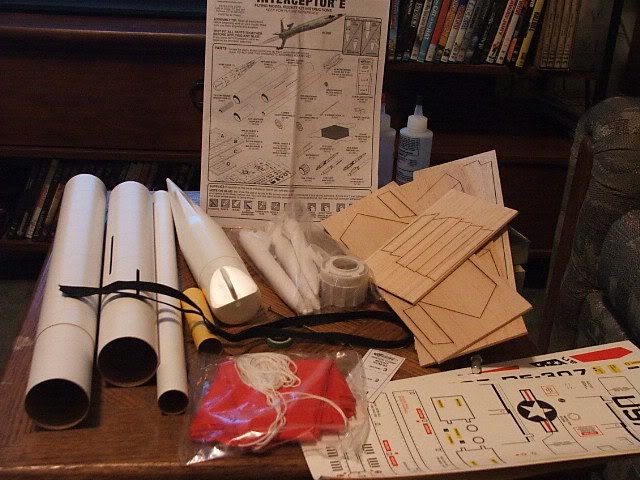
Anyways, I am impressed with the quality of the parts..Nice tubes, awesome detailing on the nosecone, hefty balsa..and then the one piece of pooh- the mega short shock cord! WHAT were they thinking! This little thing is barely 2' long! Oh well, will replace that with a much longer one!

I am making some minor adjustments to the assembly of this rocket..It will be pretty stock but I am going to take a couple of liberties early on, well, cause I can..;)

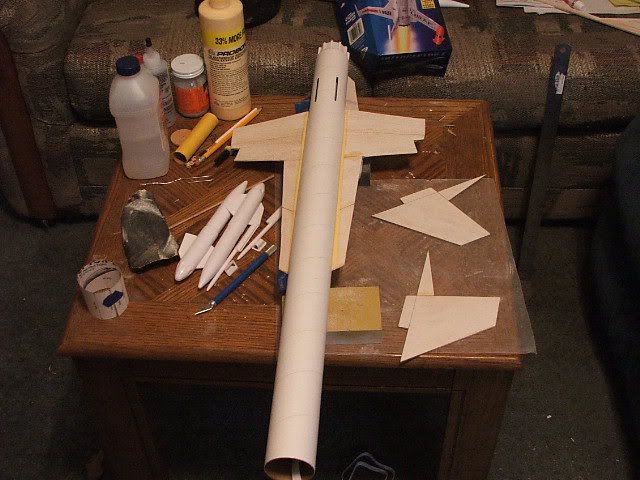
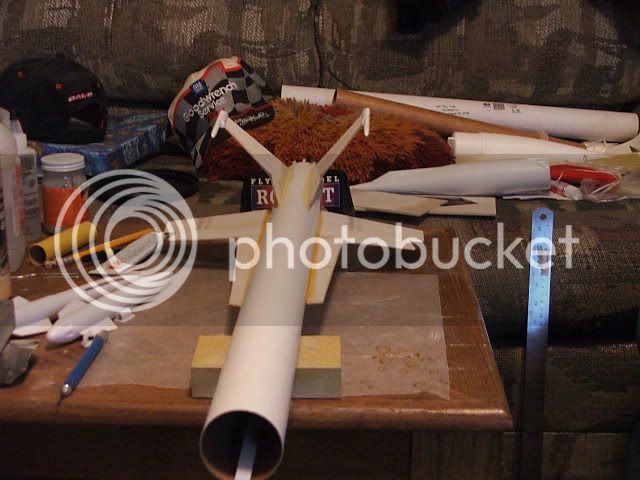
Here is a shot of the parts on my little work table:
Interceptor-E001.jpg


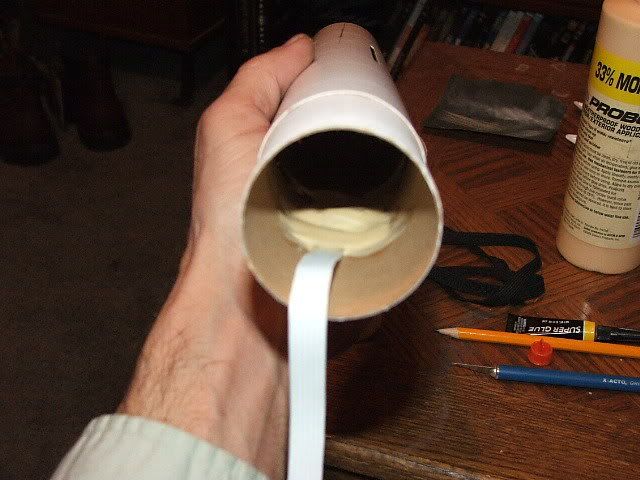
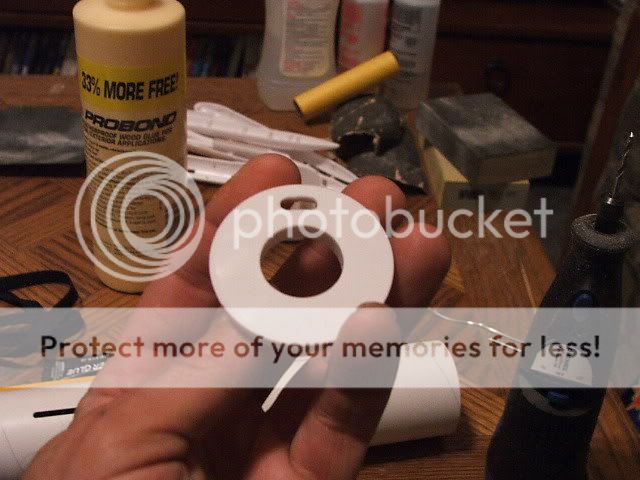
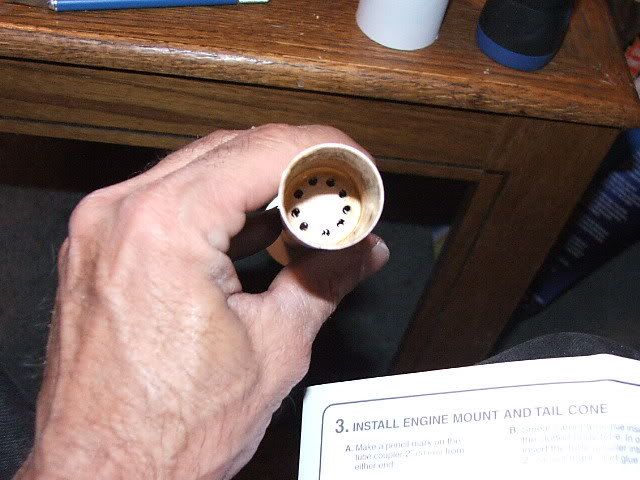
Ok, first modification..After gluing the engine hook and thrust block and rear centering ring on I put in my special baffle! In the motor tube!
Interceptor-E002.jpg
 
Then my next modification to the kit..I decided I wanted to mount the shock cord in a different location..I decided on mounting the cord at the midpoint of the coupler tube..It is below the end of the long motor tube, plus I have the baffle, so should have not problems from heat of flaming particles..lol.. That is as far as I got tonight..Hopefully will get some more done on it tomorrow- umm later today I guess...lol..

Shock cord mount:
Interceptor-E004.jpg


Notch in front centering ring for cord to go thru:
Interceptor-E003.jpg
 
Cool build,
this is gonna be good...

...sorta comforting too - I'm not the only
one all bug-eyed tonight...
 
looking great John :) I just finished attaching the wings on mine :)
Cheers
'fred
 
Well, got a little bit more done tonight as I watched the one eyed monster:lol:

Here the motor mount is installed and the tubes joined along with the nozzle:
Interceptor-E005.jpg


And I got the sub fins assembled and glued on..I have applied 3 coats of aerogloss filler to all balsa parts and have sanded them down..They feel super smooth!:D This is turning out to be a fun build!
Interceptor-E006.jpg


Hopefully will get the rest of the fins assembled and on tomorrow after work...
 
Hey Jon-

Nice to see that I'm not the only one who goofed on the lower fins... Yours are on backwards as well! I did the same thing on my Interceptor-C... Oops!
 
:lol::rotflol: I must be sydlestic or something!All I can say is 'CRICKEY!!' Yep, I put the sub fins on backwards!:eek: Well, they are on correctly now!:p


Interceptor&


Thanks for pointing out my blunder! It just seemed more intuitive to put them on they way I did originally..lol..I think it was all the dope 'fumes' and I was 'dopey' when I put them on....Yeah, that's my story and I am sticking to it!
 
Thanks for pointing out my blunder! It just seemed more intuitive to put them on they way I did originally..lol..I think it was all the dope 'fumes' and I was 'dopey' when I put them on....Yeah, that's my story and I am sticking to it!

I agree with you... I think they look better "backwards" myself! I didn't notice myself until I was trying to figure out why the decals weren't going onto the sub fins quite right.... Major D'oh!

No one that I've pointed it out to has noticed before it being announced...
 
One other thing about this kit, I am trying my bestest to NOT use ANY epoxy which is contrary to the instructions..For the plastic centering rings I used the Super Glue brand Modeler's Cement and the rest with wood glue..I don't really see the NEED for using epoxy..Am also going to take some laborious measurements and work up a RockSim file for it as well(if someone hasn't beaten me to the punch yet)...I do intend on using some 24mm RMS loads in it..:D
 
OK, true confessions - I put the E's sub-fins on backwards too!!! but I did the regular Interceptor's sub-fins correctly. oh well. caught it before the glue dried, whew!

instead of my usual orange Testors', I used MEK based liquid cement on the plastic bits, because I still remember it was the only thing that worked on the plastic of the X-Prize rockets.

thinking about substituting plywood for the butt-jointed and cleated main wings. those big bumps - yuck.


otherwise, trying to build it light & stock.
 
One other thing about this kit, I am trying my bestest to NOT use ANY epoxy which is contrary to the instructions..For the plastic centering rings I used the Super Glue brand Modeler's Cement and the rest with wood glue..I don't really see the NEED for using epoxy..Am also going to take some laborious measurements and work up a RockSim file for it as well(if someone hasn't beaten me to the punch yet)...I do intend on using some 24mm RMS loads in it..:D


John:
One of the things to keep in mind about all CA's (Super Glues) is they become very brittle over a rather short amount of time, while most decent epoxies maintain a least a little flexablility after curing. I wasn't happy seeing the Plastic centering rings in this kit at all but decided to leave them in just to see how they hold up. I plan on mostly using D12's in mine anyway. I did epoxy in the motor mount but used carpentered cement everwhere else;) Looks like your well on your way, Should be a fun build:)
About the only Special thing added is a Stainless steel 1x19 strand avaition cable shockcord anchor to my motor mount as the only real diversion from the instructions so I didn't take any "build" photos at all.

cls: Have to agree with you on the YUCK! about the wing blisters but again went ahead with them just to see what I could do with them, as well as wanting to see what happens when we try applying the wing decals over these custom sanded bumps. I have to believe everyone building will have them just a little different. I'm thinking the wing and tail decal are gonna require a lot of attention and solvent?

I'm at the point of sanding the first 3 coats of applied primer. Just waitng for the "sanding bug" to bite me:lol: Maybe this weekend if it stays as cold as they are calling for and I skip the club launch???
 

Attachments

  • 474p02-sm_Interceptor-E 3 coat Primed_02-05-08.JPG
    474p02-sm_Interceptor-E 3 coat Primed_02-05-08.JPG
    84.7 KB · Views: 17
I use epoxy EXCLUSIVELY for structural components exposed to force loads on EVERYTHING "E" power and above, period.
Why ?
It is heavy, but it is very cheap insurance; I have NEVER had an epoxy joint fail and my rockets are always recovered with ZERO busted parts.
I do not know why certain individuals try to avoid using epoxy like it is toxic waste or something...makes ZERO sense to me unless one is worried about the MINIMAL weight it adds to the average MPR build....the benefit FAR outweighs any small weight penalty.
 
I use epoxy EXCLUSIVELY for structural components exposed to force loads on EVERYTHING "E" power and above, period.
Why ?
It is heavy, but it is very cheap insurance; I have NEVER had an epoxy joint fail and my rockets are always recovered with ZERO busted parts.
I do not know why certain individuals try to aboid using epoxy...makes ZERO sense to me unless one is worried about the MINIMAL weight it adds to the average MPR build....the benefit FAR outweighs any small weight penalty.

Mostly because epoxy is totally unnecessary for most LPR/MPR (MR/LMR) builds. Overbuilding is the bane of the hobby. Building bulletproof models is neither in the best interest of the hobby or our safety record.
Personally I use epoxy only were needed as other adhesives work just as well (with NO broken joints on landings), maintain more flexability and result in as strong or stronger adhesion in Paper-carboard/wood joints. All that while greatly reduces the unnecessary weight added with epoxy. There is only marginal benifit to using CA's and epoxy is in speeding up a build.
Knowing the materials with which we work is something more of our rocket building family need to investigate and learn.
The sense is built lighter for better performance...every grams counts.
The Speed of balsa/bass or light-Ply for that matter, has Little to do with which glue or adhesive is used. I have 30 year old models that are still flying with all White glue constructions, some of much younger age with epoxy fillets have cracked and had to be replaced.
Generally flying only BP motors, either single or in clusters I've yet to have a butt paper/wood glue joint fail on landing under normal recovery conditions up to the 3.3lb(1500g)LMR limit. In fact several not so normal chute failure recoveries have not broken at the glue joints, rather in the wood.

Model and (LRM)Large Model Rockets such as the Interceptor-E, are Intended to Break rather then do harm.
 
ghrocketman,

If a person build rockets with minimal attention to the fit of the parts, rather he/she just likes to get the job done, than epoxy is probably the best choice. it's better at filling gaps and hiding things than wood glue.

If your a finess type builder that likes to sand ,tweak and massage every component than squirting a gob of epoxy over all that effort would probably cause major distress.

If it works nomatter what the method than I say, to each his own.
but atleast try to understand why it bothers some people to even think of >needing< epoxy for a low or midpowered rocket.
it's a big deal to some people(read any glue thread,, they often get pretty intense)

not everyone uses "gobs" of epoxy ofcourse, but I've seen plenty at launches that do.

back in the old days epoxy wasnt even a blip on the rocketry radar, and millions of rockets still took to the skys
if it wasnt necessary than , it's probably not necessary today, model rocket kit materials have changed very little since the beginning.

does that help clear the reasoning up a bit?
 
Jon how is that wicked looking interceptor of yours coming along :)
Cheers
fred
 
Jon how is that wicked looking interceptor of yours coming along :)
Cheers
fred

Still in pieces! :lol: With work and getting a property ready for closing I haven't had much time to do anything!:banghead:

I DID get the main wings put together..Actually twice..I did a 'dry fit' with the tab into the tube slot and the 'strake' on one fin popped off..In trying to juggle things the rocket tipped over and the other 'strake' popped off:eek: I hadn't sanded the laser burn off the balsa and the glue wouldn't 'stick'..Sanded the effected areas and re-glued them on..Hopefully I will be able to do some more in the morning as I actually have some FREE time! Will post a picture if any significant progress is made!;)
 
Well, actually made some progress this morning!:D The rain and thunder awoke me a little earlier then normal, so after getting a cup of coffee I set to work on the Interceptor E! I did some shaping of the forward and trailing edges of the main fins and got them glued on..Only problem I ran into was the 'dorsel fins' wouldn't lay flat against the BT:mad: I used a straight edge when I glued them on and the tab is straight in the BT..Tried as best I could by taping the ends down as the glue cured, which helped a lot, but one still has a little bit of a gap..I have also glued the upper fins together..Also applied the first fillets to the main fins..It is starting to look like an Interceptor now!

Interceptor-E008.jpg
 
Built the Interceptor C and working on the E. Ordered that from Discount Rocketry the got another from Hobby Lobby with 40% off coupon. No issues with construction so far.:)
 
Is there a Hobby Lobby in Michigan that is carrying the Interceptor "E " ???
If so, I need to buy another with a 40% off coupon.
 
Well, I did some more work on the Interceptor this(well, yesterday now) morning before heading out to paint a house I am selling..Got the top fins glued on along with the antenna plastic 'thingies' on top..lol..I did a preliminary 'dry fit' weigh in of the rocket earlier and it came in at exactly 11oz!:eek; I don't think I will be putting on those 'wing support' pieces, I really don't see why they are needed(the wings and fins feel awfully sturdy) and it just adds some unneeded weight..

I also scratched together a rough RockSim file for it as well..I haven't been able to figure out how to add the doo-dads on the ends of fins and the nose cone isn't an exact replica..The fins also do't show the TTW portion. I used the mass override and plugged the numbers in from my rocket(weight and CG location)..Sure, it will fly(in the sim) to almost 500' with an E9-4 and a very soft deployment at 5ft/sec..But, does anyone have a 23' long launch rod?:lol: According to RS it takes 174" for it to attain minimum speed for stable flight-which I have set at 44 ft/sec or 30mph..Best performer is with an F39-6, goes to 1261' with deployment at 29 ft/sec..

Anyway here is a picture and the RockSim file for your viewing pleasure!

Interceptor-E009.jpg


View attachment Interceptor-E.rkt
 
And since I am sure you all want to see it anyway here are a couple more pictures!:lol: The first is with a dry fitting of the main wing pods- which will be painted later today..All I need to do is glue on the launch lugs and get it painted! :)

Interceptor-E011.jpg


And here he is with his 'little bro' :D

Interceptor-E010.jpg
 
Hey John,
If you dont mind i thought I would add some photos of my build to your thread. This is the first lick of paint. The pods will need a little more. I also showed the decals i intend to use in conjunction with some of the supplied stuff
Cheers
fred

IMG_7738.jpg

IMG_7739.jpg

IMG_7742.jpg
 
The Hobby Lobby gets them occassionally, like the D-Region Tomahawk kit, and they don't stay on the rack very long. So don't raise your expectations too high.
 
Hey John,
If you dont mind i thought I would add some photos of my build to your thread. This is the first lick of paint. The pods will need a little more. I also showed the decals i intend to use in conjunction with some of the supplied stuff
Cheers
fred

That could never happer, Fred.

Since the 60's one of the requirements of the RCAF has been dual engines!

But a cool idea.
 
That could never happer, Fred.

Since the 60's one of the requirements of the RCAF has been dual engines!

But a cool idea.

Too true but JATO is as close as to a rocket as we ever got :)
Cheers
fred
 
Hey John,
If you dont mind i thought I would add some photos of my build to your thread. This is the first lick of paint. The pods will need a little more. I also showed the decals i intend to use in conjunction with some of the supplied stuff
Cheers
fred

Fred:
We must be on somewhat of the same wave length...
I was looking at mine in Grey Primer, thinking it's be kinda cool in aluminum, Titanium and Stainless steel colors with some sort of Color Tail art.
Good look'in start! Can't wait to see both yours and Johns decaled.
 
Hey John,
If you dont mind i thought I would add some photos of my build to your thread. This is the first lick of paint. The pods will need a little more. I also showed the decals i intend to use in conjunction with some of the supplied stuff
Cheers
fred

Fred,
Nice looking alternate colors. Oddly enough, I planned to paint my "E" different than stock -- the bag is open but haven't started yet. I do plan to build my standard model Interceptor true to the original with original colors and use supplied decals. What is it about the larger model that says "modify me"?

By the way, is that a workbench under your model?

:)
 
Hey John,
If you dont mind i thought I would add some photos of my build to your thread. This is the first lick of paint. The pods will need a little more. I also showed the decals i intend to use in conjunction with some of the supplied stuff
Cheers
fred

Looking nice Fred! I, too, must be on the same wavelength as you and Micro!:lol: As I intend to paint mine in silver as well, and seeing the other colors on the upper fins gives me some ideas and what to put on mine!;)
 
Well, between work(job), prepping this house I am selling and the weather not much has happened since the last update on the Interceptor..I do have it primed and the primer revealed some areas that needed some work...Mainly on the seams of the wings and the body tubes..Did some sanding to work out most of the ugly, and spent some time doing some filling..Am going to see if I can get a 2nd coat of primer on this afternoon and maybe the first coat of color..

Overall shot:
Interceptor-E012.jpg


Detail shot top port wing:
Interceptor-E013.jpg


Top tube joint:
Interceptor-E014.jpg


Bottom port wing:
Interceptor-E015.jpg


Bottom tube joint:
Interceptor-E016.jpg
 

Latest posts

Back
Top