BaddAzz Rocktery's "Das Blitzzkrieg" Build

The Rocketry Forum

Help Support The Rocketry Forum:

This site may earn a commission from merchant affiliate links, including eBay, Amazon, and others.
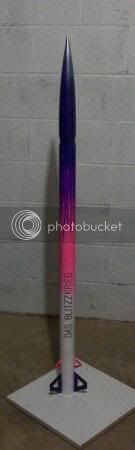
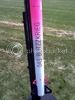
QUOTE=delamancha;212831]Would love to know how you did the paint job on the RED DasBLITZZKRIEG on your web page....[/QUOTE]

Vinyl, Trying to get vinyl from a friend of mine but he's on vacation like most. I did these and the ZZtarfire flames by hand.

I just got my kit and I have to say it really is a great rocket. Eric you have included so much in the package that is also a great value. I would recommend it to anyone who wants a unique rocket that is built like a tank. :headbang:

Thanks so much Jaz, I hope when people hear what you all have to say they will feel better about the price. I'm trying hard to make this a better hobby for all of us.

I am waiting for the Miss Rhonda to come out. Eric what type of paint works well on PVC. I am mostly a rattle can painter. Very nice kits.

Thank for the kind post! Rattle Cans! I call them Spray Bombs!!!!!
Guess What?? Me too!!:D:D I love Dupli color, but pricey. Honestly, I grab whatever the Auto zone or Advance or Walmart has, If it catches my eye!
Rough the surface with some #500 wet, prime, Sand again, prime,tack, Paint!
 
Last edited:
Krylon Fusion hands down. Great color selection, made for plastics, and doesn't require primer. I got a few cans for my blitzzkrieg.
 
Got my Baddazz kit yesterday.... the mail lady had left a dang orange card for me. I decided to see if I could get it before the PO closed. Well she was at the corner gas station! Kit in hand, I finished my work day and rushed home

After the kids were in bed I was able to put in a couple of hours. Have it together! Lack fin bracbracing and fillets. Should be spraying paint tonight!

Going for Level 1 this Sat...

Barry
 
Hey Eric

Any chance you have stickers in a file that you could email me..... just need the file for my vinyl cutter......

Barry
 
These were not that kind of vinyl, I had to do these by hand. Drew it out on paper and trace/cut it to the tape. Never again!!!!!

I wish you all the best!
Relax you'll get that L1!!!


Eric Foster
 
20110707011650-1.jpg
 
Eric.... thanks

Was very late and exhausted but wanted to post a pic. Will try to get a better pic outside today. Painted it with colors picked out by my 3yo daughter. She is pink crazy...... she is going to the field this weekend for the maiden. Have electronics to do in the meantime. Painted with an Iwata in WB colors then cleared with Dupont automotive clear.

Loving my BaddAzz kit......

BTW... ordered another kit that will remain anamyous.... two days before this kit. STILL NOT HERE!

Barry
 
Eric I know some of the screws are 2/56 and 1/4" long. There are two sizes. What are the others?
 
Finishing up the build with external fillets (although don't really know if these are necessary?). I kept them real small so as not to take a way from the "mechanical" look of the overall design. Now though, my question... I'm thinking of taking the whole thing apart, at least removing all the screws for the top two CRs which would likely stay fairly closely in place to paint the thing? For sure I'm removing the rear CR so it will stay the natural silver color. Any thoughts on finishing?

BTW, I did use normal Bob Smith type epoxy with 50-50 milled fiberglass and fillet filler. I scuffed up the fin tabs and internal gluing area on the NC and booster airframe well with 60 grit. I don't really see these things "going anywhere."

IMG_0288.jpg
 
Finishing up the build with external fillets (although don't really know if these are necessary?). I kept them real small so as not to take a way from the "mechanical" look of the overall design. Now though, my question... I'm thinking of taking the whole thing apart, at least removing all the screws for the top two CRs which would likely stay fairly closely in place to paint the thing? For sure I'm removing the rear CR so it will stay the natural silver color. Any thoughts on finishing?

BTW, I did use normal Bob Smith type epoxy with 50-50 milled fiberglass and fillet filler. I scuffed up the fin tabs and internal gluing area on the NC and booster airframe well with 60 grit. I don't really see these things "going anywhere."

The rings won't move. A little Vaseline in the holes will keep you from having to chase threads from paint. I won't vote on finishing, you've already seen mine!
Ok I lied!!! :D
How about a Blue/grey/white camo job? Add a Phat Red Maltese Cross! I think that would Rock the House!!!!!:headbang::headbang::headbang:

Eric Foster
 
Eric,

Just two minor suggestions so far on a BADDAZZ kit! Wish the av vent lined up with the tray just a tad better. I used the vent for a internal slide switch. Had to twist the rods slightly. Also... the rods could be moved inward slightly.... not much clearance when I slide av bay into booster. Had to toe them in slightly.... no room for BP tape on charges....

Otherwise..... awesome kit and VALUE!

BARRY

I agree on moving threaded rods inward. About .062 per side on next batch. The vent should have aligned perfectly though. Could you post a photo of your set up please? I don't use switches, I twist and tape.

Thanks for the input! I want to make these kits the best thing on the market!
You guy's see a place to improve I'm all for it!!

Eric Foster

Yep, I played with it a bit and decided to use a small pushbutton with the positioning of the hole almost directly perpendicular to the av-bay sled. Yes, BTW, I am building my own sled as I don't like the width/spacing of the plastic one provided (minor issue though).

It is a very quick build (one day) and I am moving into second coat of primer right now. I would also agree--great value in this kit!

Decals on order from Mark at Stickershock--I'm pumped!!!

-Tim

IMG_0292.jpg

IMG_0291.jpg
 
I agree on moving threaded rods inward. About .062 per side on next batch. The vent should have aligned perfectly though. Could you post a photo of your set up please? I don't use switches, I twist and tape.

Thanks for the input! I want to make these kits the best thing on the market!
You guy's see a place to improve I'm all for it!!

Eric Foster

Eric,

Glad you are on that. Was a real tight fit putting loaded charges into the body.

I will try to get a shot of the av bay..... maybe I used the wrong hole combination but I tried several. My vent was about 10 degrees off perpendicular..... i made it work though.
 
Yep, I played with it a bit and decided to use a small pushbutton with the positioning of the hole almost directly perpendicular to the av-bay sled. Yes, BTW, I am building my own sled as I don't like the width/spacing of the plastic one provided (minor issue though).

It is a very quick build (one day) and I am moving into second coat of primer right now. I would also agree--great value in this kit!

Decals on order from Mark at Stickershock--I'm pumped!!!

-Tim

That's looking Very BadAzz!!!!

Eric
 
Eric

Just back from a day of flying..... several comments/suggestions.

Found the booster a tight fit for single deploy..... ended up flying full deploy.

Had to tape the booster to the av bay..... was a loose fit. May have been okay..... not sure if it would have drag seperated.

Here is the posing shot.
20110709141636.jpg


Here is the flight on a H123 Skid...... slight stability issues....... only rocket all day to fly backwards and recover correctly! Came off the pad and corkscrewed 100ft up..... then swapped ends and slid backwards! luckily and electronics worked fine and main came out just before landing..... CG was about two inches above the top centering ring...... seemed good to me. Afraid to fly cutout fins now......


My son bringing it back

20110709143236.jpg
 
Last edited:
Now THAT is a nice launch site.

Sometimes I forget that there are places where the grass is green during the summer.
 
Eric

Just back from a day of flying..... several comments/suggestions.

Found the booster a tight fit for single deploy..... ended up flying full deploy.

Had to tape the booster to the av bay..... was a loose fit. May have been okay..... not sure if it would have drag seperated.

Here is the posing shot.
20110709141636.jpg


Here is the flight on a H123 Skid...... slight stability issues....... only rocket all day to fly backwards and recover correctly! Came off the pad and corkscrewed 100ft up..... then swapped ends and slid backwards! luckily and electronics worked fine and main came out just before landing..... CG was about two inches above the top centering ring...... seemed good to me. Afraid to fly cutout fins now......


My son bringing it back

20110709143236.jpg

Great pictures and field Barry.
The nose will not fit the sustainer.
I intended a loose fit on ave bay, Please adjust with masking tape on circumference of ave. bay coupler.
Don't understand the flight, I've flown several flights and only had 1 squirrely flight. Nothing like what you had though. I think I grabbed on the last rail button. My rocket veered with the wind and and flew 2800' at a 70 degree angle lost a 1000' or so.

Freakin Bizzaro!

Eric
 
Last edited:
Eric,

i know the nose cone wont fit the sustainer...... i was trying to set it up with single deploy seperating below the av bay...... could do it with a 24" TARC chute and engine deploy...... but I like full deploy better. More chance of safe landing.

Anyways..... it was a perfect day. Open skies and dead calm all day. Perfect day for cert flights. However, after my funked up flight I wasnt going to try another. Certainly not going to try a J motor in it. I don't trust it after that flight.

I love the looks of those open fins but it isn't going up again until the fins get changed. Something large and solid from now on......

Now I am no expert...... but my rocket was the only flight all day to swap ends....... need more stability before it goes up again.

Barry
 
There could be a number of reason why the rocket flew like it did. I had a PR Gizmo that I drilled out the fins making them look like Swiss Cheese when I was done, it flew great on all 20 of its flights. Did you check Cd and Cg before its first flight?
 
There could be a number of reason why the rocket flew like it did. I had a PR Gizmo that I drilled out the fins making them look like Swiss Cheese when I was done, it flew great on all 20 of its flights. Did you check Cd and Cg before its first flight?

Well.... not sure what "Cd" is.... if you mean CP we didn't know how to check that. CG was roughly 20" forward from the aft end on a 51" rocket..... certainly several diameters forward of the CP IMHO.

The nozzle looked perfect. The rail was 10' tall and smooth. It seemed to get squirrley about the time it got up some speed. There was NO wind. From what I remember, it swapped ends at about burnout.

Barry
 
Yes I should have said CP. Didn't Bad Azz have the CP & Cg on their site for the kits. Maybe Eric can give you that. It should fly well.
 
I just looked at the Badd Azz site the CP for your kit should be about 8.75" from the base of the rocket. If your CG is 20"s from the base your stable maybe over stable
 
You are correct.... forgot that was there.

Eric says CP is 8.875 from base and my CG was roughly 20" from base per a hand balance test......
 
Yeah based on what you have said it seems like your about 5 cal over-stable. Thats quite a bit. Also as propellant burns your cg will change slightly. During this change with that much variance it could have caused instability. Also could have hit a freak wind shear which if your way over-stable could have caused you to invert. Looking at the kit specs and how well you built it I'd say it's wind shear....
 
Take a look at the Apogee web site they have a section where they talk about a rocket being over stable. One thing they did say was a high thrust motor works better for a over stable rocket. Some how do you have a lot of weight in the back end of the rocket?
 
Yeah based on what you have said it seems like your about 5 cal over-stable. Thats quite a bit. Also as propellant burns your cg will change slightly. During this change with that much variance it could have caused instability. Also could have hit a freak wind shear which if your way over-stable could have caused you to invert. Looking at the kit specs and how well you built it I'd say it's wind shear....

Really? I will research overstable and see what can be done......
 

Latest posts

Back
Top