Wile E

The Rocketry Forum

Help Support The Rocketry Forum:

This site may earn a commission from merchant affiliate links, including eBay, Amazon, and others.

JamesS

Well-Known Member
Joined
Dec 6, 2019
Messages
134
Reaction score
92
Started this build a few years ago but didn't finish and I'm thinking if I start a thread maybe I'll put more effort on working on it. I don't plan to fly it (will it even?) this year but I still would like to complete the build at least. This is mostly just a fun project using miscellaneous parts and material I have lying around. Also, must catch and eat roadrunner!! haha.
WileE.JPG
Overall rough dimensions:
WileEOverallDims.jpg
 
ZJNXX2J.jpg
 

Attachments

  • Rocket sled.ork
    1.3 KB · Views: 25
Coach, is that your own attempt? Did you catch the roadrunner?

I think I have a 6.25 pound "mass component" in my nosecone.
 
Will need to keep an eye out for leather straps at thrift shops.
 
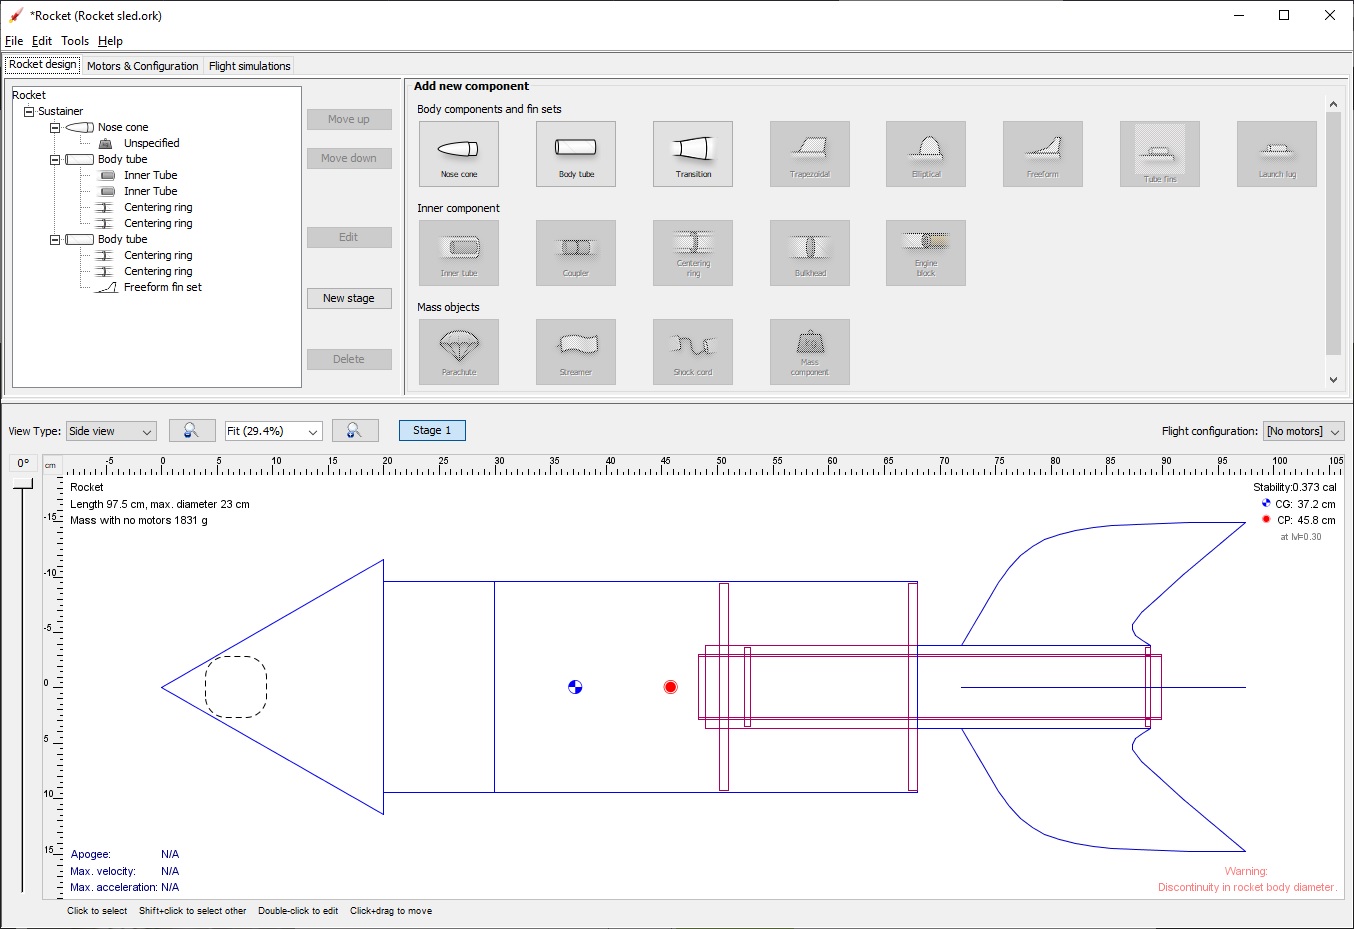
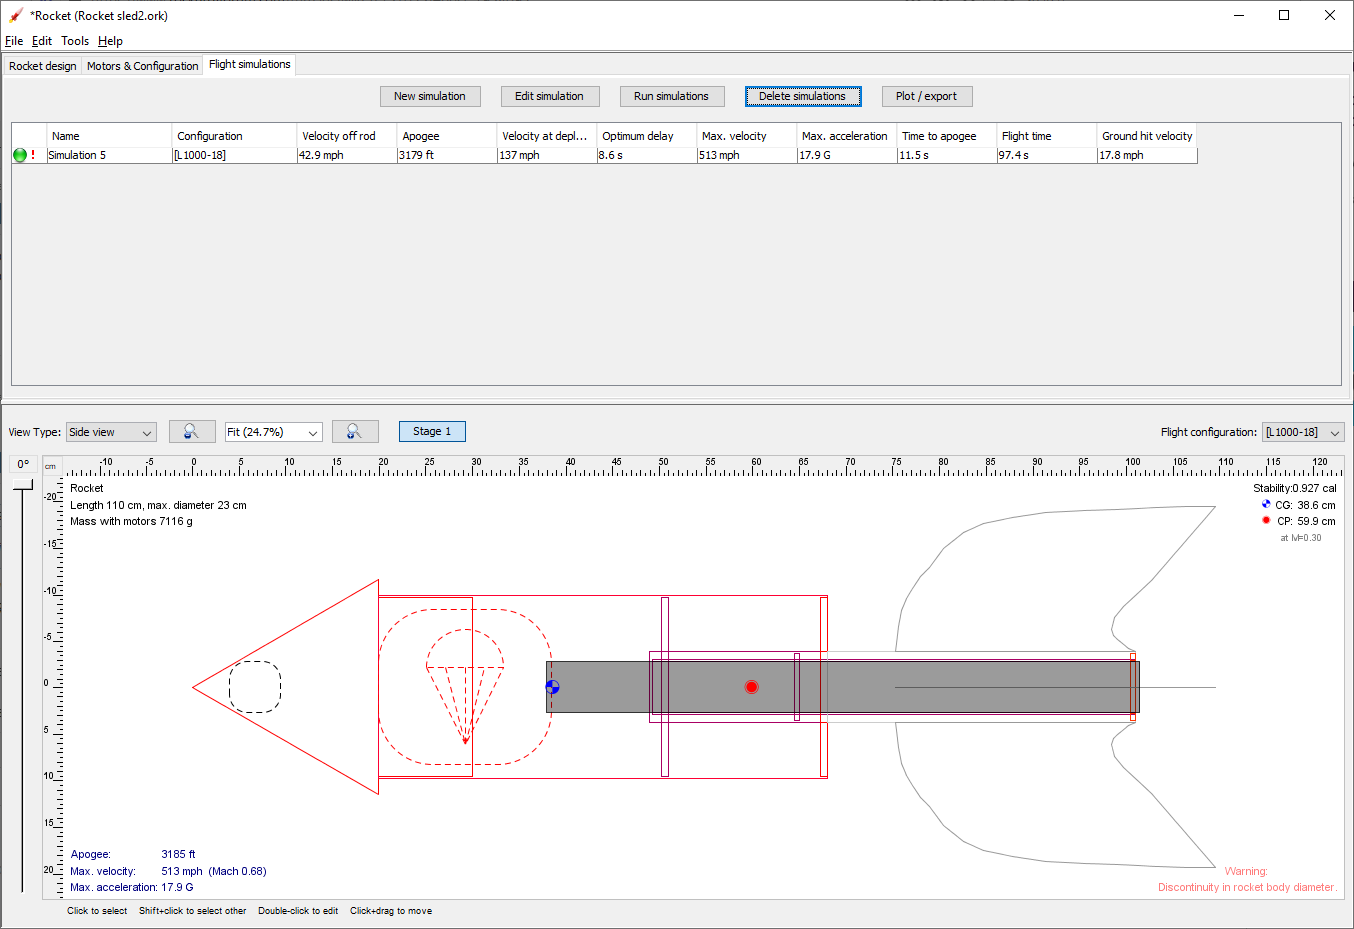
Not a sim expert. I noticed the configuration
" [no motors]"

If it means what I think it means, gonna be a problem when motors added.

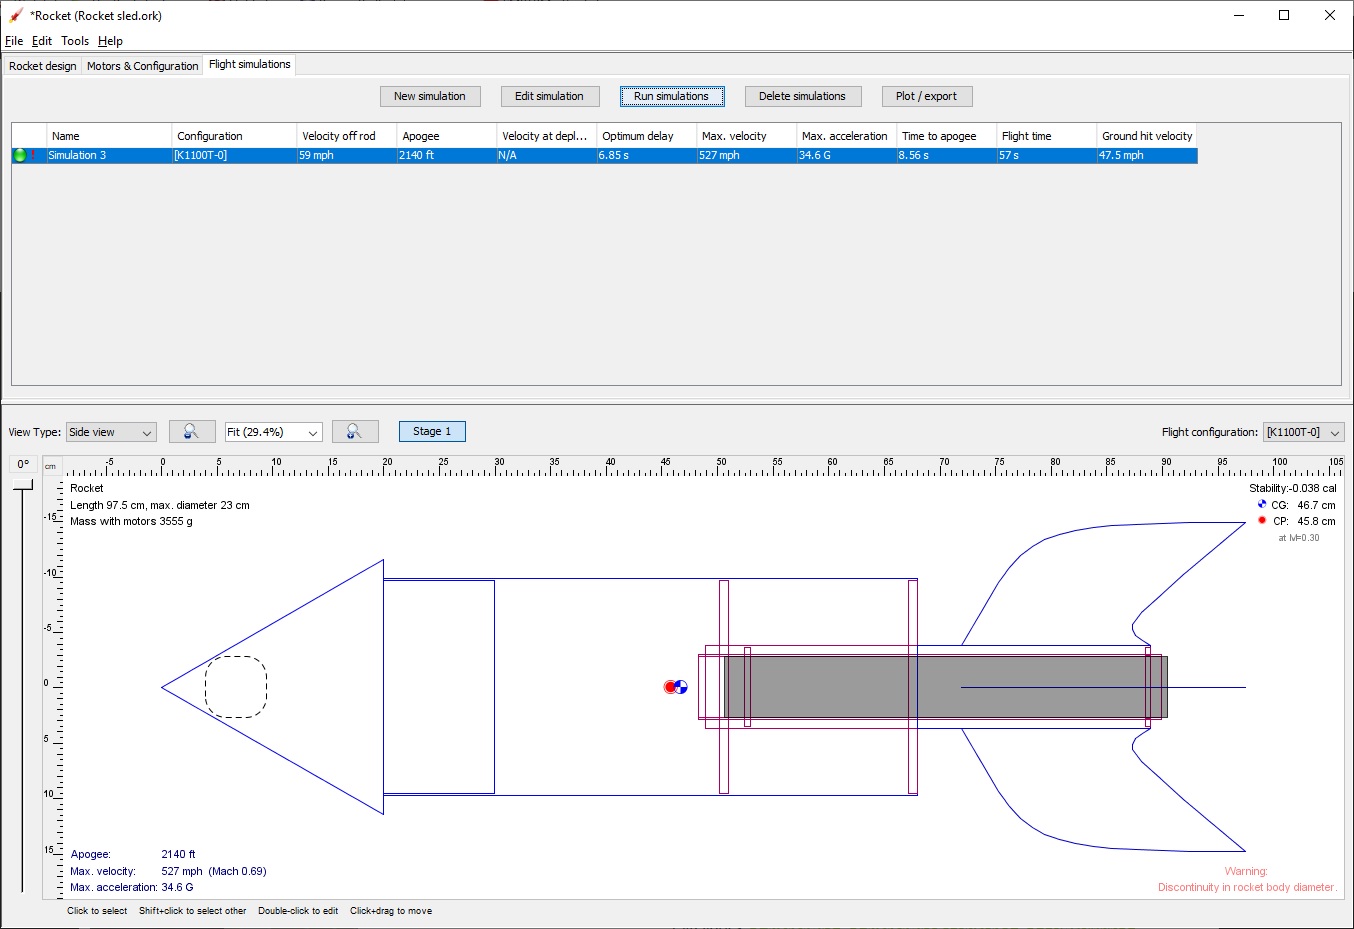
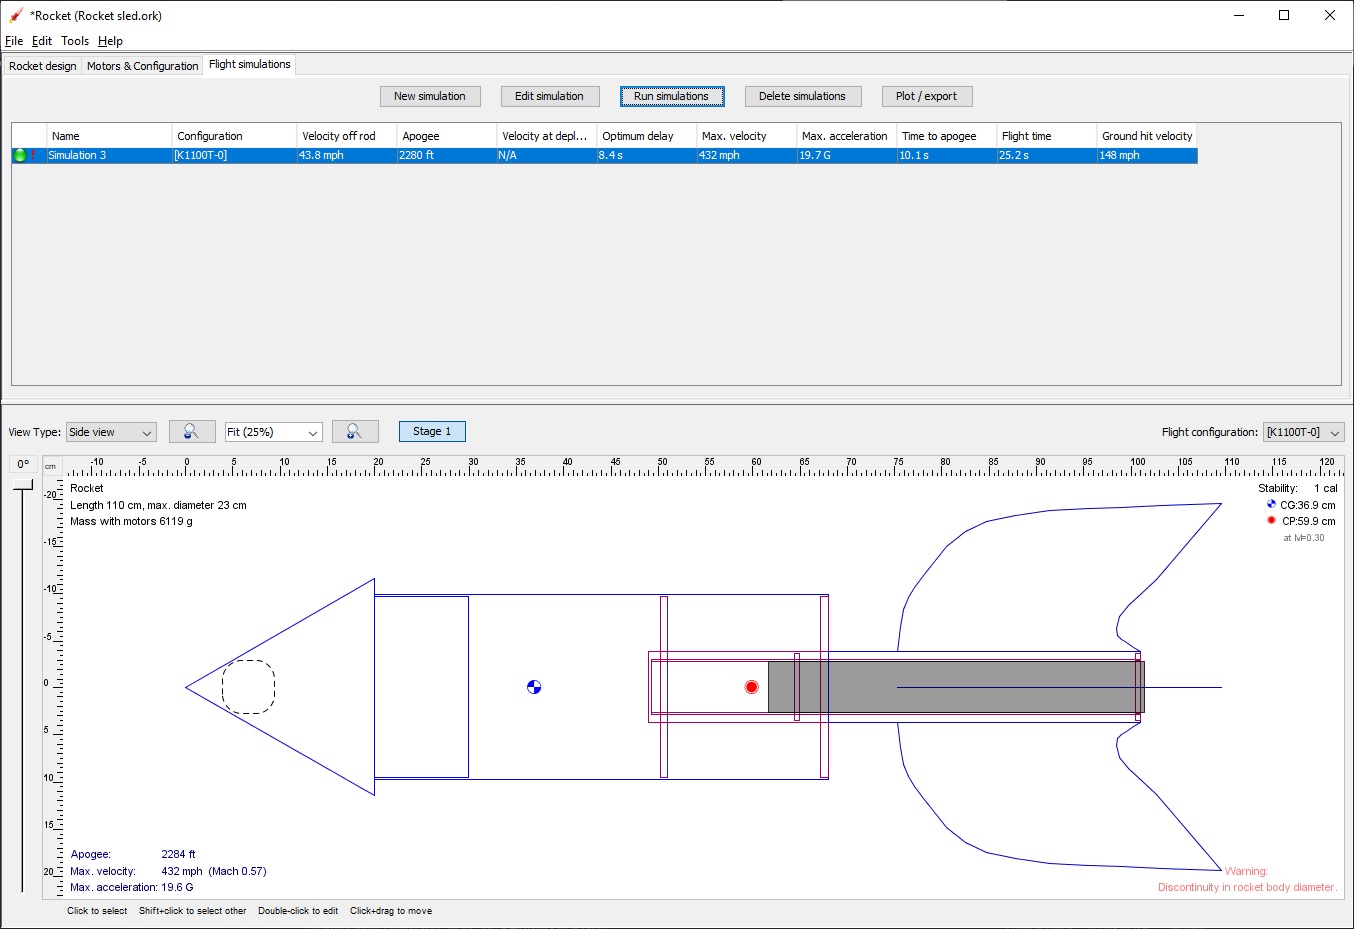
May be "tweakable" however with the fins a bit bigger, the body a bit longer, and the motor mount a bit longer (fins further back) without losing too much "Loony Tunes" (? "Luny Tunes"?) flavor.

Those pointy fin tips may be a bit breakable.

With that small motor mount and the BIG body tube, this would be a NICE model for rear ejection. You got TONS of space for chute between the mount and the body.

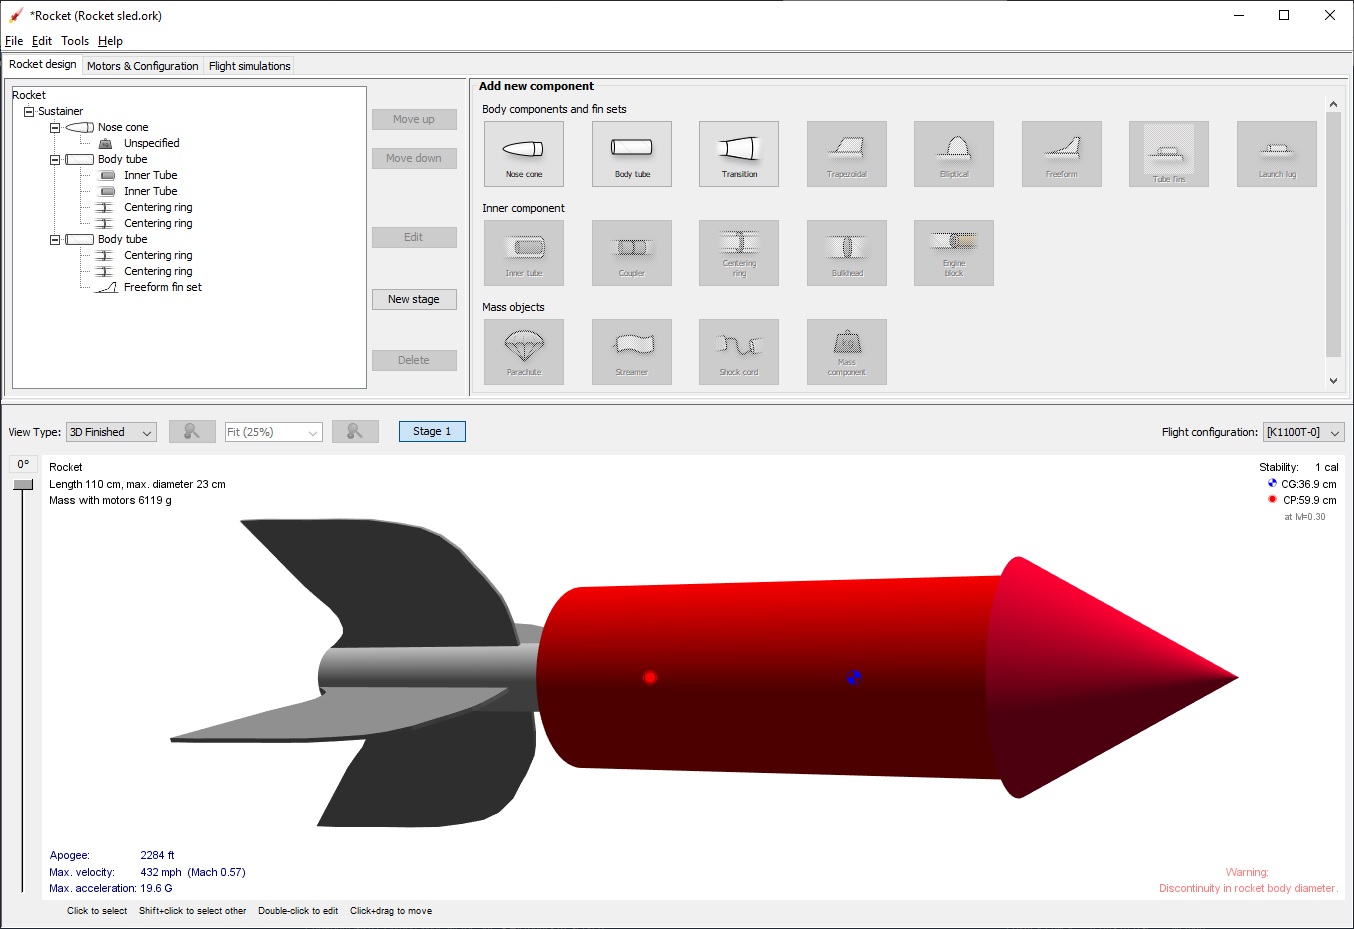
The nose cone is glued (and I mean REALLY SOLIDYLY glued) in place, the motor mount is extended all the way up into the nose cone (put something in the inside of the nose cone tip to protect it from the ejection blast, or PLUG the forward end of the motor mount and punch a bunch of side holes to let the ejection charge go out the sides of the mount, still works.) You need a forward centering ring placed just aft of the base of the nose cone.

Beauty of this is, you can put weight/mass on the forward end of the motor mount which is actually inside the interior of the nose cone at launch. With rear eject, the rocket comes back in two parts (you can connect them and use one chute or let them separate each with it's own chute.) The fin/motor mount unit with fall NOSE end first, so the weighted forward end of this unit takes the impact when it hits the ground, not the fin tips. Meanwhile, the rocket BODY and NOSE CONE section is a much lighter, so the impact has less force on it as well.
 
You could increase the inner part of the fins to attach to the bottom of the larger body tube. This would give more structural rigidity.

Beep-beep! :)
 
I know my Open Rocket mock up above is just for fun but here it is with a motor too :)
the sim uses LOC standard tubing sizes - so I threw a 54mm K motor in there - just because
xDyqLrH.jpg
 
I know my Open Rocket mock up above is just for fun but here it is with a motor too :)
the sim uses LOC standard tubing sizes - so I threw a 54mm K motor in there - just because
xDyqLrH.jpg
May want to increase the noseweight. -0.038 cal stability :eek::eek::eek:
 
ok - since it is fun to think this could be real - here you go - big old fins and a 7 pound nose weight :)
gsKC1Y5.jpg

TbuC7Tf.jpg
 
Don't forget the 5 foot parachute too - that will net you about 17 FT/s
you know, to protect those pointy fin tips :)
 
Last edited:
ok - since it is fun to think this could be real - here you go - big old fins and a 7 pound nose weight :)

Wile E's determination to catch Roadrunner is inspiring this build. :p Only if he had access to
OpenRocket!

Pulled various component parts from storage yesterday. Much of the nosecone is solid teak wood (7 lbs sounds good) that I started forming on a lathe. I no longer have access to a lathe, so will need to improvise to finish it.

Thanks all for the ideas! Keep 'em coming! I'll try to post up a pic later of the parts I have so far. Also, don't you just put a bigger motor in to make a rocket stable?
 
I guess it only works if the motor starts going past the CG. That's a beast of a looking rocket though!

(Coach, your minimag project put thoughts in my head for my own minimag to go under the knife, lol)
 
I had a lot of fun shaving every available ounce out of a Magg - nice kit as well - LOC does a good job
 
So here's the parts I have so far - PML airframe, 54mm blue tube for motor, centering rings and fins of 1/4" 5-ply, crazy looking unfinished nose cone. I forget why I have holes in my lower motor mount centering ring but I think the large hole was for either electronics or down facing keychain cam and the smaller holes were maybe just to shave some weight.
_DSC8180.JPG
 
Back
Top