Wild Child Build

The Rocketry Forum

Help Support The Rocketry Forum:

This site may earn a commission from merchant affiliate links, including eBay, Amazon, and others.

smapdiage9

Well-Known Member
Joined
Mar 14, 2009
Messages
442
Reaction score
3
It’s been five or so years since I’ve flown a rocket, and more for high power. Life circumstances have recently conspired to put me away from home and all my other hobbies for a few months during this summer, and I happened to see that there’s a high power launch in a nearby city in July. It’s time to fly again.

The objective of this build is to re-familiarize myself with sound high power rocket design, construction, and flight procedures by producing a rocket comfortably capable of flying safely on a range of commercial motors spanning at least G-I impulses. The build must include an electronically controlled, dual-stage recovery system and durable construction that finds a reasonable balance between performance and durability. Because I am accomplishing this build away from my home and tools, it is essential that I am happy to settle on readily available, hobby-grade materials.

The ideal state of this build is a rocket light enough to fly on an E or F motor from a conventional low power pad, but strong enough to fly level one high power motors and allowing me a platform to experiment with new recovery and tracking systems.

Goals List:

  • Dual deploy recovery
    Low power motor capable flight weight
    GPS tracker
    Single airframe break to prepare for future, higher performance builds
    Minimal weight for a small sport rocket

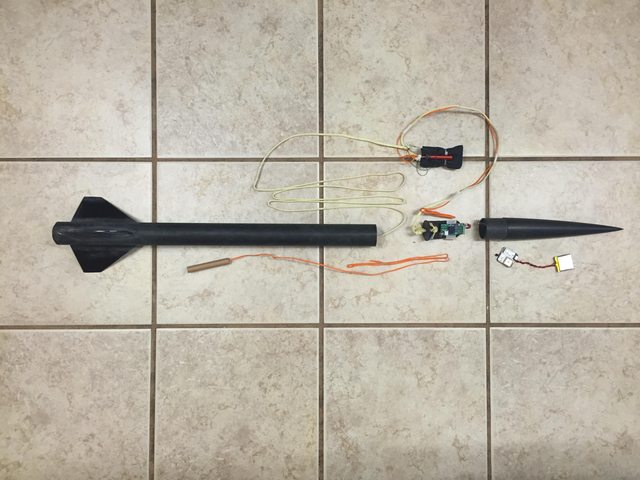
After a brief search I settled on building a Wildman Wild Child. This is a fiberglass 38mm rocket with a 29mm motor mount, and an available dual deploy upgrade. I have a Wildman 3" dual deploy and always liked the durable construction of these rockets.

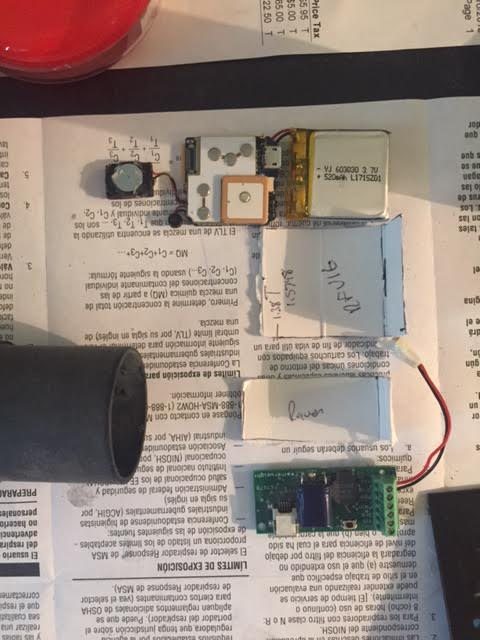
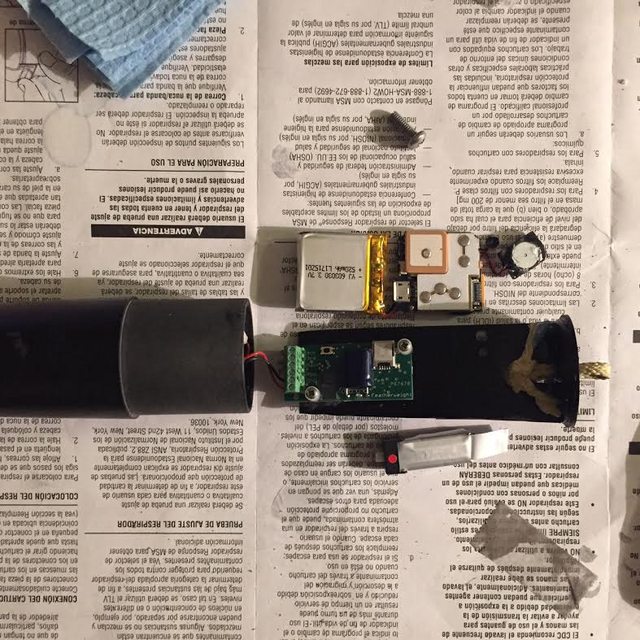
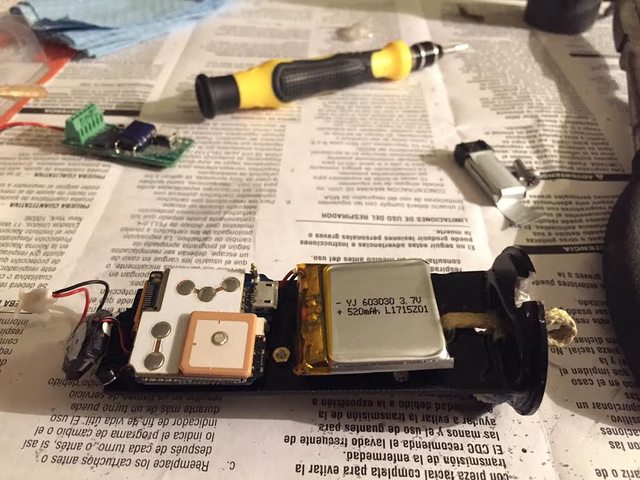
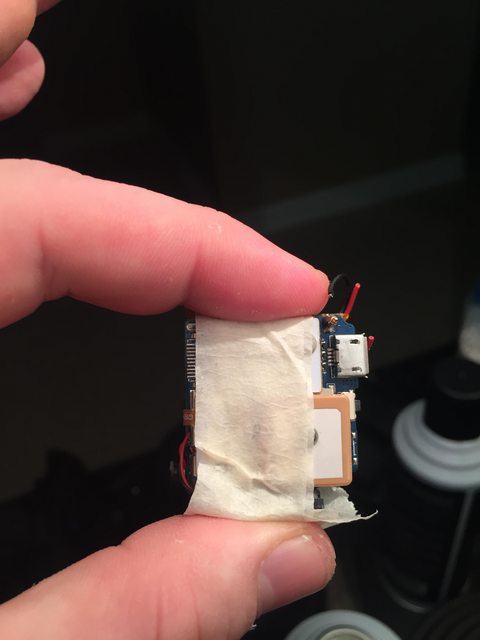
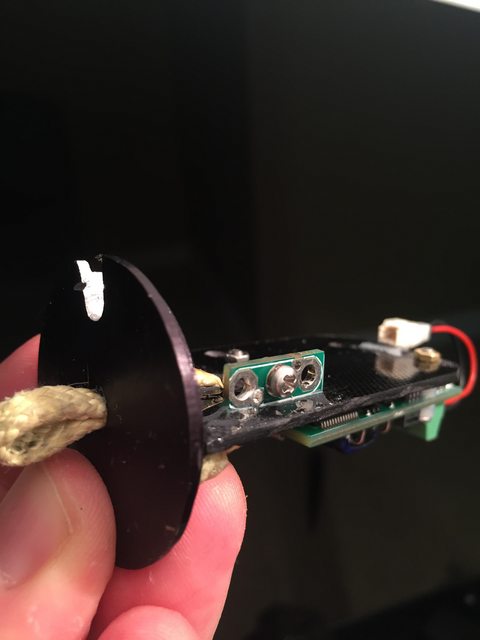
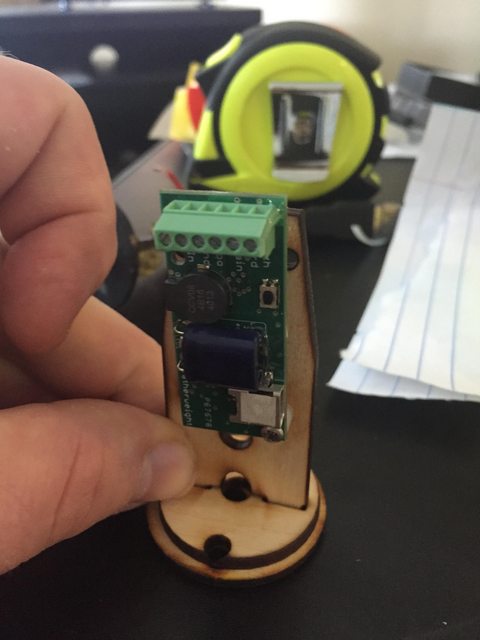
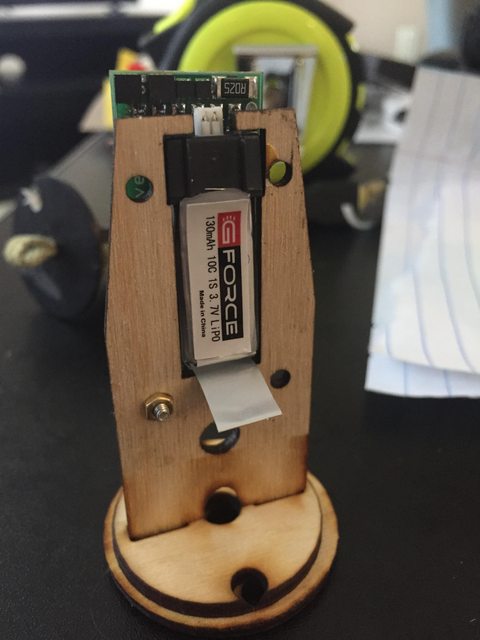
I also bought a Featherweight Raven 3 altimeter to control and record the flight, an RF-V16 cellular GPS tracker to provide post-landing tracking info, and archetype cable cutters because I haven't used that recovery device before and it seemed interesting to me.

As the many UPS boxes showed up, I began to feel like I should focus on designing the rocket to incorporate an avionics bay within the nosecone, to use motor ejection with one backup charge for separation at apogee, and to use a chute burrito restrained by zip tied cable cutter to control main deployment.

Initial Assembly:

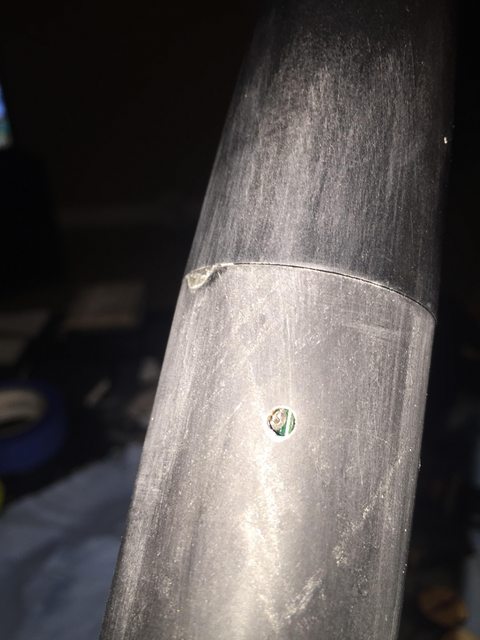
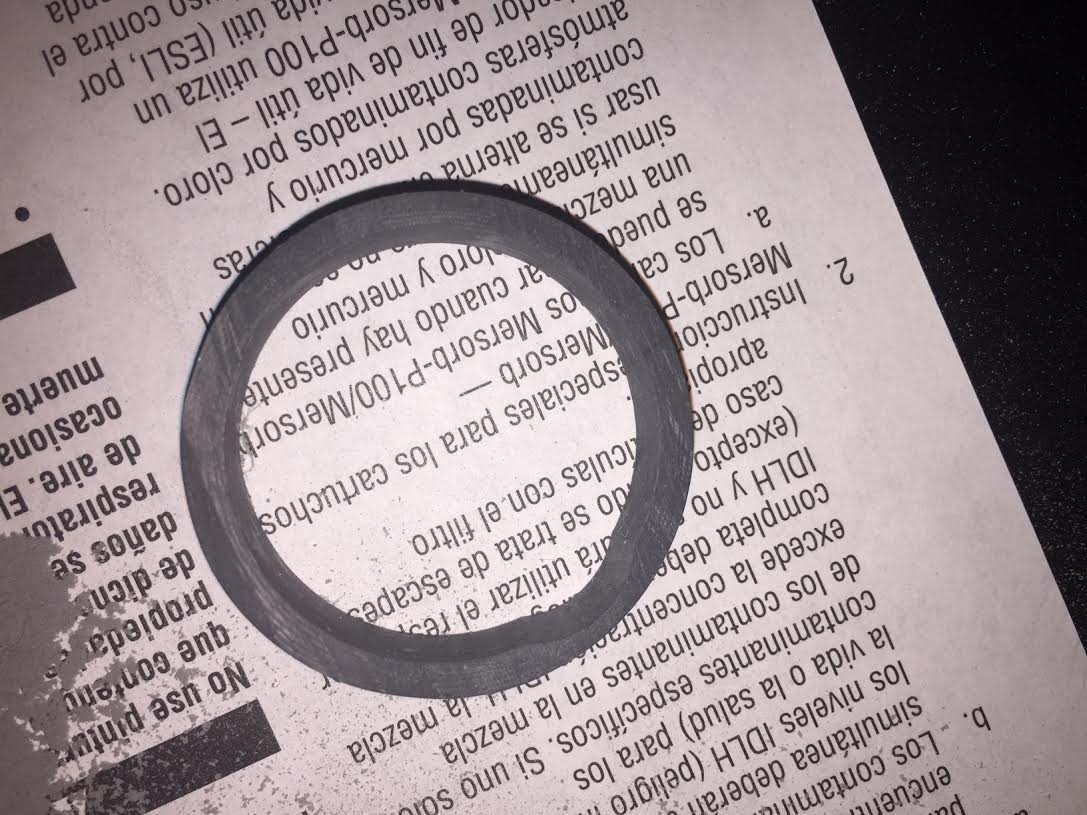
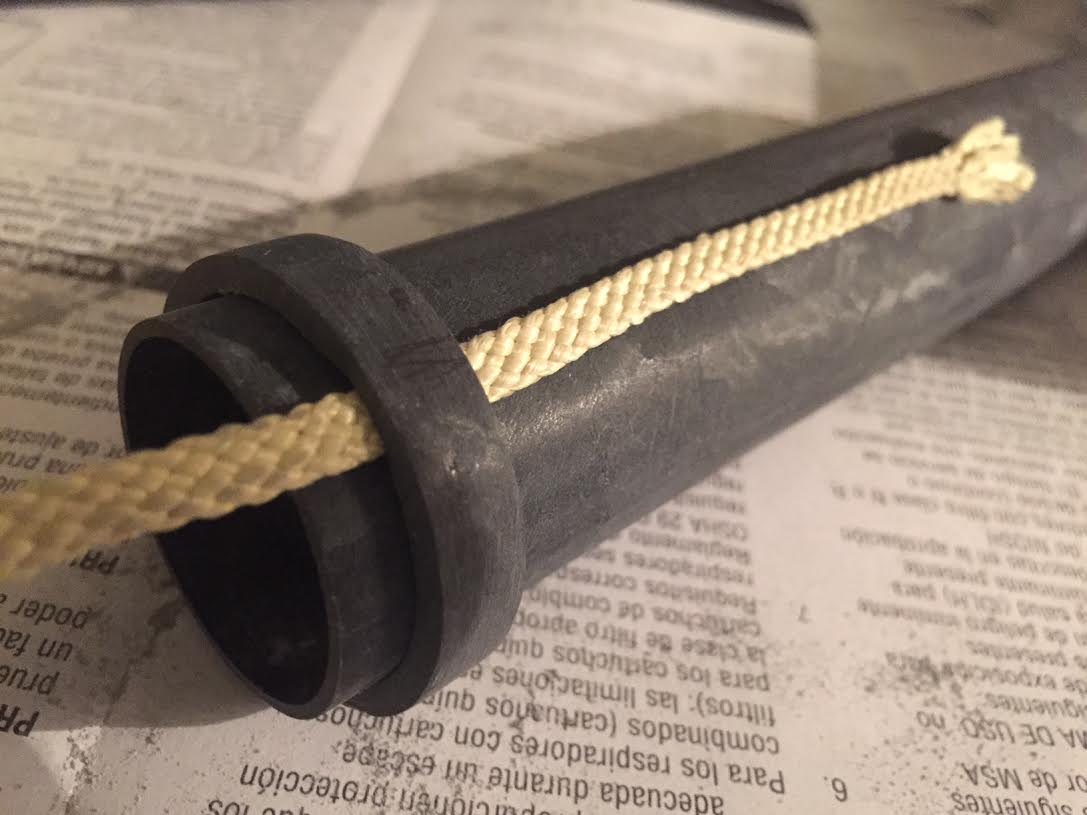
Using the wonderful stickied thread about epoxy adhesion as a guide I began sanding, cleaning, and test-fitting parts. The first step in assembling this build is the MMT and shock cord adhesion. I bought an inexpensive Chinese rotary tool from Amazon and started grinding:

UYM4Jty.jpg

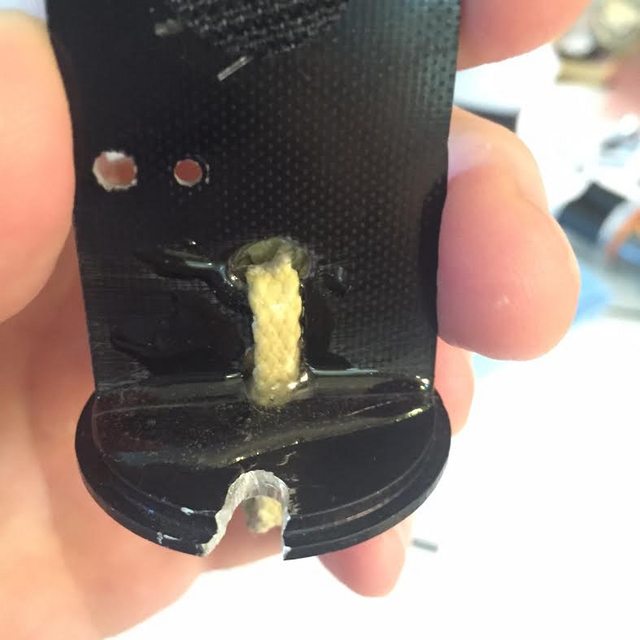
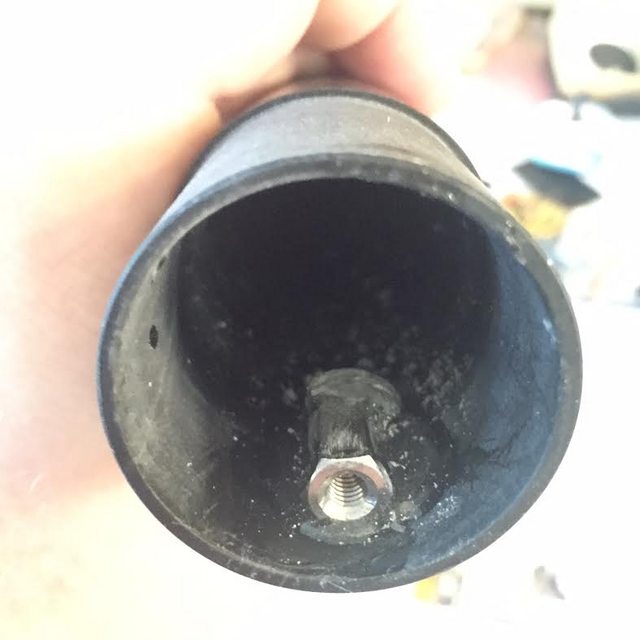
Forward CR notched for shock cord.

6yWUckc.jpg

Test fit before epoxy.

3MOOH6w.jpg

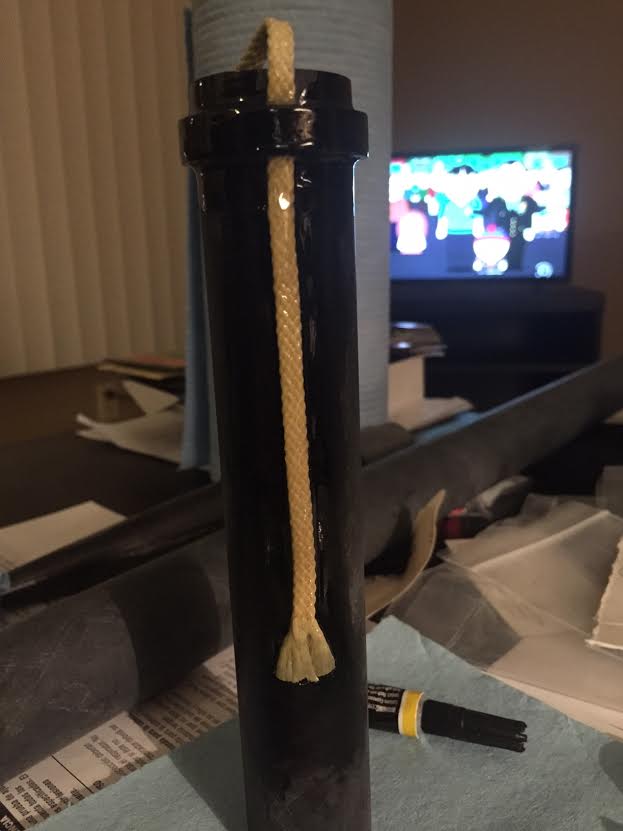
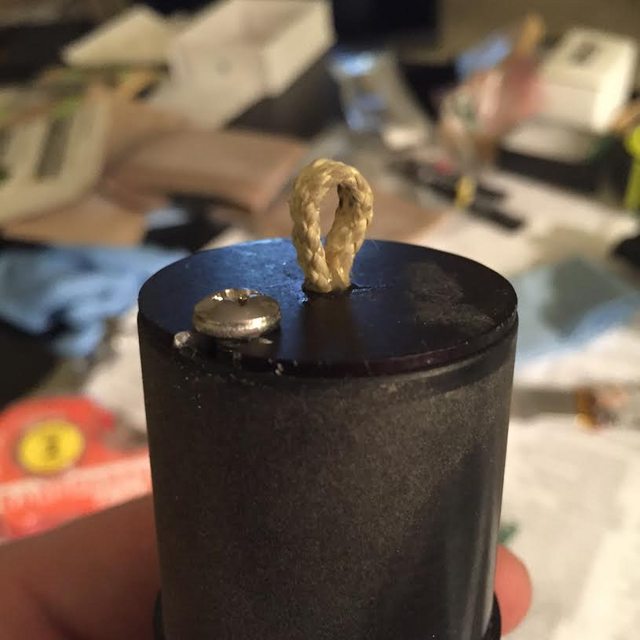
Though I love fancy motor retainers and have plenty of them in other rockets, I kept thinking about my goal for low weight in this sport build. At the end of the day I couldn't justify spending over 1/3 of the kit cost on a motor retainer when I've had so many successful flights using masking tape for friction fit, and decided I'd just do that again. If I was making this piece again I'd consider knotting the cord behind the CR before epoxying it.

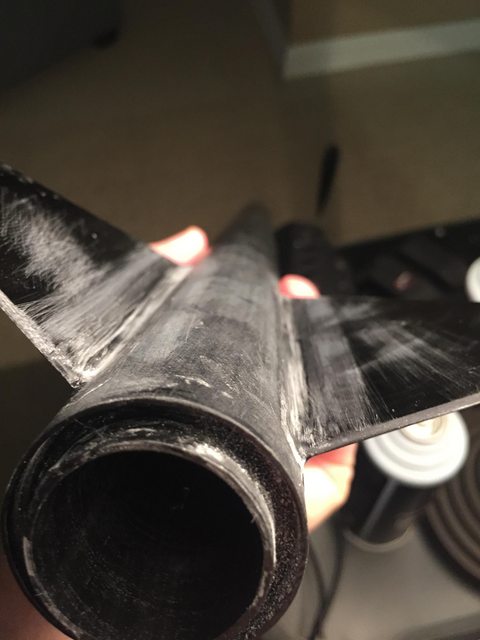
Since this is not a high performance build I rounded the fin-edges by hand sanding them with no specific strategy for aerodynamic advantage. Once the motor tube was all nice and messy I sanded, cleaned, and buttered the fins with 5 minute epoxy to tack them into the slots. I printed off a fin guide from the internets and superglued it onto a section of cardboard box that I cut out from one of the shipments I received:
0lpC3UE.jpg


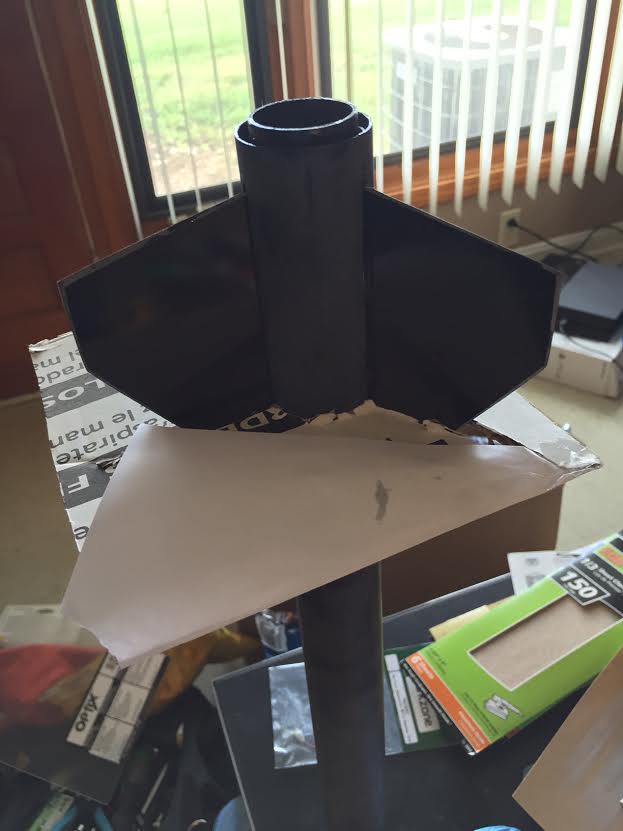
One thing I realized after putting the rear CR in place was that I hadn't thought about the epoxy buildup limiting flush fin placement once it was inserted, so I had to grind down some of the built up epoxy in order to make the MMT fit even that close to the end of the body tube.

With only five minute epoxy at my disposal I knew these wouldn't be the coolest fin fillets ever but, hey, who cares? I used the available scotch tape to mask off some fillet channels after preparatory sanding and cleaning:
6agMkMI.jpg


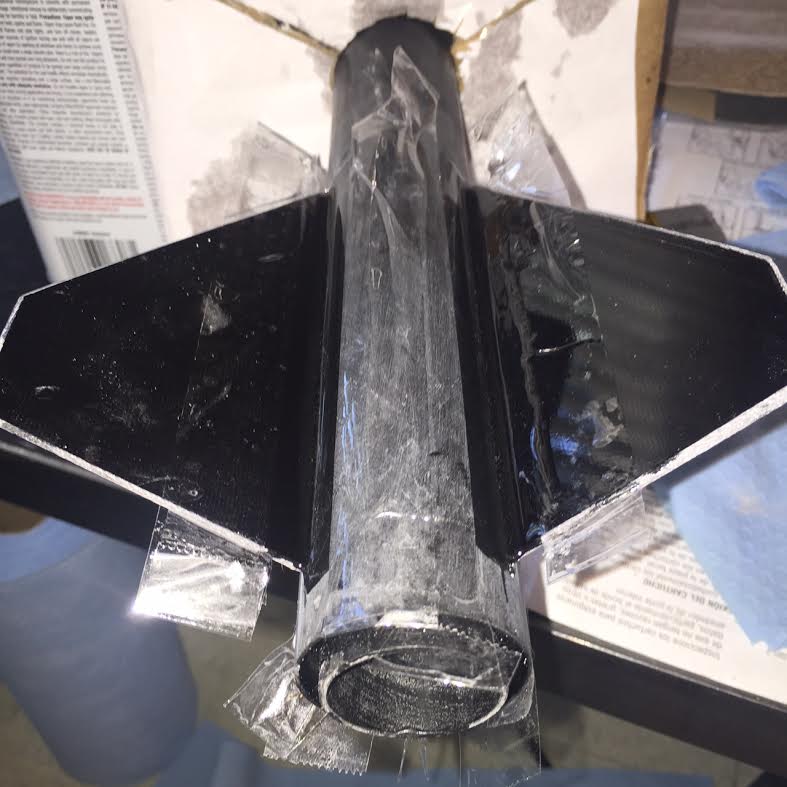
A wetted, gloved finger was used to shape the fillets in one continuous motion so I ended up with relatively small, light weight fillets:
goTf3aI.jpg


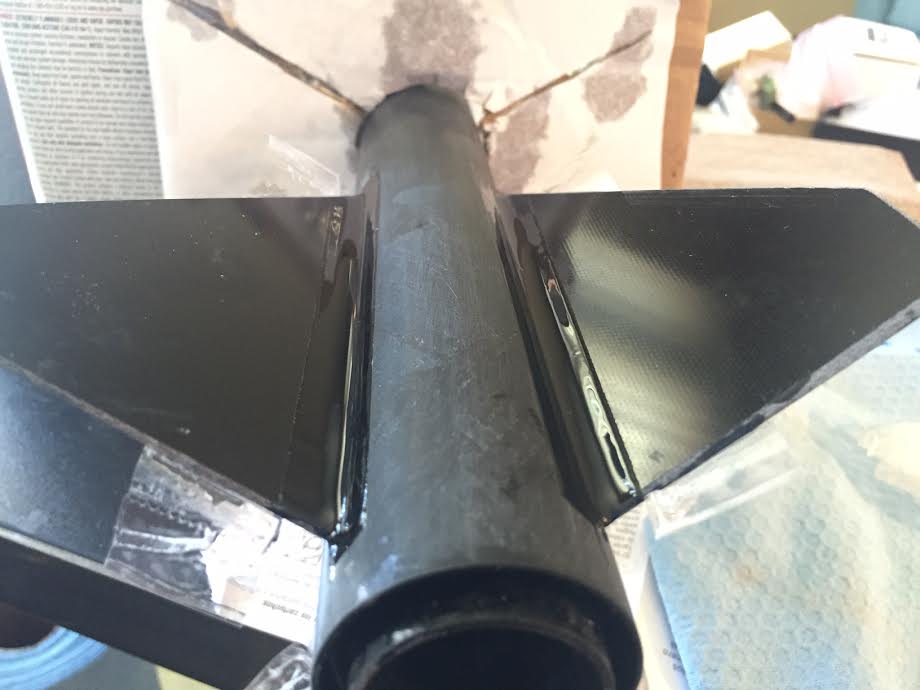
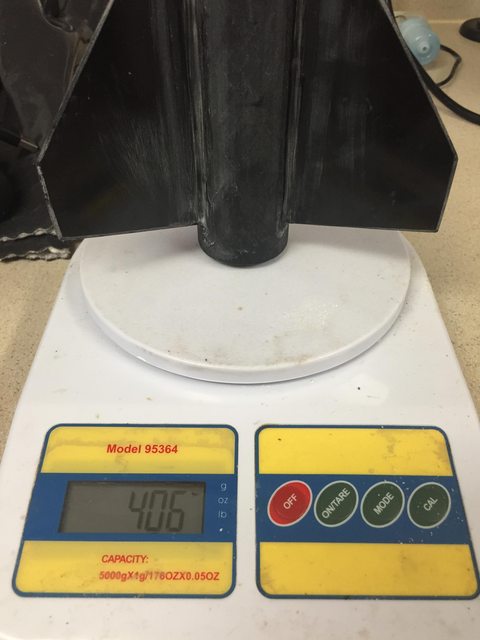
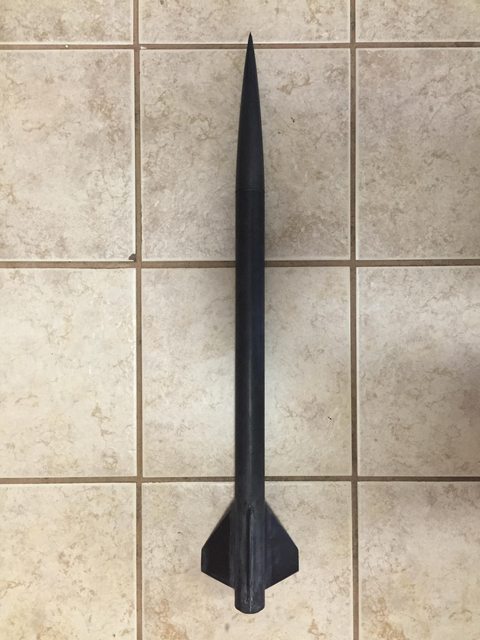
With fins in place, this rocket is fitting together pretty nicely and sprucing up these temporary quarrters:
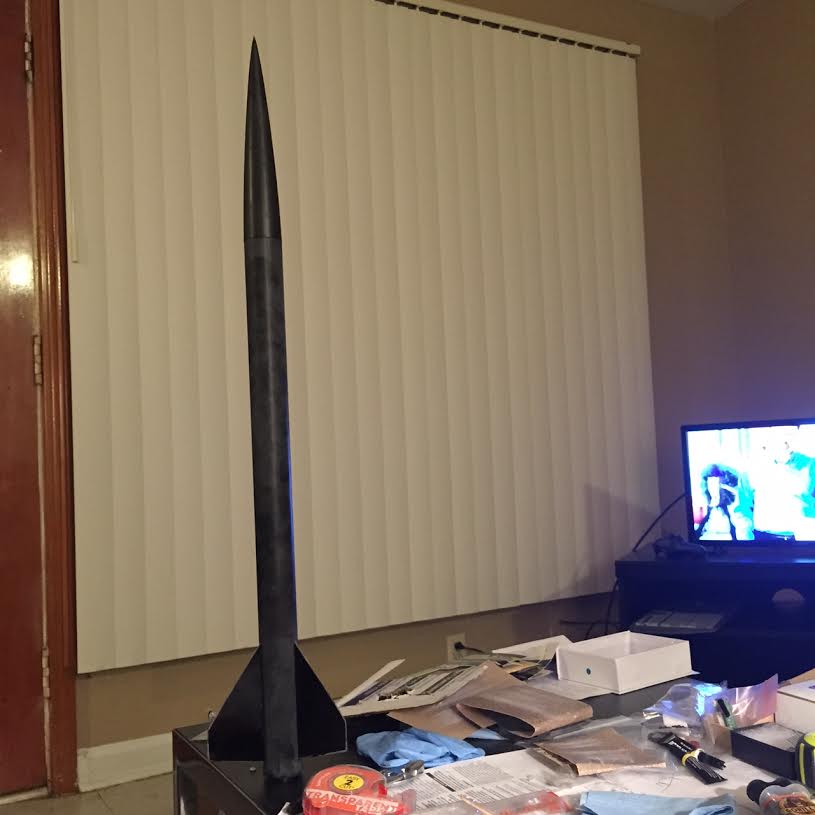
ZcvQdY4.jpg


MTF...
 
I knew I wanted dual deploy out of this and bought the DD upgrade kit from Wildman. As I considered my options for building, I realized that I really wanted the experience of trying to get everything out of a single airframe break as practice for other builds later and just because I'd never done it before. I've built dual deploy rockets, but always with a coupler glued into the bottom of the upper body tube and bulkplates sandwiched together by allthread. I always found this to be a bit inelegant and wanted to try something new. I considered the always popular switchband avionics bay coupler, but again the multiple breaks and the need for at least one that wouldn't even be used for a deployment event just turned me off this time.

Following my heart this time lead me to putting avionics in the nosecone and a cable cutter on the main.

The first problem was trying to fit anything inside of that 38mm nosecone. The RF-V16 GPS tracker is pretty small at 34x45x15mm, but its case was still too wide to reasonably slide inside the nose so I had to break the electronics free of their plastic prison. The Raven was narrow enough, but has a fairly tall terminal block which meant it would need to ride in the middle-ish. I selected LiPo power to save size over a 9v. I cut out paper L-shapes in the primary dimensions of the components and taped them to a paper sled to see what arrangement would allow me to fit everything inside.

vatzRDRl.jpg


I thought about various ways of containing everything in here and keeping it attached to the recovery harness. In the end I decided that the objective of the parachute was first and foremost to bring my electronics back to me and the rest of the rocket was secondary. With this in mind I settled on a flat, narrow sled epoxied to the center of one of the aluminum bulk plates that came with the DD upgrade:

tcAVvDml.jpg


The sled rests in a shallow groove I cut across the center of the bulkplate to keep it in place during gluing and increase the adhesion area. A short length of braided kevlar was looped through the hole in the center of the bulkhead and a hole in the fiberglass sled, tied in a square knot, and epoxied into place. This one length provides for positive attachment of the electronics sled to the recovery harness while also forming a loop through which the harness can be tied, no hardware necessary.

DwNUUo0l.jpg


The sled is just big enough to contain the GPS and its battery on one side, and the altimeter with its battery on the other:

7YznlBgl.jpg


After trying and failing to make a hole in the aluminum bulkplate with the knockoff dremel I purchased and its included bits, I went to the cutoff wheel and made a large enough notch to allow a screw to fit through. The panhead screw threads into a coupling nut that was epoxied inside the nose cone's shoulder:

pd3g3Pll.jpg


rpfE7lbl.jpg


All put together, it's reaaaally tight on space. Probably too tight. I want to put in another nut and screw to secure the nosecone to the bulkplate from both sides, but I haven't been able to figure out an electronics arrangement that would facilitate this. The deceleration loads are well shouldered by the bulkplate into the NC, and in a fall the junction only needs to support the weight of the cone itself, but of course under high G acceleration that single point of failure will experience the weight of everything inside. As is, it feels really strong. The built weight of the sled, bulkplate, loop, epoxy, raven, gps, and some wire is about 50 grams, so the coupling nut has to stand up to just over a pound for every 10Gs if my beer math is correct.

I fully expect this thing to explode on the pad due to my lazy, lazy craftsmanship and all around sloppiness. But before I can make that happen, I'll have to figure out the rest of the build- more to come!
 
Nice build so far Smap, maybe I miss read, but I don't see your ejection charge well or provisions for it.

What your doing is similar to what want to do but make my other rockets accept it. And maybe a minimum of 54mm birds.
 
Thanks! I haven't really addressed the charge yet but since there is only one break I only need one, which can be backed up by the charge from the motor. My plan so far had simply been to suspend a non permanent charge well (cardboard or surgical tubing) out of the avionics bay into the main body tube.

Other considerations I'm working with are mounting the switch (thinking about a screw switch inside the vent hole), securing the GPS to the sled in a better way than tape, keying the nc to the body tube so I can have vent holes through the shoulder that won't be blocked by rotation, and testing the cable cutter.
 
Last edited:
Made some progress today:

I wrapped up a chute burrito with the archetype cable cutter and wired a couple of e-matches to act as the apogee and main charges. Connected lipo power to the Raven through a screw switch, hooked up the USB port on the altimeter to my laptop through a long cable then set the whole mess outside and ran a simulated flight. Both popped fine so I've got a working system, though it's not perfect. The match heads on the wildman e-matches are barely small enough to fit inside the cable cutter device, and the o-rings required a lot of stretching to get over from the front end so next time I'll install one from the wire side before threading it through the cutter head. The match heads are also a bit too big in length, and I was not able to fully screw the head in once the piston, black powder, and a couple of o-rings were installed. For flight I'll leave out the extra o-ring, and use a wrap of tape to ensure the head screw stays in place.

I chopped up the RF-V16 case even further in a series of attempts to make it mount on my avionics sled. Ultimately I've determined that I just won't have clearance within the nosecone to do anything but glue it directly to the sled, which I don't want to do. A more sophisticated arrangement, with off-center supports and shaved down pcb standoffs, would make this possible but since I'm doing this build with hand tools in what amounts to a large hotel room that's not going to happen this time. Fortunately, I discovered an easy cop out: tape the battery and the tracker pcb back together and just shove it way up into the end of the cone beyond the sled, which will now only contain the altimeter. I'll pad it out with something to keep it in place, and that should be that. Constantly manipulating the tracker outside of its case finally caused the battery leads to break off so I had to buy a cheapo soldering iron from Amazon and once that's reconnected I'll be able to try the AT&T sim card I ordered for it to ensure I get a decent lock and everything works.

Currently gluing a screw switch to the root of the sled near the bulkplate. This will allow me to double dip one of my altimeter vent holes as a switch access port, and the design of the featherweight products means the battery circuit will remain open to the altimeter and the pyro until the rocket is assembled on the rail. More to follow!
 
Fillets sanded down to smoothness:
WGZbw6Gl.jpg


RF-V16 tracker and battery size without case, taped together:
6e0O77Jl.jpg


Sled shortened for just holding altimeter. Screw switch installed, female power plug tacked into place with CA, will be wired to the switch once I get everything in. The lipo battery sits on this slide of the sled, altimeter on the other.
PulsEHKl.jpg
 
Test fitting it all together with temporary knots.

zYiIy6Gl.jpg


Tracker and battery below the nosecone, altimeter sled with raven, lipo, screw switch and aluminum bulkhead just left of it. Main chute in nomex wrap zip tied together with a cable cutter, main ematch lead is taped to the shock cord up to the bulkhead. Apogee charge is just a loose cardboard tube that'll be crammed in there.

FBhjM41l.jpg


406g without motor, black powder, or whatever splicing/tape I'm gonna use to tie the ematch leads together at the switch. Not super light, but I'm okay with it considering it's non-MD and I haven't shortened the sustainer at all. Sims to 3900 on a G80, I'd be happy with half that from a dual deploy sport rocket on a mid power motor!

cZ6kPv4l.jpg
 
ImageUploadedByRocketry Forum1436558791.649180.jpg

I bought one over a year ago. Was part of a deal with a Pro 29mm starter set. Went for the dual deploy upgrade. It's still in the pack. This is as close as I've gotten opening the pack.

Am in the UK and have a cool guy that's a Ham radio wiz and made a tracker for it. I've also a Perfectflite SL100 for it.

In tempted to order some pro line epoxy, Aeropack and the fly away rail guides.
 
I was stupid and didn't order the Pro29 set with it because I didn't notice the deal on the website. :facepalm:

I did however just receive the fly-away rail guide from AMW which shipped super fast and fits perfectly. Is your nosecone tip removable or is it just colored like that? Hope you get to build yours soon!
 
Playing around with scrap wood to see if I can hold this jalopy together in a more elegant manner than tape:

50rbvv5l.jpg


I copied the current sled design with a cord-retained platform bonded to the center of a bulkhead. This time, however, I sliced out some battery space from the sled itself:

gKVU42tl.jpg


In this position the battery is firmly held in place in all but one axis, and some tape should suffice for that.

Advantages here are really just buying more space for the coupling nut side of the avionics bay and looking less janky. I haven't glued it together yet but it's probably heavier and weaker than the fiberglass/aluminum setup. :cool:
 
Trying to help the vent holes line up better. I notched the open edge of the body tube, then inserted the nosecone and taped off a little epoxy well:

FS76slDl.jpg


Once it was dry enough I sanded the NC-BT join all the way around, and smoothed out the index point to be the same height. Nice and slippery:

XDCMnh2l.jpg


Keyed together, you can see the screw switch just inside one of the vent holes:

Uw2MBJel.jpg


So the design compromise of having the avionics bay in the nosecone is having my vent holes within a caliber of the single airframe break, but at this performance level it will probably be okay. This is just a model rocket after all (depending on what motor I put it in!)
 
Just in case anyone else has been frustrated by their Rf-v16 GPS/gsm tracker, I thought I'd share my experience for the archives:

I bought one from ebay which specifically mentioned it included the box and accessories. It was $40 and arrived quickly.
I have an unused smartphone line on my AT&T account so I activated the micro sim for that line and had customer service provision it for the imei number of the tracker. This should've worked, but all I could ever get out of the tracker was slow blinking lights indicating no cell or GPS reception.

I opened a case with AT&T and they did the same Internet research I did. We ensured it had voice and data, it had caller ID, it had gprs access, etc. They tried changing its plan around from a normal smart phone, to a smart device, to a lost child tracker, all without luck. These things worked for other people online but not for me.

Unwilling to give up, I went to a store kiosk and bought an AT&T prepaid SIM card with $20 on it for voice and data. I tested this card in a phone to ensure it worked. Brought it home and no change, just slow blinking of both status LEDs and no response to commands. Customer service and the Internet again were unable to help.

Disappointed by this, I complained to the ebay seller who refunded me about 50% of my cost. I decided to nuke all the variables and purchase a new one, from a different seller which was listed "no box" for $29. I also went to wal mart and got a t-mobile SIM card on a prepaid plan with $30 of air time since that was the cheapest.

The new tracker showed up today, surprisingly with a box and all accessories, and immediately connected with the t-mobile sim. Wouldn't you know it, that sim also works fine in the old tracker. So now I'm 20+40+29+30-20=$99 into this and Ive got two, fully working gps trackers and $30 of air time i can use and $20 of air time I cant. Hopefully my adventure here saves someone else some trouble in exploiting cheap overseas electronics for rocket use. :)

First flight of the wild child is scheduled for this weekend, weather permitting!
 
Two beautiful flights on this thing last weekend: G77R to 2600' and H135W to 4800'. Smashed my personal record of 2400'!

Observations:
The 3d printed fly away rail buttons were super convenient to use, but it's surprising how much drag I felt sliding them onto the rail. Since they are constantly being pried apart by the rubber band, the buttons are constantly trying to press the outside of the rail. I think whatever drag and weight penalty this gives you is overcome by not having the aerodynamic drag for the rest of the flight. Don't forget to go back to the pad and pick up your rail guides after you recover!

Nose cone avbay worked great, absolutely no issues with deployment events being commanded. I will never build another rocket that can't be easily turned on/off in its fully assembled configuration. I feel compelled to keep my future projects to a single airframe break, but in the next build if I were to use a nosecone avbay I would use a coupler to extend the shoulder by a few calibers to move my vent holes out away from the cone.

The cable cutters worked perfectly on both flights. The only related issue was on the second flight: I heard the cutter pop right on time at 700' AGL but the chute didn't fully deploy until about 10'. Most people like using a pilot chute to pull the main out from the cable cutter, but that's tough in a 38mm rocket. My biggest complaint about the cutters is they get so gunked up by each use that it takes two sets of pliers to unscrew them then you have to thoroughly clean.

RF-V16 tracker was perfect. I was lucky to have both flights land easily within sight, but I checked the GPS both times pre and post flight and it was great.

I knocked a lot of brain dust off in building and flying this thing, and I'm very excited to get actively back into rocketry. My biggest complaint is the 29mm motor mount. I ordered a Wildman Jr. two-stage setup, which I think I'm going to have to bash into a MD bird. :)
 
Last edited:
I brought this one back out for punishment on an AT I-205 today:

[video=youtube;TgTHSBC8Q6g]https://www.youtube.com/watch?v=TgTHSBC8Q6g[/video]

Sorry for the vertical video but you can see it leaps off pretty crazy fast. This is about as long of a motor as I can fit inside of this rocket considering the main chute and all laundry are in the booster tube. Smashed my PR yet again with this tiny thing, hitting 7212' and about 1300fps despite that crazy turn into the wind off the pad. Once it cleared the smoke column I lost sight of it until we found it on the ground. For all the money I've spent on rocket stuff in my life I am pretty awed that my highest, fastest, and frankly coolest flight to date has been with a 60 dollar kit on a 40 dollar disposable motor.

For future rocket people searching the forums:
A 40G launch is too much for the weight of the buttons on the RF-V16 to sustain without pressing themselves. Oops. I'll leave that tracker for rockets that are big enough that it can be mounted horizontally.
The Archetype cable cutter has worked beautifully but it is so hard to clean and re-use that it's almost disposable. Seriously, I bought two of them and the one that's been flown three times now has a stuck piston and is worthless. Haven't cleaned this one yet but I wouldn't be surprised if it is extremely difficult or impossible to disassemble.
This flight broke my AMW fly-away rail guides. Maybe that caused the turn off the rail, I dunno, but one of the rubber band "ears" snapped off during the launch and the two halves of the device were about 60 feet away from each other. I can probably fix it with epoxy but I'm disappointed given the amount I just spent on a 54mm flyaway set.
 
Last edited:
wow, congrats! that is a serious flight on a little rocket! makes me feel the need to punish my darkstar mini DD next weekend. I do have that 6g cti case I haven't used yet...
 
It is a really fun little rocket. If I can get the dual deploy section done for MWP I might let one rip on an h180 or h220.
 
Mine has landed drogueless with the main chute failing to come unfurled twice with no ill effects. Omit the dual deploy section AND the parachute!
 
Goex 4F 0.1g per the instructions. The event occurs perfectly, the disassembly not so much.
 
Well if I ever get these things apart again I'll give pyrodex a try. The ultrasonic cleaner is a great idea. I didn't have one handy so I just soaked my stuck one in PB Blaster which helped me coax the screw head out but the piston will not return despite much hammering with a tiny nail through the end hole.
 
I use .1gm (1.5gr) TAC smokeless powder in my Archetypes and clean them with Remoil and an 1/8th inch SS brush after every use and never had a problem.

My guess would be the decreased residue of smokeless powder vs anything else being the main contributing factor to ease of use and re-usability.
 
Back
Top