What did you do rocket wise today?

The Rocketry Forum

Help Support The Rocketry Forum:

This site may earn a commission from merchant affiliate links, including eBay, Amazon, and others.
L-2 project is starting to show some life. Taking my time and enjoying the "spirit of the build" along the way.

IMG-5334-3.jpg
 
Last night I finished my current project. It started out with a 3" BT from BMS. It has a 38mm x 9" mmt and 1/4" ply fins. I added a section of 29mm heavy motor tube to the ends of each fin. Then put a 30mm plastic dome on each of the tubes. I reinforced the bottom of each tube with strips of balsa that I glued to the inside of each tube with TB II. I added a balsa centering ring to the bottom of each tube with TB II. Then soaked the ring with thin CA. The rocket is 45" long and weighs 40 ounces with a chute. I made a small Av bay for an Eggtimer Apogee that will go into the rocket and is connected to the nose cone. When the charge fire the Av bay and nose cone are ejected taking the chute with them, I hope. I'm calling it "Vesta Mining". It would be the survey ship that locates asteroids to mine. The stripes and cockpit are all pin stripping.
Yesterday I received the soldering station I ordered from Amazon. And today I put what Bill from BMS taught me to solder 15 rotary switches up. The first couple were a little ruff, but I got better as I went along. I'm also still trying to come up with a new design for the next project. I like the rocket plane from Mach7's lost box of rockets. Still working on the drawing. So for the rest of today I will be installing switches in my dual deploy rockets that don't have switches in them. Here are the pictures.20210924_171502[1218].jpg20210924_171517[1219].jpg20210924_171542[1220].jpg20210924_165236[1217].jpg20210924_165136[1216].jpg
 
Last night I finished my current project. It started out with a 3" BT from BMS. It has a 38mm x 9" mmt and 1/4" ply fins. I added a section of 29mm heavy motor tube to the ends of each fin. Then put a 30mm plastic dome on each of the tubes. I reinforced the bottom of each tube with strips of balsa that I glued to the inside of each tube with TB II. I added a balsa centering ring to the bottom of each tube with TB II. Then soaked the ring with thin CA. The rocket is 45" long and weighs 40 ounces with a chute. I made a small Av bay for an Eggtimer Apogee that will go into the rocket and is connected to the nose cone. When the charge fire the Av bay and nose cone are ejected taking the chute with them, I hope. I'm calling it "Vesta Mining". It would be the survey ship that locates asteroids to mine. The stripes and cockpit are all pin stripping.
Yesterday I received the soldering station I ordered from Amazon. And today I put what Bill from BMS taught me to solder 15 rotary switches up. The first couple were a little ruff, but I got better as I went along. I'm also still trying to come up with a new design for the next project. I like the rocket plane from Mach7's lost box of rockets. Still working on the drawing. So for the rest of today I will be installing switches in my dual deploy rockets that don't have switches in them. Here are the pictures.View attachment 483292View attachment 483293View attachment 483294View attachment 483295View attachment 483296

Badass Rocket teepot love it! 👍 👍
 
I’m a bit nervous about flying with a deployment bag, to be honest. It feels like a risk to give the parachute another step to complete before deploying. However, it’s vital that the massive parachute that is going to be needed on my level 3 rocket uses one and I am determined to not try anything for the first time on that rocket except the 75mm motors. It was somewhat reassuring at least how easily the parachute falls out of the bag when it is packed according to Ky Michaelson’s demonstration video on the website.
Jim Jarvis talks about deployment bags in this video. He's one of my Level 3 TAP's, and I'm following his suggestion to do it his way. Something else he recommends is with a "zipperless" drogue configuration, have the drogue close to the aft section... "non-zipperless", closer to the coupler. Can't recall where I saw him suggest that, but that's what I'm doing.
About the 31 minute point...
 
Something else he recommends is with a "zipperless" drogue configuration, have the drogue close to the aft section...

My TAP's are telling me the exact opposite - the drogue needs to be attached to the upper section to help keep it pointed away from the aft section when the main deploys.
 
My TAP's are telling me the exact opposite - the drogue needs to be attached to the upper section to help keep it pointed away from the aft section when the main deploys.
Depends on whether you are building a standard fincan or zipperless. Zipperless, closer to fin can, Traditional, closer to altimeter bay. I use OneBadHawk 3 loop harnesses and depending on the fincan style the drogue loop is closer to one end or the other.
 
Finally soldered screw switches on my own last night. I only had 3/4” of the .06” solder left, so I split a wooden match and used that as a holder. I had enough to do two switches. Didn’t turn out too bad for a noob using my high powered Snap On R450A with the smallest tip. I’m used to using the medium or large tip and heating stuff up good for machinery wire…A6949D70-B66C-4166-BE72-8B224C3BCFF0.jpeg
Used the excuse of being out of solder to place a order for more plus a couple more books and the all important socks🙄🙄
 
Dug into my twins’ rockets with them (after over 2 years of sitting in our move storage) & discovered really, really dead lipos. Everything else still looks like it wants to fly.
4D1DC806-5C60-4BF6-A82F-4A53688B8AD4.jpeg

Edit: Same with my Broken Arrow 54.
BAB57DB9-CFD1-48B8-BC38-9AE499ACAB01.jpeg
 
Last edited:
I'm new to this site and not sure how to navigate it yet. I am working on a Super Big Bertha. I moved the engine back about a 1/2". Not sure if this was a good idea but I like the look better. I figure this will also put the motor back to the same spot as a metal engine retainer. This morning I got the fins and aft motor centering ring installed.16326858265062245460866443750575.jpg
 
Saturday, we went to the Tulsa Rocketry High Fronteer launch in Pawhuska. It was yet another beautiful day in (Eastern) Oklahoma. Even the drive up was nice (well, except for that stretch of road that was one lane because the bridge was out...). They had lots of pads set up for everything from low power mod rocks up to "away" pads for high power. It was great to see vendors on site!

I ran into my friend Kevin that I haven't seen since high school. We were both seriously into rocketry back then, but lost touch as each of us went away to college.

I flew four rockets, with poor performance in each instance (my own fault). I flew my seven motor cluster Fat Boy (only 6 lit, the best so far) and broke a fin on landing. I flew in the Big Daddy drag race, but for some reason the nose didn't pop and it went in hot (it will now need to be shortened a bit). I flew my "Raspberry Ice ) a much rebuilt Fat Boy - the screw eye pulled out of the balsa nosecone. Finally, I flew the "Rebuild" (a temporary name). WRITE YOUR NAME AND CONTACT INFO ON YOUR ROCKETS! It went up on a G53 smokey reload (I love smokey motors!). I lost it on the way up. We looked for it for a while and gave up. I wasn't too upset about losing the rocket (it's over 20 years old, lots of flights), I was mad because of losing the hardware,; the motor casing, the chute and protector, the NEW JLCR, etc. About 20 minutes after we had left, I got a phone call/text that someone had found my rocket. We headed back and picked it up (no damage, but I am getting tangled or twisted chutes, even with swivels).

From near the low power pads, looking at the RSO/LSo tent and parking area
paw1.jpg

Looking North from the low power pads (Raspberry Ice is at far end)
paw2.jpg

the away pads, across the runway
paw3.jpg

there were vendors on site. The most important was food!
paw4.jpg

next to them were the local Hobby Town, Wildman Oklahoma, and the Tulsa Rocketry tents
paw5.jpg
 
Started my SBR Fusion Rockets 38mm Thor, motor mount almost ready to install. I will be modifying the kit a bit to allow dual deploy, so the forward payload bay will be getting lengthened, and the 3D printed coue will be replaced with a 38mm blue tube coupler altimeter bay. The fin pockets only add about 6 grams to the mmt, but may easily save that much epoxy too, anf the fin can will be nice and strong. First flight is expected to be a G then as long as everything works right the next one will be a AT H268R. One thing I like about the SBS Lil' series and the 38 and 54 series is the fact they use the heavier motor tube for airframes and its fun to spank em' with hard hitting motors. The Lil' Fusion in the other pic was on a 24mmAT G55W SU, it also flew the same day on a 24mm AT G110T SU, and a CTI 24mm F240Vmax, the Lil' Fusion earned the nickname "Vanishing Act" as it disappeared on launch and reappeared once the 10' mylar streamer deployed.
 

Attachments

  • 20210926_154644.jpg
    20210926_154644.jpg
    64.6 KB · Views: 12
  • IMG_7137.JPG
    IMG_7137.JPG
    49.4 KB · Views: 13
Behind the times here, so yesterday was a ton of fun. Finally was able to make a club launch at Bong since joining WOOSH back in the spring (MTB racing fell on almost all launch weekends). My son and I brought a few rockets to fly, mostly newer attempts so there was a lot of firsts yesterday.

I do need to say that we met a lot of really nice people and enjoyed our time there. The best part of this hobby is the never-ending ability to learn new things and people are willing to share knowledge they've gained. I picked up a lot of new ideas and tips/pointers from people who have been flying much more than I have, and it's very much appreciated. We all want successful flights and we get better together.

I've never flown anything in winds like we had yesterday (15 gusting higher from the SW). So, that was educational on not just my rockets, but seeing many others fly. I had recently picked up a JLCR and that has to be the best thing I've bought for the hobby so far!

First two flights for the Gobblin' went perfectly on F42-4Ts. This was my first build that uses 29mm motors, uses rail buttons, and has nomex for chute protection. I get it with that stuff now :) I think I'm going to use a lot more nomex. Also put some in my Big Daddy - worked great.


IMG_7957.jpg
IMG_8010.jpg

Was also the first flight for the cluster-motored carrot. My first lighting of a cluster ever. Just used the white-tipped Estes igniters and three C6-5s. Really nice flight. All three motors lit and despite a bit of turning into the wind, recovered very near the pad after the chute release unloaded at 200'.

IMG_7941.jpg

After sustaining damage from the maiden D12-3 flight a few weeks ago, Super Baby Bertha was repaired and we put it up on an E30-4T - much better boost. Having more shock cord and the JLCR made for a perfect flight. Love this thing.

IMG_7969.jpg

Solar Warrior got a first flight as well. C11-3. Didn't want to start with anything more, I need to spend some time practicing and finding the best method to get the chute release in this so it comes out cleanly....on my desk at home, not leaning into the back of my car. :) Nice flying rocket though.

IMG_8018.jpg

Big Daddy on a new Q-Jet 26-7 was a near mistake. Too short of rod when I launched and it turned right into the wind and went nearly horizontal. CR did its thing when it ejected and it made it back undamaged. Took a while to find though. Next flight was on an E30-4T and that was much better. Perfect, really. Only going to use that E26 on calm days with a 4' rod. Not quite enough kick off the line with that for the BD.

All rockets we flew recovered fine and there was no damage or loss. Pretty good day!

Got to see Doug's CF Hydra, from the recent name that rocket thread, fly. That thing rips and recovered really nicely.

I did not put effort into taking many photos although I should have. Next time, I'll put more effort into that part of things.

Here's a nice lineup (was a really Goblin-y day). IIRC, G, H, F motors left to right.
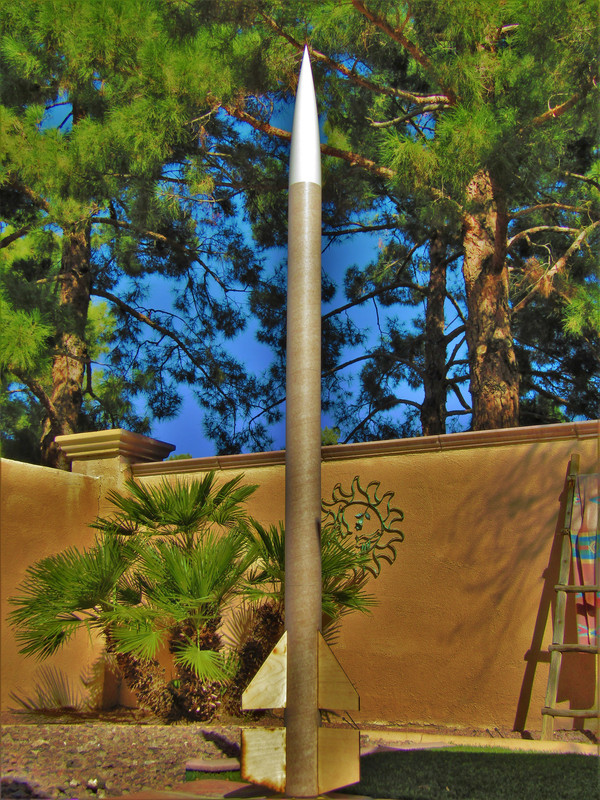
IMG_7996.jpg

And, not my Goblin :)

IMG_7978.jpg
 
Last edited:
Did a full up balance check so I'd have a pretty good idea of CG location (not having much luck with RockSim's "mass override"...
Was closely supervised by the "Weight & Balance" Inspector.
 

Attachments

  • Balancing.jpg
    Balancing.jpg
    37.4 KB · Views: 23
  • Wazizz.jpg
    Wazizz.jpg
    36.2 KB · Views: 24
  • Weight and Balance Inspector.jpg
    Weight and Balance Inspector.jpg
    77.6 KB · Views: 23
I recently 3D printed a bracket to attach the antenna boom from my GSE to a NEMA 42 stepper motor. That is 7lb worth of motor in the vice! The antenna boom was clamped to the mount and dropped onto the 3/4" (keyed!) motor shaft. Drive was accomplished with a 24v PSU (15A max) and a TIC 36v4 drive board. This was controlled through a RC transmitter and receiver. So this will be the azimuth drive for the Automatic Antenna Tracker. Works well I think.


Next up would be mounting the altitude drive motor between this motor and the boom, to give me a full altazimuth mount.

Those TIC 36v4 drivers are amazing. They allow you to use a stepper motor in either rate or position modes with all sorts of control inputs.
More info here:
https://www.pololu.com/product/3141
 
Last edited:
Did the club launch thingy both Saturday and Sunday at Bong. Put 4 up on Saturday, all had decent flights despite the high winds. Had a few issues with chute tangles but everything recovered pretty much unscathed.

My son joined me for the Sunday festivities and the results were much more of a mixed bag. Winds were still a stout 13 to 18mph constant with gusts in the high 20s. Of the 7 we put up 4 were successful and we treated those in attendance to a "powered pinwheel" show on the other 3. Of those 1 was a total loss and 1 may be able to be restored.. Did have the opportunity to introduce myself to DigBaddy.

A post mortem of Sundays failures is underway. I'm pretty confident in looking back that my decision to fly those 3 did not take into account the angle of attack issues that the winds produced in relationship to the size, type, and location of the fins on those specific birds.. So....hopefully lessons learned.

Are there any videos floating around of the pinwheels?
 
Finally got the Airfest totes into the shop and partway unpacked. Kansas mud is still on the truck, but it's supposed to rain soon.
 
Unfortunately not. I've been pretty remiss at taking pics or videos. Need to chance that at the next launch.
What you've been remiss in (if anything; this stuff is not truly required) is getting someone else to take pictures or video for you. You concentrate on watching the rocket, and hand off the camera.
 
I see the supervisor is fully inspecting your work lol lol


QUOTE="Tech 68, post: 2185153, member: 29976"]
Did a full up balance check so I'd have a pretty good idea of CG location (not having much luck with RockSim's "mass override"...
Was closely supervised by the "Weight & Balance" Inspector.
[/QUOTE]
 
Back
Top