

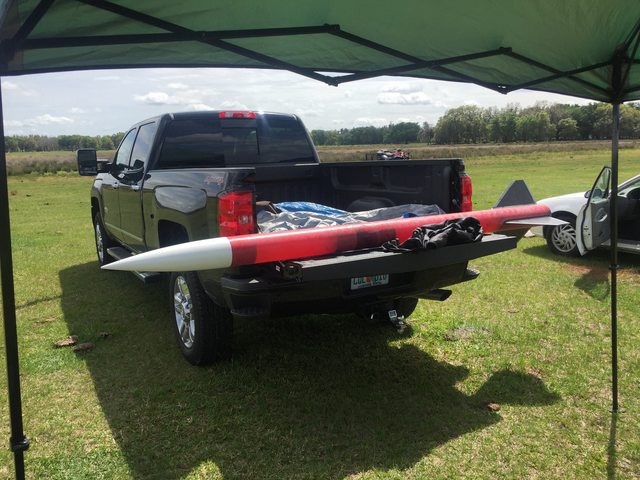
I sanded a rocket that has been in primer for close a year. This marked the first building I have done in over 3 months. On a related note, my garage rocket palace is complete once the ac man comes in the morning and does the final connections and charging of the ductless system I put in.
You are using an out of date browser. It may not display this or other websites correctly.
You should upgrade or use an alternative browser.
You should upgrade or use an alternative browser.
What did you do rocket wise today?
- Thread starter BeerorKid
- Start date
Help Support The Rocketry Forum:
This site may earn a commission from merchant affiliate
links, including eBay, Amazon, and others.
smapdiage9
Well-Known Member
- Joined
- Mar 14, 2009
- Messages
- 442
- Reaction score
- 3
Got it put together for TAP inspection at the launch today. Stickershock wrap should arrive this week, hopefully flying next month!
DavieRockets
Well-Known Member
- Joined
- Mar 30, 2011
- Messages
- 484
- Reaction score
- 12
Launched 4 rockets today at the CRMRC monthly launch in St. Albans VT.
Yellow Crayon on a CTI H175 Smokey Sam
.JPG")
Going Postal on an Estes E9-6
.JPG")
Mouse 38 on a AT F23 Fast Jack
.JPG")
Blue Iguana on a CTI I345 White Thunder
.jpg")
Yellow Crayon on a CTI H175 Smokey Sam
Going Postal on an Estes E9-6
Mouse 38 on a AT F23 Fast Jack
Blue Iguana on a CTI I345 White Thunder
- Joined
- Jun 19, 2015
- Messages
- 545
- Reaction score
- 37
It was good to see such a nice turnout at yesterday's launch. Hope the trend continues.
TopRamen
SA-5
- Joined
- Aug 9, 2013
- Messages
- 9,955
- Reaction score
- 111
Started dry fitting some parts to make the booster lug ring on the tail cone of my SA-5.
I'm loving all of these transitions, and having to fit them.
I was on a roll, but I had to go out in the cold to soak this transition with CA, and then to sand it to precise dimensions, and now my arthritis and nerve damage in my right hand is bothering me, so I'm taking a coffee break.:caffeine:
Anyhow, dry fitting stuff is fun, and this is a unique arrangement, so I thought I'de share the pics' from my build thread of today's rocketry wise so far.:
Last edited:
rharshberger
Well-Known Member
Started dry fitting some parts to make the booster lug ring on the tail cone of my SA-5.
I'm loving all of these transitions, and having to fit them.
I was on a roll, but I had to go out in the cold to soak this transition with CA, and then to sand it to precise dimensions, and now my arthritis and nerve damage in my right hand is bothering me, so I'm taking a coffee break.:caffeine:
Anyhow, dry fitting stuff is fun, and this is a unique arrangement, so I thought I'de share the pics' from my build thread of today's rocketry wise so far.:
View attachment 285745
View attachment 285742View attachment 285743View attachment 285744
Its coming along nicely Top!
Started dry fitting some parts to make the booster lug ring on the tail cone of my SA-5.
I'm loving all of these transitions, and having to fit them.
I was on a roll, but I had to go out in the cold to soak this transition with CA, and then to sand it to precise dimensions, and now my arthritis and nerve damage in my right hand is bothering me, so I'm taking a coffee break.:caffeine:
Anyhow, dry fitting stuff is fun, and this is a unique arrangement, so I thought I'de share the pics' from my build thread of today's rocketry wise so far.:
View attachment 285745
View attachment 285742View attachment 285743View attachment 285744
That is looking real clean, Top. This thing is going to be a masters class in paper transitions and multi tube construction till you are done.
SteveA63
Well-Known Member
- Joined
- Dec 28, 2015
- Messages
- 86
- Reaction score
- 10
That is looking real clean, Top. This thing is going to be a masters class in paper transitions and multi tube construction till you are done.
I concur. To say that I'm duly impressed doesn't even cover it. I really am watching this with great interest!:jaw:
I went rocket launching on Saturday with the Jackson Model Rocket Club. A bit cold and windy but the kids and I managed to launch a bunch of LPRs and I got in a couple of MPR flights as well. This was our first launch of the year and it was great to get out and put some rockets in the air.
I used the Aerotech 24/40 reloadable casing for the first time. Two launches of D9-7W with an Estes Eliminator XL and Top Shot. Both really nice flights. Composite motors are great!
We popped 3 fins off LPR models but no major damage. Sunday we got them repaired and ready to fly again.
Estes Eliminiator XL on D9-7W
.jpg")
Estes Argent on an F22-5J
.jpg")
Our Madcow Cricket (Swifty XXL) made it's first launch on a F52-11T. It's flying naked because we just put it together the night before. Not much room for recovery gear in this one. I'm going to cut the shoulder of the nosecone down a bit to make more room.
.jpg")
I used the Aerotech 24/40 reloadable casing for the first time. Two launches of D9-7W with an Estes Eliminator XL and Top Shot. Both really nice flights. Composite motors are great!
We popped 3 fins off LPR models but no major damage. Sunday we got them repaired and ready to fly again.
Estes Eliminiator XL on D9-7W
Estes Argent on an F22-5J
Our Madcow Cricket (Swifty XXL) made it's first launch on a F52-11T. It's flying naked because we just put it together the night before. Not much room for recovery gear in this one. I'm going to cut the shoulder of the nosecone down a bit to make more room.
Attachments


TopRamen
SA-5
- Joined
- Aug 9, 2013
- Messages
- 9,955
- Reaction score
- 111
I concur. To say that I'm duly impressed doesn't even cover it. I really am watching this with great interest!:jaw:
Thanks.
I came up with a clever way to make the booster cones today too. Using the PDF that rocketguy101 made for me, I took the Angle diagram and used it as a template for a balsa triangle that was then sanded to fit inside for reinforcement.
Prior to this, my oblique cones left a lot to be desired when it came to making them the perfect shape.


DavieRockets
Well-Known Member
- Joined
- Mar 30, 2011
- Messages
- 484
- Reaction score
- 12
Did the rocket laundry from Sunday's launch.
.JPG")
Repaired the dent in Molly's Crayon rocket
.JPG")
Did most of the repair on the broken Blue Iguana nosecone.
.JPG")
Started the avbay on my Broken Arrow 54.
.JPG")
Repaired the dent in Molly's Crayon rocket
Did most of the repair on the broken Blue Iguana nosecone.
Started the avbay on my Broken Arrow 54.
TopRamen
SA-5
- Joined
- Aug 9, 2013
- Messages
- 9,955
- Reaction score
- 111
Threw some of the screws I use as micro rail buttons for makerbeam into my 13mmxBT-20 Fiberglassed, TTW Fins, AIM-120 AMRAAM, and prepped my LPR pad for launch.
Just waiting for the camera battery to charge, then I'll fly it in the front yard.


Sorry for the crappy video quality. The Camera is from 2003, and does not even have audio.
https://www.youtube.com/watch?v=9RF6hk0NgDo&feature=youtu.be
Just waiting for the camera battery to charge, then I'll fly it in the front yard.
Sorry for the crappy video quality. The Camera is from 2003, and does not even have audio.
https://www.youtube.com/watch?v=9RF6hk0NgDo&feature=youtu.be
Last edited:
swatkat
Down these mean skies, a kat must fly!
Bought yet more motors for the SARG launch this weekend... now to prep rockets.
Flyfalcons
Well-Known Member
- Joined
- Apr 14, 2015
- Messages
- 2,584
- Reaction score
- 912
Got the white paint on my PSII Patriot. Heading on a week-long trip starting tomorrow so that base coat will have lots of time to cure before I start masking for the yellow and red.
o1d_dude
'I battle gravity'
Laid down what I thought was the final clear coat on my Madcow f/g 29mm Lil Goblin but of course there was a gnat. The finish came out otherwise very well. Perhaps I'll just leave the gnat there as a warning to future generations of gnats. I AM LEGEND!
Fitted the 38mm motor mount to the body tube of my f/g Lil Goblin ("Plan B") and fitted the the fins to the appropriate slots. Marked each fin and slot so that there should be no mistakes when the epoxy comes into play. It will be be too cool tonight so tomorrow might be a good day for it.
Fitted the 38mm motor mount to the body tube of my f/g Lil Goblin ("Plan B") and fitted the the fins to the appropriate slots. Marked each fin and slot so that there should be no mistakes when the epoxy comes into play. It will be be too cool tonight so tomorrow might be a good day for it.
swatkat
Down these mean skies, a kat must fly!
Le sigh... another trip to the local hobby store for a few more motors... just a few I promised!
TopRamen
SA-5
- Joined
- Aug 9, 2013
- Messages
- 9,955
- Reaction score
- 111
Finally had enough of the first practice booster made to do some dry fit mock up pictures.
I've got to make four of them eventually, so I want to try out a couple of different Ideas/methods first, to get the best design possible.
Looks cool though.")


I've got to make four of them eventually, so I want to try out a couple of different Ideas/methods first, to get the best design possible.
Looks cool though.
dave carver
....what hump?
Finally had enough of the first practice booster made to do some dry fit mock up pictures.
I've got to make four of them eventually, so I want to try out a couple of different Ideas/methods first, to get the best design possible.
Looks cool though.
View attachment 285976View attachment 285977View attachment 285978
How much weight (if any) are you going to need for that rocket? Looks a little "butt" heavy...
TopRamen
SA-5
- Joined
- Aug 9, 2013
- Messages
- 9,955
- Reaction score
- 111
How much weight (if any) are you going to need for that rocket? Looks a little "butt" heavy...
Nose weight, according to Openrocket, little if any. The model relies on base drag for stability for the most part.
I think my sim is down to 1 oz. of nose weight in the latest revision, and still over 1.5 Calibers with a G40 loaded in OR.
That said, the model is not so large as to make swing testing impossible, so when it is near completion, the last part of the build will be dialing in the nose weight. Might not need any, might need as much as an ounce and a half.
It's not like a Matra R550 or AIM-9 with the forward canard fins, so though it "Looks butt heavy", aerodynamics take care of that in reality.
Aerodynamically speaking, it is nearly a cone.
The design has some inherent stability built into it. There have been other models of this basic configuration in the past, and Fliskits still makes a Thunderbird scale model which is similar. This is not virgin territory like my ongoing quest to see a flying TALOS.
Not to mention, those are all just practice parts you see in those pics, save for the tail cone and sustainer body tube.
I need to get my bearings straight on the design/dimensions, and develop the most lightweight methods possible for this build, without sacrificing strength.
Last edited:
smapdiage9
Well-Known Member
- Joined
- Mar 14, 2009
- Messages
- 442
- Reaction score
- 3
Got it put together for TAP inspection at the launch today. Stickershock wrap should arrive this week, hopefully flying next month!
Let the wrapping begin!
I have a yellow rocket , it is 56"tall and quite heavy . 3 lbs 2 oz. anyway can you tell me the reason forthe brass threads ? They are 3 in a triangle .The outside diameter is3.6" or 80.25 mm.
In the photo shown the Inner diameter is 2.14" or 54.36mm . what are the 3inner BRASS THREADS FOR . I HAVE A TALLER ROCKET (85 " ) THAT HAS THE NORMAL F MOTOR MOUNT . CAN YOU TELL ME MORE ABOUT THIS MOTOR MOUNTPLEASE !!!! THANKS , APOGEE DIDN'T EVEN REPLY . THANKYOU , Photo attached .

In the photo shown the Inner diameter is 2.14" or 54.36mm . what are the 3inner BRASS THREADS FOR . I HAVE A TALLER ROCKET (85 " ) THAT HAS THE NORMAL F MOTOR MOUNT . CAN YOU TELL ME MORE ABOUT THIS MOTOR MOUNTPLEASE !!!! THANKS , APOGEE DIDN'T EVEN REPLY . THANKYOU , Photo attached .
smapdiage9
Well-Known Member
- Joined
- Mar 14, 2009
- Messages
- 442
- Reaction score
- 3
That's probably for motor retention. Some systems use a retaining plate that is screwed into the threaded inserts in the aft centering ring to keep the motor pinned in. Others just use a screw with a washer on each insert that has enough overhang to retain the thrust ring in three places.
rharshberger
Well-Known Member
I have a yellow rocket , it is 56"tall and quite heavy . 3 lbs 2 oz. anyway can you tell me the reason forthe brass threads ? They are 3 in a triangle .The outside diameter is3.6" or 80.25 mm.
In the photo shown the Inner diameter is 2.14" or 54.36mm . what are the 3inner BRASS THREADS FOR . I HAVE A TALLER ROCKET (85 " ) THAT HAS THE NORMAL F MOTOR MOUNT . CAN YOU TELL ME MORE ABOUT THIS MOTOR MOUNTPLEASE !!!! THANKS , APOGEE DIDN'T EVEN REPLY . THANKYOU , Photo attached .
Those three inserts are indeed for motor retention, as someone else pointed out most likely a simple screw with a washer large enough to catch the motors rear closure. I use the same "kaplow clip" style retention on most of my MPR and HPR rockets.


Last edited:
SteveA63
Well-Known Member
- Joined
- Dec 28, 2015
- Messages
- 86
- Reaction score
- 10
I'm glad I scrolled down further. I was wondering how and with what, you accomplished this. So,I gotta ask, on a scale of 1 to 10, how would you rate this as a challenge? Great work. Enjoying watching it evolve.
I came up with a clever way to make the booster cones today too. Using the PDF that rocketguy101 made for me, I took the Angle diagram and used it as a template for a balsa triangle that was then sanded to fit inside for reinforcement.
Prior to this, my oblique cones left a lot to be desired when it came to making them the perfect shape.
View attachment 285843
TopRamen
SA-5
- Joined
- Aug 9, 2013
- Messages
- 9,955
- Reaction score
- 111
I'm glad I scrolled down further. I was wondering how and with what, you accomplished this. So,I gotta ask, on a scale of 1 to 10, how would you rate this as a challenge? Great work. Enjoying watching it evolve.
Thank You!
Challenge? On a scale? Hard to say because it is giving me so much sheer enjoyment.
Compared to other scratch builds or kits however, I guess I could rate it as an 7 or 8, mostly do to "How to attach the boosters to the sustainer".
Thankfully, unlike my ongoing attempt at a TALOS, it has no moving parts, so that is nice, and it is a fairly stable design in the first place.
If you imagine it cutting through through the air, as if in a wind tunnel, it is essentially a cone, and the booster fins and exhaust nozzles generate a healthy dose of base drag. As long as my boosters are all balanced in every aspect it should fly just fine.
I may purchase and build the Fliskits Thunderbird to use as a test platform to see what happens if I add a few grams to one side or the other.
Either way, I'll make sure all my boosters have identical weights and centers of gravity before attaching them to the sustainer.
The next most challenging part, but which is doable, is getting the angles of the fins and wings correct. The fins I have found can be done with the sandwiched fiberglass cloth method that Sunderll posted recently, and I may use paper skins on the wings, but that requires little thought, so I have not made it to that step yet. I'm still most concerned with the attachment points of the boosters.
It may take me a year to complete this build, but that's fine by me. When it is done, I will have advanced my skillsets and learned new ones, making me a more proficient modeler for the next "Challenge".
swatkat
Down these mean skies, a kat must fly!
Did the field checks on the range box and rockets today for the SARG launch on Saturday. 7 rockets, 14 flights planned. Filled out flight cards for all of them. Will load the reloadable casings tomorrow night.
Working on piezo buzzers for the tall grass anticipated. I just hope the coin batteries can power them for an appreciable amount of time.
Working on piezo buzzers for the tall grass anticipated. I just hope the coin batteries can power them for an appreciable amount of time.
- Joined
- Aug 18, 2011
- Messages
- 1,459
- Reaction score
- 57
I designed one of my rockets in Solidworks and took some renderings.


Similar threads
- Replies
- 158
- Views
- 5K
- Replies
- 5
- Views
- 266
- Replies
- 18
- Views
- 2K
- Replies
- 1
- Views
- 972