3D Printing What Are You Printing Today?

The Rocketry Forum

Help Support The Rocketry Forum:

This site may earn a commission from merchant affiliate links, including eBay, Amazon, and others.
NIce. What's the total print time? What's the wall thickness? Will you be glassing it?
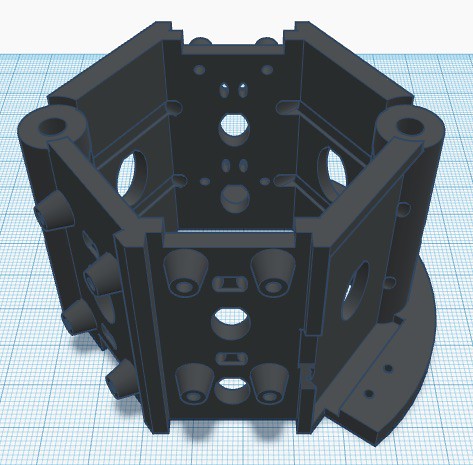
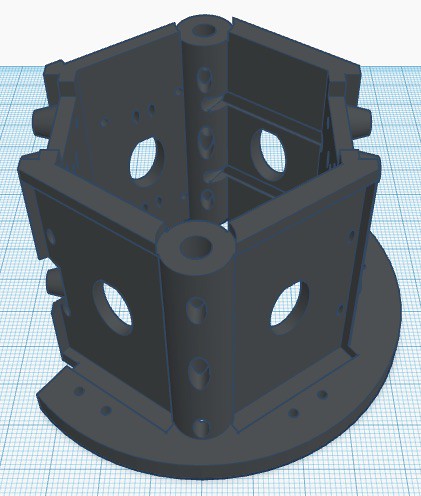
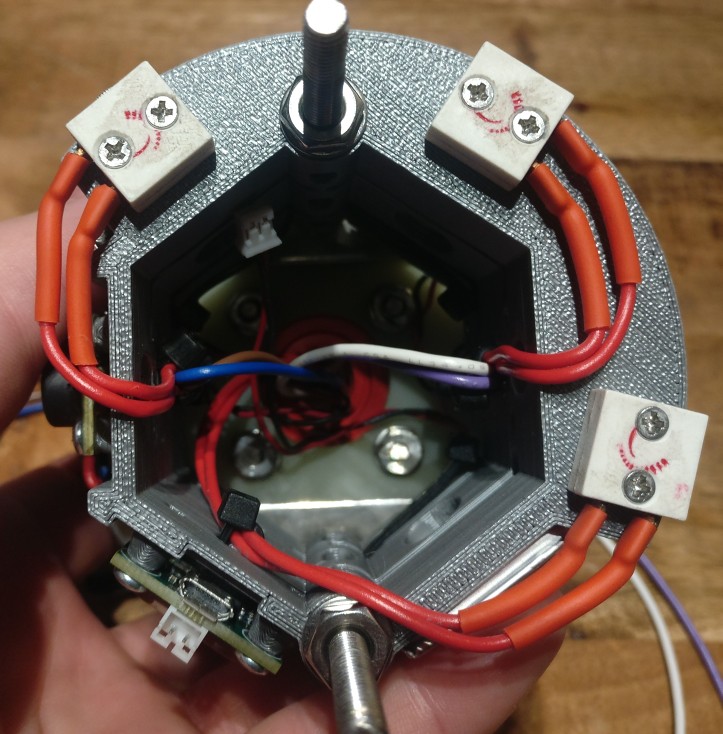
Approx .08" wall and the if I do glass it will be internal, plan is currently to put a 6" sonotube in it and foam it in place. Total print time is going to be for the first half 5.5 days, I need to step up and calibrate for a larger nozzle. Second part is about 4 days. The hotend is an all metal MicroSwiss Mk8 (Creality standard on the CR-10v2), but I want to change the heater block out to a plated copper block before recalibrating for the new nozzle. The supports is almost doubling the print time.
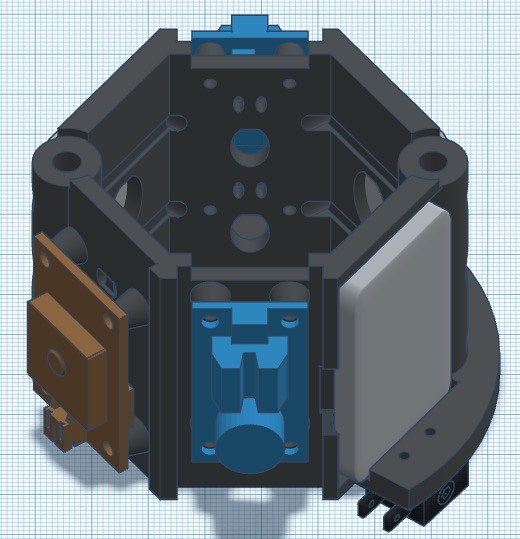
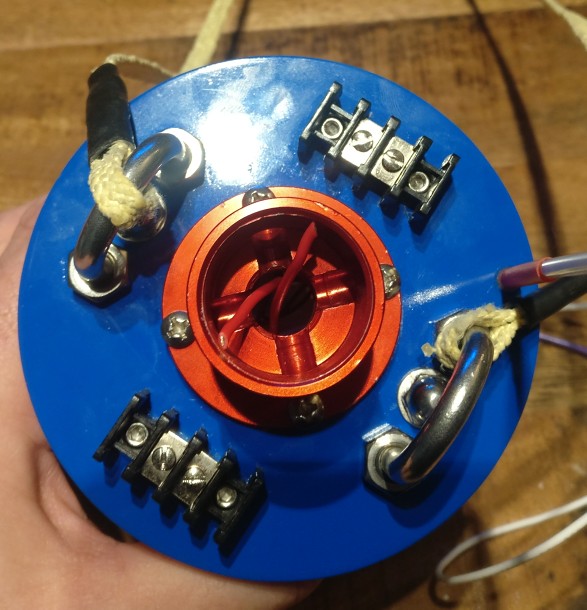
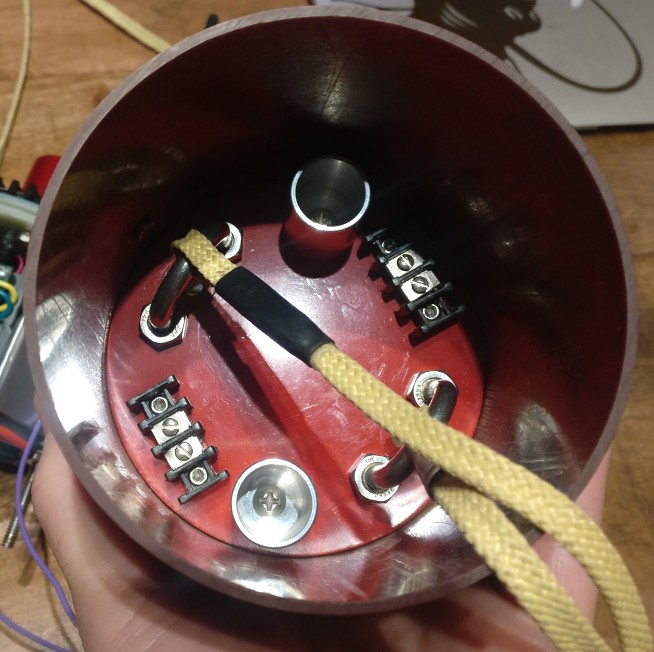
Its for an upscale of this rocket.
20200110_201615.jpg
 
Last edited:
Working on a new HED AV bay for my 4" BlackFly. The sled is a dual altimeter (Altus Metrum Easy Mini) single tracker (Altus Metrum TeleGPS) with independent LiPos (2S 900 MaH) and independent screw switches (FingerTech Mini Screw Switch). The challenge with this sled was that I wanted to fly the Loki 54-2800 hardware, however it extends into the nosecone. So instead of extending the body I opted to go with HED and push the aft bulkhead of the sled into the 7" AV bay by 3.5". This left me with 55mm to work with.


Michael,

Would you be willing to discuss your set up in a sidebar?

Eric
 
Print continues Day 4 and counting, at least its now above the step on the shoulder and making real progress without having to print supports. The supports on this one will be a 4" tall x 8" diameter ring, I should be able to convert with a bit of work into a pieces of miniatures wargamming terrain/building.

20220208_175318.jpg20220208_175324.jpg
 
The supports on this one will be a 4" tall x 8" diameter ring

Just a thought, since (currently) you're only printing the bottom of the cone (no steep angles) couldn't you have printed it upside down, and skipped the shoulder supports?
 
Just a thought, since (currently) you're only printing the bottom of the cone (no steep angles) couldn't you have printed it upside down, and skipped the shoulder supports?

Possibly, but there is a shoulder that has to be supported where the two pieces meet as well, not as long but still there, at this point its live and learn. Its printing very nice so far, next time I will only print a 1" shoulder then print a 3rd piece that is nothing but shoulder than can be reinforced on the inside with a homemade coupler of sonotube or mailer tube.

By switching to a .06 nozzle I can probably double my deposition rate, and based on area of the nozzle increasing it to .08 would quadruple the deposition, upgrade heater block first though....
 
1143984C-FB32-4BF0-AC47-8B6DE449BAAC.jpeg
Take 2…… HoJo 3” at widest. Fits 2-6 tube BT 80. 390 mm long. 2 1/2 hour print time !!!!! Switching to a bigger nozzle has made a massive difference. ABS. 2 sections.
6CD3EBE2-3AF5-4187-90A6-4D05261617EA.jpeg
Take 1. Shouldn’t have told Cura to join up multiple small curves into 1. Bad mistake. Fortunately only an hour of my life I won’t get back. 😂
 
Possibly, but there is a shoulder that has to be supported where the two pieces meet
True, but that could be designed out - it's internal, so no reason why you couldn't design a coupling without it.
(Not nitpicking your approach, just thinking out loud and picking your brain, for my next print.)
I think I'll look into a larger nozzle - I don't trust my printer enough to ask it for a 5-day print!
My printer is a stock Creality CR-10v2, and it runs like a champ. If I designed the nosecone myself or knew enough coding to mod the nosecone generator I could add fillets in areas that might allow me to print without supports.
 
My printer is a stock Creality CR-10v2, and it runs like a champ. If I designed the nosecone myself or knew enough coding to mod the nosecone generator I could add fillets in areas that might allow me to print without supports.
PM me with a sketch of what you want and your JSON file as a .txt for I assume the Alex Zoghlin nosecone generator and I'll see if I can assist.
Norm
 
First part turned out pretty nice after a 6 day and 12 hour print time. The additional time was due to me tuning the printer on the fly (Creality CR10v2's are pretty easy in that regard) to improve quality, I started by slowing 15% the upping extrusion by 10%, this time I am going to just play with the extruder before slowing down the travel. Temp was good at 258°C with the first 3-4 layer at 265°C using the Overture Lt. Gray PETG. The second half should take about 4 days 12 hours estimated.
 

Attachments

  • 20220211_071353.jpg
    20220211_071353.jpg
    88.2 KB · Views: 18
  • 20220211_071358.jpg
    20220211_071358.jpg
    184.9 KB · Views: 18
First part turned out pretty nice after a 6 day and 12 hour print time. The additional time was due to me tuning the printer on the fly (Creality CR10v2's are pretty easy in that regard) to improve quality, I started by slowing 15% the upping extrusion by 10%, this time I am going to just play with the extruder before slowing down the travel. Temp was good at 258°C with the first 3-4 layer at 265°C using the Overture Lt. Gray PETG. The second half should take about 4 days 12 hours estimated.
The max temperature on the Overture3D website for their PETG is 250 degC. Why so high for your print? At those temps you're getting past the limit for the standard thermistor. You might need to move to a platinum sensor.
 
You could get thermistor failure and have thermal runaway. Make sure themistor failure detection is enabled for your firmware. And your house insurance is paid up.... :)
Have you checked the actual temperature of your block?
 
You could get thermistor failure and have thermal runaway. Make sure themistor failure detection is enabled for your firmware. And your house insurance is paid up.... :)
Have you checked the actual temperature of your block?
I have not checked the temp of the block, the printer functions just like it has for the last 2 years with almost no issues, so I leave it alone till it breaks. The custom firmware from TinyMachines3D that they ship with the CR10v2's sold by them has the thermal runaway protection active. The machine is going to get some upgrades as soon as the next print is done, the plated copper block, and a I am going to pick up a second complete hotend setup (hotend, and cooling fan shrouds that are Creality standard). TBH the CR10v2 has turned out to be a fantastic printer for the money, and TinyMachines3D a fantastic company to purchase from.
 
I have not checked the temp of the block, the printer functions just like it has for the last 2 years with almost no issues, so I leave it alone till it breaks. The custom firmware from TinyMachines3D that they ship with the CR10v2's sold by them has the thermal runaway protection active. The machine is going to get some upgrades as soon as the next print is done, the plated copper block, and a I am going to pick up a second complete hotend setup (hotend, and cooling fan shrouds that are Creality standard). TBH the CR10v2 has turned out to be a fantastic printer for the money, and TinyMachines3D a fantastic company to purchase from.
I had a bad thermistor on my first printer. Drove me bananas not knowing what the actual temperature was. Swapped it out. All good. Also assists everyone if the temp you quote for great prints is the actual one... :)
Norm
 
I had a bad thermistor on my first printer. Drove me bananas not knowing what the actual temperature was. Swapped it out. All good. Also assists everyone if the temp you quote for great prints is the actual one... :)
Norm
While I did quote the temps I use, each printer is a little different, after doing a bit of searching in the Book of Google, evidently its not uncommon for the temps to vary some from printer to printer (kind of like my wifes oven, it runs about 5 or so degrees cooler than the setting on the panel (set for 350F and its between 340F and 345F-ish). But I do understand what you are saying, but anyone with experience in 3d printing hopefully has taken the time to learn their own printer. I like the CR10V2 enough I am thinking about getting something another one.
 
Just a thought, since (currently) you're only printing the bottom of the cone (no steep angles) couldn't you have printed it upside down, and skipped the shoulder supports?
So after printing the base @Kelly , I could have printed the darn thing upside down and been totally without supports, it would have saved time and material, the "coupler" is on the top half of the nose cone. The base section probably would not have needed any mods to the .stl to print it.
 
I could have printed the darn thing upside down and been totally without supports
Good to know, I have that generator but haven't used it yet.
The cone I'm fiddling with now is only 3" diameter. I printed the wall thin, and smooth/continuous, and strengthened with an internal layer of glass. If you use foam - something I'd like to try next - I'd be interested in hearing about it.
 
No mods needed at this time, thanks for the offer @kalsow and @RocketScientistAustralia to the nose cone generator.
The mods have been added and Bill is testing them now. Includes support for the lip and waisting on the mating part so there is only a contact band at top and bottom of the tube. Bill is starting his 3rd test print to dial the settings in. He writes nice code. Better than my nasty code.... :) @kalsow
Pretty sure your firmware has an offset for the thermistor and a thermistor calibration factor. Also there's a youtube video where issues with dry joints were found on the board in your printer. I'd expect there to be some variation but you seem to be about 20 degC out That's roughly 40degF Which is a lot. Check it out when you rebuild. No point stopping a perfectly good print run now.
Norm
 
The mods have been added and Bill is testing them now. Includes support for the lip and waisting on the mating part so there is only a contact band at top and bottom of the tube.

Yep. My last print seemed Good Enough(TM). :) Here's the updated version of the nose cone designer.
 

Attachments

  • NoseConeDesigner.scad
    24.8 KB · Views: 9
  • NoseConeDesiger_json.txt
    7.2 KB · Views: 5
I can show you a pic of the nose cone, but looks like most others. The supports have already been trimmed. Below is a snapshot from OpenSCAD showing the thinner shoulder waist and the shoulder supports (in blue).

View attachment 504240
OOOOOh a no supports, supported nosecone. That should save a bit of print time. Just watch out for a nosecone that's a bit too domed. That could be done by printing the top domed section as a separate piece with support. Just drop the whole nosecone below the print surface in Cura so only the overly domed section was above and print that section with support. Nice job. Close enough. :)
 
I can show you a pic of the nose cone, but looks like most others. The supports have already been trimmed. Below is a snapshot from OpenSCAD showing the thinner shoulder waist and the shoulder supports (in blue).

View attachment 504240
@kalsow
Change n_bridges = circumfrence / (4/3 * Shoulder_Bridge_Max); to n_bridges =1+round( circumfrence / (4/3 * Shoulder_Bridge_Max)); to give you an integer number plus 1. It will round down or up so you want the gap to be less than the set size. Get rid of the half gap.
1644631731197.png

Result below
1644631882681.png
Norm
 
Back
Top