Wayco's Ultimate Darkstar build

The Rocketry Forum

Help Support The Rocketry Forum:

This site may earn a commission from merchant affiliate links, including eBay, Amazon, and others.

Wayco

Desert Rat Rocketeer
TRF Supporter
Joined
Mar 23, 2011
Messages
4,341
Reaction score
2,115
Location
Goodyear, AZ
Started my "BIG" build this week, an Ultimate Darkstar Sharon bought for me two years ago at Airfest. She just did it so she could buy her Gizmo XL and not feel guilty, but that's another story.
We will be building these over the summer, hopefully for the next Airfest in September.
I started out by laying all the parts out and weighing them:
004.jpg


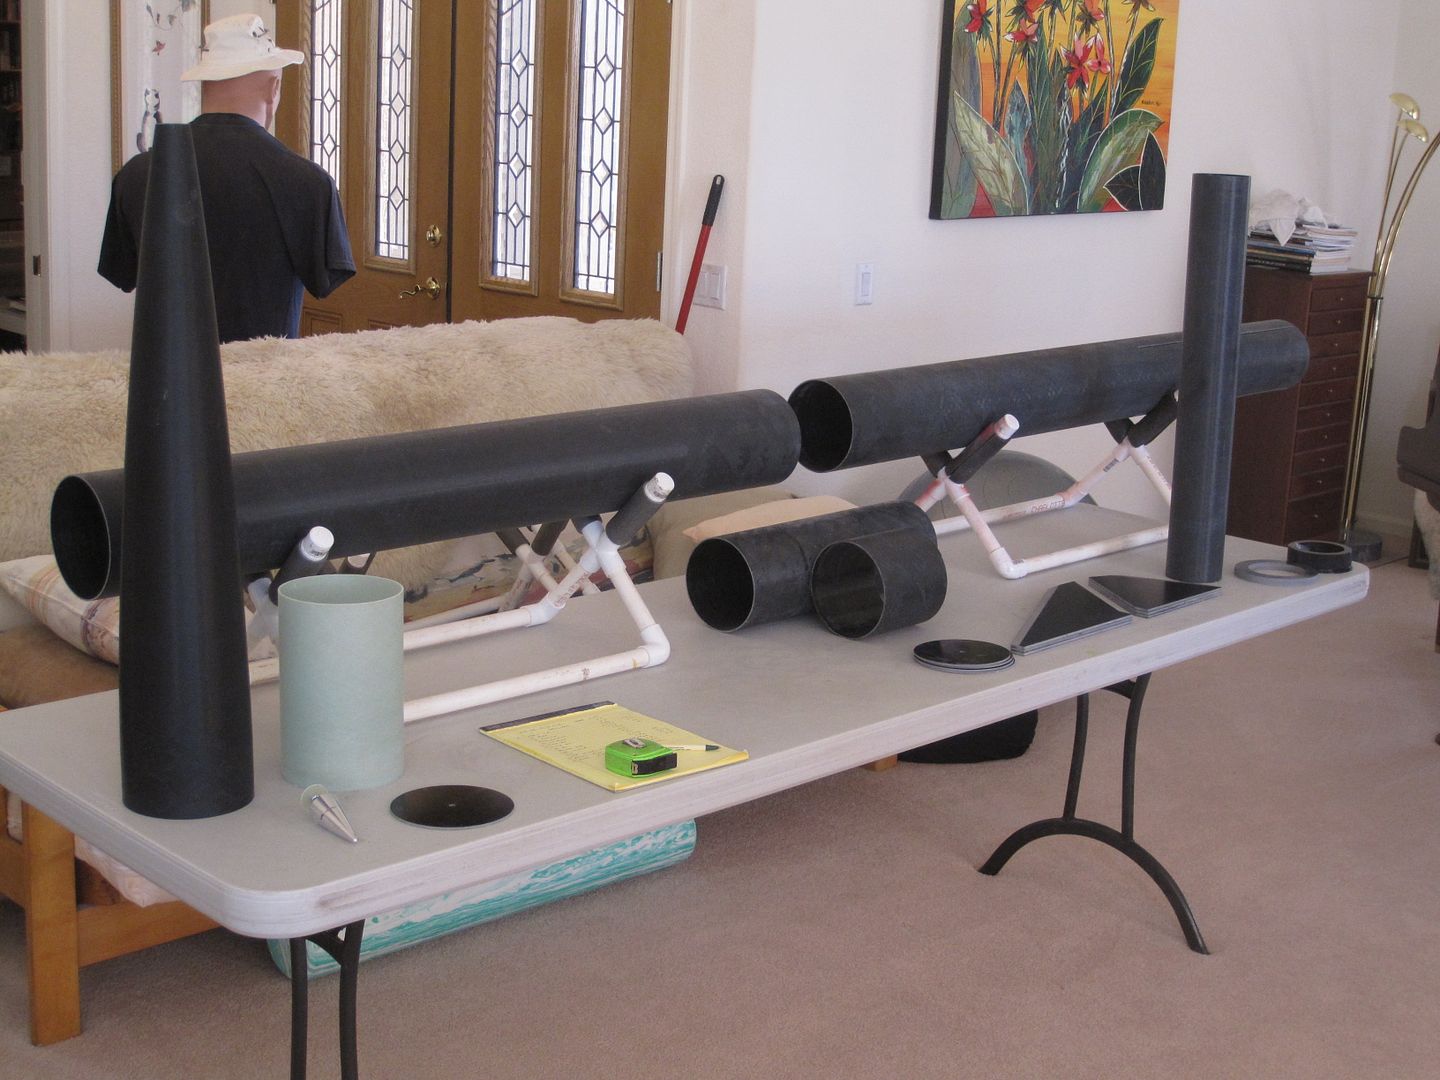
These numbers may change a bit, I might be trimming down the 6" switch band and 18" avbay/coupler, maybe a few other things....
006.jpg


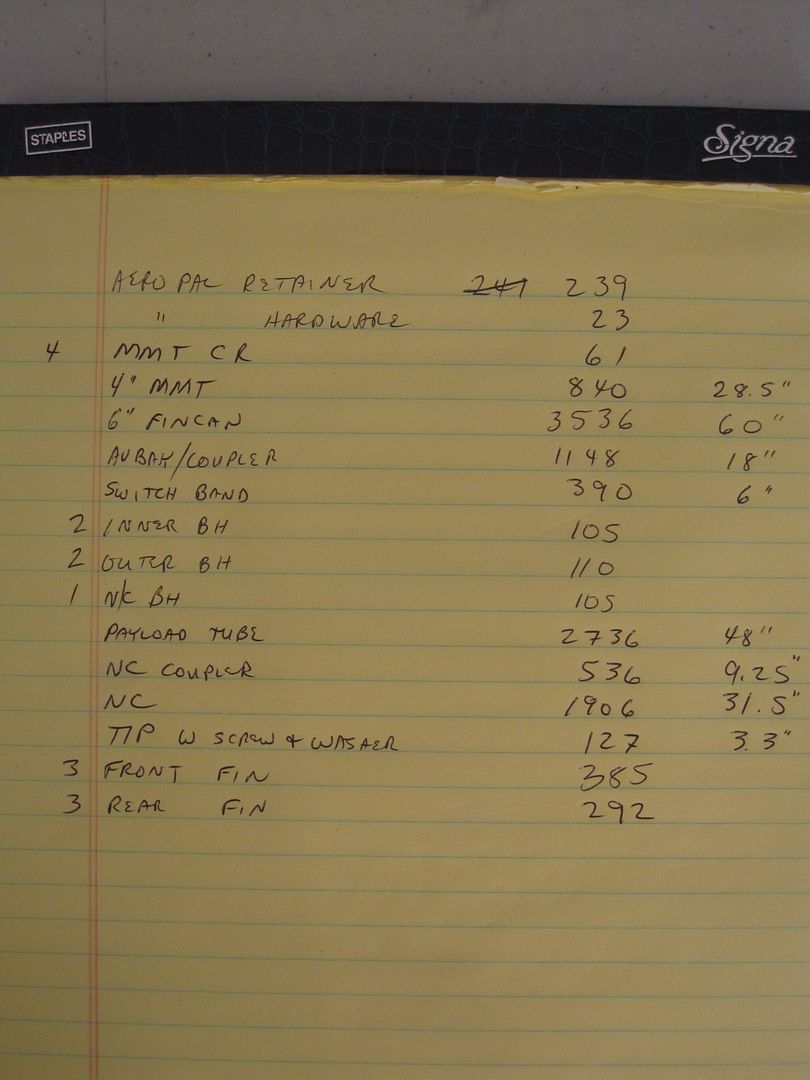
About 32 lbs. without epoxy and recovery. I have a Cert. 3 XL for the main and a 24" drogue. Probably add a few more pounds of epoxy, since I plan to inject internal fillets too.
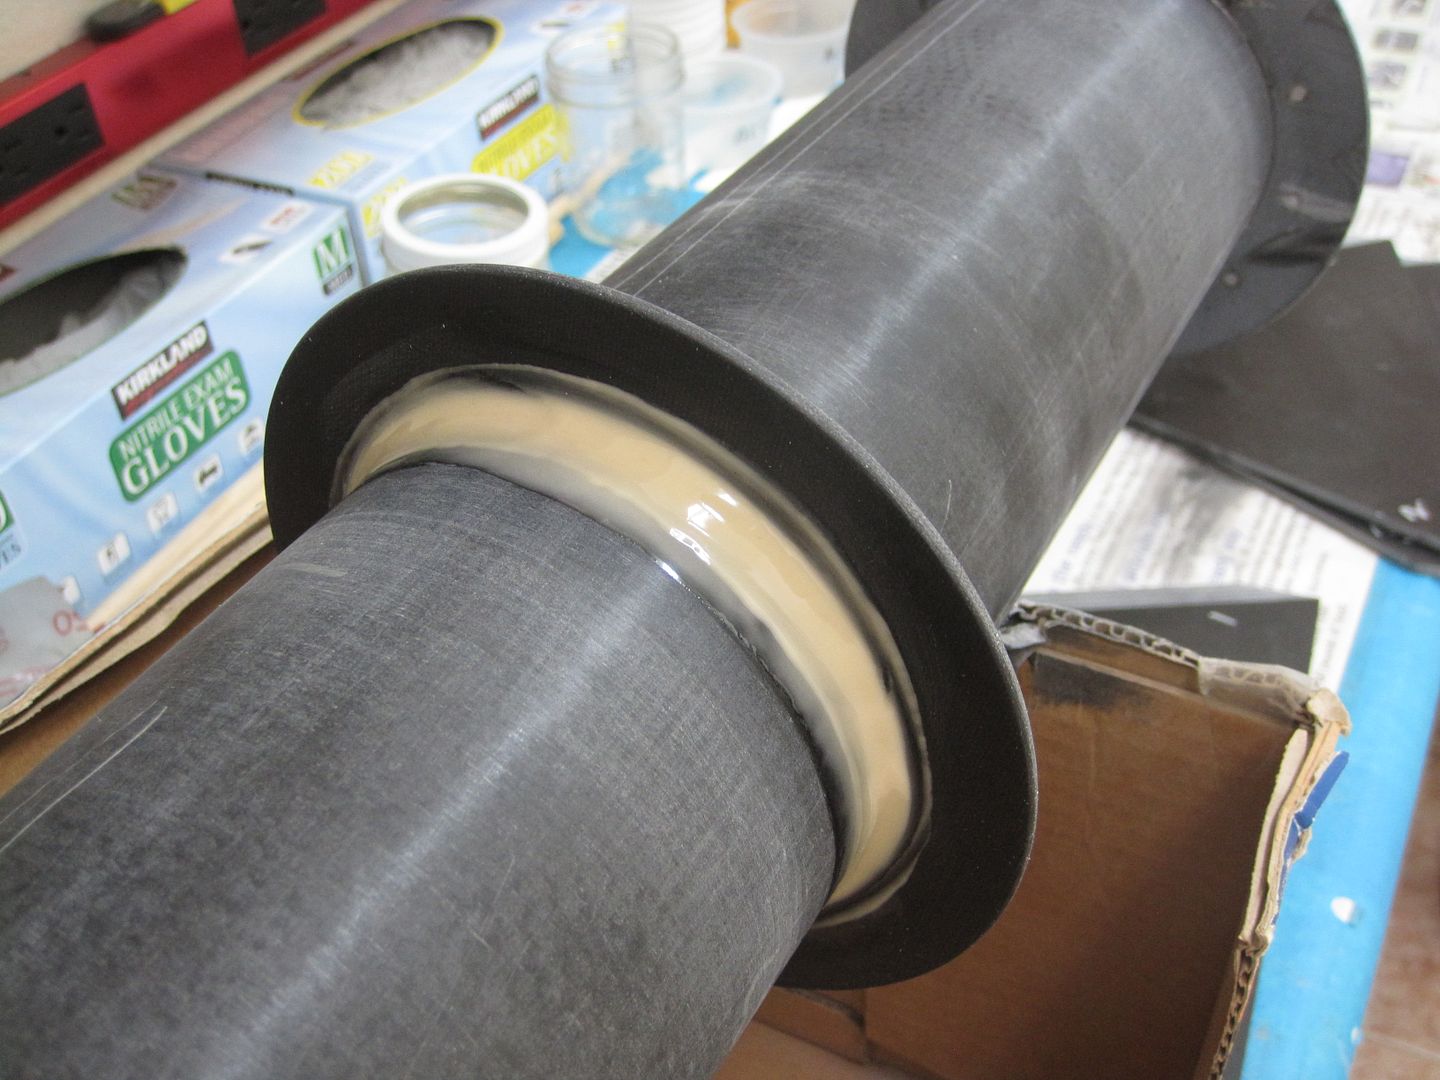
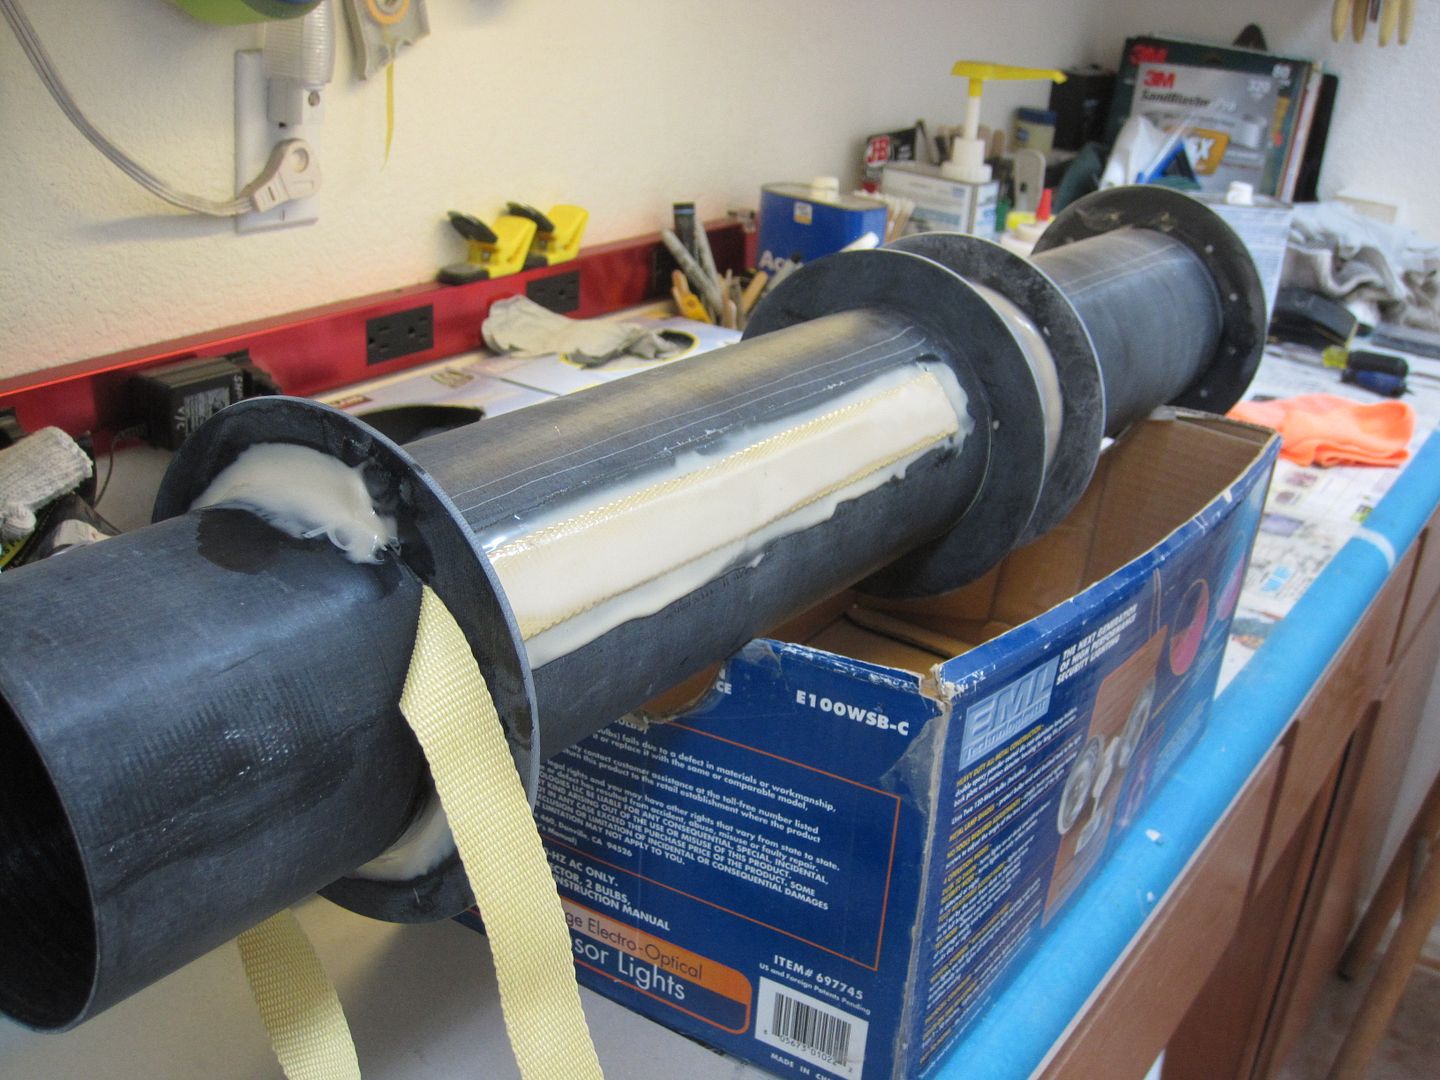
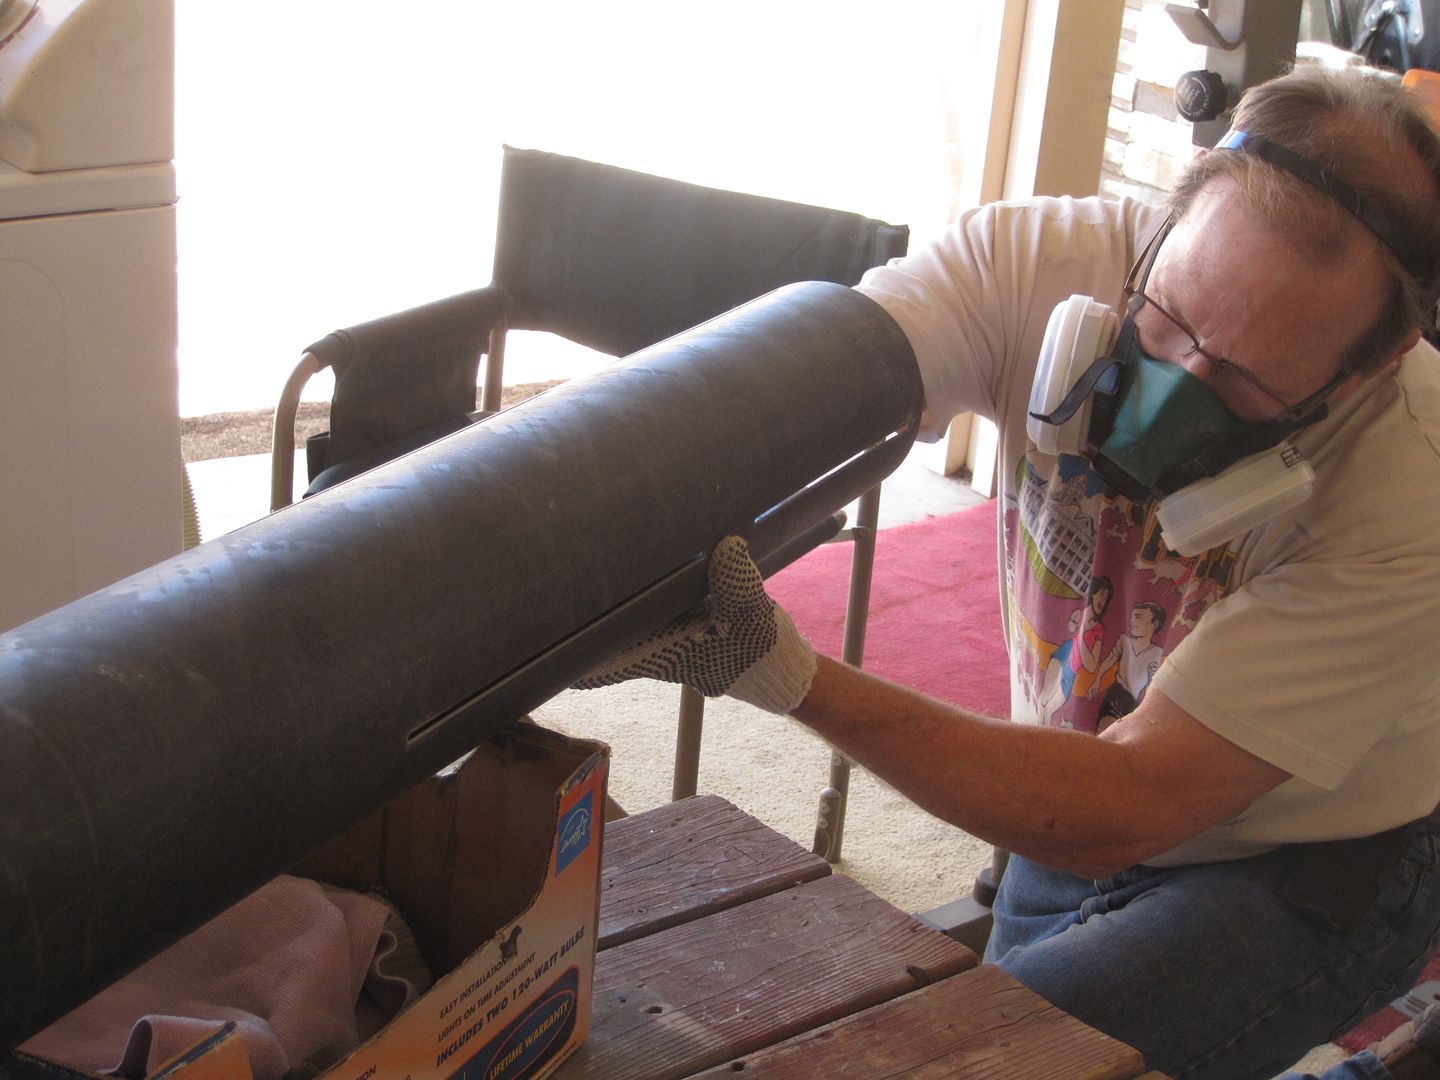
I took the motor mount tube outside to sand it down, along with the centering rings and fins to fit them on the MMT:
006_1.jpg


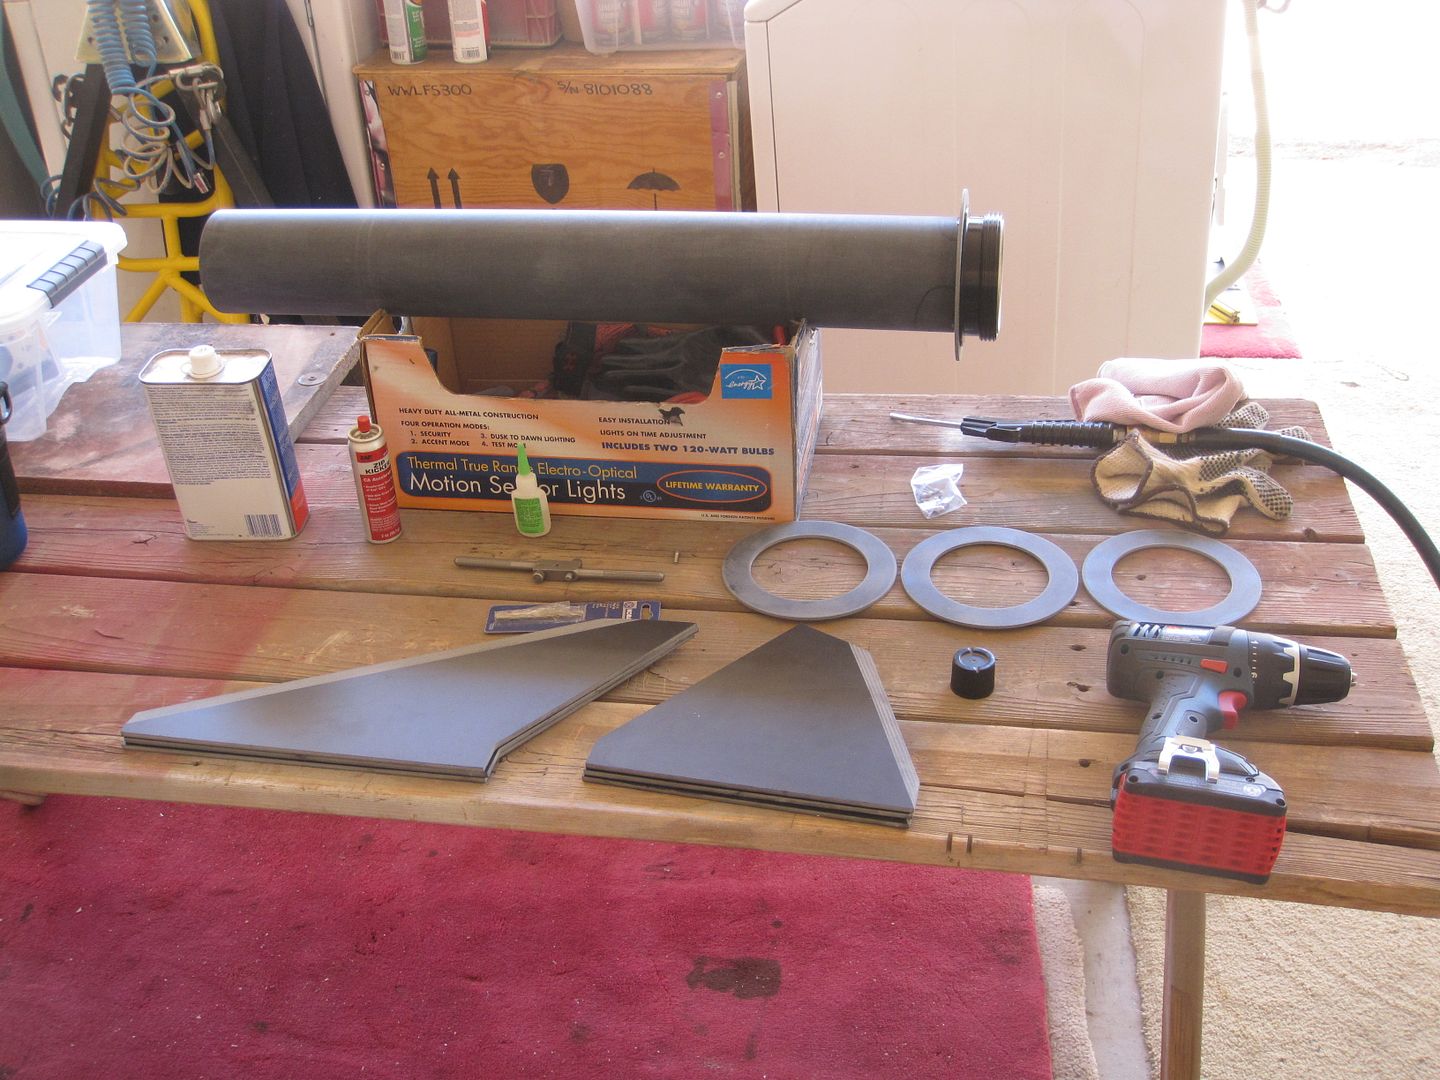
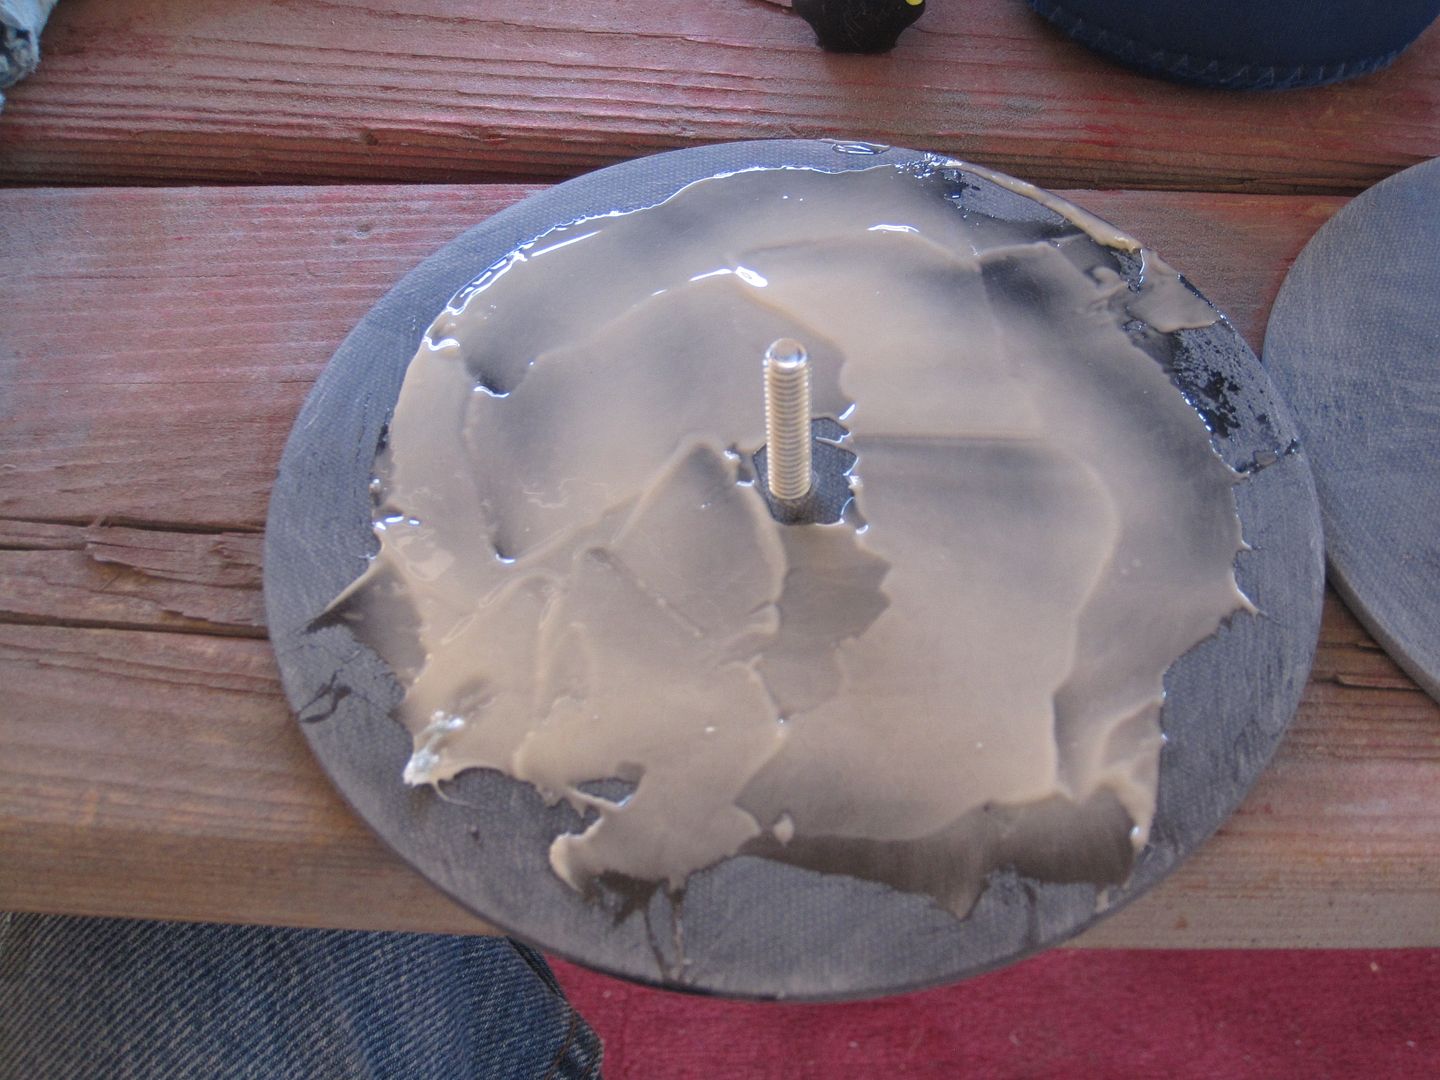
Starting at the bottom and working my way up, I pulled a CTI 4 grain casing out of our stash to mount the Aeropac retainer to the aft CR:
007.jpg


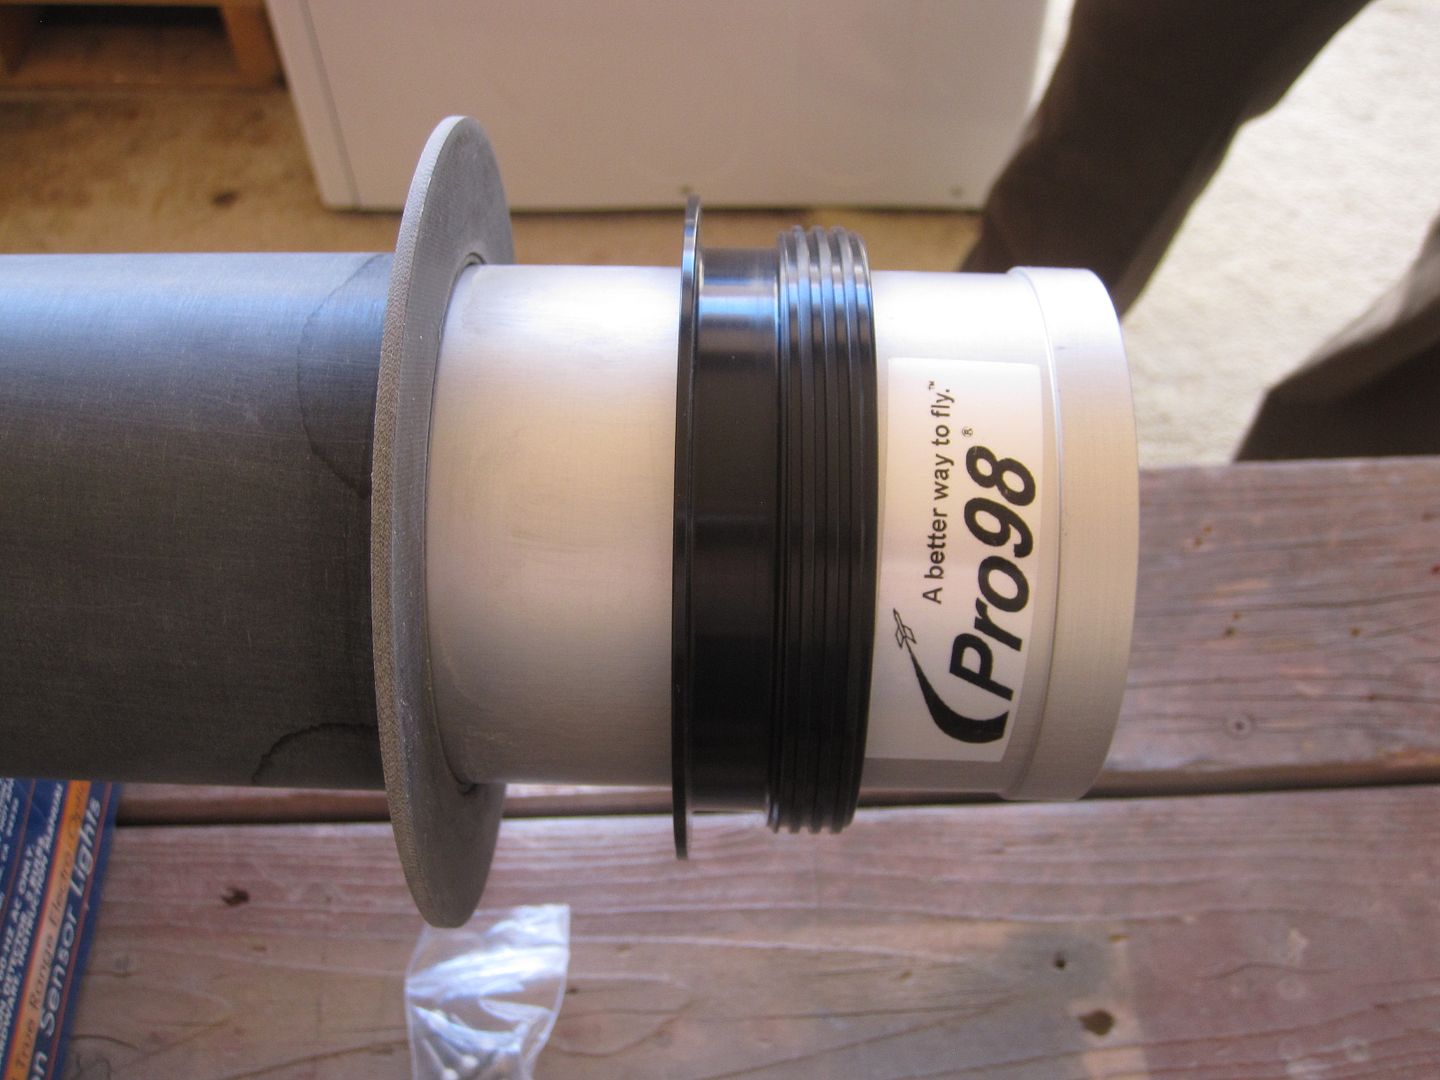
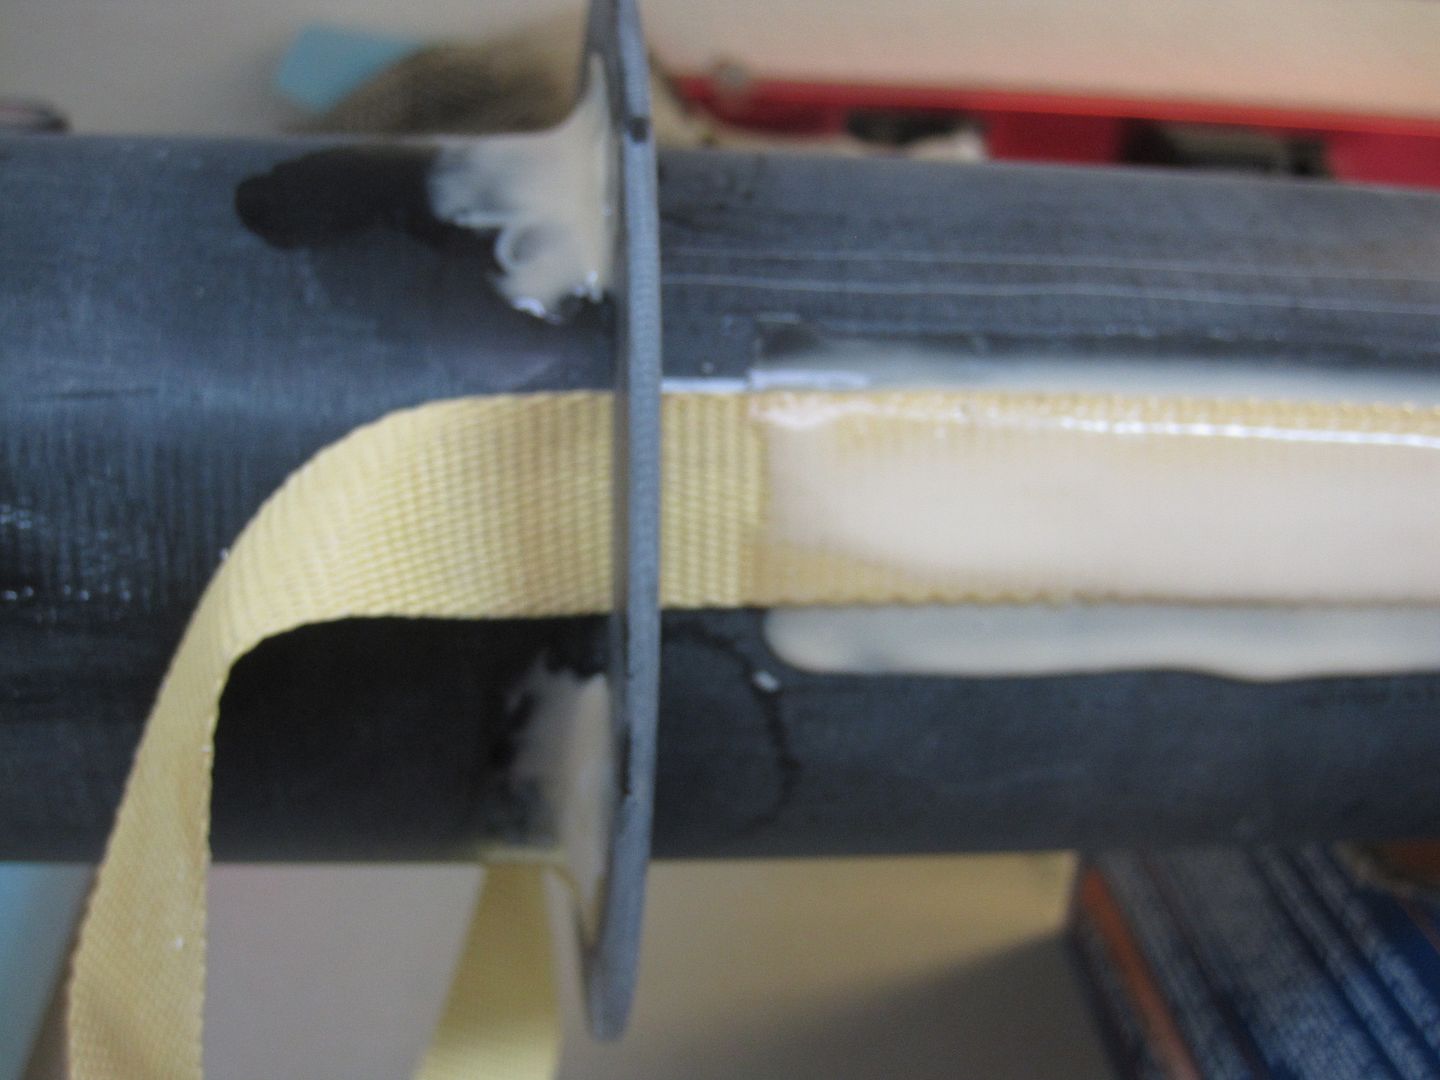
I tacked the aft CR onto the MMT with some medium CA:
008.jpg


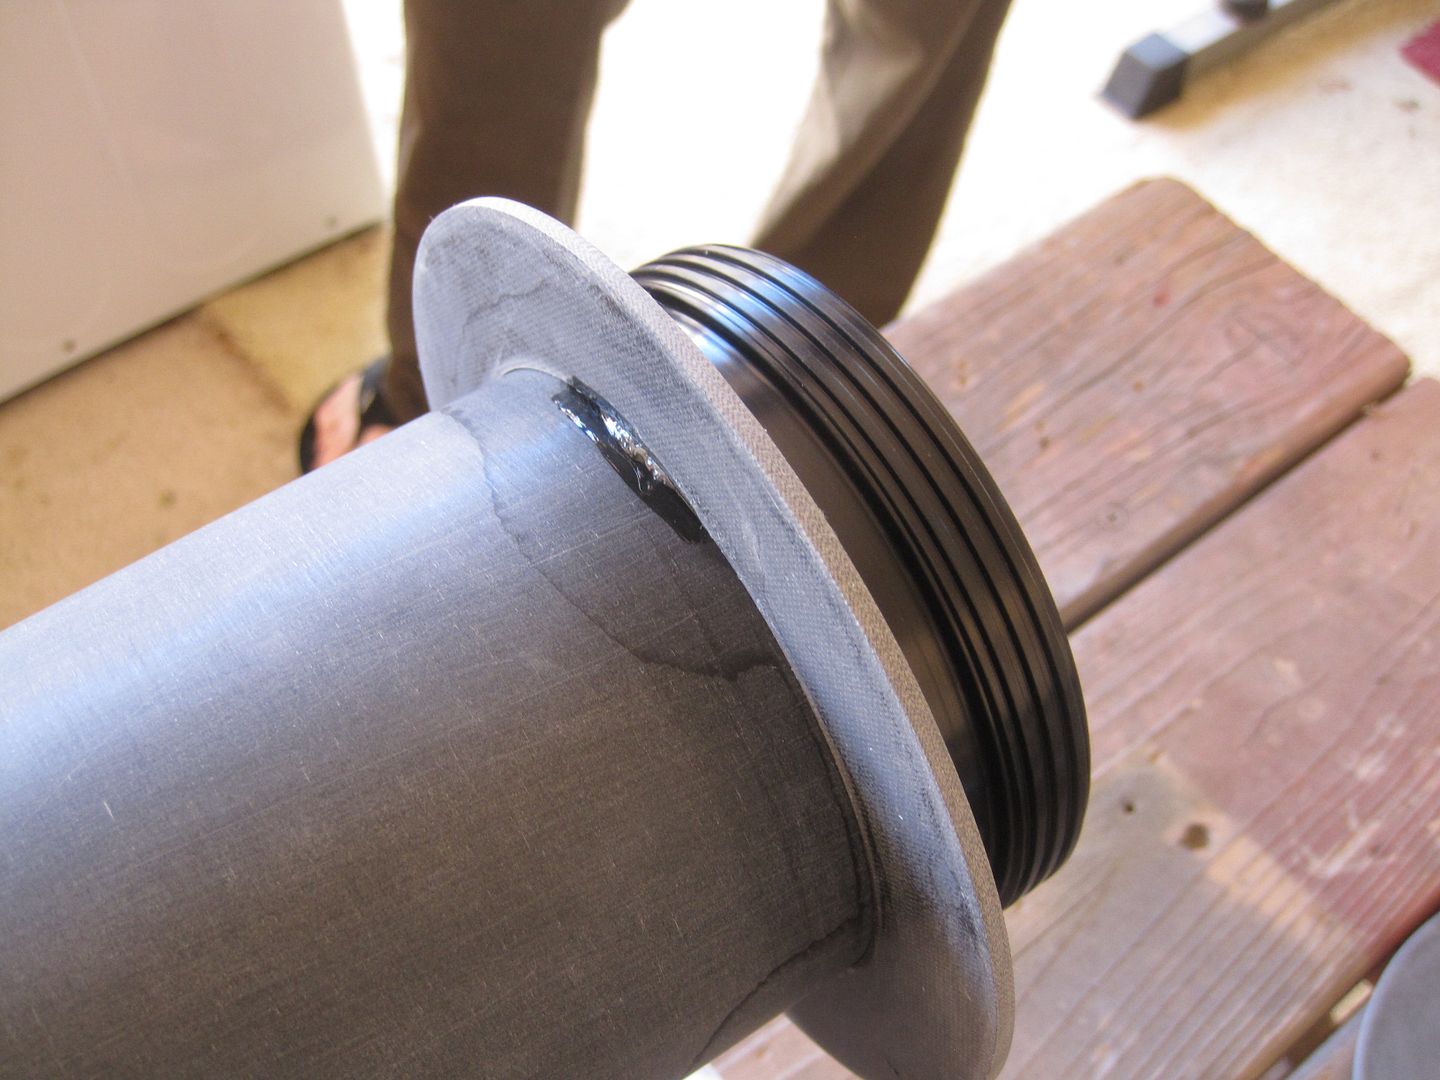
Then I pressed the retainer up against it and drilled my first hole. The 8-32 screws that hold the retainer on need to be cut off flush with the CR so the fins can fit flush to the ring, so I'm tapping threads to the holes, one at a time:
010.jpg


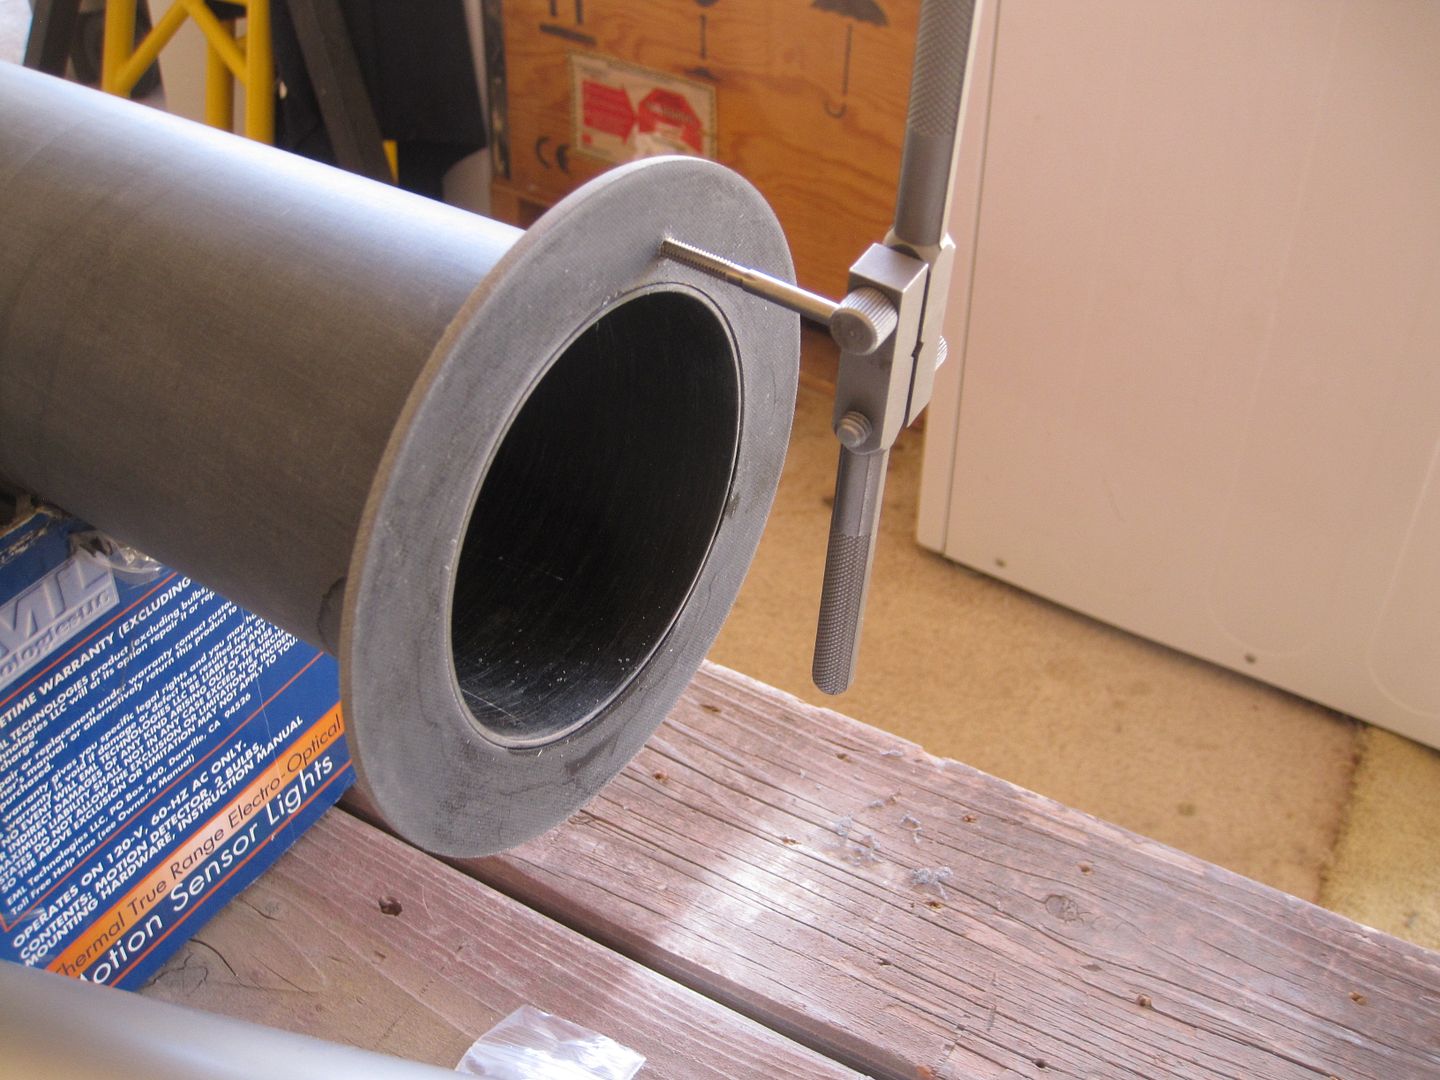
Screw the first one in, and drill another hole at the opposite side:
014.jpg


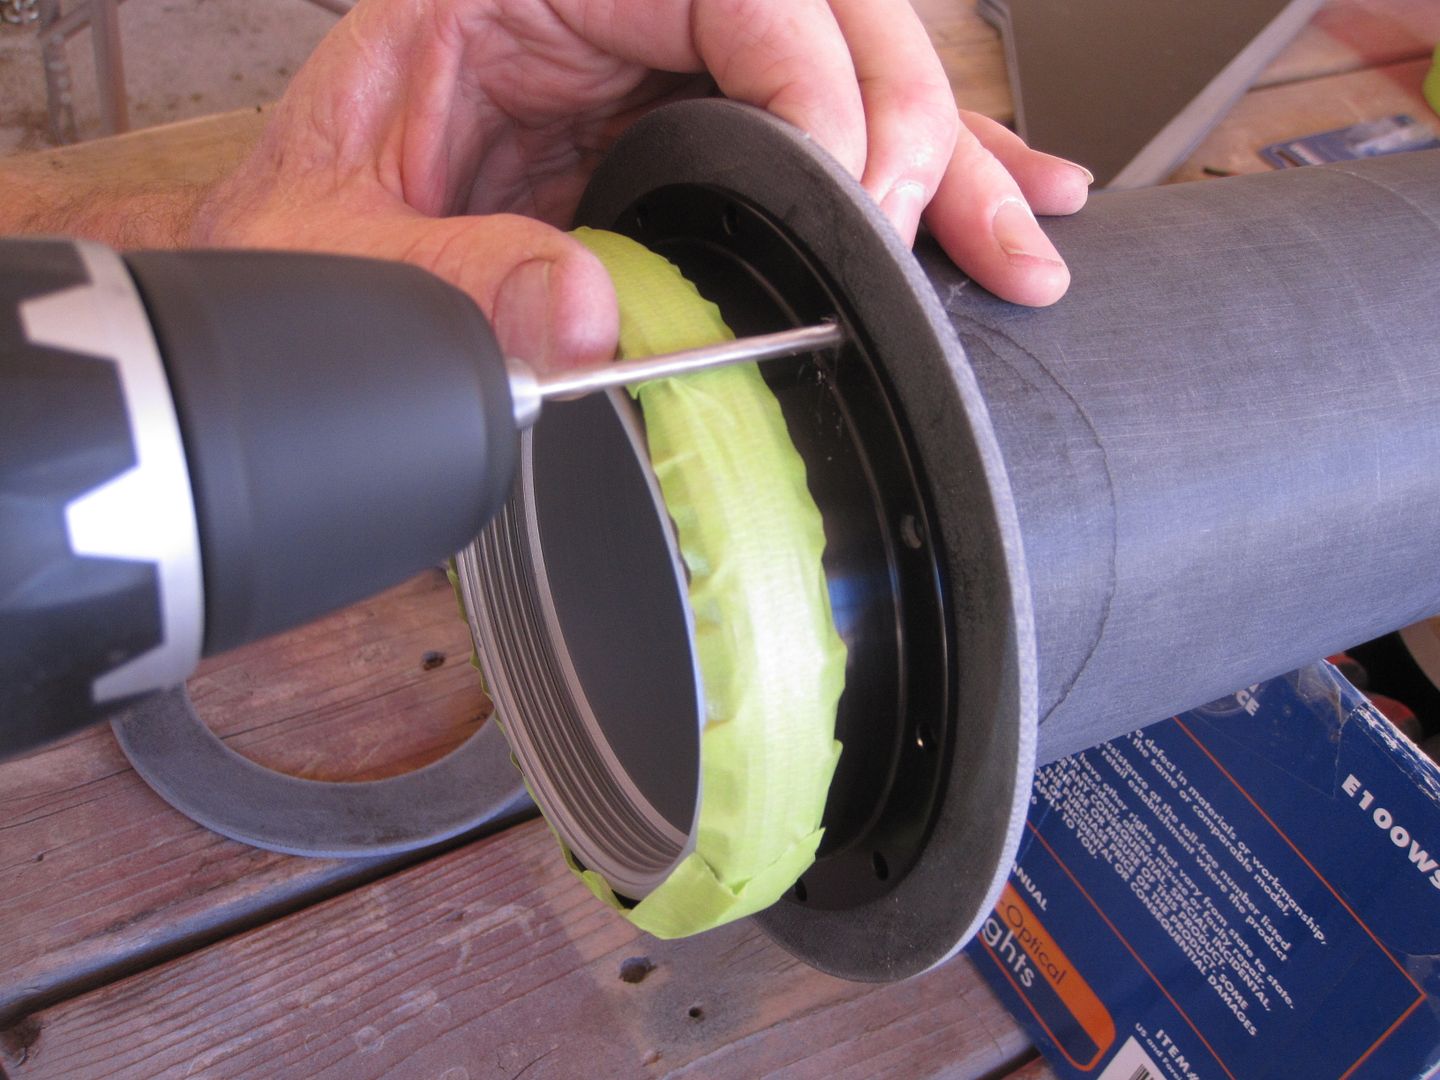
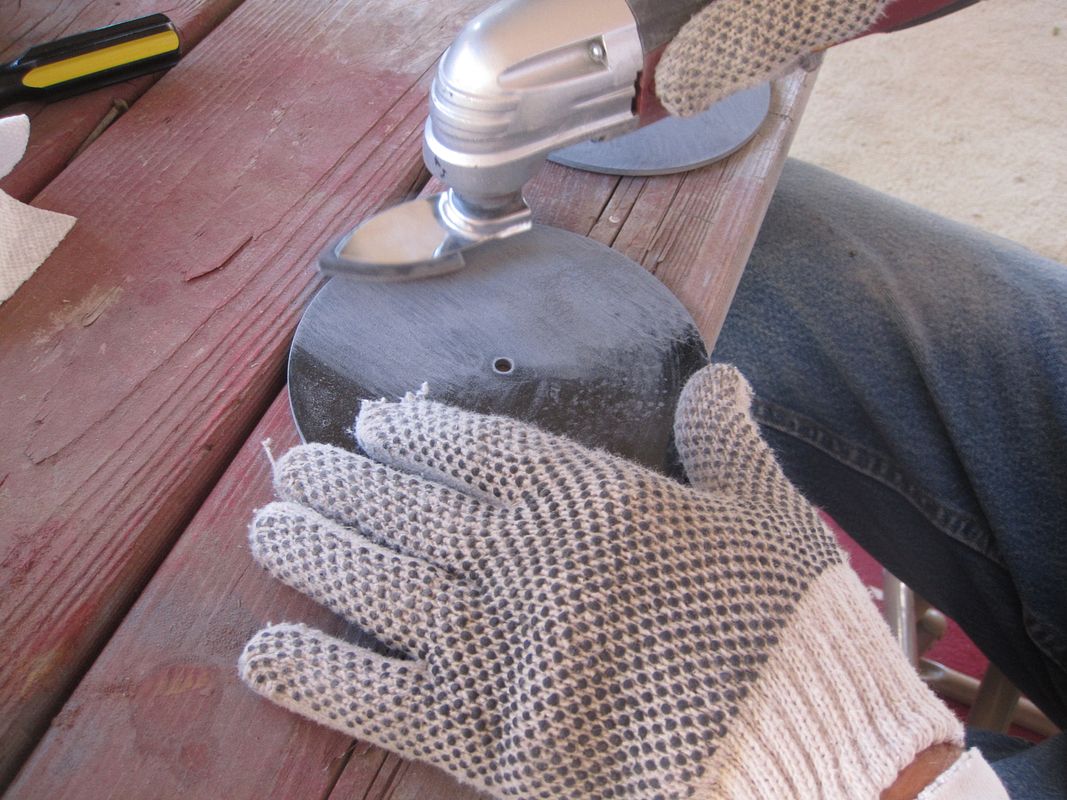
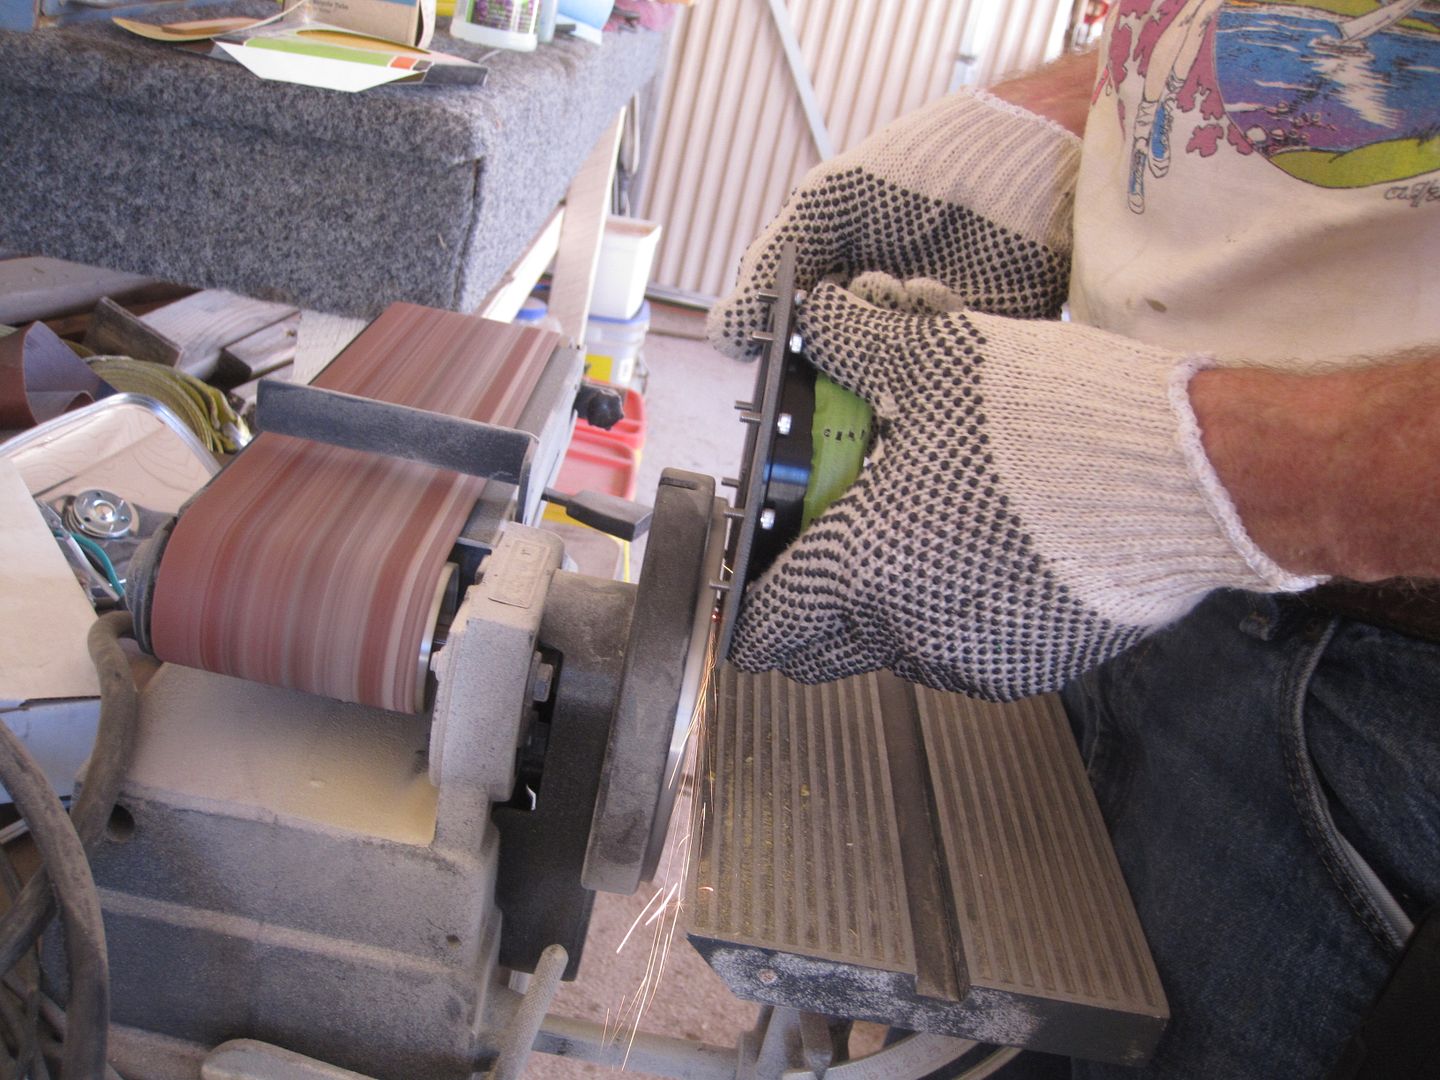
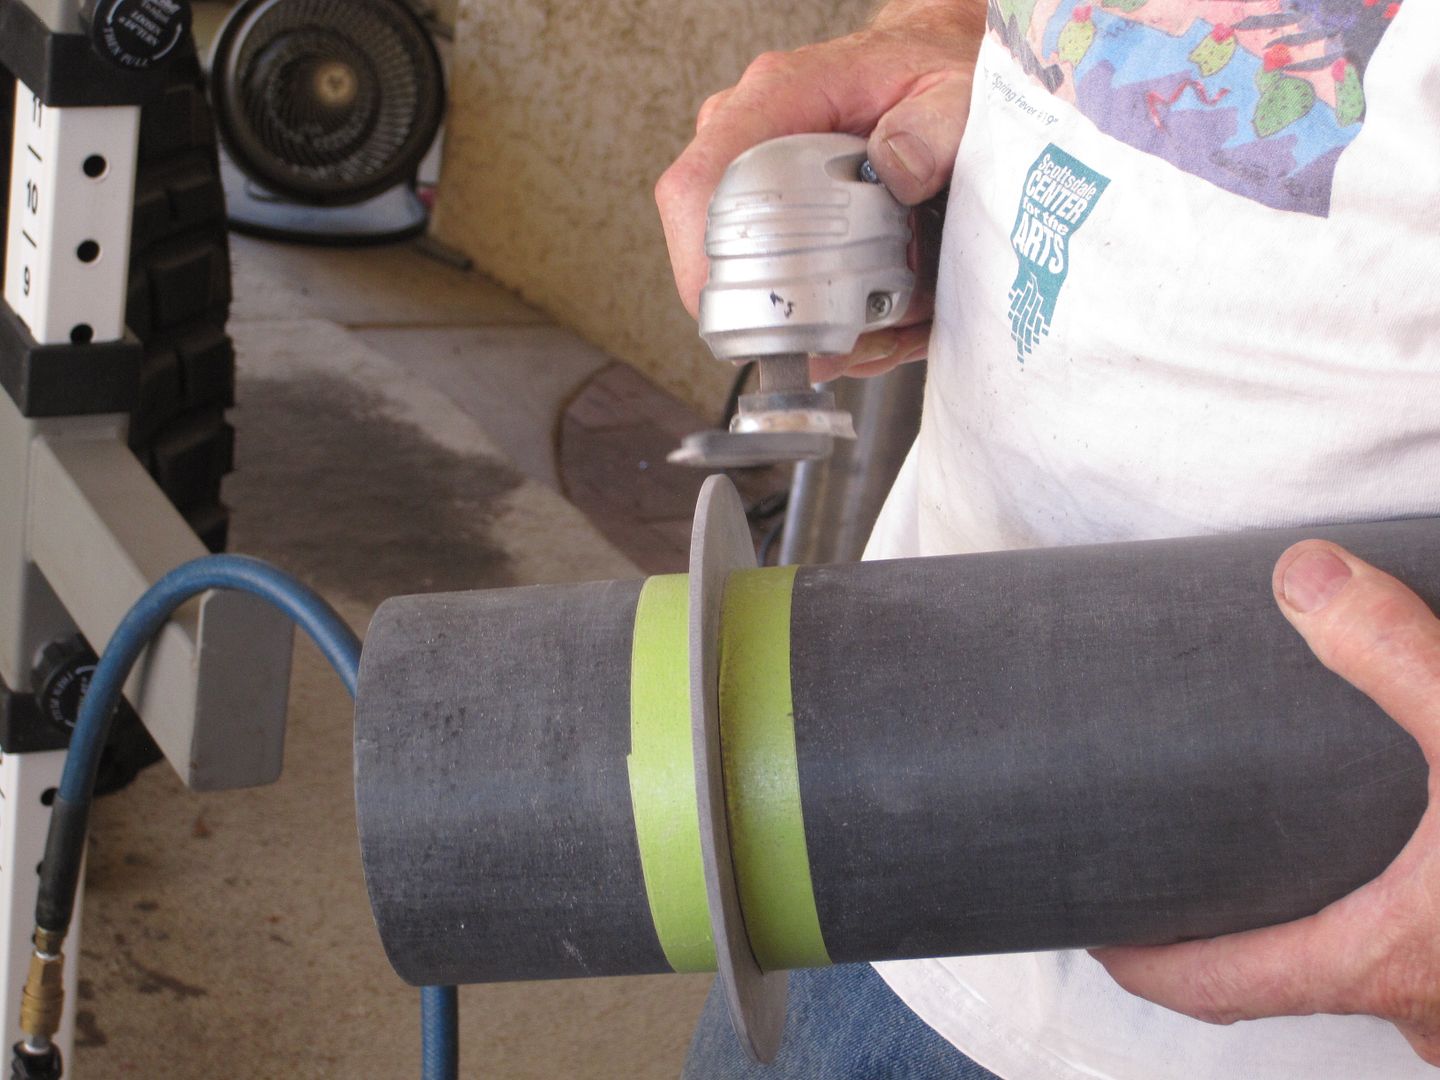
Tap that hole and tighten in the second screw to hold the retainer in place, and you can drill out the rest of the holes. After I got that task done, I removed the CR and retainer and started removing the ends of the screws that stuck through the CR. I first tried sanding them off with my bench sander:
032.jpg


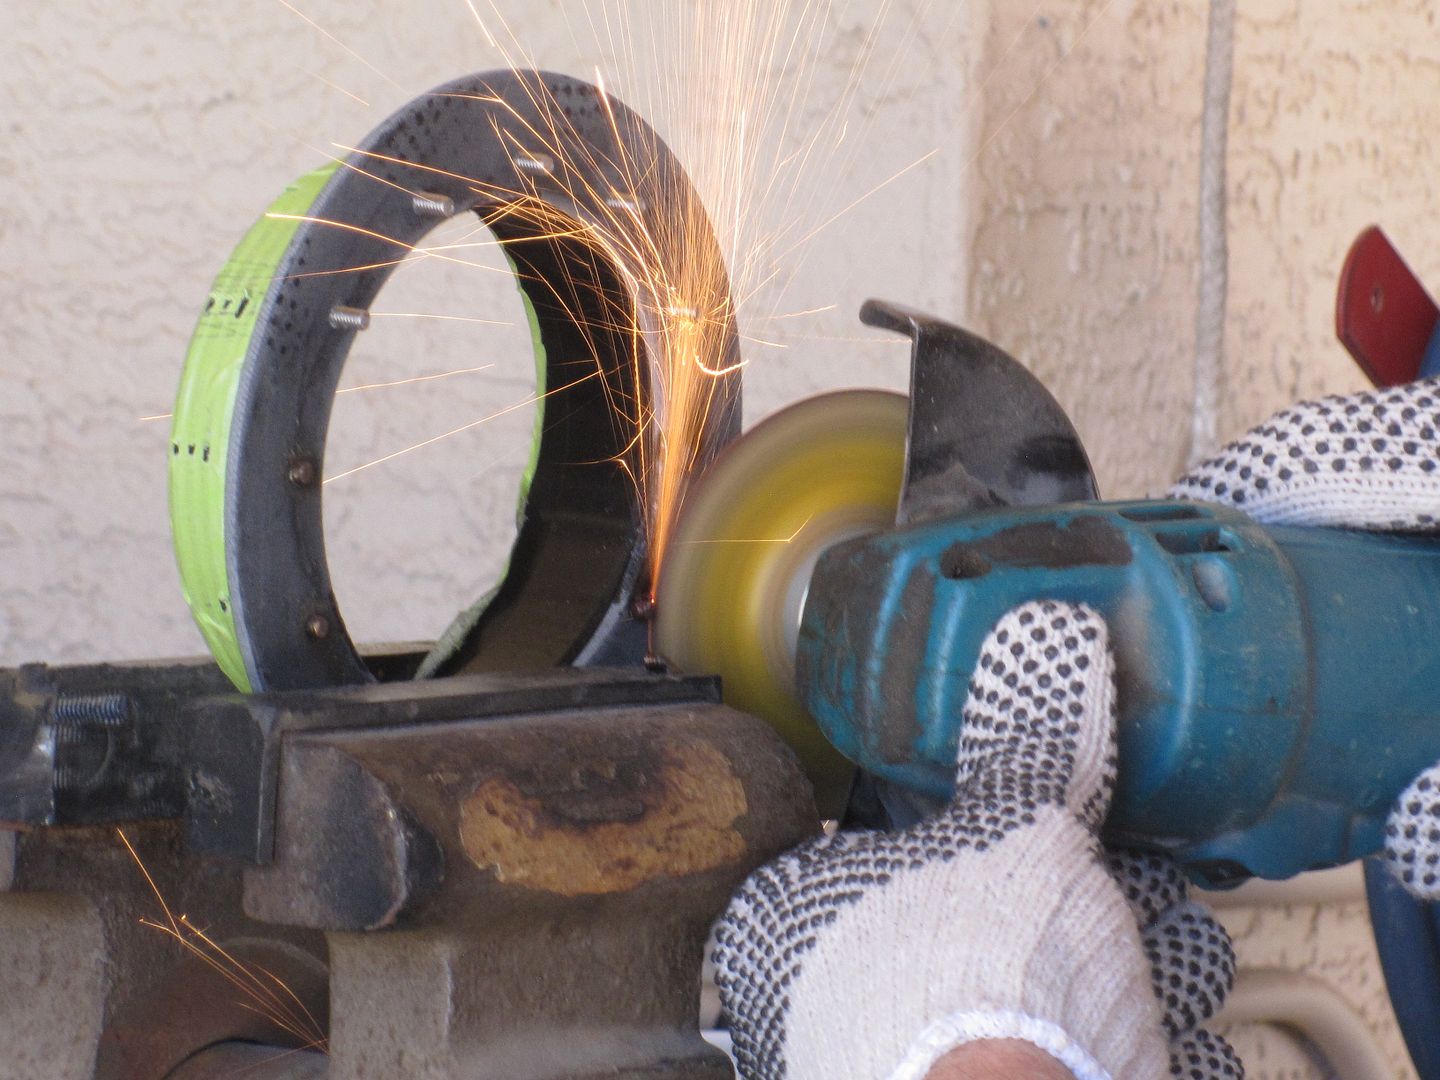
That didn't work too well, so I switched to my grinder:
035.jpg


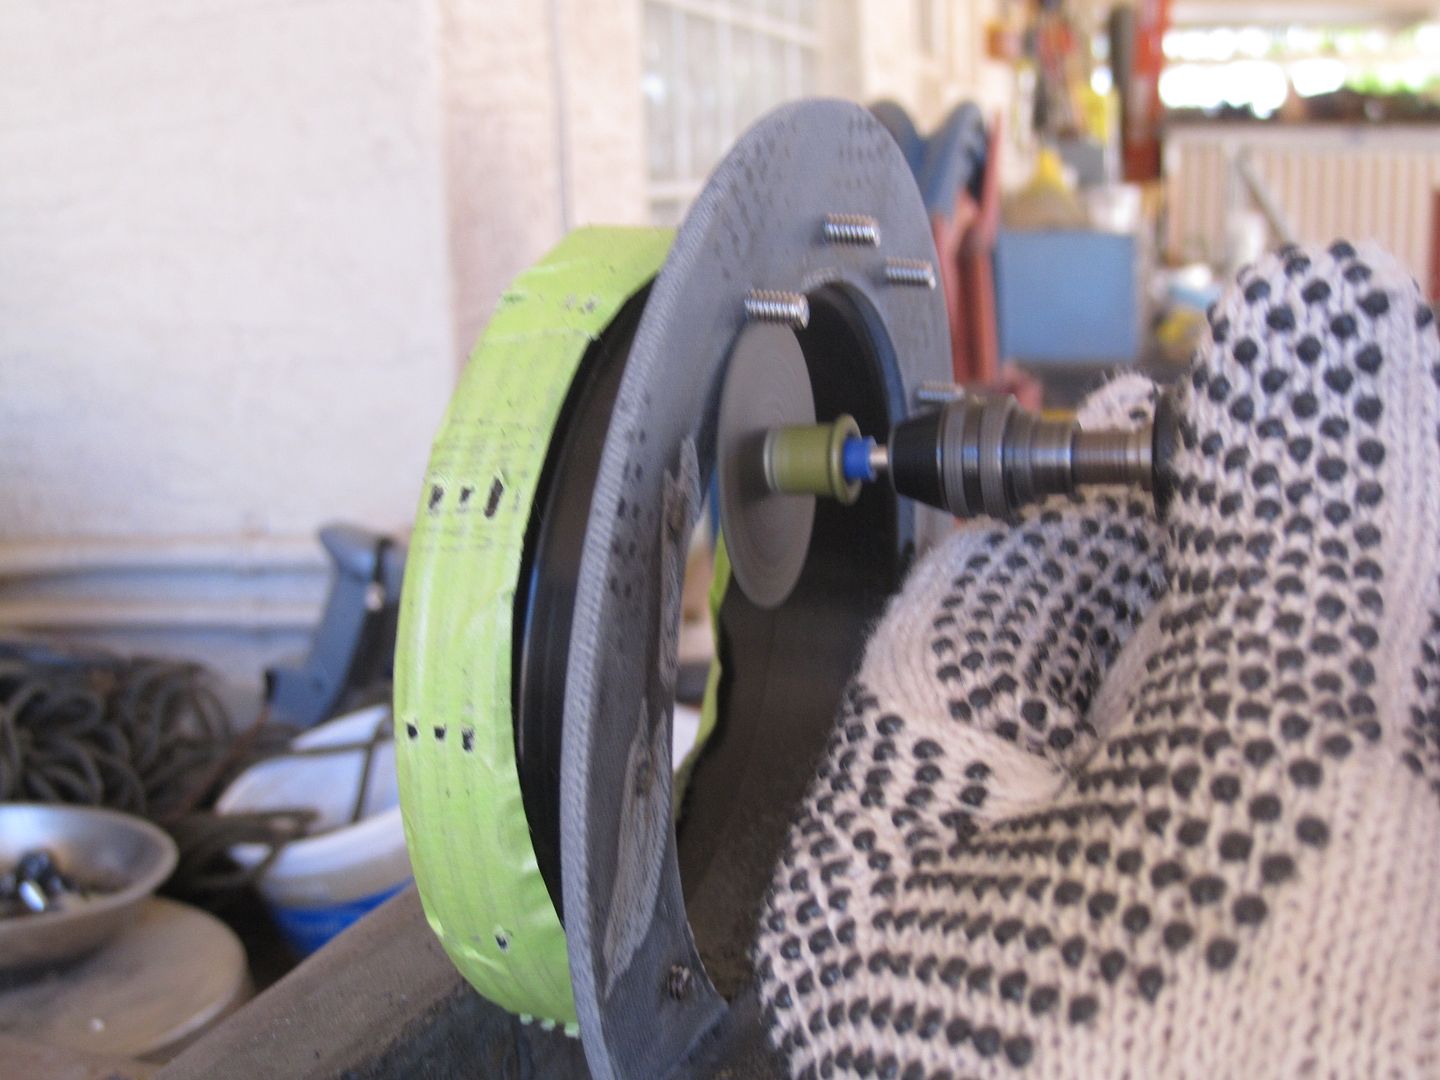
Ended up using the dremel:
041.jpg


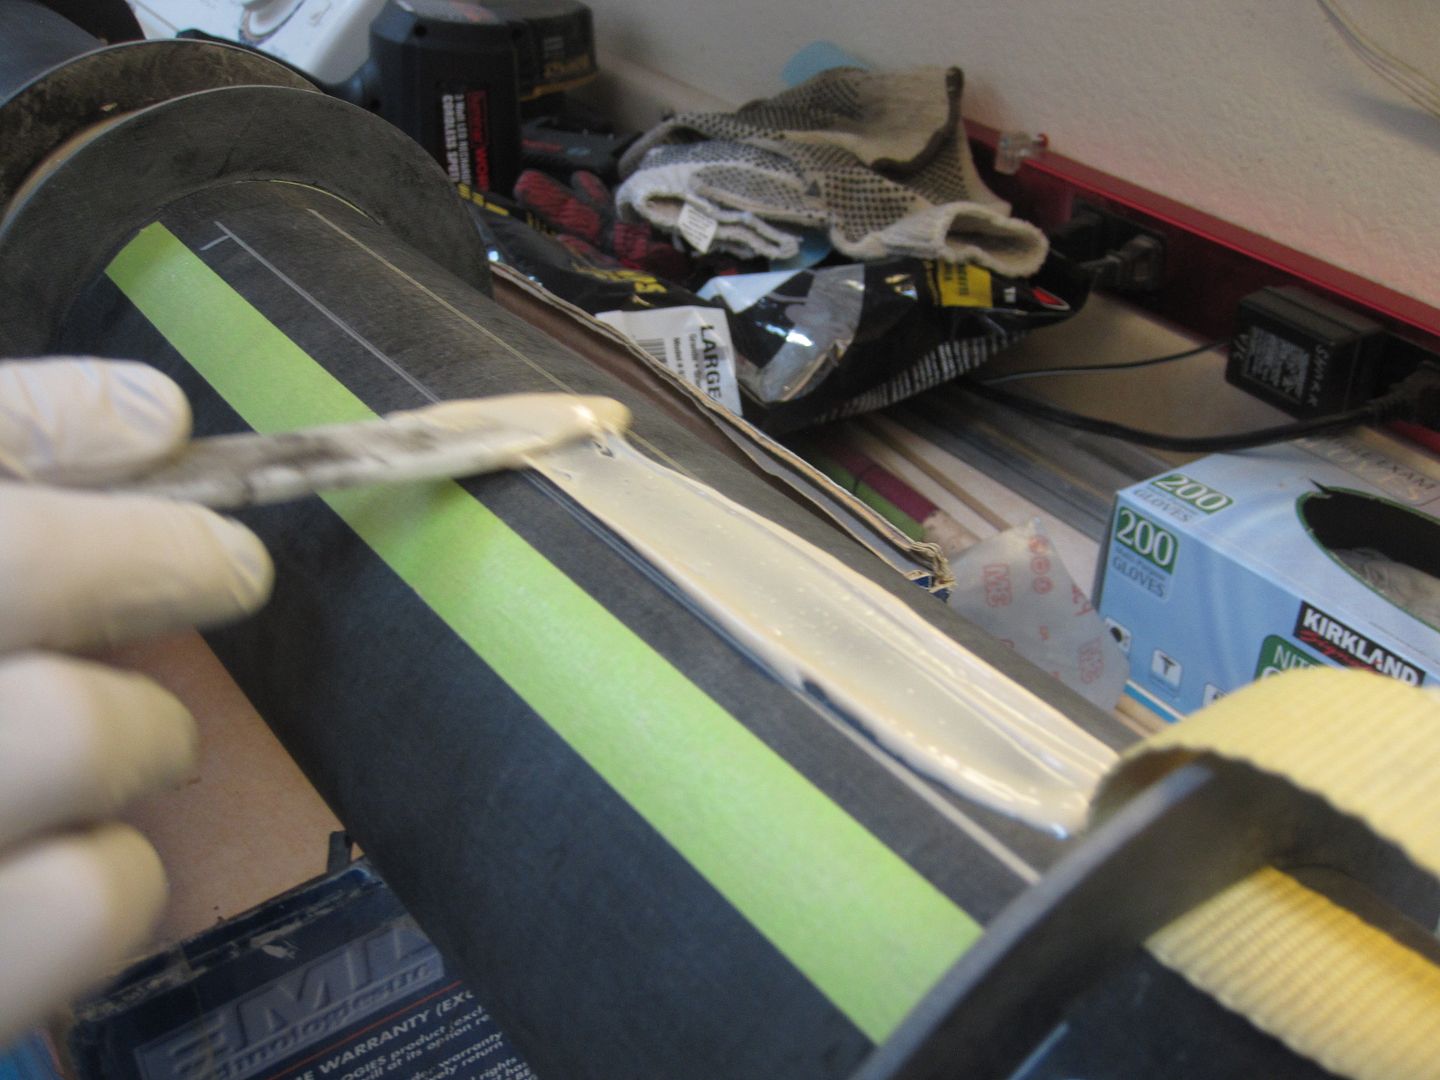
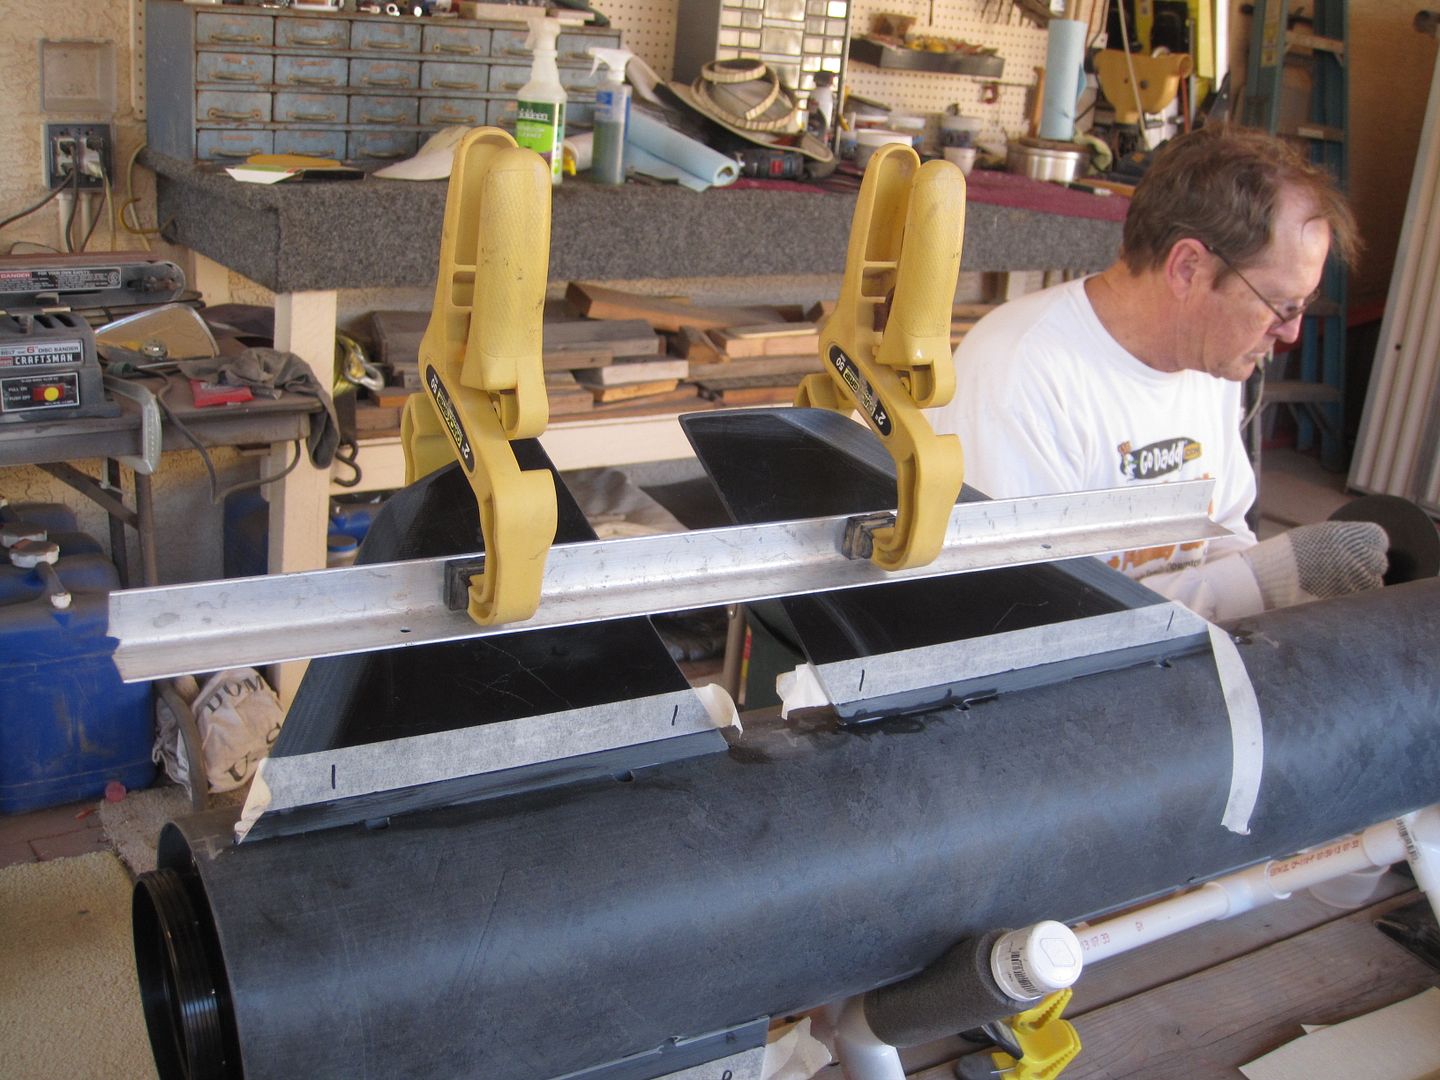
Re-installed the rear CR and added the top CR to mark the fin slots. This took some sanding, not only on the CR's, but the fincan also. Pulled out my handy new cordless sander from Harbor freight and started in on the fincan:
051.jpg


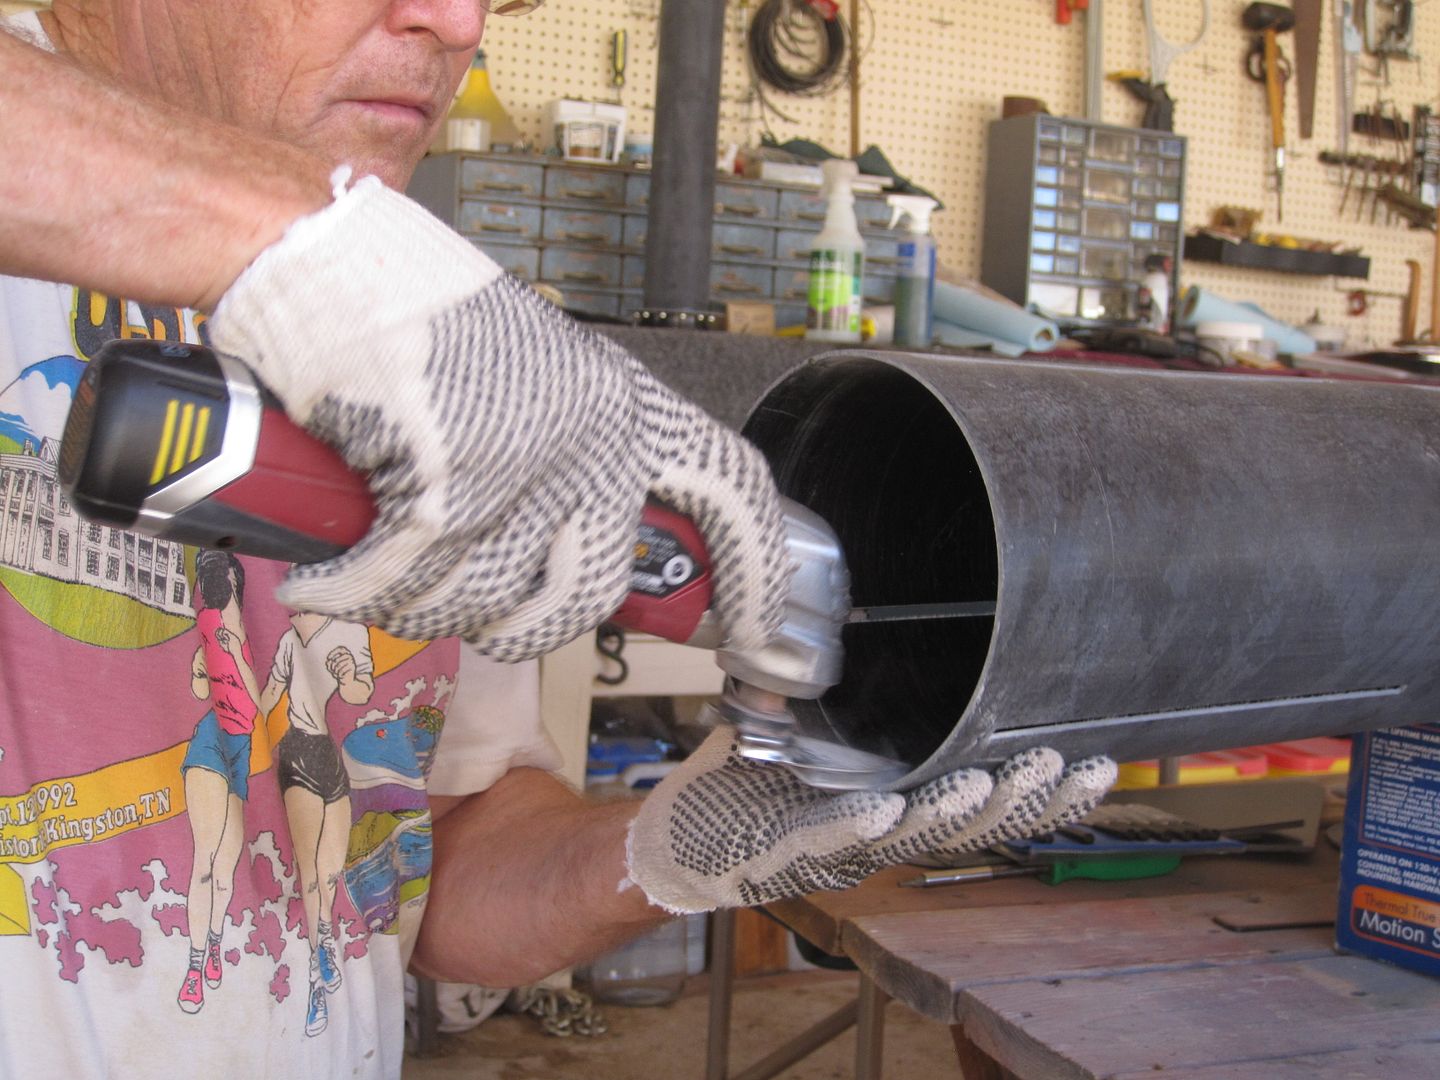
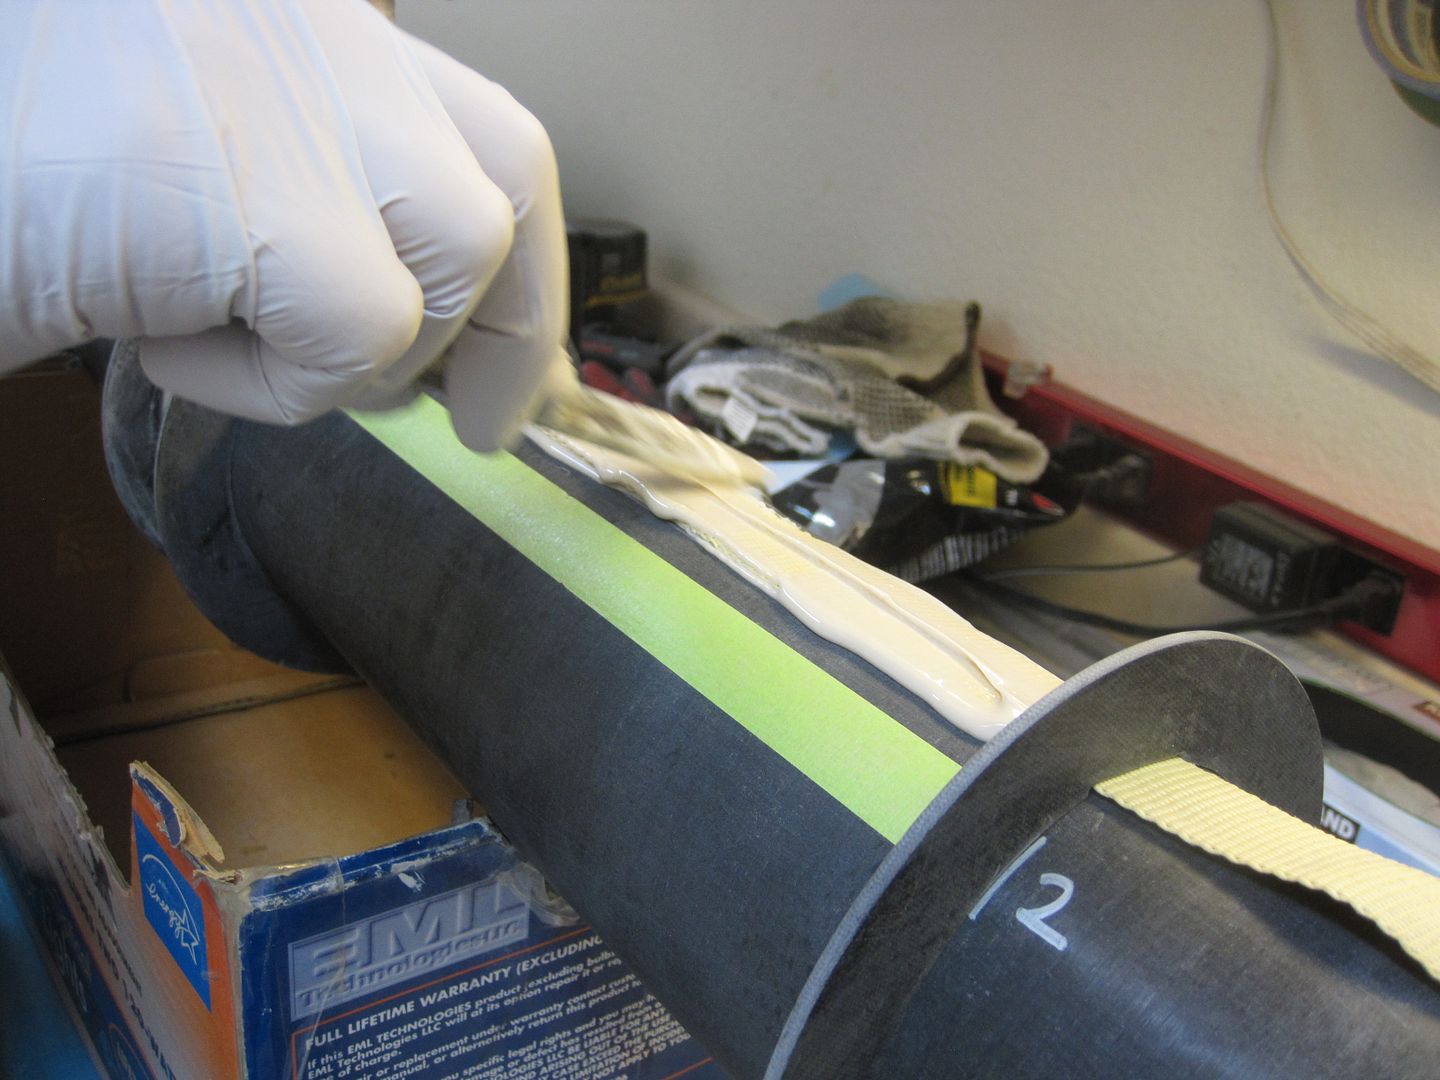
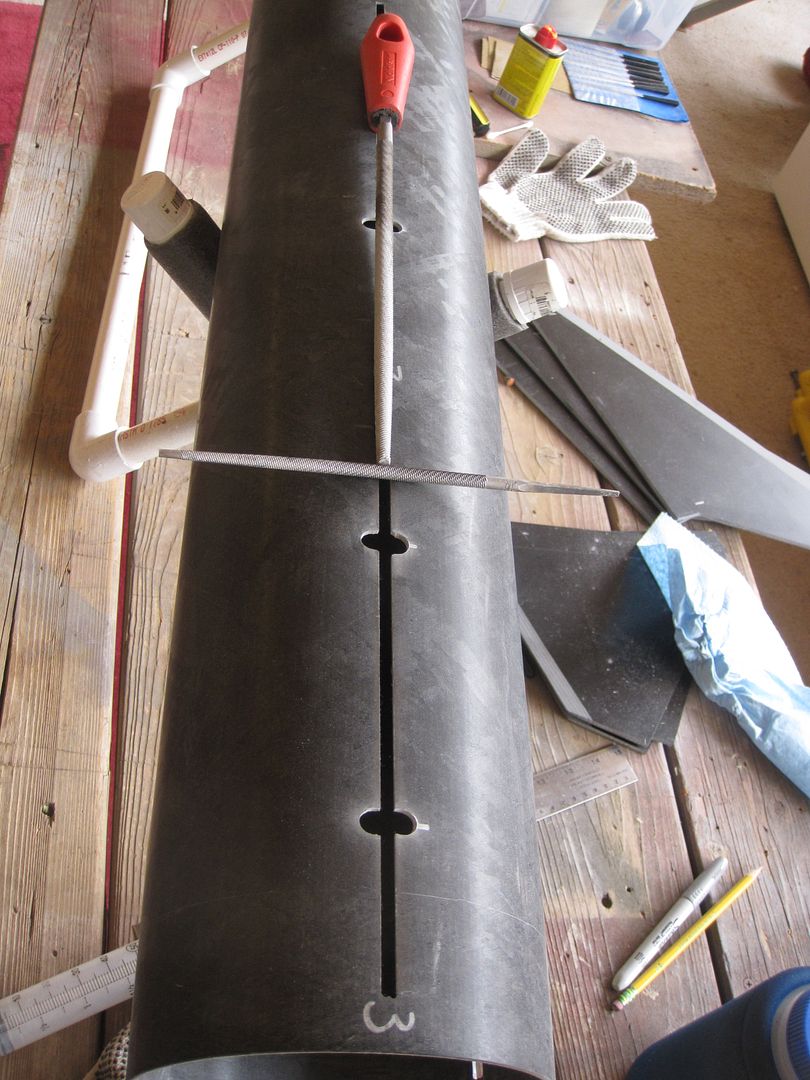
Sanded down where the rings would fit against the fincan, and also the fin slots, which tend to bow in when cut:
065.jpg


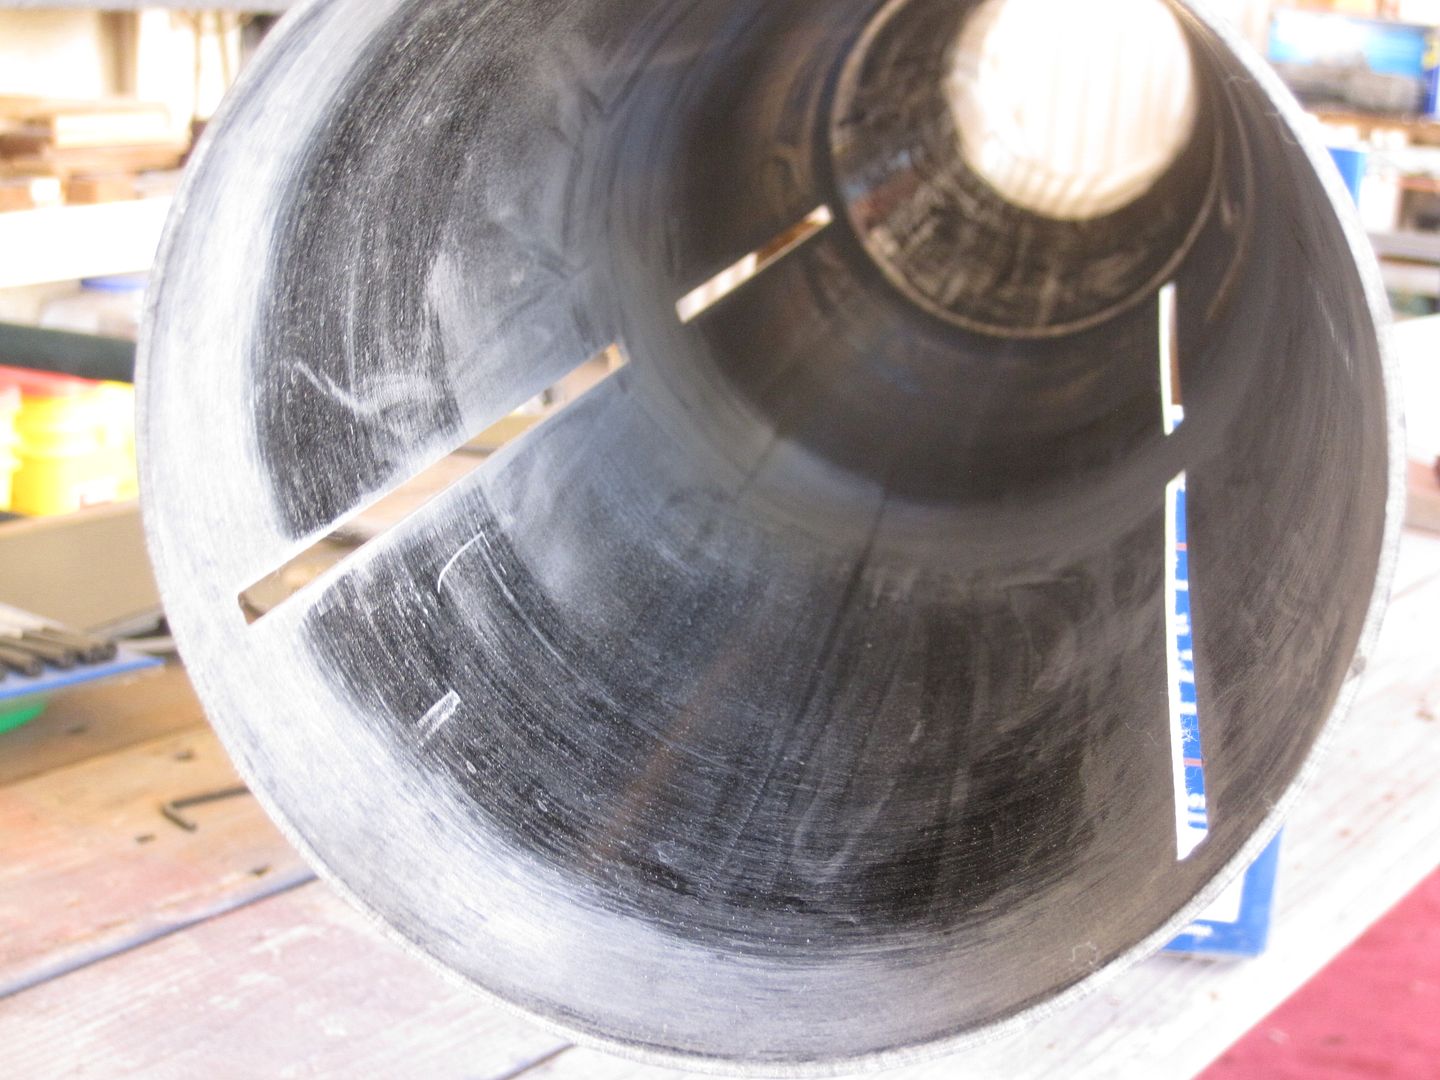
This went pretty quickly, the new tool did the job well:
060.jpg


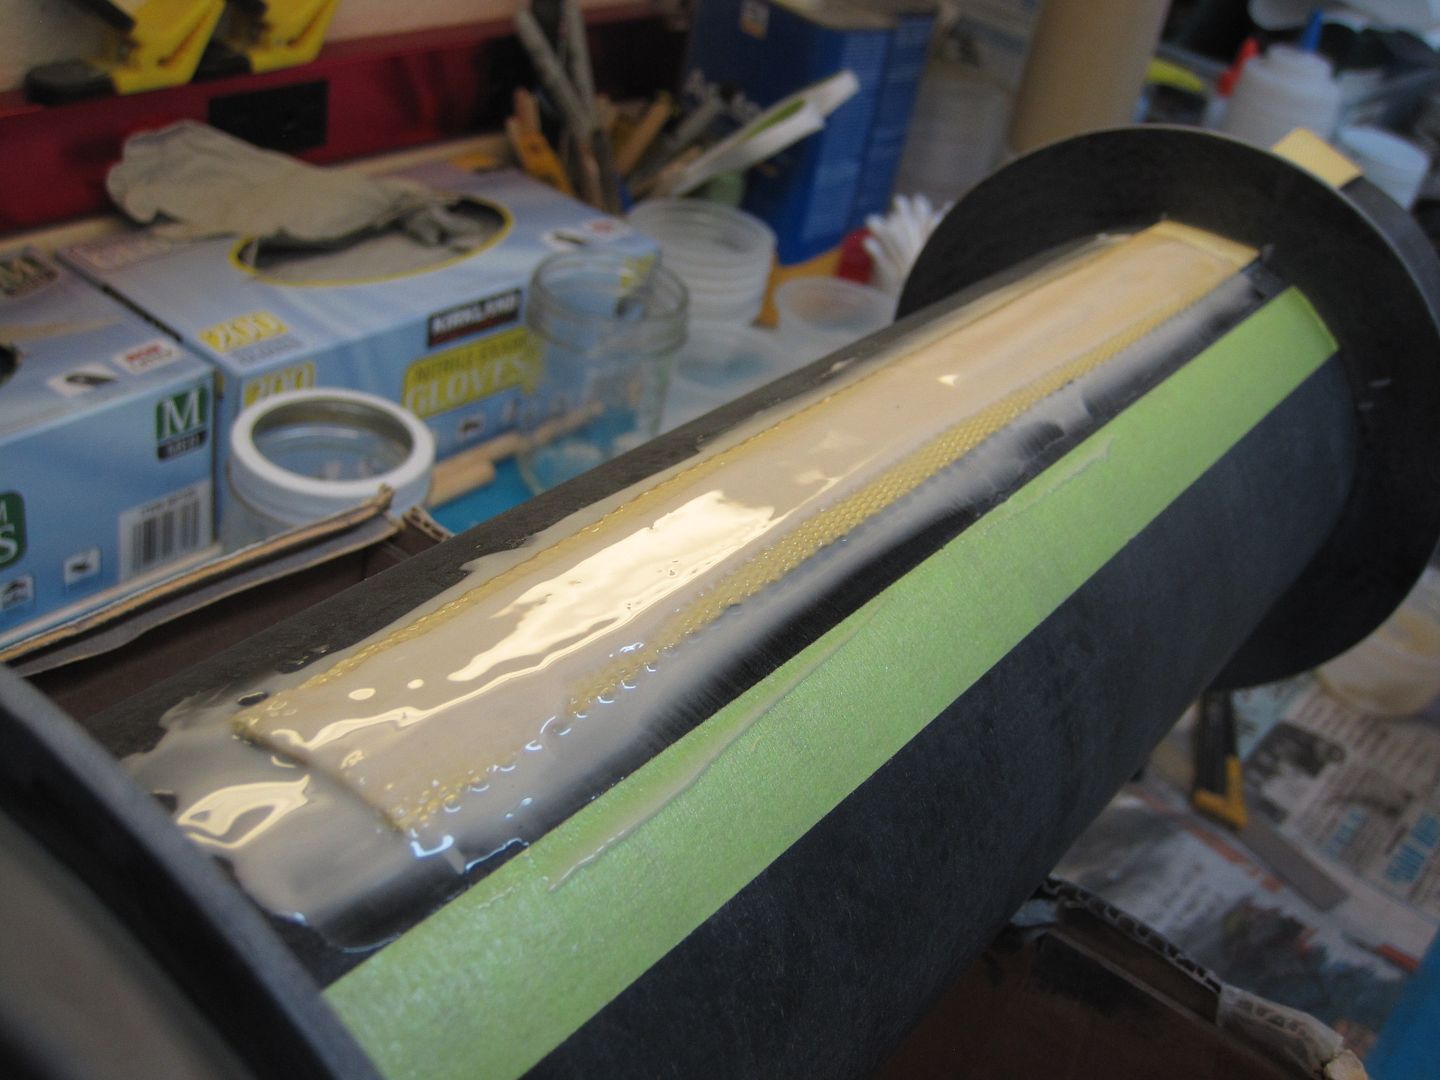
First attempt at inserting the MMT didn't work at all, so I went back and sanded the fincan some more and sanded the forward CR:
077.jpg


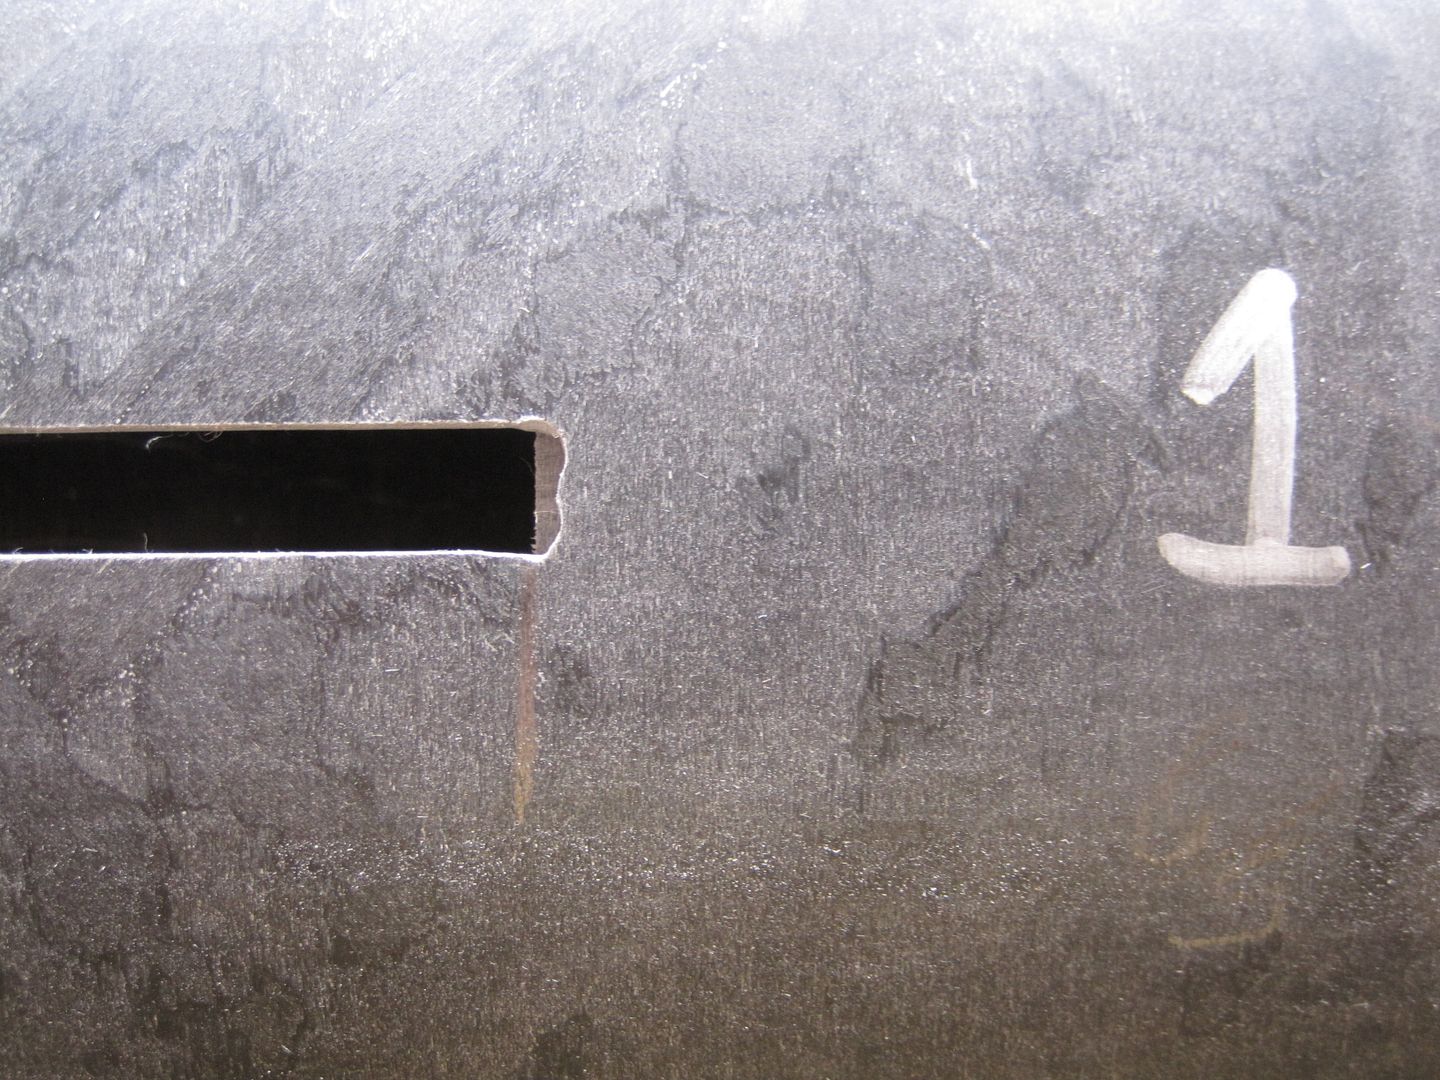
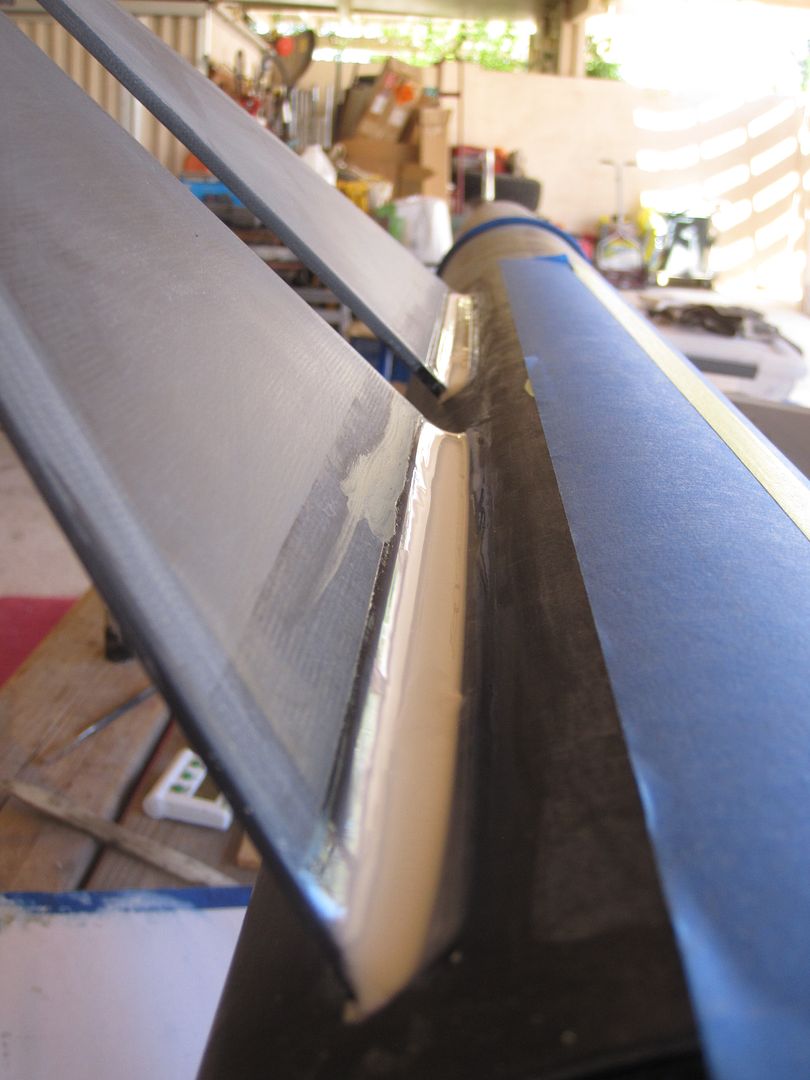
Once I got the MMT installed, I used my olfa knife to mark it where the fins would go:
091.jpg


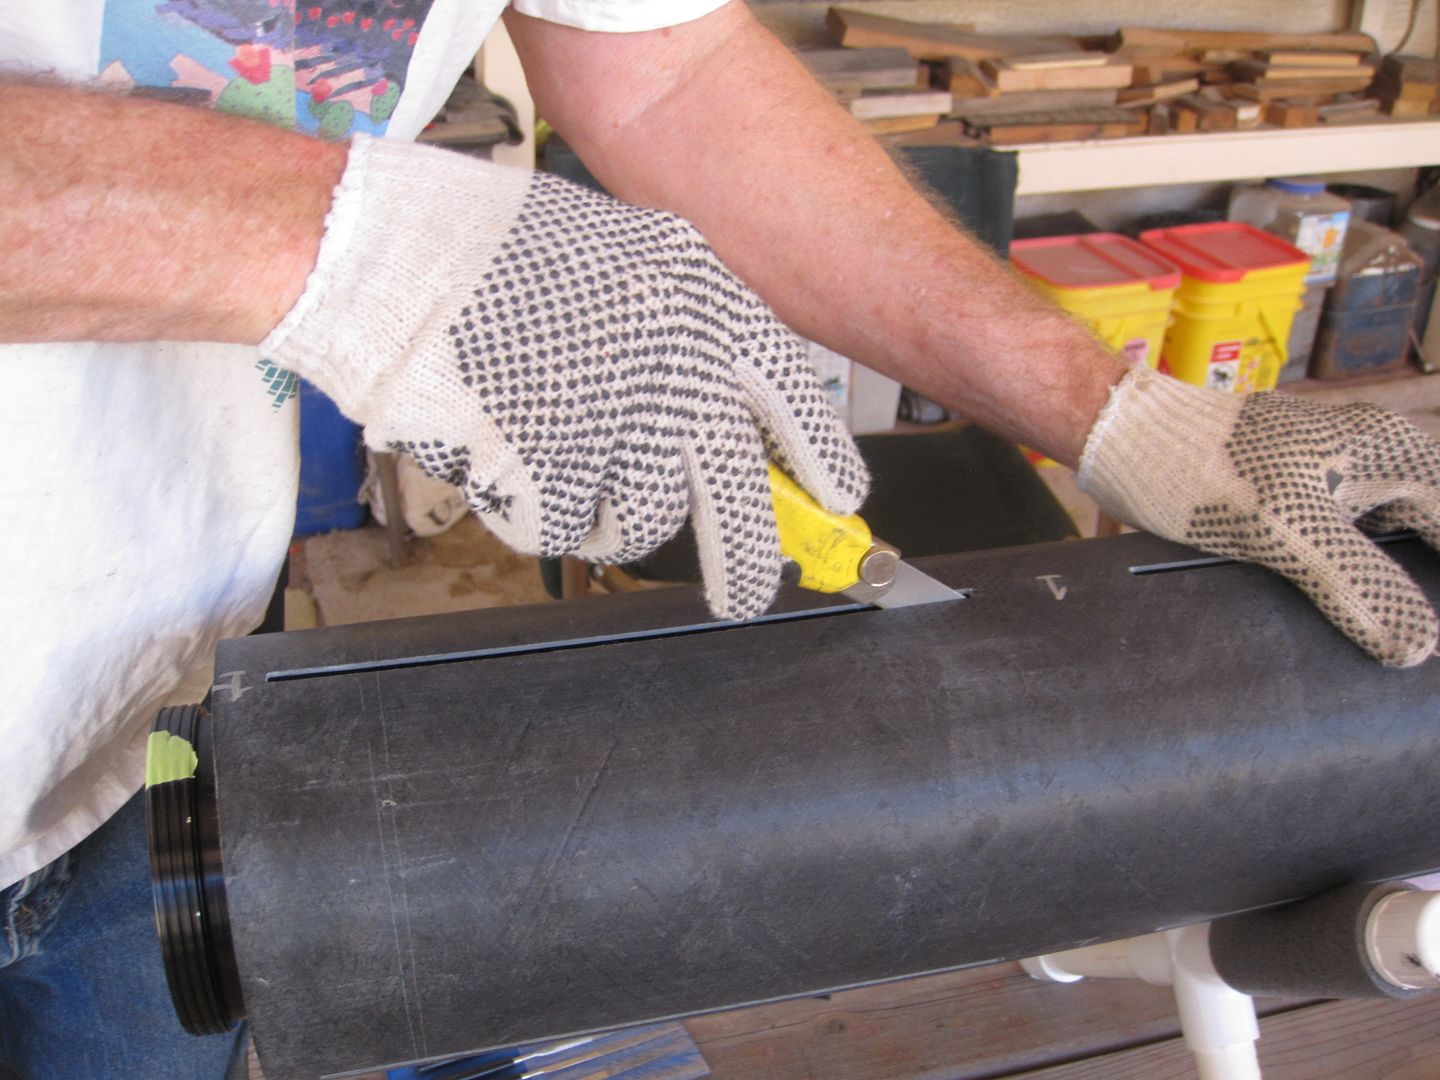
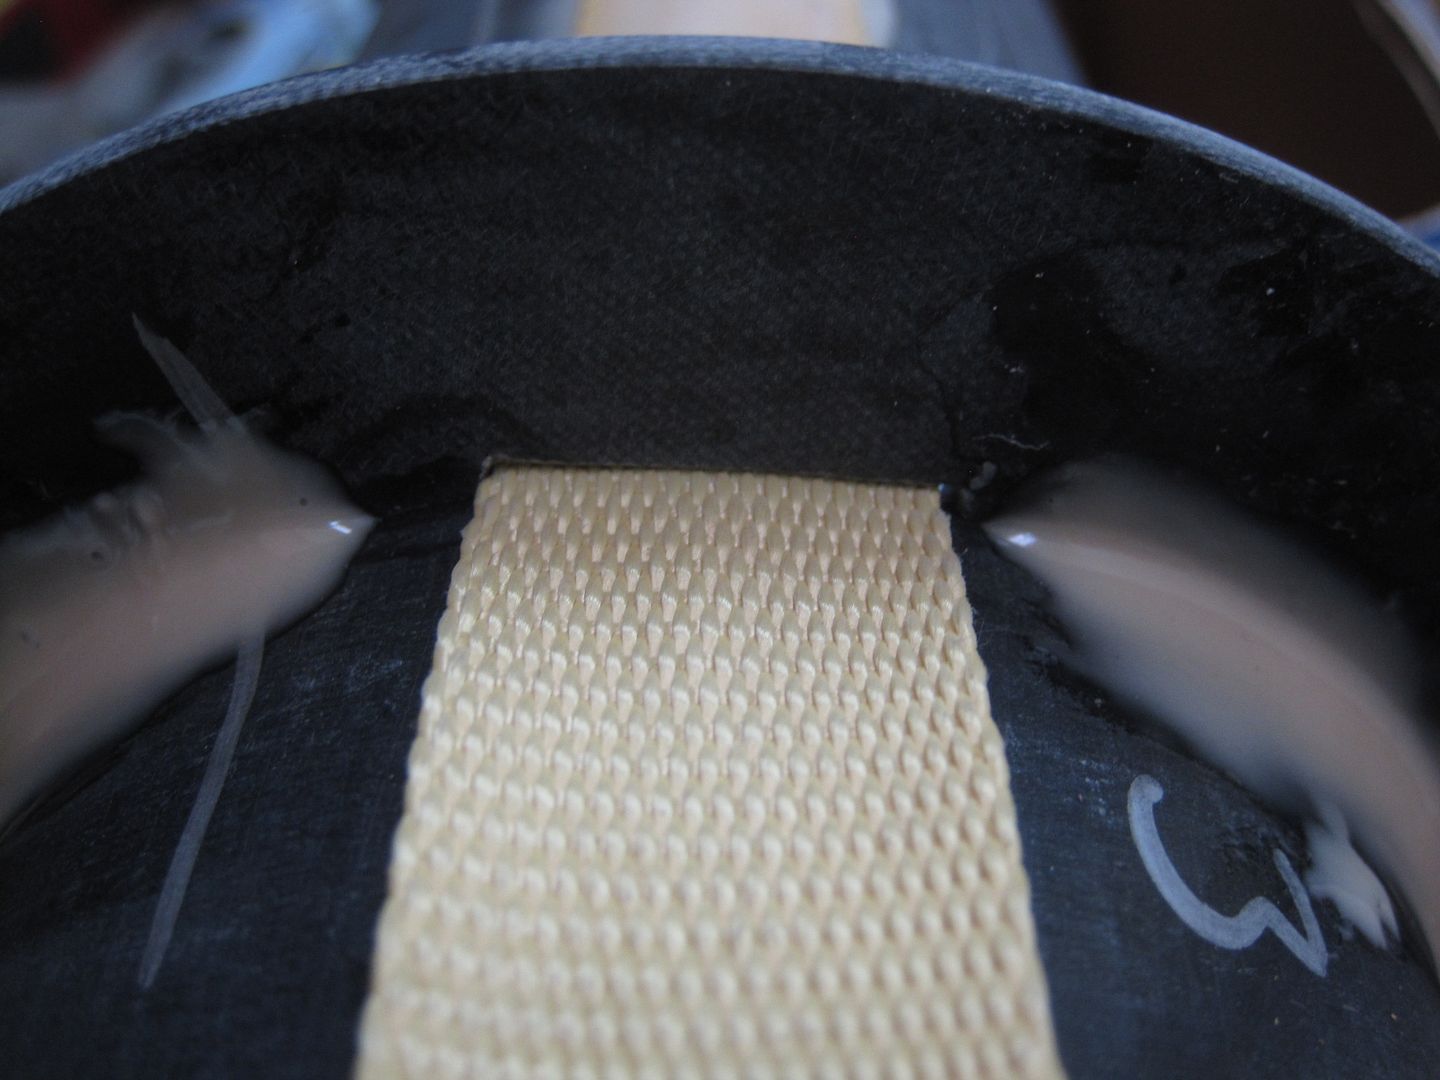
I marked the fin slots with a silver sharpie, and marked an index mark on the aft CR:
090.jpg


It took Sharon and I both to pull the MMT back out, a 6" tube with long slots bows in quite a bit. Sharon was holding the fincan down while I wiggled the MMT back out. Here are the slot markings on the MMT:
094.jpg


We started working on fitting the next CR in, but tacking it in with CA glue was just not working. Decided to take a break, and when we checked the thermometer, it was 104* in the work area. I think we will pick this back up later....

 
Excellent, Wayne! I've been waiting two years for this. Remember I'm the one that joked you put in cathedral ceilings so you could build it in the living room! Way cool, Wayco-rocket on!
 
I really enjoy your threads Wayne! Can't wait to watch the rest of this.
 
Love it, Wayne! What are you going to fly it with at Oktoberfest? Please say something that starts with "N" or "O".
 
Excellent, Wayne! I've been waiting two years for this. Remember I'm the one that joked you put in cathedral ceilings so you could build it in the living room! Way cool, Wayco-rocket on!

Yeah, I've been cringing every time I walk into the living room, with that huge rocket towering over me. Some of the work will be done in the living room, while most of the sanding and epoxy work will be done outside.

Looking great so far!!!
Can't wait to see more build pics :)

Not as many build pic's in this thread, when I get the "bit in my teeth", I'm building, not taking pic's. That's what happened yesterday. I have a few shots, mostly when Sharon came down from her ivory tower and took over the camera while I encapsulated the 1" Kevlar "Y" harness.

I enjoy following the build. Wayne it looks great so far. I like how everything is in order and organized. That's the best way to work

If there was a shot that looked organized, it was probably taken before I got rolling. I try to keep everything in it's proper place, but the longer I'm at it, the more time I spend looking for stuff.

Looking great Wayne, subscribed!

Thanks Rafael, you are one of the reasons I'm doing this thread. I'll explain more later.

I really enjoy your threads Wayne! Can't wait to watch the rest of this.

Same as above, those of you that follow my builds and respond make it all worth it.

Love it, Wayne! What are you going to fly it with at Oktoberfest? Please say something that starts with "N" or "O".

One step at a time Mark. First I need to finish it in time for Airfest. Then it has to survive that first flight. I don't want to disappoint you or the rest of the rocketeers in Vegas, but each 98mm motor I burn puts a substantial dent in my finances. This might be a "once a year rocket". When Sharon starts mixing motors for me, that might change, but right now she just does her own motors....

Subscribed :)

Thanks, I'm having a hard time believing all the responses I got from my first post!

Holy smokes this is awesome. I will be following for sure.

I agree, this is awesome! I better get back to the build, but first I want to thank everyone that has responded, and please feel free to ask questions about anything I'm doing.
I have learned most of the techniques you will see here from others that shared their builds on TRF, and continue to learn every day I come on this forum.

I got a little frustrated Sunday with the centering rings fitting into the body tube. The super glue just wasn't holding them in place when I tried to insert the MMT into the BT. I sanded, and sanded and sanded some more, and finally just epoxied the aft CR with the retainer and the second CR in place with Rocketpoxy:
103.jpg


The aft ring just took a small amount, and I cleaned it up to keep it out of the way of the fin tabs when they are inserted later. To get the correct spacing, I ran the fillet at the top of the second CR and stood the MMT on the retainer, then fit each rear fin in place. When the epoxy started setting, I pulled the fins and took the MMT back outside to cure in the AZ curing room. (Garage) That was it for Sunday.
Yesterday, (Monday) I measured the distance from the top of the rear fin slot to the back of the front fin slot. Came out to 2 5/8", so I used that to space the next CR. Mixed up another small batch of epoxy and glued it in place, checking the spacing several times around the MMT to keep the spacing constant. Set it outside in the sun and it dried in 30 min. Gotta love building in the summer here in AZ! I sanded both of the middle CR's on my belt sander until they slid into the fincan easily. I figured that if the top and bottom rings were snug, the MMT would be centered in the fincan.
I re-inserted the MMT again and checked my spacing, everything was in exactly the right spot, so I pulled it back out and started on the top CR. This ring needs the slots filed out to make room for the 1" Kevlar "Y" harness. I put it in a vise and filed the slots with a square file. When I had it just right, I measured out my Kevlar and cut it to fit. Slid the CR over the ends of Kevlar and taped it in place. I use an overhand loop at the top of the "Y" and fit it so the knot hits the upper edge of the tube.
Notice how I'm describing these steps without the benefit of pictures? Like I said earlier, when I get the bit in my teeth, I forget to document the steps with pic's. So about this time Sharon comes down and picks up the camera, just as I'm mixing up a 30 gram batch of Rocketpoxy to encapsulate the ends of the "Y" harness. First I roll back the Kevlar and lay on some epoxy:
014%202.jpg


Notice the tape right below where the Kevlar goes? That is there so I don't get any epoxy where the fin goes. Once I have the strip covered, I lay the strap down into the epoxy and put another layer on top:
021%202.jpg


Here's how it looks when It's done:
030%202.jpg


I had a good bit of epoxy left over, so I put the MMT back out in the sun to cure. About 30 min. later it was hard, so I brought it back in and ran a fillet around the top of the upper CR. The left over epoxy was still soft, since it had been left in the cool room. I slid the forward fins in between the upper CR's to get the spacing correct, and since this epoxy was about 40 min. old, when I ran the fillet on top of the upper ring,the ring stayed in place. Back outside for another cure, with the MMT standing on the retainer so the epoxy would set down on the top of the upper CR. It's surprising how long Rocketpoxy will flow if you keep it cool, but when it gets hot, it cures pretty quickly. While the fillet on the upper CR cured, I mixed up a smaller batch (15 grams) of epoxy to encapsulate the other end of the "Y" harness. 20 minutes later, I brought the MMT back in and spread the final layer of epoxy. Here is a shot of the finished MMT:
034%202.jpg


A detail shot of how the Kevlar fits through the upper CR, with no epoxy where it goes through:
035%202.jpg


Yeah, that's a wear point, but I use a small rat-tailed file and round the edges of the slot, since this is way down the fincan tube, most of the force is pulled straight up the tube, with little lateral movement. When I put the MMT back in the fincan, all the CR's lined up like this:
020%203.jpg


The knot at the top of the "Y" harness came out right at the edge of the tube, so all my measuring and fitting worked out perfectly. Before I glue in the MMT, I need to install the avbay coupler into the back of the fincan and mark the fin slots on it. This will give me the 120* spacing around the tubes for screws to hold the payload tube to the avbay, and static ports on the switch band. I also will be attaching the nosecone coupler/shoulder to the N/C so I can use it for my Eggfinder GPS. Enough for now, Tomorrow I will be sanding the fins and maybe sticking them into the fincan/MMT.


...
 
Why do you not just fill inter hole that the Kevlar goes through with epoxy?
 
Why do you not just fill inter hole that the Kevlar goes through with epoxy?

There are several theories about this and it's a topic I discussed with Wildman just a couple of days ago. He had a failure at that anchor point using the "Y" harness on a large rocket after about 20 flights. He suggested using 2 u-bolts attached at the top CR with quick links so the harness could be replaced if it showed signs of wear. I tried to get my hand down the tube 35" to the ring and couldn't reach it, even with my shoulder stuffed down the tube. I went with the method that has worked for me on half a dozen rockets for over 100 flights. Putting epoxy on the top CR over the Kevlar makes it weaker at that point in my opinion, but I have no scientific proof that this is true. I'm working on the theory that if it works, don't fix it.
Another topic of discussion with Wildman is the length of the harness, if you make it shorter, the shock cord will wear on the top of the tube, and can be inspected and replaced when necessary. I prefer to tape the knot at the top of the "Y" harness, which has a larger area at that point, and replace or just add more tape when wear occurs. I also sand down the inside edge of the tube, to reduce wear at that point.
These are all just personal decisions based on the experiences that have occurred to me over the years.


How long is the kevlar for your Y harness?

The "Y" harness is 48" long with the knot at the top, so about 98" of kevlar.
 
Nice looking build! Question - Is there any reason for not glueing the Y-harness all the wat to top of MMT? What harm could come from that?
 
Nice looking build! Question - Is there any reason for not glueing the Y-harness all the wat to top of MMT? What harm could come from that?

Each rocket is different. The further down the tube your anchor point is, the less the lateral forces are. I think the side to side movement is what wears kevlar. By putting the last epoxy behind the CR, all the force is in one direction, straight up.
I think this is a fine point, and any method you use that works for you is good. I have had kevlar fail at the glue point when it was too close to the top of the tube, but no failures since I started using the method shown above. If you have a rocket with a bunch of flights and are using another method, post it up, we could all learn something.
 
What he said.:wink: I believe if the adhesive permeates the individual fibers of the Kevlar by the CR, it negates the ability of the forces to be spread to the adjacent fibers to carry the load. In essence, the load is being transferred directly to the adhesive. If there is any off center force on an a fully epoxy slathered attachment point, the Kevlar fibers are more apt to fracture since the force cannot be evenly distributed over the area of the strap.

Round off the area under the centering ring where the strap passes under and try to avoid adhesive "contamination" like pictured. That will best preserve the strap strength. Kurt

Yeah, that's what I said, but you say it so much more eloquently. Thanks Kurt.
I tried to get a picture of the rounded edges I put in the slot with a small rat-tailed file, but this is the best I could do:

004%202.jpg
 
Very interesting discussion.

An Idea- does your arm fit up the motor mount?

(edit: just looked back through photos.... not likely I bet :) )
 
Yeah, that's what I said, but you say it so much more eloquently. Thanks Kurt.
I tried to get a picture of the rounded edges I put in the slot with a small rat-tailed file, but this is the best I could do:

004%202.jpg

One other suggestion to this situation is to perhaps put a small piece of masking or duct tape on the forward side of the CR where the strap passes through before you slather on the epoxy on the interior of the sustainer tube to slide the assembly up.
Kind of hard to control the adhesive when installing the mount inside of the sustainer. If one has the forward side covered with tape, it might avoid the strap from getting permeated with epoxy while sliding it it. Yeah, the tape stays in but who cares if it eventually wears out and falls off. At least the strap fibers are unencumbered by epoxy that could "wander over" and soak the exit from the CR so they stay soft and supple!

One other thing to try when sliding in the motor assembly is I wrap loosely the shockcord or bridle with wax paper and tape together in a few spots with masking tape beforehand. This avoids getting the epoxy gobbed on the shockcord/bridle as one is epoxying/sliding the unit up the sustainer tube. If any epoxy dribbles on the bridle/shockcord, it goes on the wax paper masking and doesn't soak in. Once cured, it's easy to remove the wax paper masking from the top of the sustainer tube. I try to make it so it slides right off. Don't TAPE the masking material to the cord, make is so it slides so it won't leave anything behind. I think wax paper is an easy masking material to use in this case but I suppose other stuff could be tried.

Fred, I mention this for the benefit of other readers who might be starting out. I have several flying rockets that have epoxy gobbed bridles and shockcords that are holding up O.K. but makes more sense to use a more mechanically sound construction. At least it might help someone else to avoid the trial and error I went through. Plus it is not that much harder to achieve once the steps are pointed out.

For example, I recently screwed up a 3" diameter rocket plywood CR for a 54mm motor tube by trying to pre-drill the CR for the flange mount Aeropack retainer. Bad idea as there is not much material for the size hole needed. Dorked one plywood CR on the attempt as I should have done the drilling after I epoxied the aft CR on. Not a big deal as I can get another plywood CR and start over. I intend to laminate a G10 ring to a plywood ring so the threaded inserts have something more to bite into. I will have to wait until I epoxy the aft G10/plywood laminate CR after I get to the point of doing the internal fillets by injection. It's a tight fit but can be done with syringe and tubing.
Epoxy the last CR ring in place then drill and install the threaded inserts. Live and learn. Kurt
 
Each rocket is different. The further down the tube your anchor point is, the less the lateral forces are. I think the side to side movement is what wears kevlar. By putting the last epoxy behind the CR, all the force is in one direction, straight up.
I think this is a fine point, and any method you use that works for you is good. I have had kevlar fail at the glue point when it was too close to the top of the tube, but no failures since I started using the method shown above. If you have a rocket with a bunch of flights and are using another method, post it up, we could all learn something.

I'm still learning myself. Only have a few flights on my rocket with a Y-harness but I epoxied the strap to the forward CR. I was following a Wildman build by Crazy Jim and he had the strap buttered with epoxy right up to the CR.
 
It makes sense to me. I have a number of shirts that have had epoxy, CA, etc spilled on them. Normal flexing of the fabric results in the formation of holes (and a shirt dedicated to rocket construction). Because of this I have been really leery of getting glue on shock cords where they flex.
 
I'm still learning myself. Only have a few flights on my rocket with a Y-harness but I epoxied the strap to the forward CR. I was following a Wildman build by Crazy Jim and he had the strap buttered with epoxy right up to the CR.

The comment Fred made about the Y Bridle being just below or nearly at the opening of the sustainer is especially valid too for longevity. I thought that one out and did that independently on three projects. The main "external" shockcord is quick-linked to the Y bridle and gets all the wear. Thing is it's easily inspected and can be replaced as necessary.

On two of my long-necked 4" rockets I did early in my career (2006) I took two eyebolts and embedded them in the forward centering ring. Instead of a kevlar bridle I figured use a steel cable loop between the eyebolts that is just long enough so I can
get my arm down there and quick-link a shockcord to the loop. I think I used a 1500lb test cable with clamps to hold the cable loops together at the eyebolts. A real "castiron/boilerplate" approach that works since the drogue chute is small. Forces aren't so great.

As an "ejection aside", I heat treated some cardboard with a borax/boric acid solution to cut a removable divider that goes down the center of the sustainer tube. I plop the shockcord/drogue down one side and the ematch charge goes on the bottom on the other side. I still use a drogue chute protector but the heat treated "sacrificial" divider protects from the initial flash of the charge. The charge "blows" up one side with the loop while the remainder of the cord/drogue is flopped over on the otherside of the divider.
That prevents an internal tangle with the steel cable loop. The steel cable wears well to say the least and the shockcord is replaceable since it is reachable.

I have flown this system in a thin-walled 4" LOC tubed rocket with a 38mm motor tube several times and have a fiberglassed longneck 4" LOC tubed project with dual deploy, dual altimeters and nosecone tracker that only needs to have the chute charges ground tested to be flyable. First motor will be an L1400 for this 54mm motored bird. I orignally used a nylon stocking and bar top coating and folks said that wasn't enough for an L so I got help with using proper fiberglass cloth over this arrangement. Tube diameter went from 3.90" to 4.00" externally. In addition, the 1/3rd, 2/3rds and full span lamination of four finned fincan will easily take the abuse of an L1400. Because of the weight, I'll be lucky if it hits 7 to 8k. This was supposed to be my L2 rocket but I rushed the L2 for complex reasons with a 3FNC and a J350M motor to get it out of the way fast back in 2006. Kurt
 
It makes sense to me. I have a number of shirts that have had epoxy, CA, etc spilled on them. Normal flexing of the fabric results in the formation of holes (and a shirt dedicated to rocket construction). Because of this I have been really leery of getting glue on shock cords where they flex.

Oh man Terry. That's the perfect example of what is happening. Good for pointing that out. Kurt
 
The comment Fred made

I was wondering, Kurt, if you knew that Wayco actually goes by "Wayne"? Both his grandfather's names were Fred so his first name is Fred, but he goes by his middle name. I only mention this because there are many people we have met in person that are on this forum and they may be confused as to who "Fred" is.
 
Thanks I'll make a note of it. I forgot which was which and pulled it out of of the FCC database. Kurt

I was wondering, Kurt, if you knew that Wayco actually goes by "Wayne"? Both his grandfather's names were Fred so his first name is Fred, but he goes by his middle name. I only mention this because there are many people we have met in person that are on this forum and they may be confused as to who "Fred" is.
 
It's been a few days since I posted, but work continues on the build. With the MMT finished, it was time to insert it into the body tube (fincan) and start sticking fins in. But first I needed to file out the slots to inject the internal fillets. I started with my dremel tool and a bit that I thought would work, but it burned up and broke on the first slot. Went back to the tried and true rat tailed file, starting with a small one to open the slot, and finishing it with a larger file:
015%203.jpg


These slots are bigger, due to the fact that the syringe is HUGE. Holds 60 cc of epoxy. I estimated that it would take about two pumps of West Systems for each fin set and it worked out about right.
I inserted the MMT and stuck a fin in place. Used my fillet tool (a 1" piece of PVC pipe) and marked where the tool ran along the tube and the fin. It was 9/16" above the joint. Removed the fin and ran a piece of tape along the fin where the edge of the fillet would end. Did this on all 6 fins, and then sanded the root and sides of the fins with 80 grit sandpaper. This is where the internal and external fillets would adhere to the fin. Now all the parts are ready to be joined, just one other task needed to be finished to start sticking fins.
I had saved a big piece of foam board from some packing we got with a framed picture, and printed out a template from Payload bay.com for a three fin rocket, 6" in diameter. Taped it down on the foam board and cut out a fin guide with an exacto knife. Since the guide was much larger than the 8.5 x 11" paper, I extended the fin lines with a ruler. I stuck a fin in the slot and slid the fin guide over the tube to check the fit. The outside diameter of the body tube is actually 6.2 inches, and my guide fit perfectly. Now I'm ready to epoxy the rear fins on. Mixed up a small batch of Rocketpoxy and applied it to the root edge of the fin:
007%203.jpg


Realized immediately that I needed to wait for the epoxy to thicken before applying it. It was a bit messy, but I went ahead and stuck the first fin, slid the fin guide over it and let it set. Since I'm working in 100*+ temps, it didn't take long.
010%203.jpg


The next batch I mixed up I let set for 15-20 minutes before applying with much better results. Using a long narrow trowel to apply the epoxy works great for this task, and if you hold the fin with the root edge down, the epoxy will droop and make it easy to fit into the slot. When you put the fin in and slide the fin guide in place, leave it all alone until the epoxy has set up.
With the warm temps, the rear fins went on quickly, Rocketpoxy will cure in less than an hour if it's hot. I picked a good time to be doing this project.
Once the rear fins were in place, I found some aluminum angle iron and clamps for the next step. The front fins are longer along the root, so I mixed up a larger batch of epoxy, and prepped the avbay bulkheads for the excess epoxy:
020%204.jpg


After about 15 minutes, the epoxy was nice and thick, so I spread epoxy on the first front fin and stuck it in the slot. With two pieces of angle and my clamps, I lined up the front fin with the rear:
026%204.jpg


Using the left over epoxy, I spread it over the bulkhead:
029%202.jpg


When I bolted the inner and outer bulkhead together, there was still a gap at the edges, so I clamped it in a vise and squeezed it together until the epoxy came out. Left it like that until the epoxy started setting up and scraped the excess off. About an hour later I repeated the process with the second fin and bulkheads. The trick to injecting internal fillets is to get a good seal between the fin, the MMT, and the centering rings that bracket it. You don't want to leave a gap where the epoxy can leak through. I add a little epoxy to the front and rear edge of the fin where it butts up to the CR to help seal it up.
After sticking the third fin and cleaning up a bit, I was running out of daylight, so I left the fin can outside to cure for the night.

 
I was wondering, Kurt, if you knew that Wayco actually goes by "Wayne"? Both his grandfather's names were Fred so his first name is Fred, but he goes by his middle name. I only mention this because there are many people we have met in person that are on this forum and they may be confused as to who "Fred" is.

No wonder I couldn't find a post by "Fred"... Thought I was going a little more crazy. Thanks for all the bridle discussion, as my next build will HAVE to use a bridle since there will be no room for my go to U-bolts.

Adrian
 
I'm gonna skim over injecting fillets, anybody that has built a Darkstar knows the proceedure and if you need a review, you can check out my previous build threads:

This is for my 3" DS, starting in post #7:

https://www.rocketryforum.com/showthread.php?54831-Wayco-s-3-quot-BlackStar

Here is my DS Extreme, which is a 4" rocket. Post #35 on page 2:
https://www.rocketryforum.com/showthread.php?66950-Wayco%92s-Dark-Star-Extreme/page2

Here are some tips relevant to this larger rocket.
You don't need to fill up the fincan with injected epoxy, I used 20 ml total
on the rear fin, 10 ml in each hole , and 25 ml on the front. Two pumps of West Systems with some chopped carbon fiber mixed in the 60 ml syringe, gives me 45 ml of mixed epoxy. When I looked in the slot that I injected into, the epoxy was just touching the bottom of the slot.
Be sure the rocket is level, both ways, along the tube lengthwise and across the fins.
Since the slots were still open, I added a small disk of epoxy putty pressed into the hole.
003%203.jpg


When it had dried, I sanded it down with some 80 grit, along with the area that the external fillets go.
I have had issues with using Rocketpoxy for external fillets until I got a tip from CJ. If you want to get rid of bubbles, spread it out nice and thin on a sheet of cardboard, preferably with a smooth finished side:
013%205.jpg


Let it set up until it stands on it's own, about 20 min. in a 75* room. Scoop it up with a long paddle like devise, like the one in the above picture, and lay it into the v-groove smoothly. Run it out with your favorite tool, mine is a 1" piece of PVC pipe. CJ has an assortment of different diameter tubes he uses for smaller and larger rockets.
Even after setting up for for 30 min., Rocketpoxy will still flow. So keep an eye out for drips at the end of the fin.
I tilted the fin up so the epoxy would fill the top edge of the slots, and it was still flowing after 45 min. in 100*+ temps.
011%204.jpg


Pull the tape off as soon as you finish running out the fillet. I did one side at a time, mixing 40 grams of Rocketpoxy for each set. Finished the last set this morning at 6 am to beat the heat. It was only 85* ...
 
Back
Top