Essentium PCTG is supposed to print like PLA with PETG properties. It's UV resistant, etc (see link). Matterhackers sells an Essentium PCTG + with much different temperature parameters. It's currently out of stock in 1.75mm and this is not about that filament. Here's the good, the bad, and the ugly, ugly first. So far no bad, and the good is only good if you find the project to be useful ") and the state of the part in the beginning of the printing process was the bad but it's all better now.
and the state of the part in the beginning of the printing process was the bad but it's all better now.
The print on the left is what I got with default PETG profiles. Up until I've never tweaked a filament profile. I wish there was a way to export mine but I couldn't find a way to do that so I screenshot the settings in Prusa Slicer. The print on the right is what I am currently getting with the "new" profile. There are 12 of these to print in this project and it's about a 6-1/2 hour print. I'm on print #9. Unfortunately I printed 5 of the left side version, which wasn't quite as bad as the one in the photo so I may use them (doubt it). I've got #4 with the new settings printing now
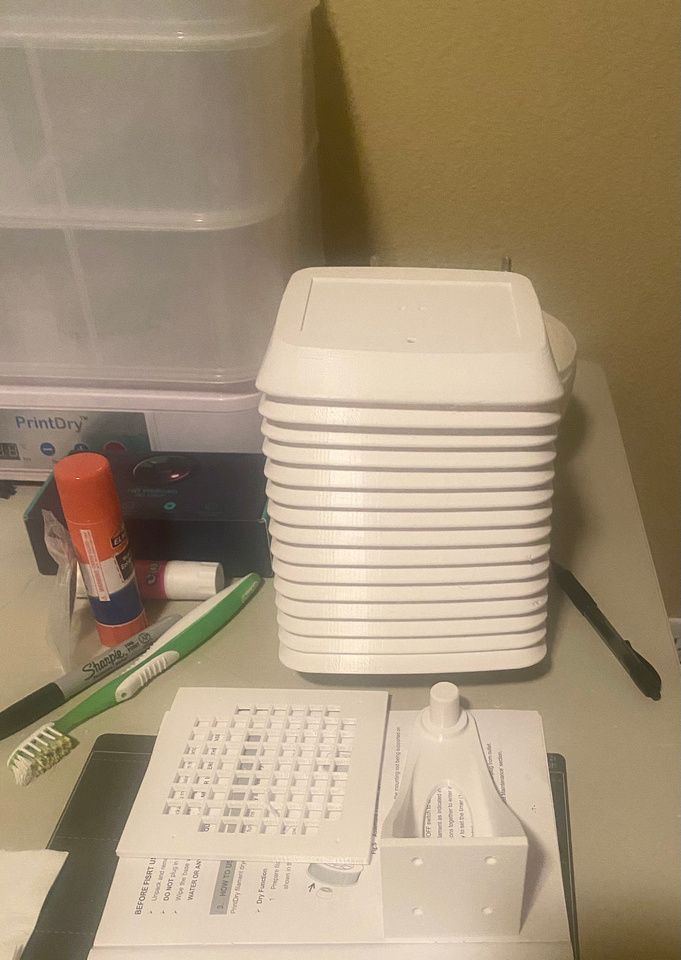
I am printing a solar powered weather station that I found on Instructables. Cost / benefit for this project may not be there for a one-off because the parts he used come in more quantities than 1 when you order. For instance, the board comes in qty 5. The components are fairly expensive (total, not each). But, I thought it might be a nice add for the launch site. I'll probably make two, we'll see.
The author says to use supports. So far I haven't needed supports. I had to flip the part so that the side you see in the photo was on the bed. I'm using the textured bed (as if it was a PETG part)

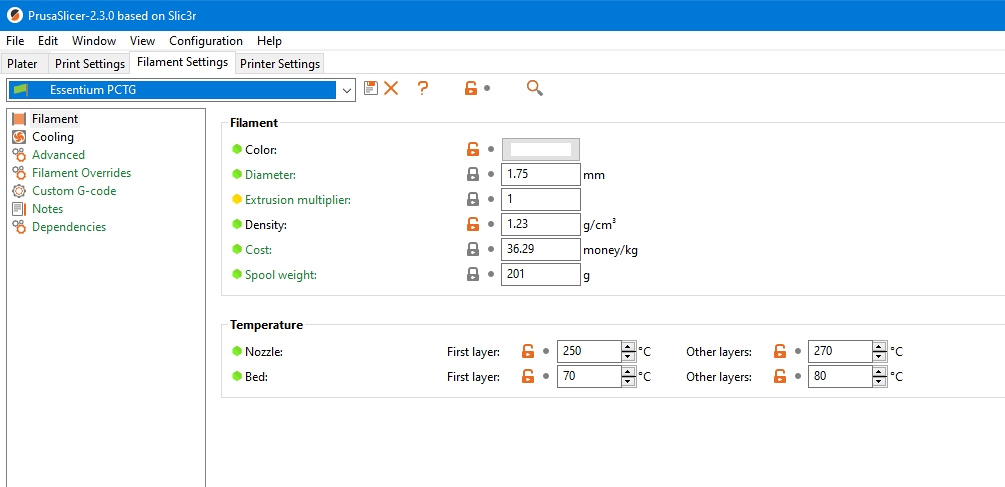
Filament Settings
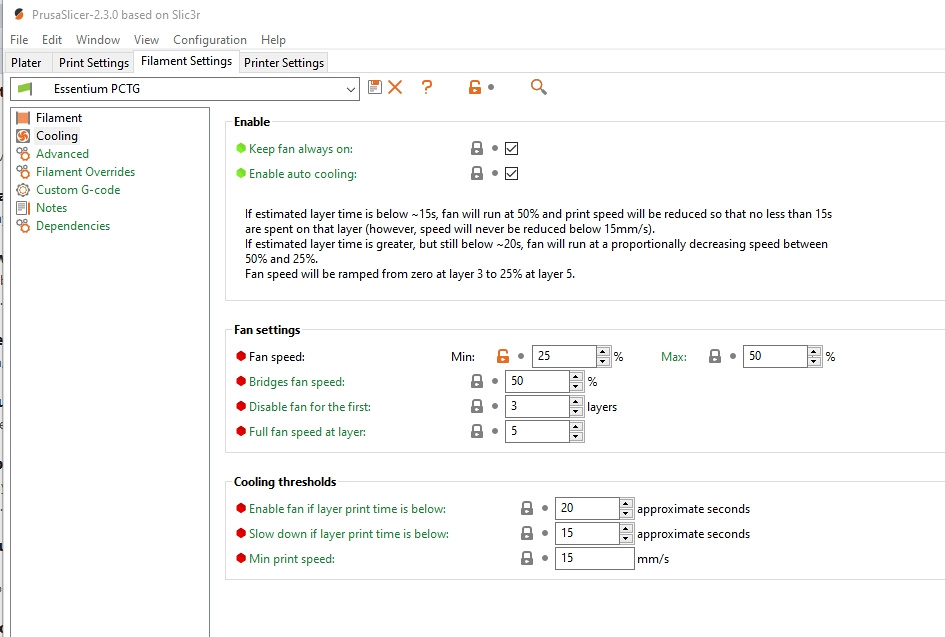
Fan settings
I'm using a 0.4mm hardened steel nozzle. Hardened steel isn't necessary to print this filament. I sometimes print carbon fiber nylon and glow in the dark PLA. Both of those will ruin brass nozzle...
and the state of the part in the beginning of the printing process was the bad but it's all better now.The print on the left is what I got with default PETG profiles. Up until I've never tweaked a filament profile. I wish there was a way to export mine but I couldn't find a way to do that so I screenshot the settings in Prusa Slicer. The print on the right is what I am currently getting with the "new" profile. There are 12 of these to print in this project and it's about a 6-1/2 hour print. I'm on print #9. Unfortunately I printed 5 of the left side version, which wasn't quite as bad as the one in the photo so I may use them (doubt it). I've got #4 with the new settings printing now
I am printing a solar powered weather station that I found on Instructables. Cost / benefit for this project may not be there for a one-off because the parts he used come in more quantities than 1 when you order. For instance, the board comes in qty 5. The components are fairly expensive (total, not each). But, I thought it might be a nice add for the launch site. I'll probably make two, we'll see.
The author says to use supports. So far I haven't needed supports. I had to flip the part so that the side you see in the photo was on the bed. I'm using the textured bed (as if it was a PETG part)
Filament Settings
Fan settings
I'm using a 0.4mm hardened steel nozzle. Hardened steel isn't necessary to print this filament. I sometimes print carbon fiber nylon and glow in the dark PLA. Both of those will ruin brass nozzle...